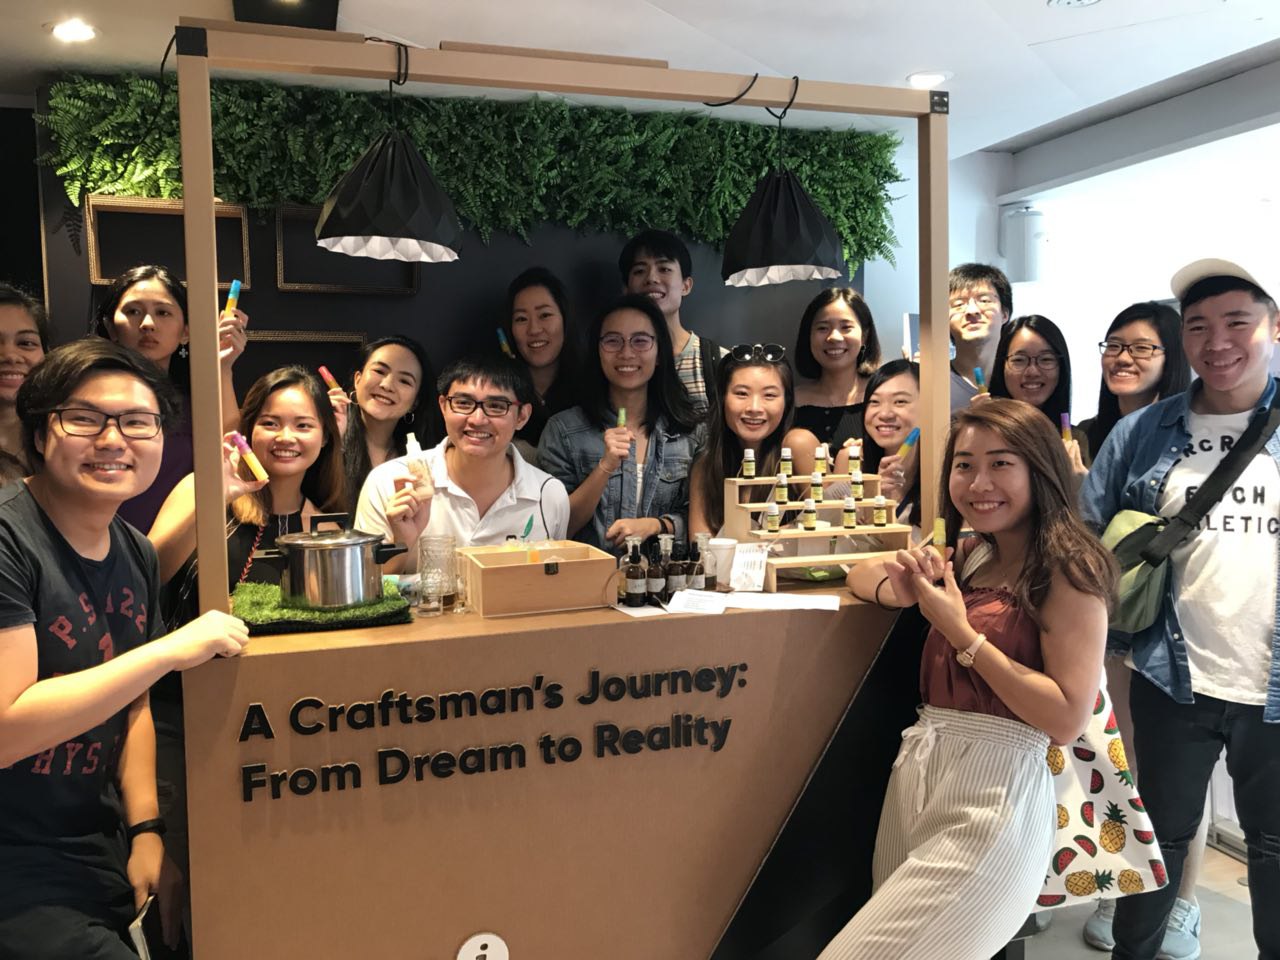
During this workshop, we learnt how Theodore, the founder of Theo10, pursued his dreams in creating natural products and the hard work he put in to come up with the right formulations. We even had the opportunity to create our very own moisturisers and mosquito repellents!
1+1 DM Staff Show 2018
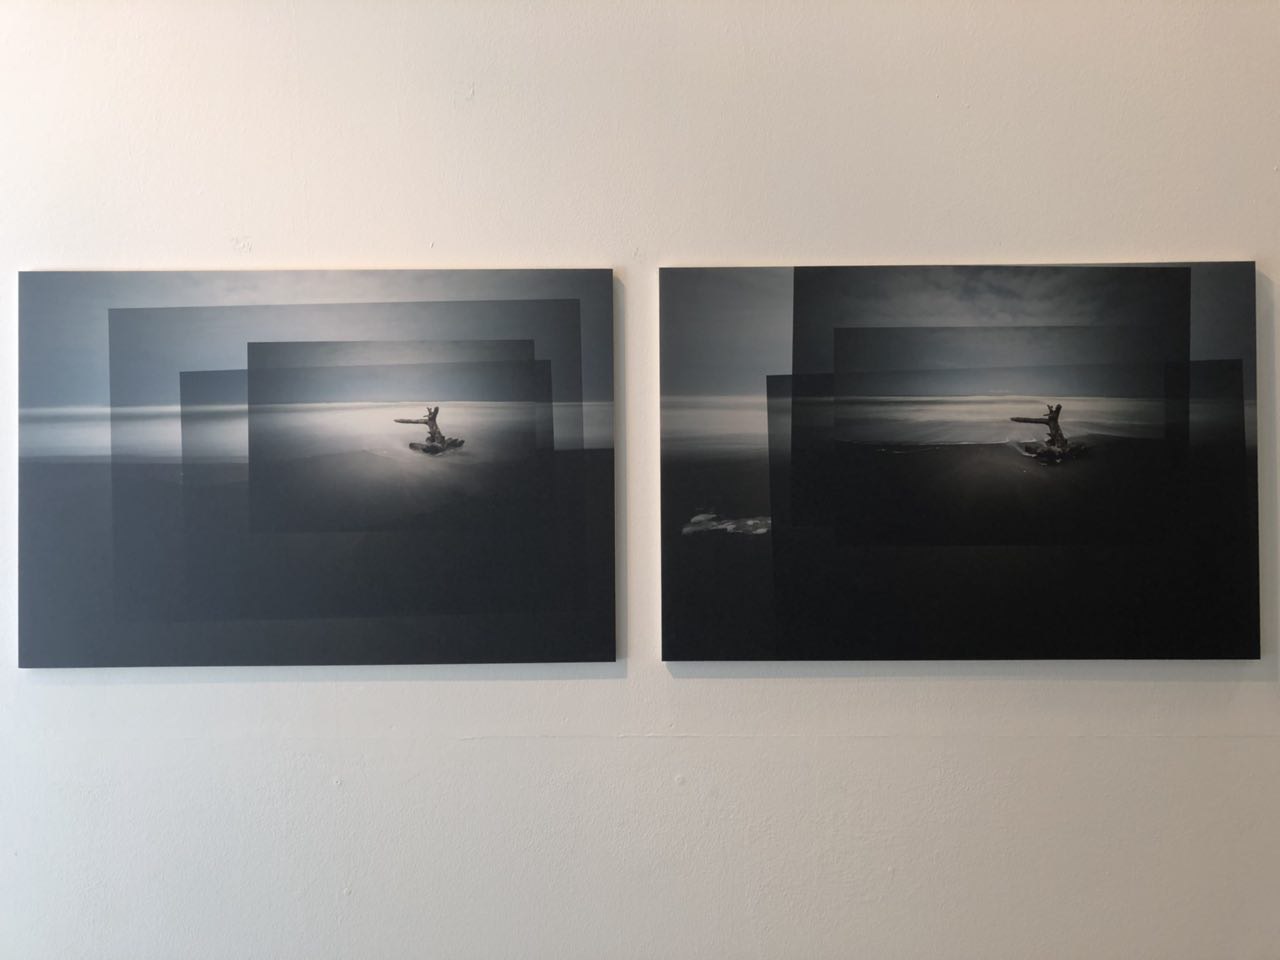
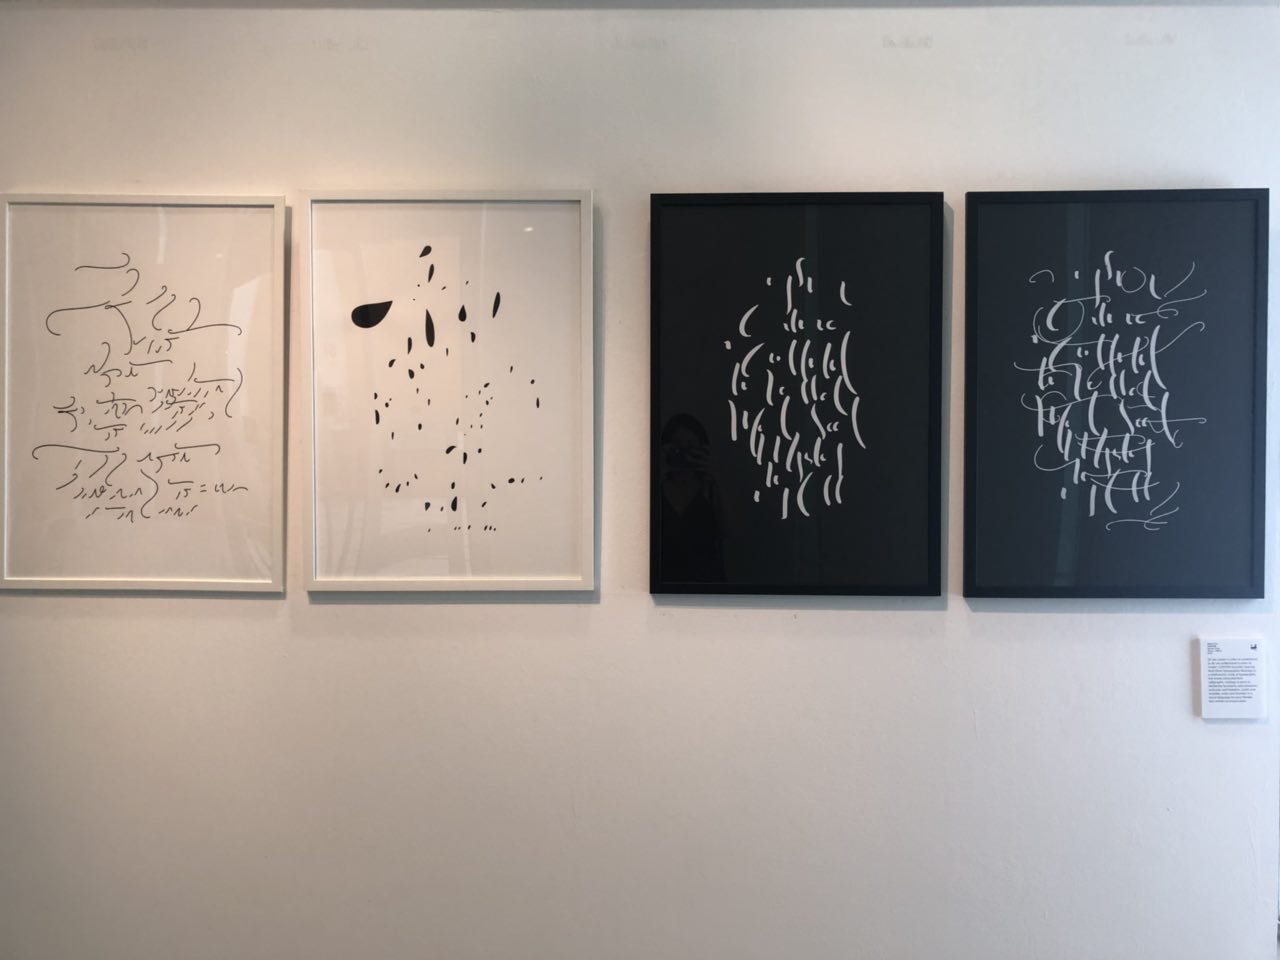
This exhibition showcased the works of NAFA’s full-time and adjunct lecturers’ practices and I thought that they were really unique and inspirational. Here are a few of my favourite artworks!
In-Process A collection of the making-of.
This exhibition showcased the design process of 20 students for works created during their diploma years. Their sketches, models and presentation boards really gave us great insights to the hard work and effort put into creating artworks.
A small design decision made in the movie is a coffee machine that dispenses different types of coffee to the passenger based on his travel class, by scanning a wristband that contains the passenger’s information. For example, an economy-class passenger like Jim has access to only a regular coffee, whereas a gold-class passenger like Aurora can get a latte. This smart coffee machine reminded me of a smart Japanese beverage vending machine that has an in-built camera that detects age and gender, and then displays drink recommendations based on the data it captures. You can read more about it here: http://retail-innovation.com/japanese-digital-vending-with-facial-recognition
Microfiction Story In the year 2500, global warming is now almost fully eradicated. In order to stop the accumulation of heat, governments worked together to eliminate not just carbon dioxide emissions, but all greenhouse gases, such as methane and nitrous oxide. Deforestation and other harmful land uses that affect the Earth’s energy balance have been successfully reversed. As a result of this, the Earth is experiencing drastic climate change and now has an average temperature of -18°C. The weather in countries all around the world is now colder and drier than ever. Flowers are at the brink of extinction, and the Earth no longer looks as vibrant as compared to decades ago.
Our protagonist, Eleanor, has always been very passionate about ceramic art and she is now one of the very few ceramic artists left. Her family used to own a ceramic art cafe where people can either attend ceramic art workshops or just enjoy the ceramic art gallery while sipping their coffees. However, as the climate on Earth started experiencing drastic changes, the clay that they used could no longer withstand the low temperatures and started to harden very quickly during the throwing process. The chemical reactions between the mineral contents in the clay bodies during the throwing process is not controllable by the human hand. Thus, Eleanor’s family cafe was forced to shut down.
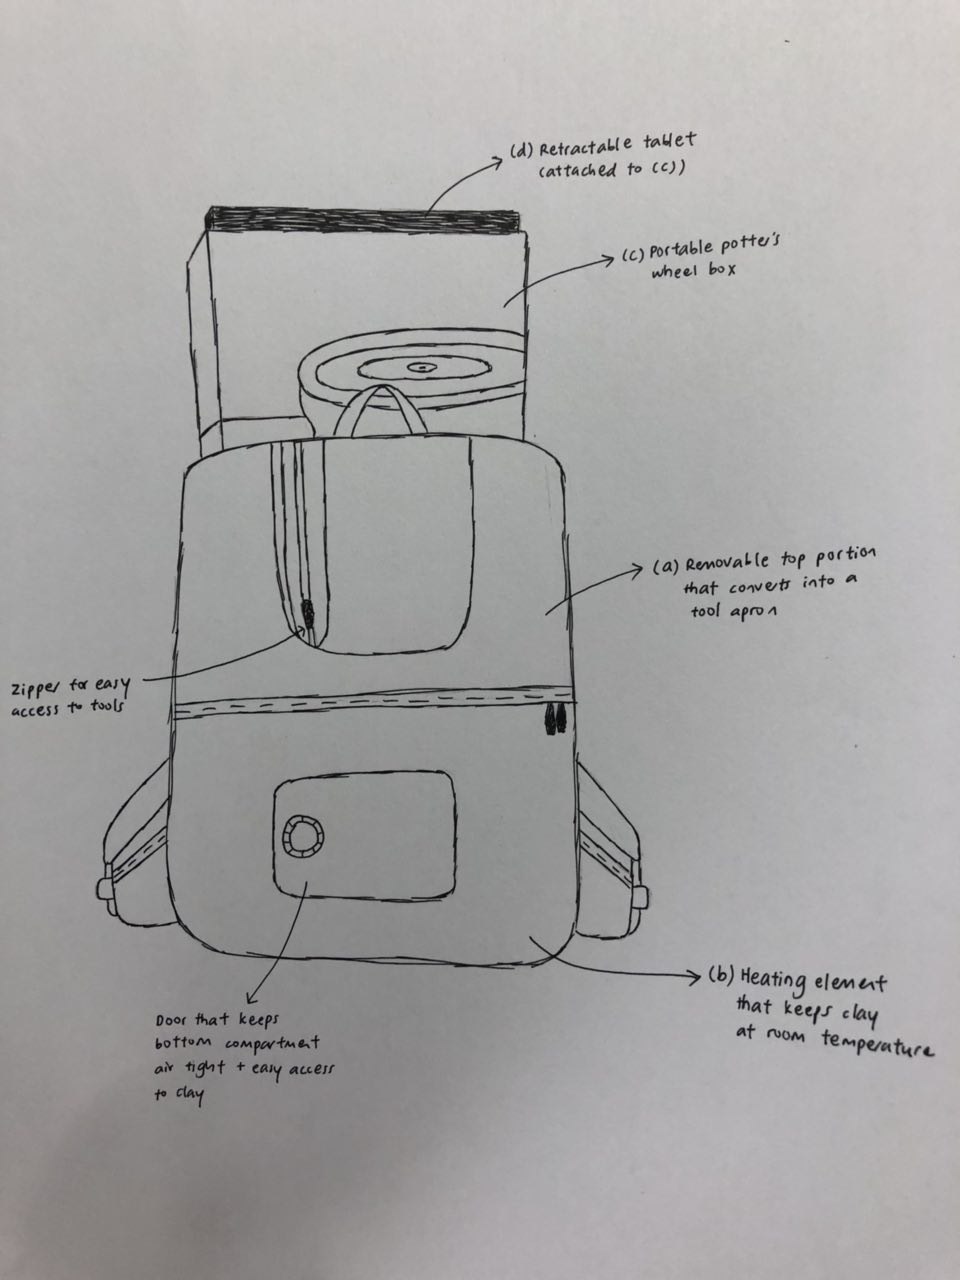
Eleanor’s biggest dream is to bring ceramic art back to life and she is unwilling to send it down the lane of banality. Therefore, she has been on a journey to educate others about ceramic art with her trusty one-of-a-kind convertible ceramic on-the-go backpack.
New technology Eleanor’s convertible backpack includes the following functions:
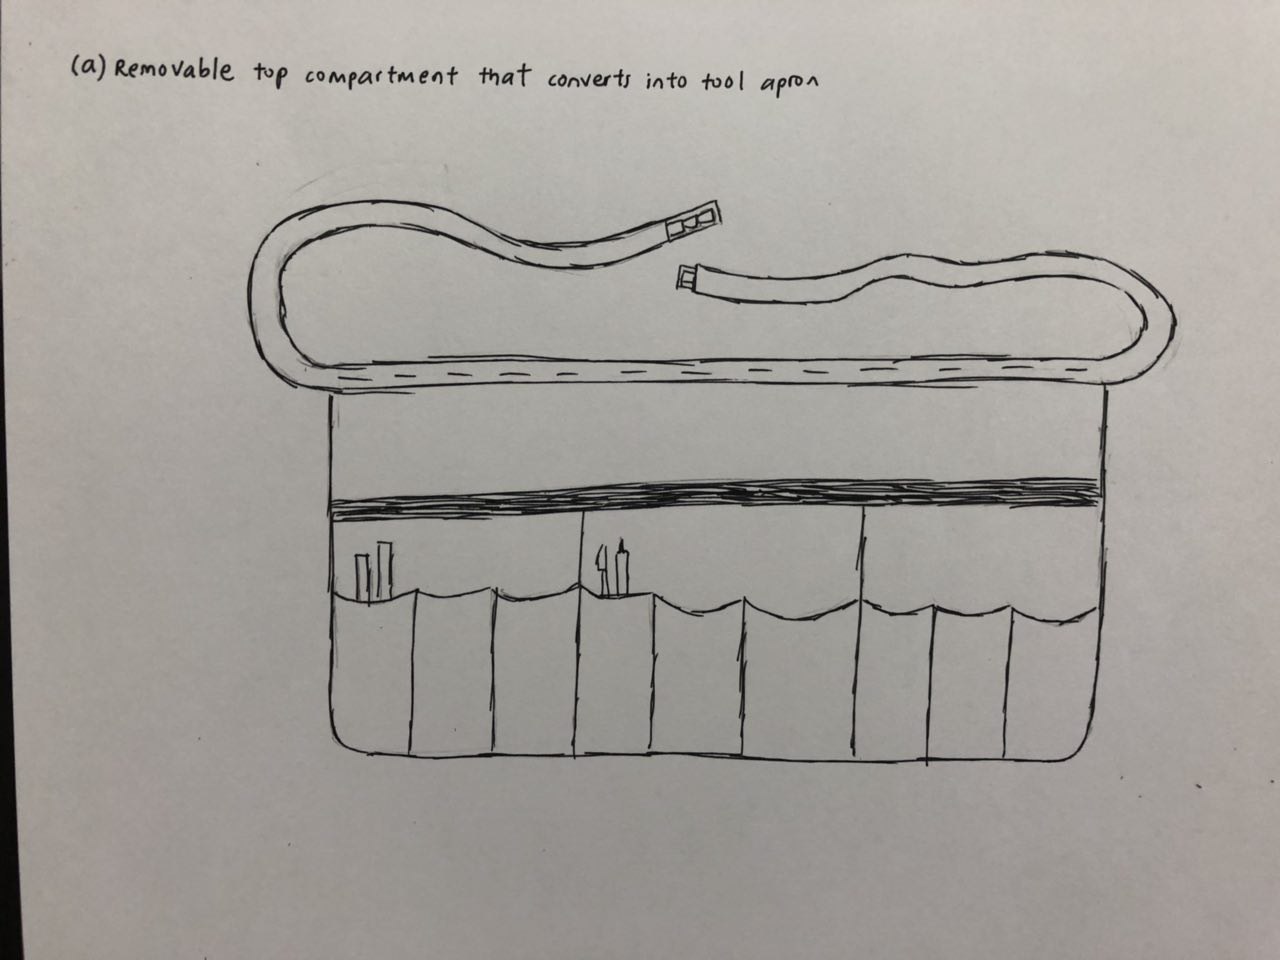
Removable top compartment that converts into a ceramic art apron that holds all the tools she need
Heating element at the bottom that keeps the clay at optimal room temperature
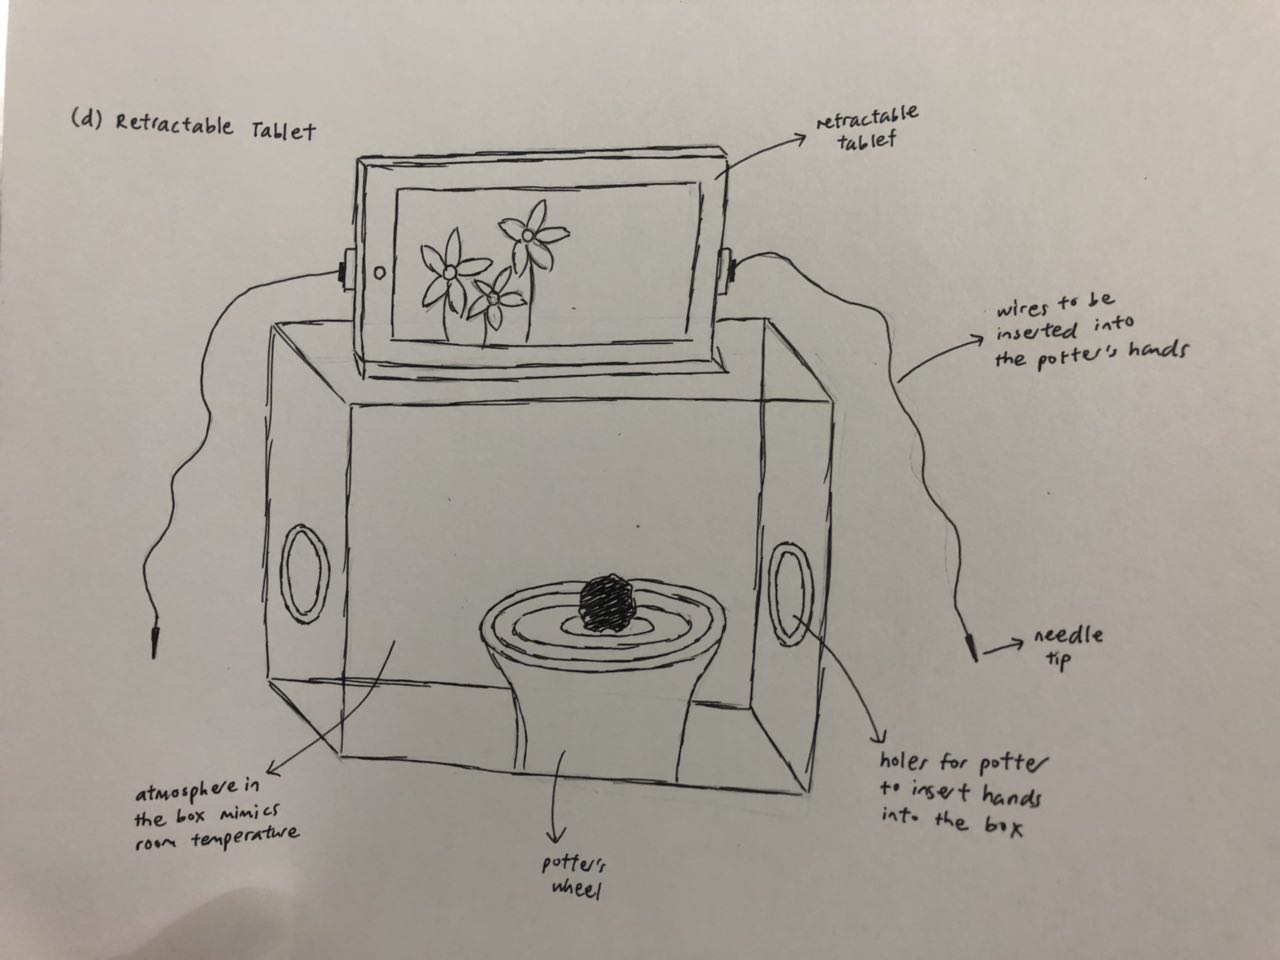
Portable potter’s wheel box attached to the top of the backpack with atmosphere that mimics room temperature to facilitate the throwing process. Attached to the top of this box is a:
Retractable tablet that stores all the photos of the past that inspired her ideation process: the tablet can be connected to the potter’s hands through his veins, which enables the potter to shape or design the clay based on the photo selected through electronic signals that are sent to the bloodstream
Sketches
Front view of backpack Close-up of removable apronClose-up of portable potter’s wheel and retractable tablet
For this assignment, I wanted to design a convenient and portable tool for pre-school teachers to store their teaching materials. Thus, I used a toolbox my cultural probe kit as it can also double as a toolbox for them to use and carry around in between lessons. The subsequent segments of this post will explain the contents of the cultural probe, tasks for the teachers, as well as my findings and personal evaluation.
Top view of cultural probe kit
Contents
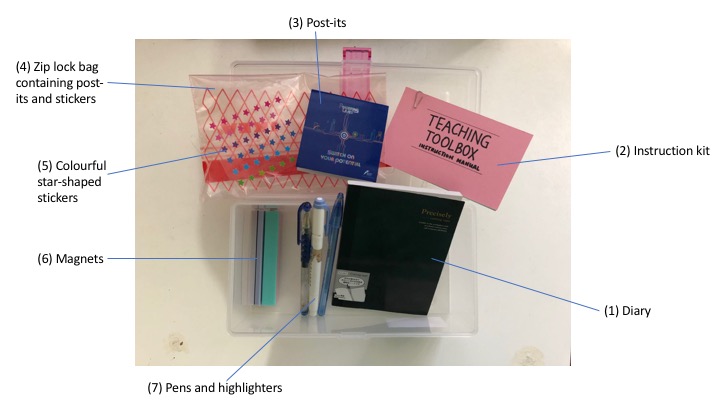
I used a transparent toolbox to hold the contents of the kit so that the teachers can easily locate the materials they need during lessons. Also, during my trip to the pre-school centre previously, I learnt that the teachers used baskets to store their writing materials. It was quite inconvenient for them as there were no handles for them to grip on to when they carried it around. Thus, I decided to use a toolbox with a handle for my cultural probe. My cultural probe kit includes the following items:
Fig 1: Contents of cultural probe kit (with labels)
Unfortunately, I could not include any cameras or electronic devices in the kit because I was told that the use of electronic devices is strictly prohibited in classrooms because electronic devices can distract the children and divert their attention away from the lesson.
Explanation of contents and tasks
My cultural probe kit included an instruction manual as follows:
Cover pagePage 1: Introduction
Instructions
Page 2: Brief instructions
Page 2 of the instruction manual includes some brief instructions that they should follow:
1. They should use the toolbox for one full day at the pre-school and use it to store their teaching materials. 2. Prompts them to refer to pages 3 and 4 for more instructions on the tasks they need to complete. 3. They can drop me a text message or call should they have any questions.
Task 1
Page 3: Instructions for task 1
The teachers will find the instructions for task 1 on page 3 of the instruction manual. On the left, there is a box indicating the materials they need from the kit to complete the task. For task 1, the teachers are required to record the following in the (1) diary using the (7) pens and highlighters provided after every lesson (refer to fig 1):
1. Describe your new experience with the toolbox. 2. Pen down and pros and cons of the toolbox, if any. 3. Pen down your thoughts and emotions during the lesson. 4. Include the date and lesson at the top of each journal entry.
Rationale for task 1: To understand their day-to-day schedules better, and how the toolbox improved/ hindered their teaching experience.
Task 2
Page 4: Instructions for task 2
The teachers will then find the instructions for task 2 on page 4 of the instruction manual. There is a box indicating the materials they need from the kit to complete the task. For task 2, the teachers are required to complete the following at the end of the day:
1. Rate your day out of 5 with the (5) colourful star-shaped stickers provided. Paste the stickers on the (3) post-its provided. 2. Explain briefly on the same (3) post-it why you rated your day as such. 3. Stick the (3) post-it on the back of the diary entries for that day.
Rationale for task 1: To understand their day-to-day experiences better, and the difficulties they face at school, so that I can improve on the tool design.
Practitioner’s experience with the cultural probe
I only managed to get one teacher to use my probe for two full days. However, also managed to let two other teachers mingle with the cultural probe kit for a few minutes and collated their comments afterwards. Below are my findings.
Diary entry 1Diary entry 2
Although the instructions stated that the teacher had to write diary entries after every lesson, she could not do so due to time constraint. She explained that she needed to bring the children from one classroom to another in between lessons, and she only had time to write the diary entries during the children’s nap time from 2:00pm-3:00pm.
Post-it with ratings
As for the post-its, the teacher forgot to do it on the first day. Therefore, there was only one post-it, which was done on the second day.
Findings
Below are the overall pros and cons of the toolbox that I collated based on the findings from the participant as well as the two other teachers:
The teachers are listed down some suggestions for improvements as follows:
1. Can consider adding a longer strap to the toolbox so that the teacher can carry it around instead of holding the handle. 2. Can divide the toolbox into different sections i.e. top and bottom tiers so that the things will be more organised. 3. The toolbox’s buckle can be more secure. 4. Can perhaps use a translucent toolbox instead of a fully transparent one so that it will be less distracting for the children.
Personal evaluation
I should have paid more attention to the teacher’s busy schedules while designing their probes. For example, one diary entry per day would have been more ideal given their erratic schedules.
Initially, I wanted to use a toolbox with dividers i.e. top and bottom tiers. However, I could not find a toolbox with that design and thus settled with one without dividers, and it turned out to be a big problem pointed out by the teachers as well.
This cultural probe really allowed me to understand the day-to-day experiences of the teachers, and their responses gave me great insights on how I can improve on the tool as well.
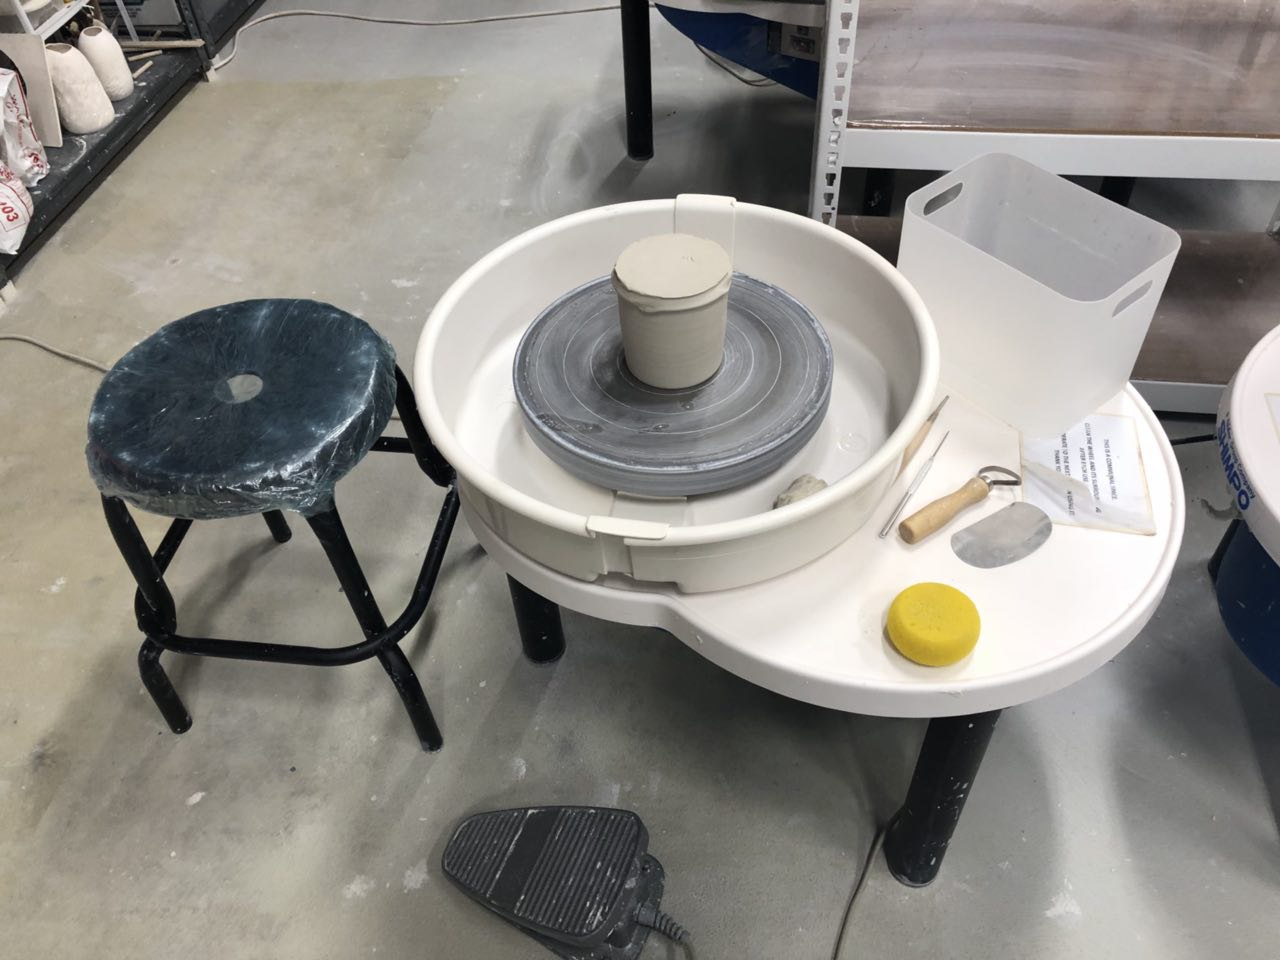
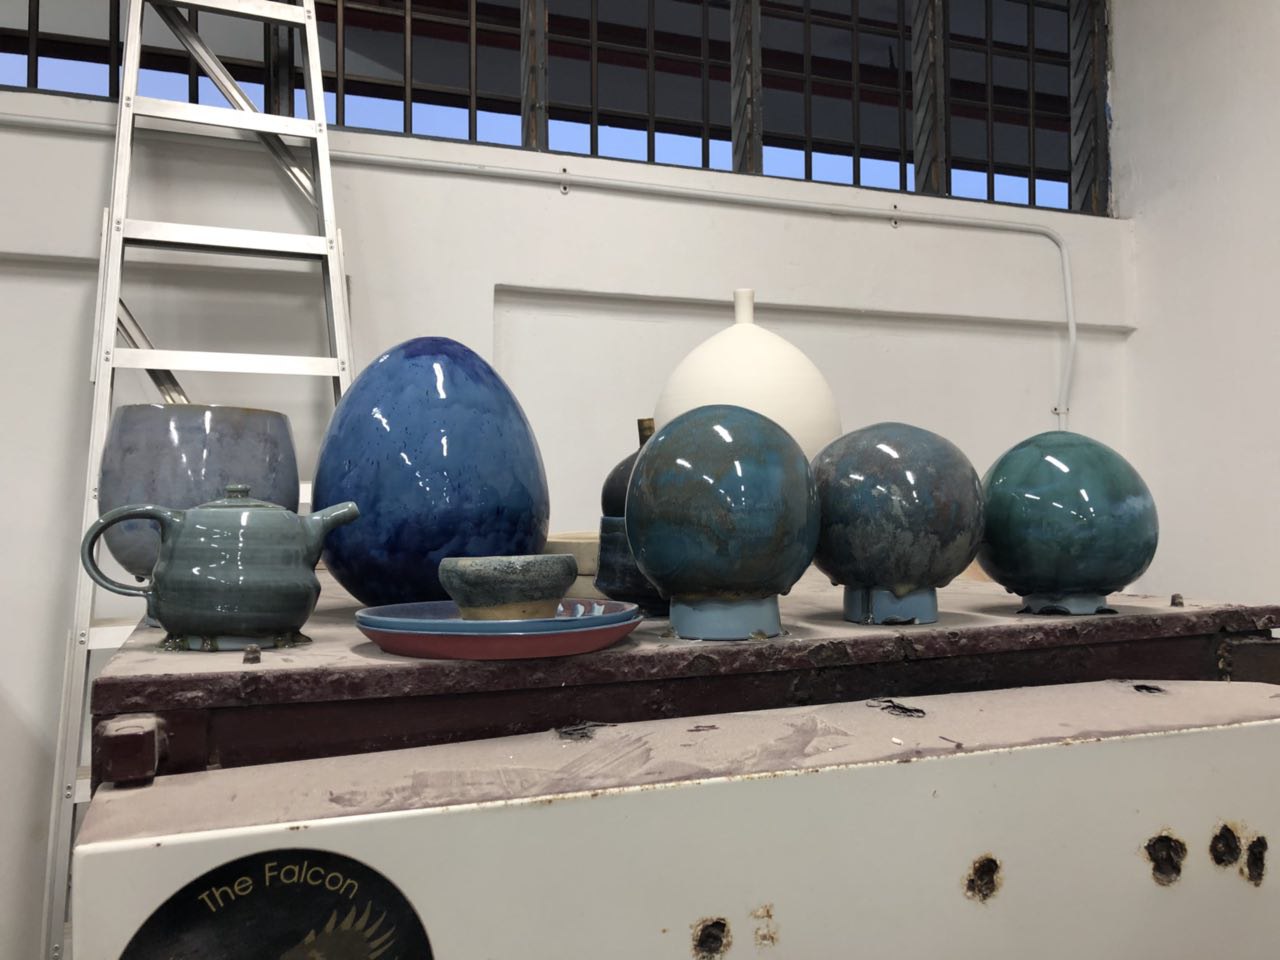
This afternoon, I participated in a ceramic pottery class. In particular, today’s class taught us how to trim a pot. Before the class started, I had the wonderful opportunity to sit down for a short interview with the practitioner, Alvin, who gave me a crash course in ceramic pottery making.
Practice Documentation and Tools Used
Step 1: Preparing and centering the clay, and creating the shape you want
Tools used: – Clay – Potter’s wheel
First, the practitioner has to prepare some clay and place it on the wheel to start moulding it into the shape that he wants. This process is also known as throwing, which refers the entire activity of shaping the clay on the potter’s wheel.
Vessel-shaped clay on the potter’s wheel
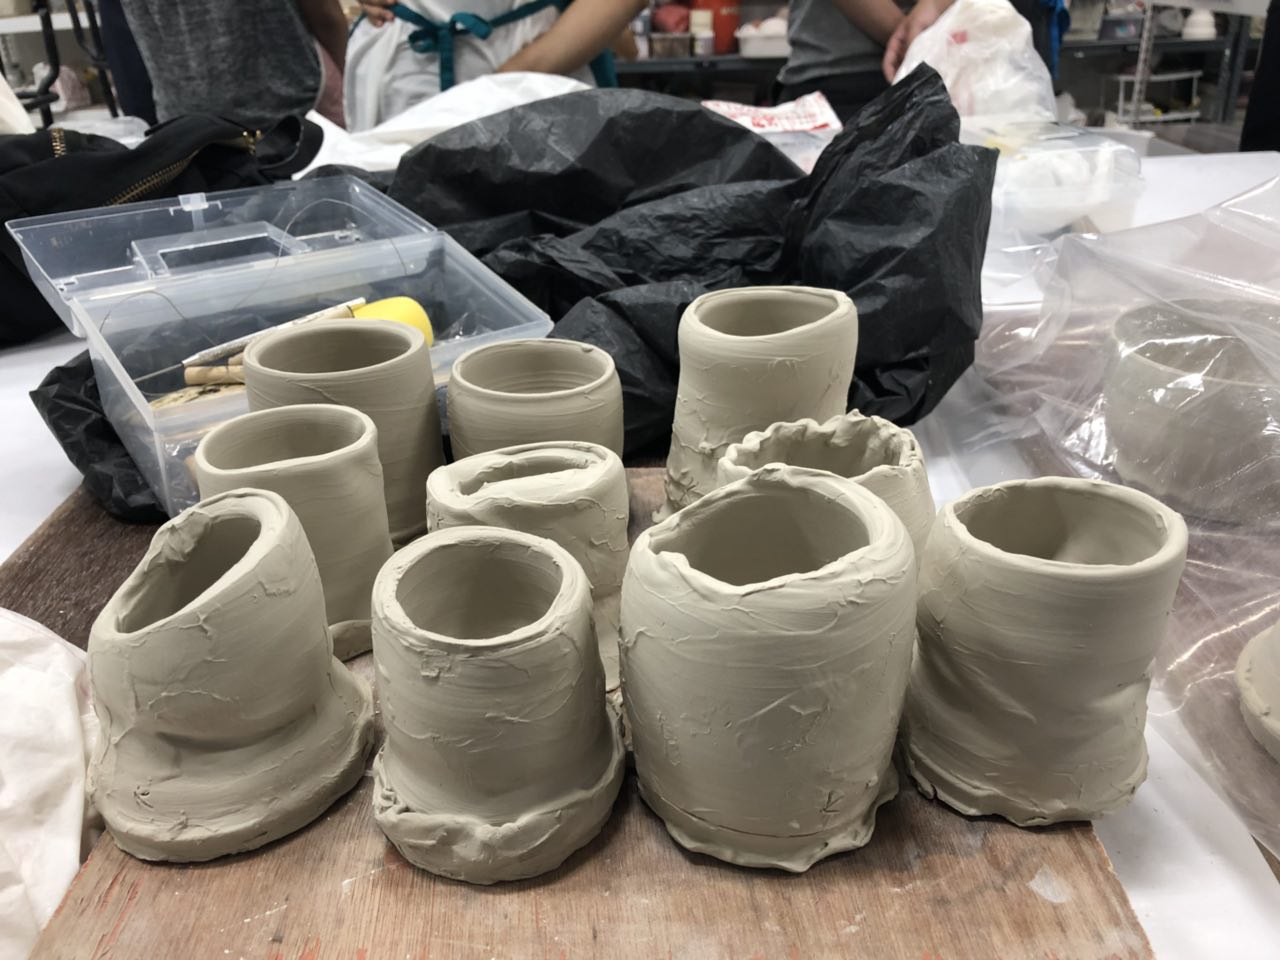
Step 2: Raising the walls
Next, the practitioner needs to pull the clay apart to create a dome and start raising the walls of the dome. Once it’s done, set the clay aside for it to dry a little. The clay shouldn’t look perfect, in fact, it should look very uneven. The clay should look something like this:
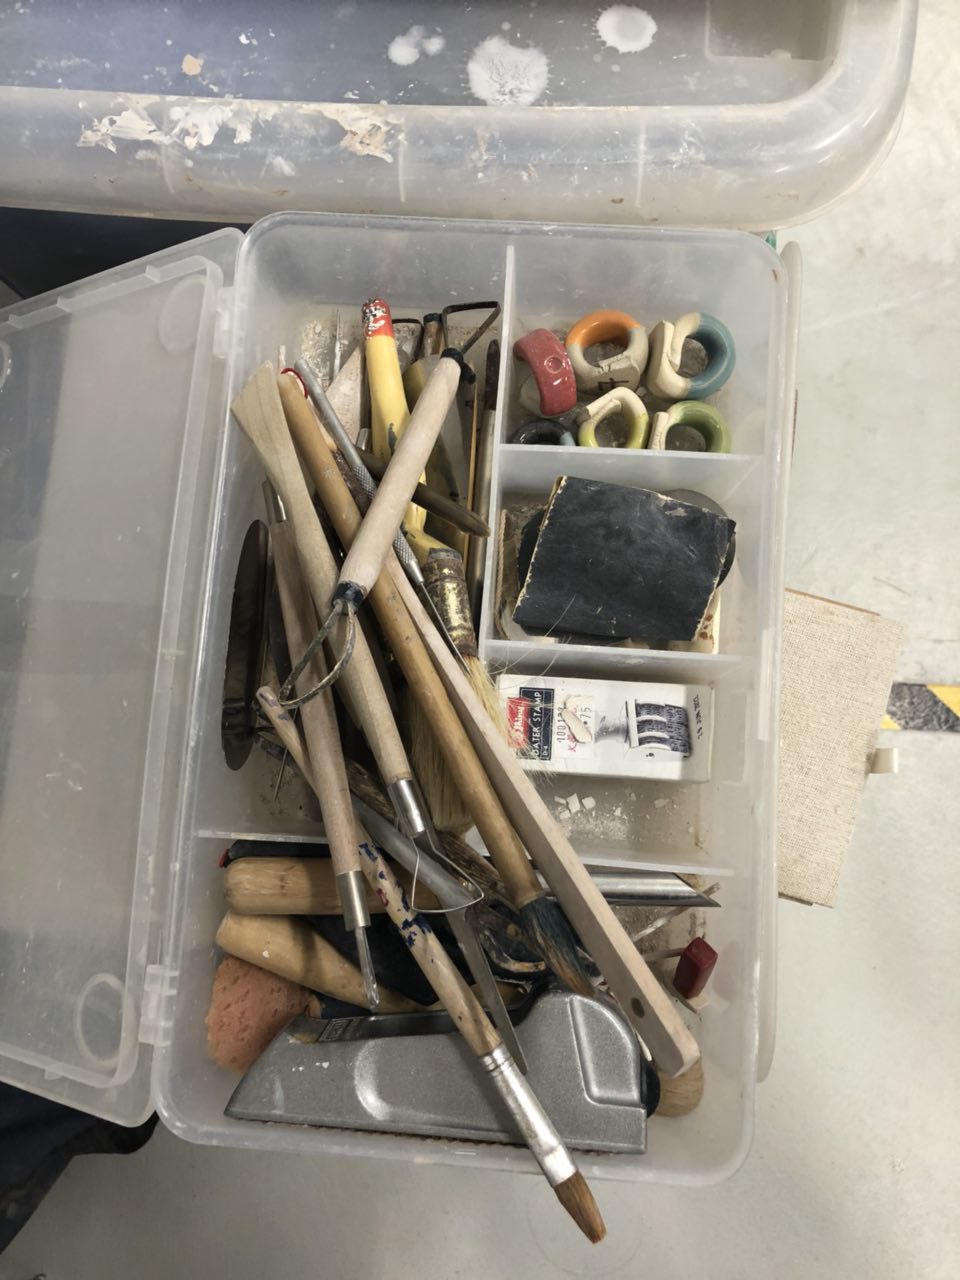
Step 3: Trimming
Tools used: – Loop, wire and ribbon tools
Practitioner’s toolbox containing loop, wire and ribbon tools
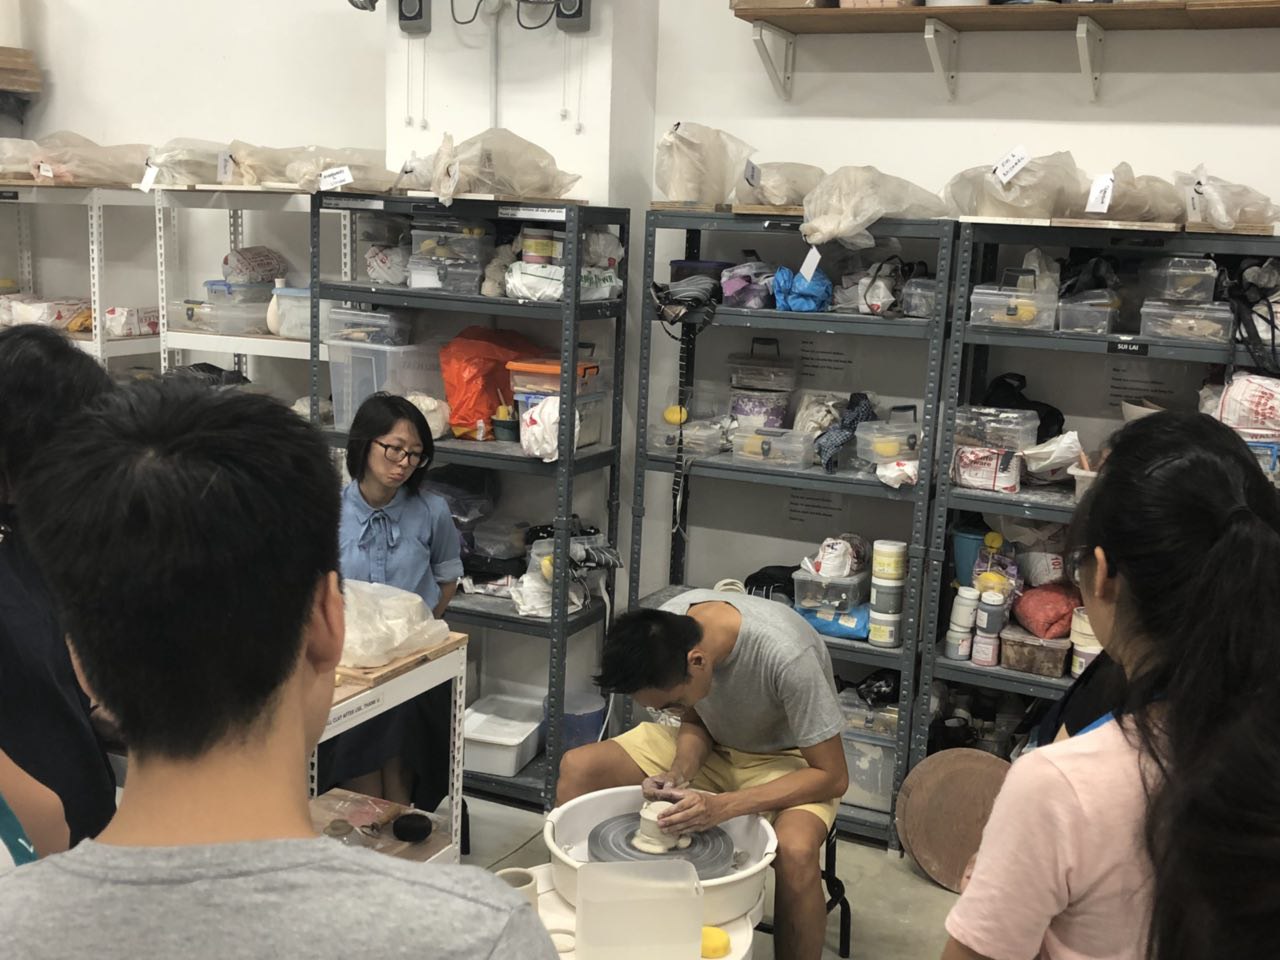
The third step is trimming the clay to even it out. Once the clay is almost dry, place it back onto the wheel. Use three small wedges of softer clay to hold it in place. Get the trimming tools and gently shave away layers of clay until the shape is perfect. Once the top is done, place it upside down and do the same until the bottom has a nice, even foot to stand on.
participant trimming her clay
Alvin teaching the students how to trim
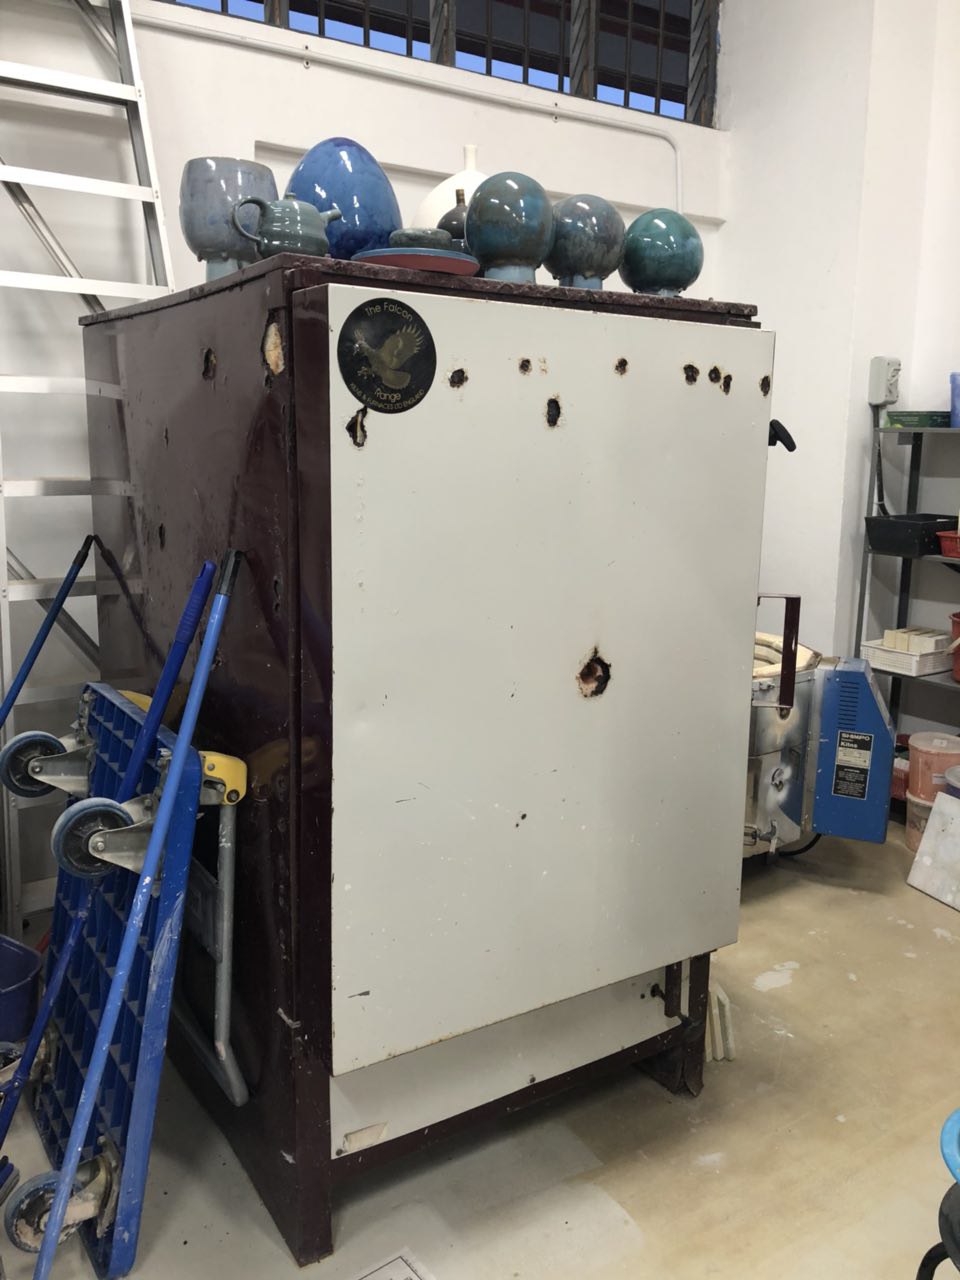
Step 4:Firing
Tools used: – Kiln
Kiln used for firing
When the clay is completely dry, it will be placed in a special oven called a kiln, which bakes the clay at very high temperatures. After the clay is baked, it will turn from grey to a slightly peachy colour as shown here:
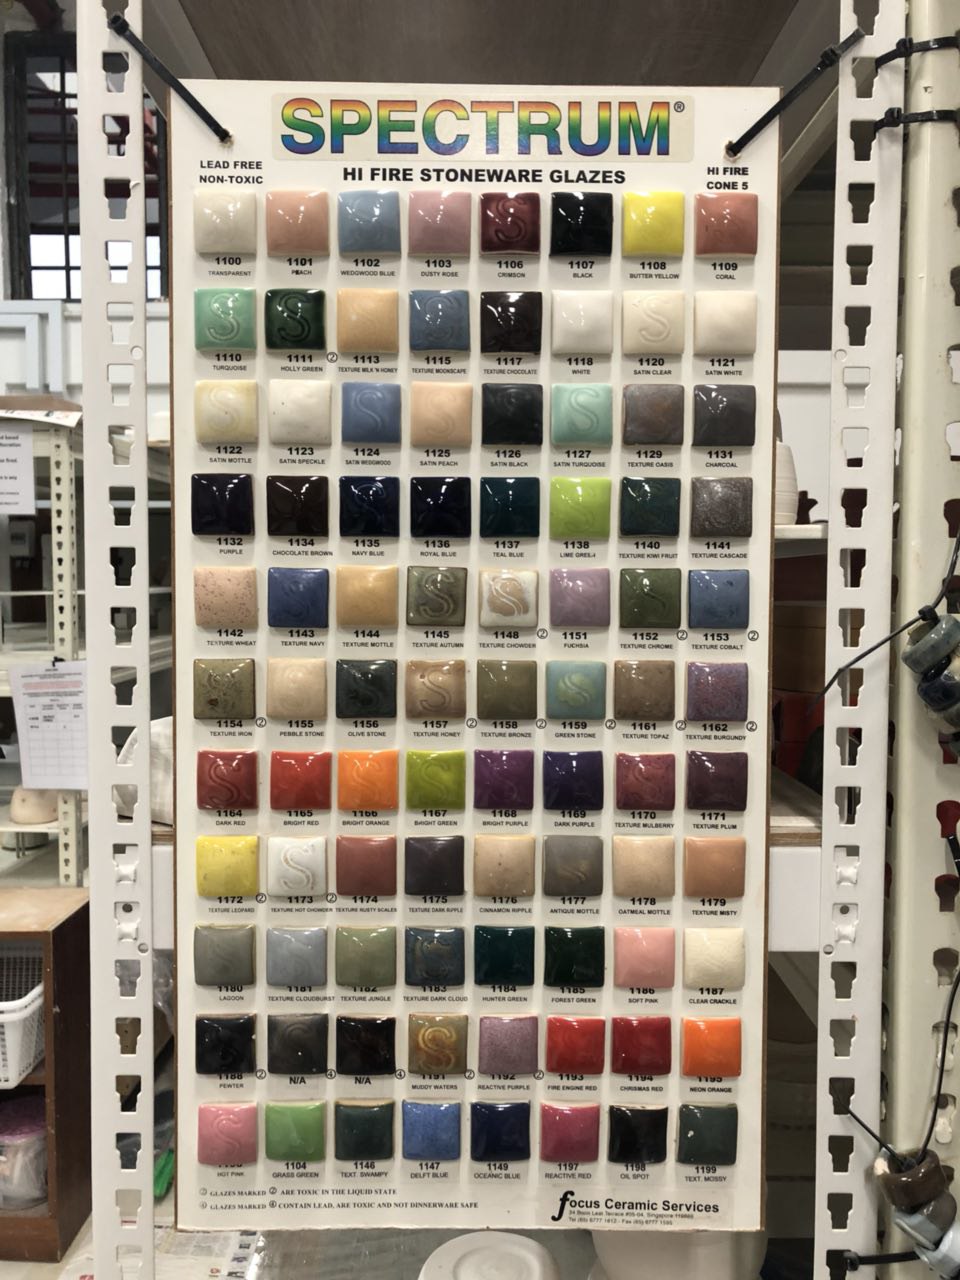
Different coloured glazes to choose from Measuring cups and mixing tools
After the clay is fired, colour can be added to it using glaze, which is a special mineral-based paint that turns into a smooth, glossy surface for the final product.
Glazed clay
Step 6: Second round of firing
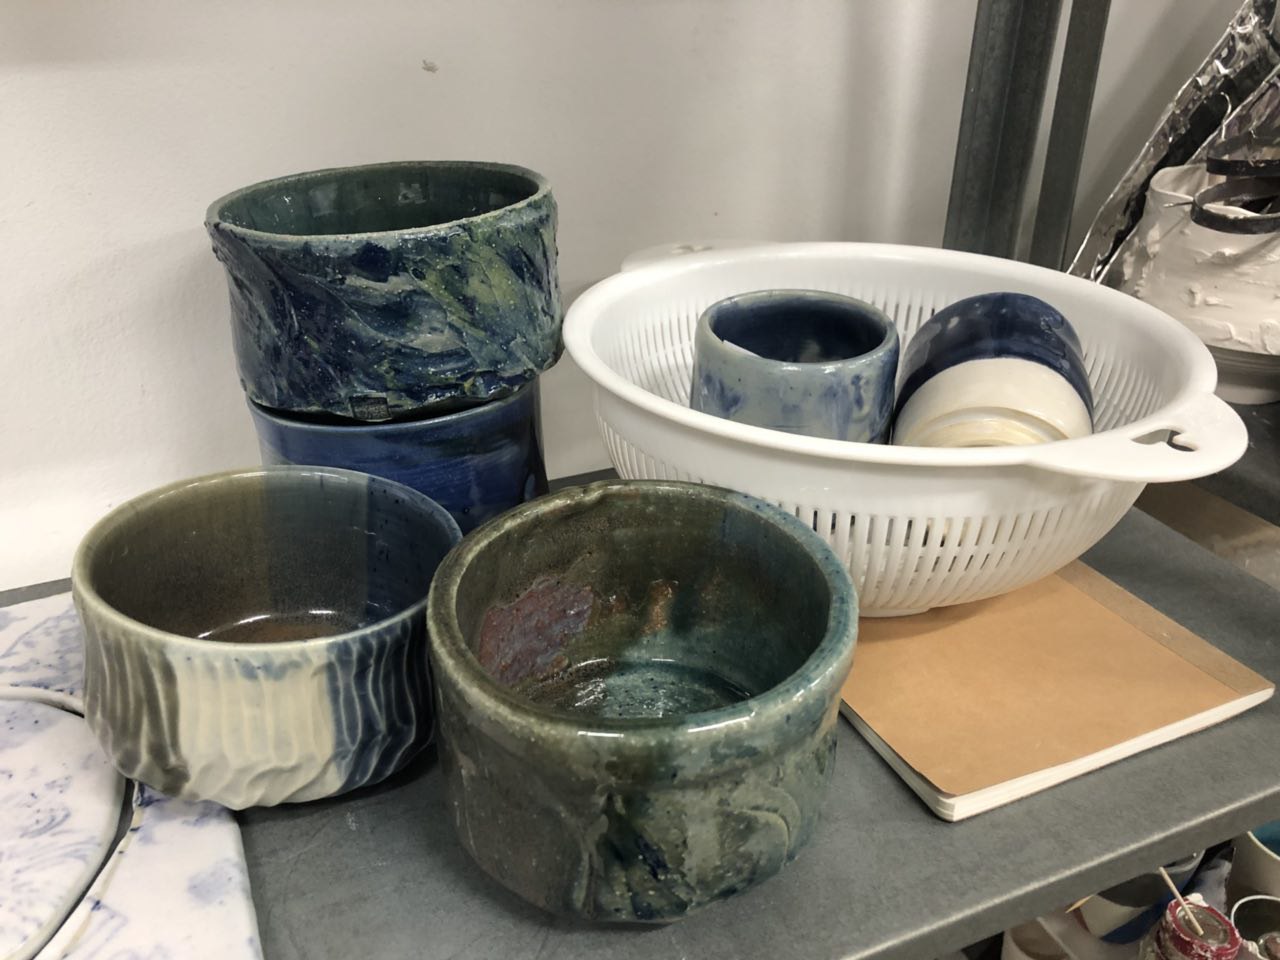
After the glaze has dried, the clay needs to be fired again in the kiln to make the colours hard and glossy. Here are some final products made by the practitioner and other students:
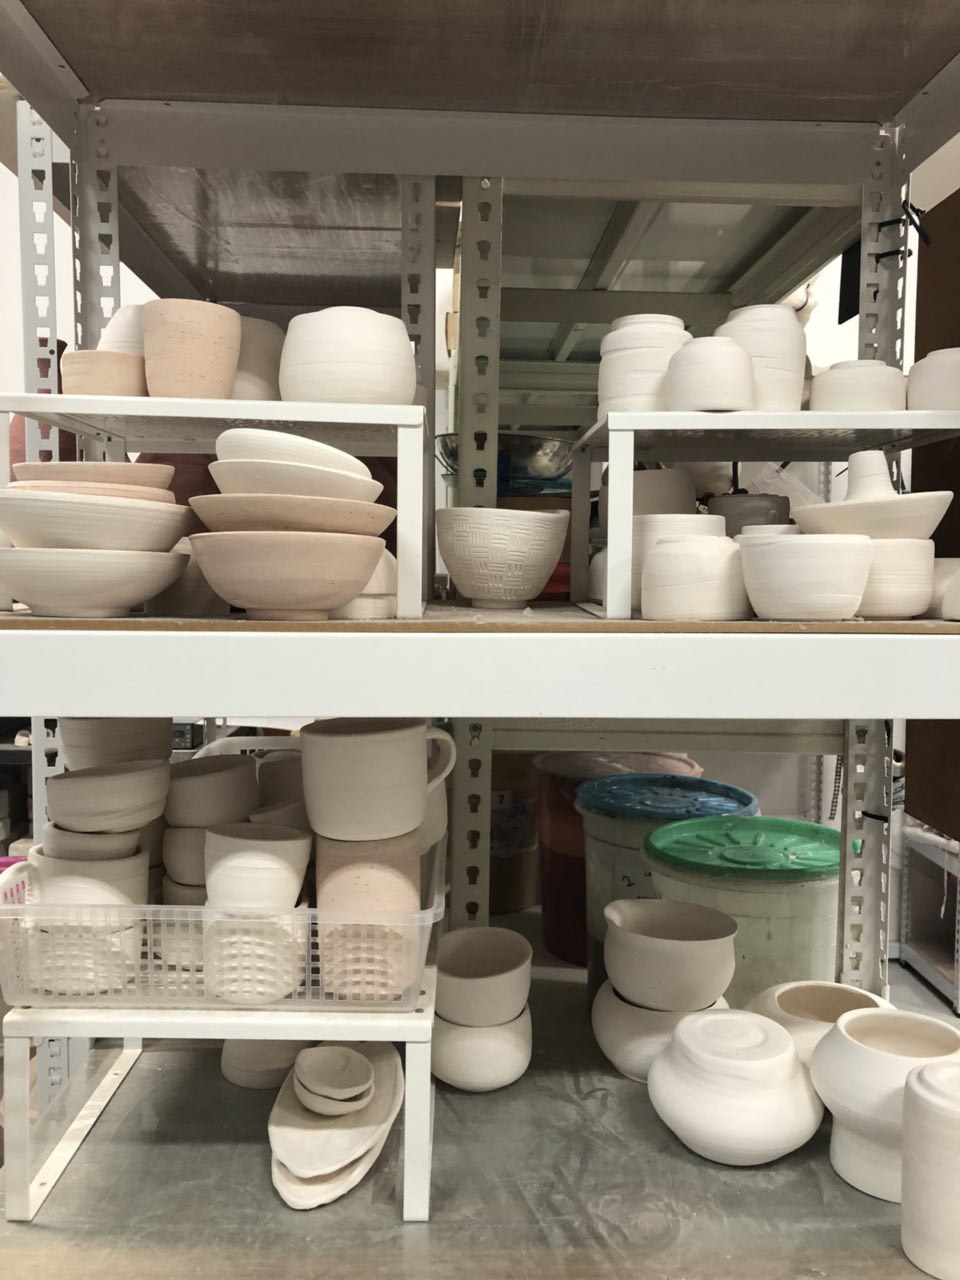
Worksite Documentation
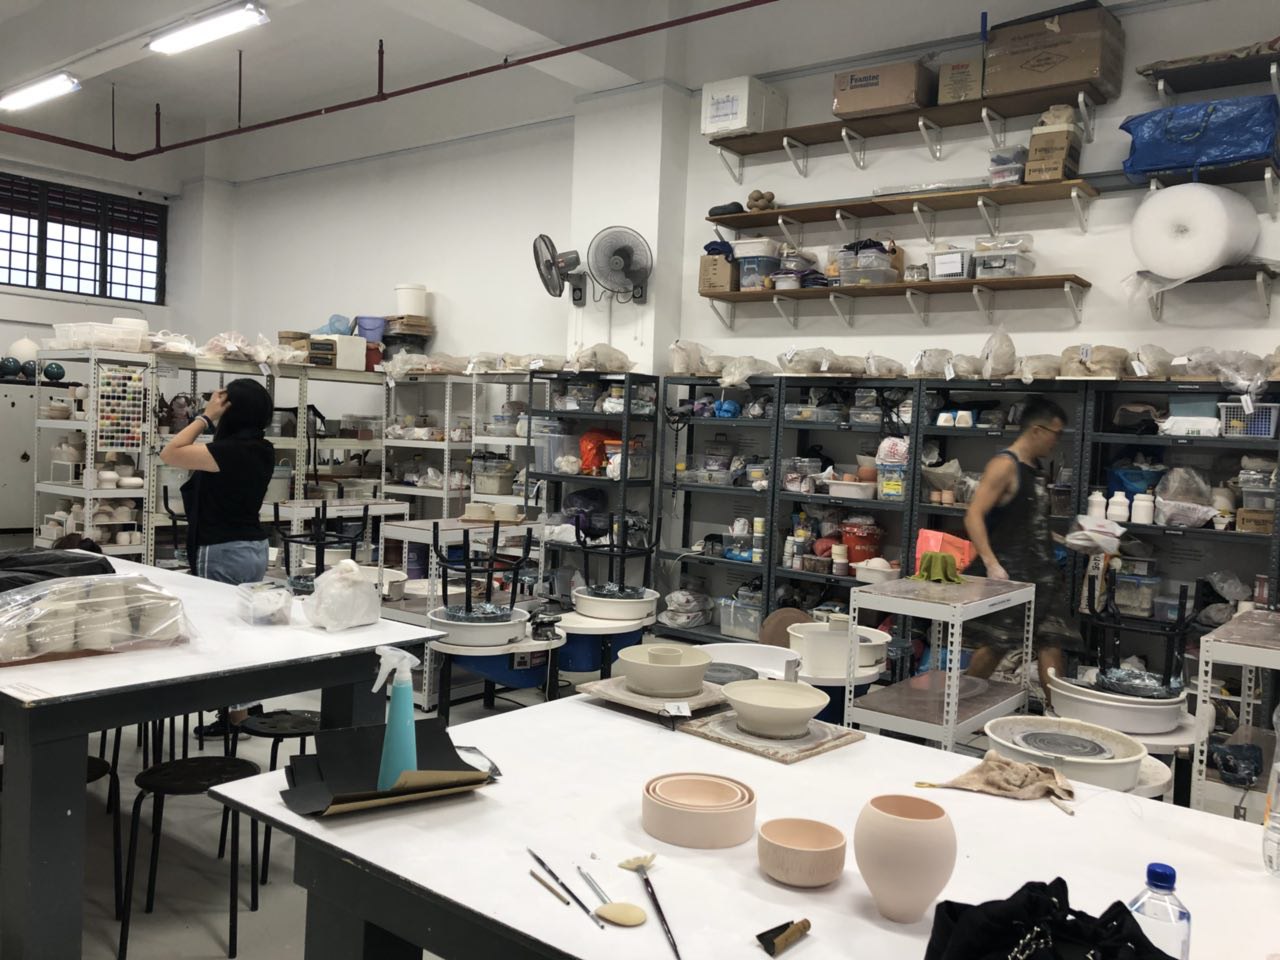
The worksite was generally messy and cluttered, but the shelves which stored the clay, tools and unfinished products were quite neatly organised. Each practitioner also had their own toolbox which contained pottery tools such as trimming tools, paint brushes and sand paper.
Photograph of worksite
Pain Points
Since I only had the chance to try out trimming, I could only document my experience for that portion of ceramic pottery making. In my opinion, trimming is one of the most challenging steps because it requires a lot of focus and hand stability. If you are not careful, you may cut off an uneven portion and you will be left with a slanted piece of work. Also, if your hand loses control after a while, you may drop the trimming tool in the potter’s wheel. In summary, trimming requires a lot of patience and determination.
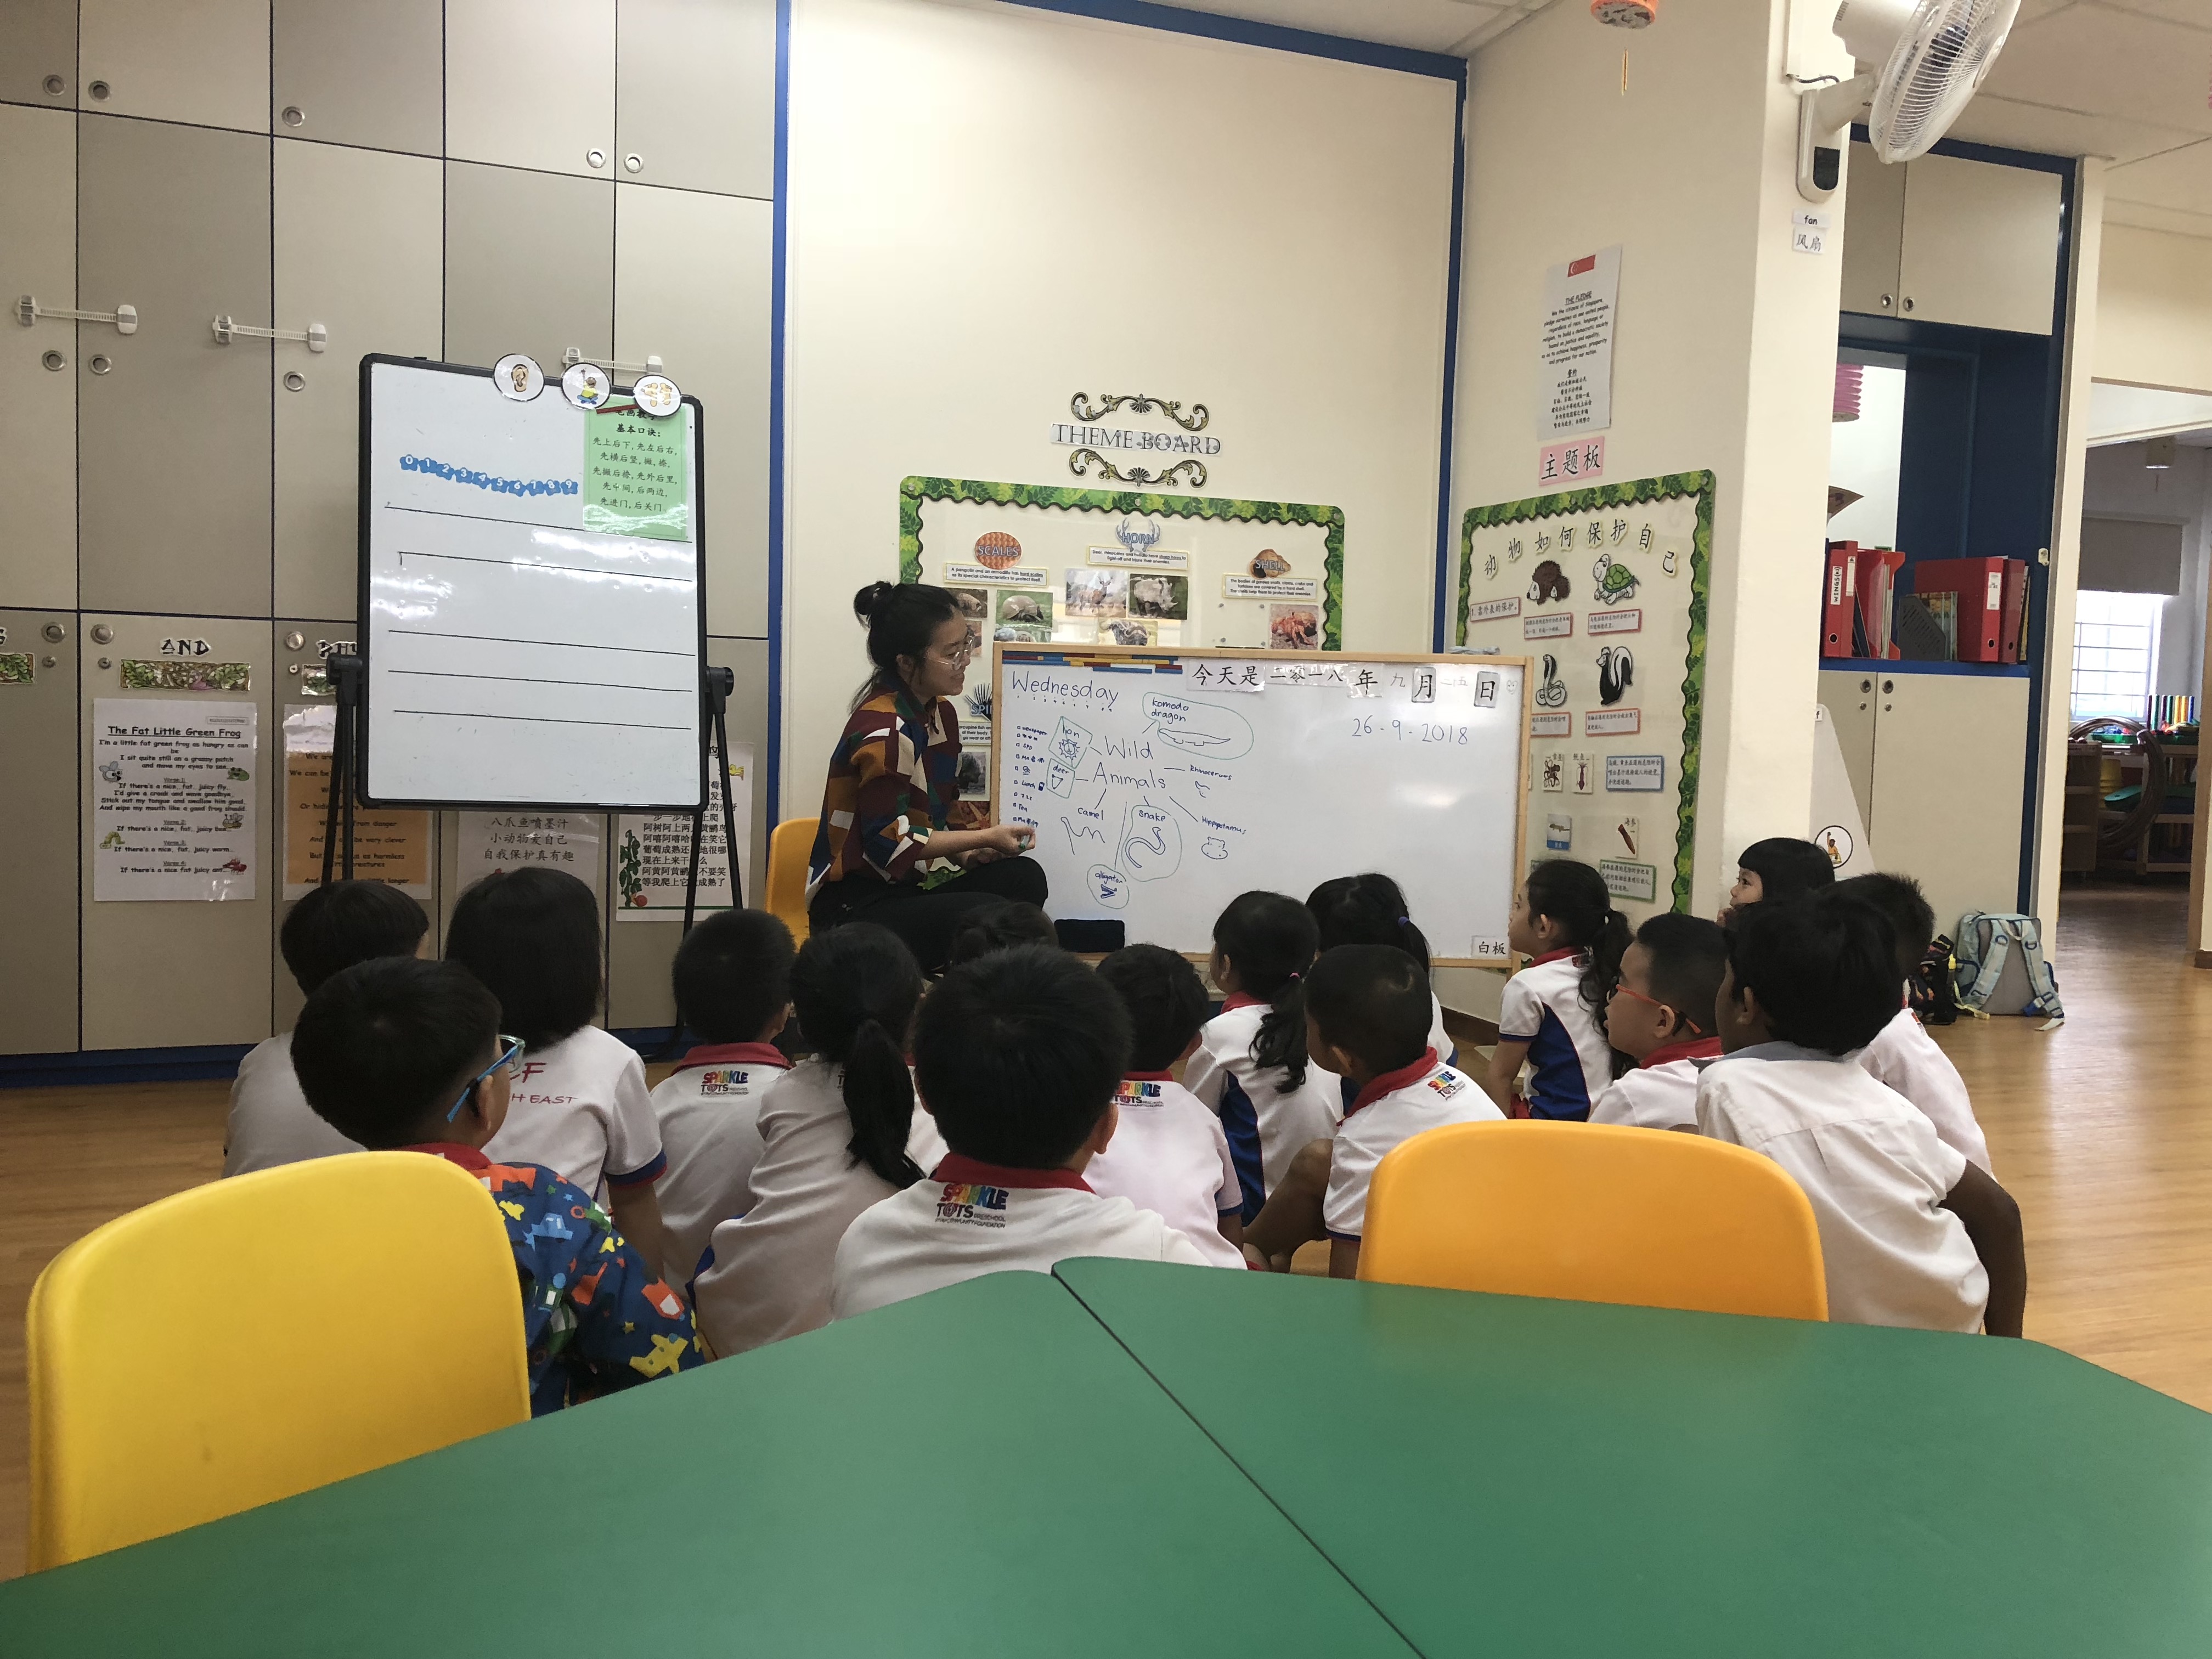
I have always thought that being an early childhood educator is the most rewarding and heartwarming job because you get to see young kids grow and achieve their little milestones. This morning, I sat in for an English class at a neighbourhood preschool center as I wanted to gain more insights on what it’s really like to be a preschool teacher.
*Note: I didn’t get to take a lot of photos of videos without an official permit.
K2 Classroom
Practice Documentation
There is no fixed process or steps when it comes to teaching a group of 6-year-olds. While the teachers have a lesson plan that they have to follow everyday, they usually have to be on the ball and ready to respond to the unpredictable needs of the kids. During the English lesson, the kids became a bit rowdy and they started to ask a lot of questions at the same time. Since the teachers need to face similar situations like this everyday, they need to be able to multi-task and learn to give her attention to more than 15 children at once.
Tools Used
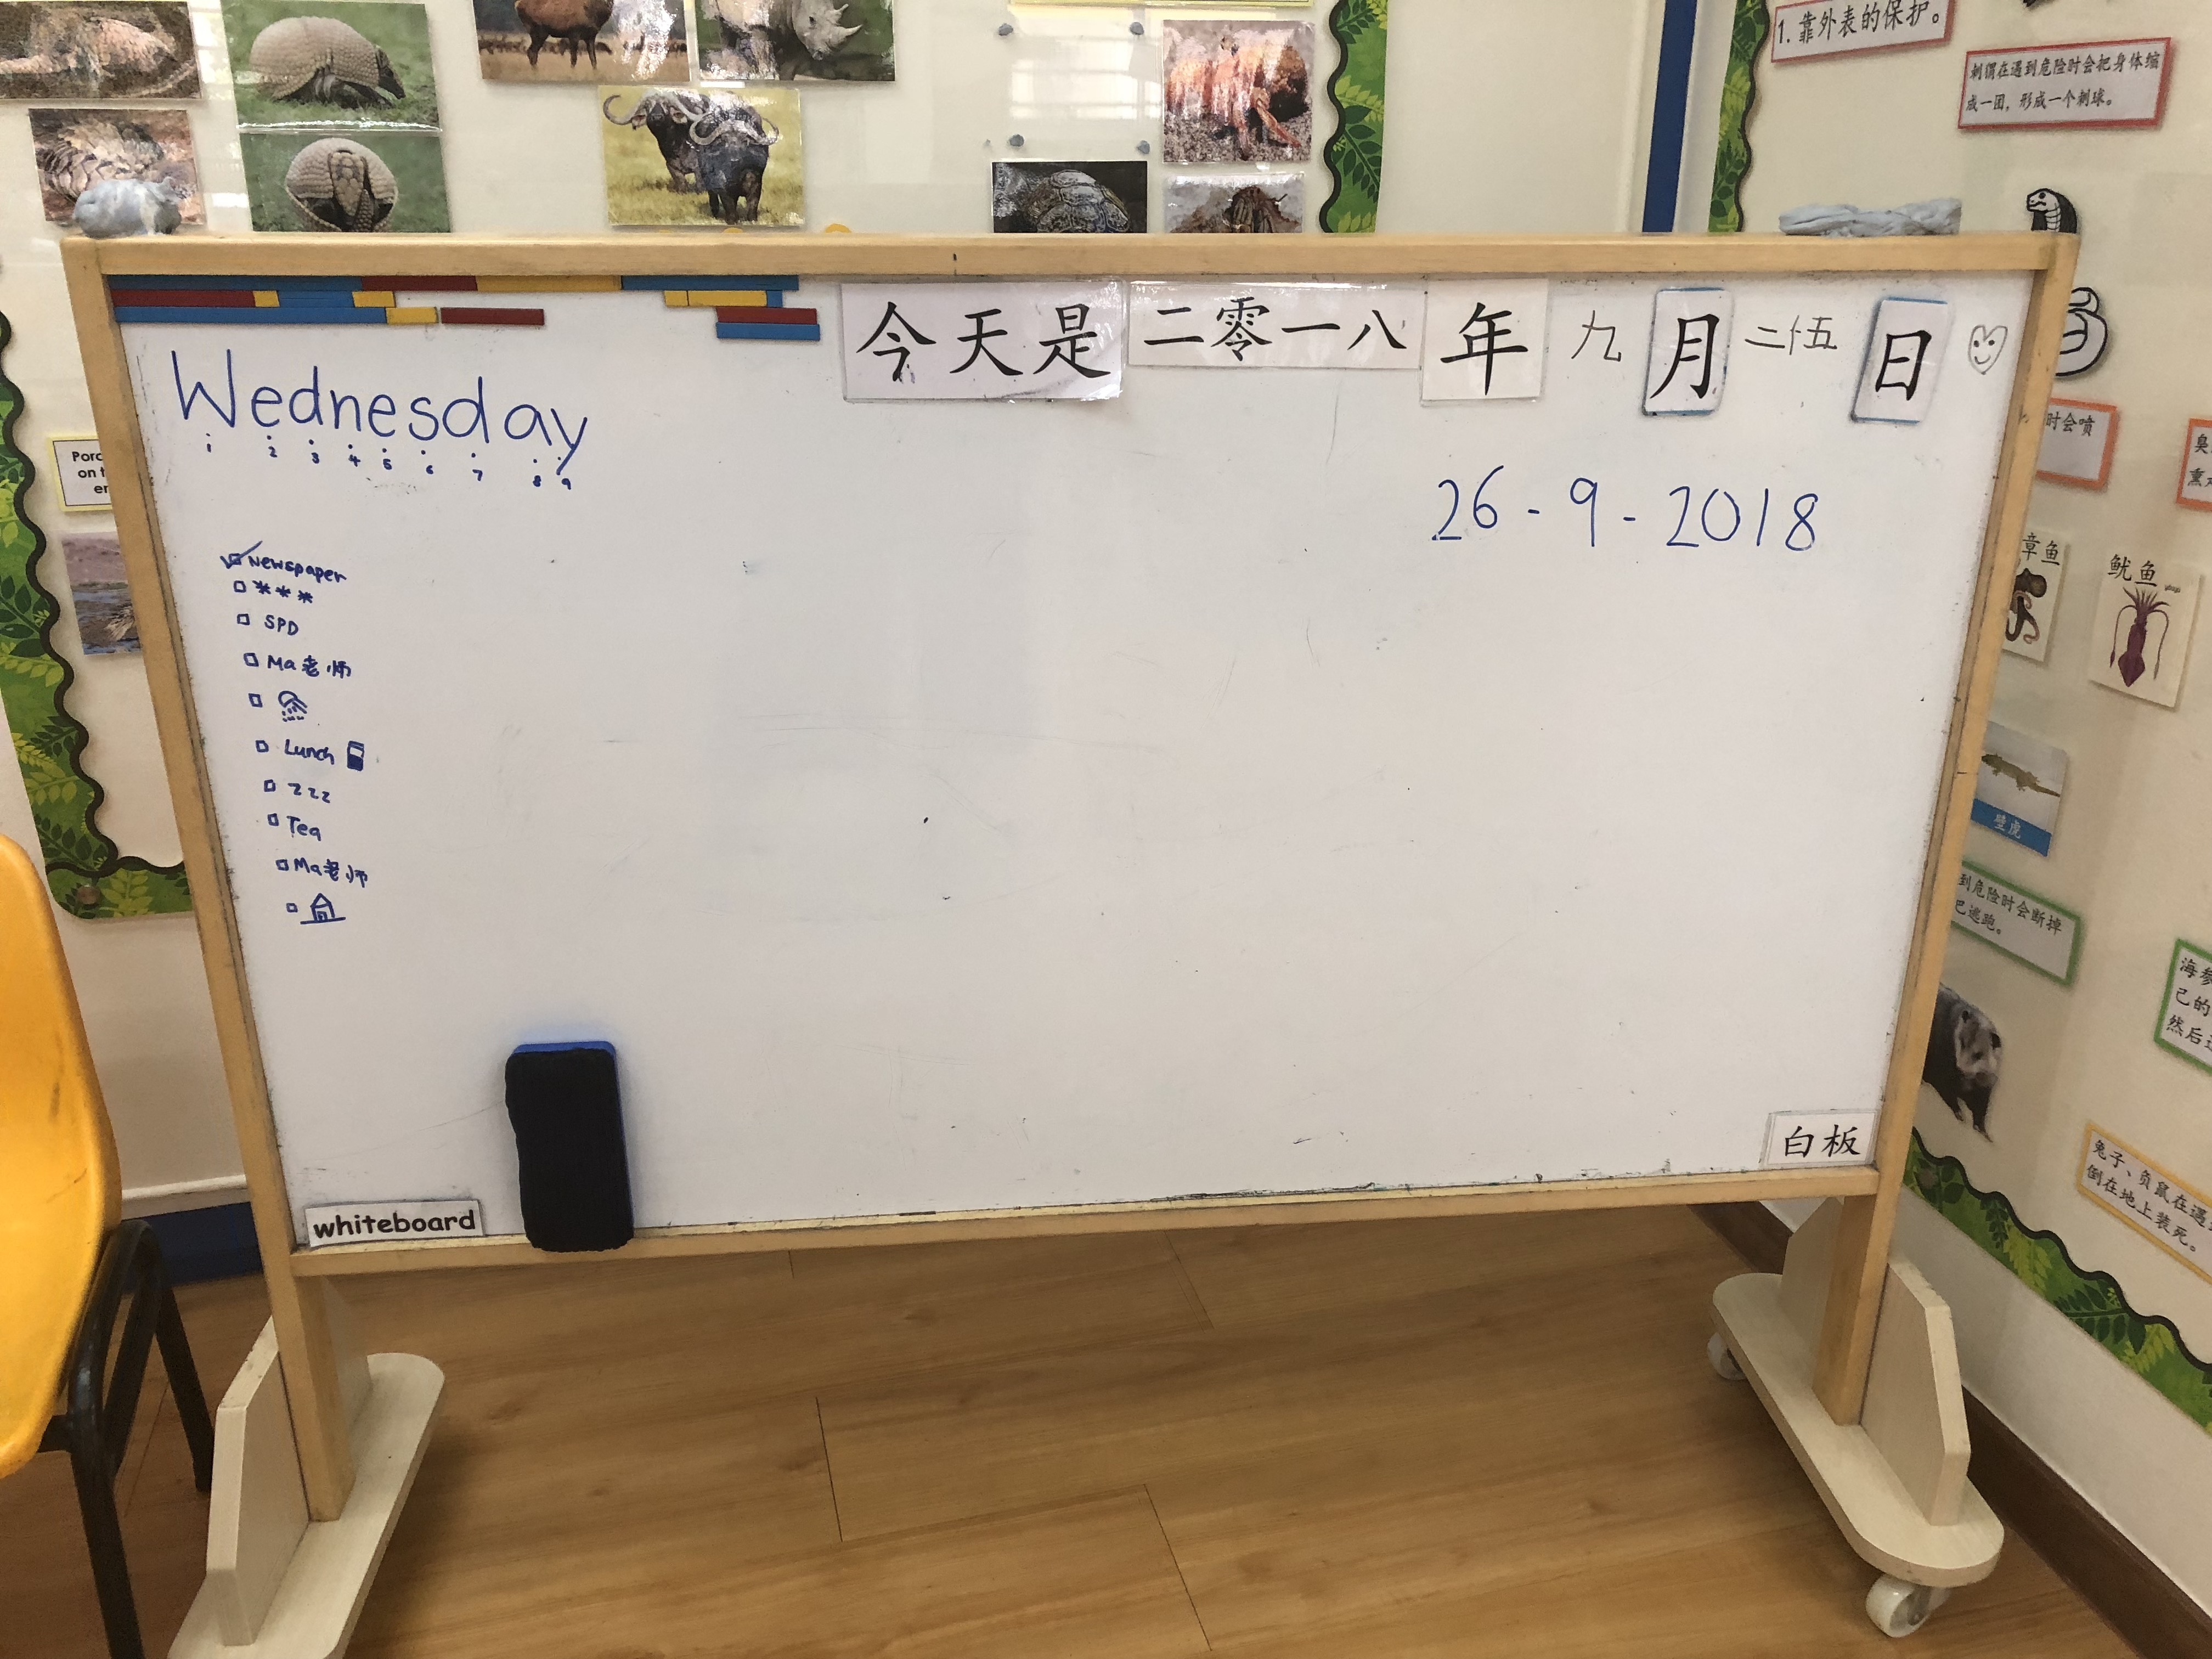
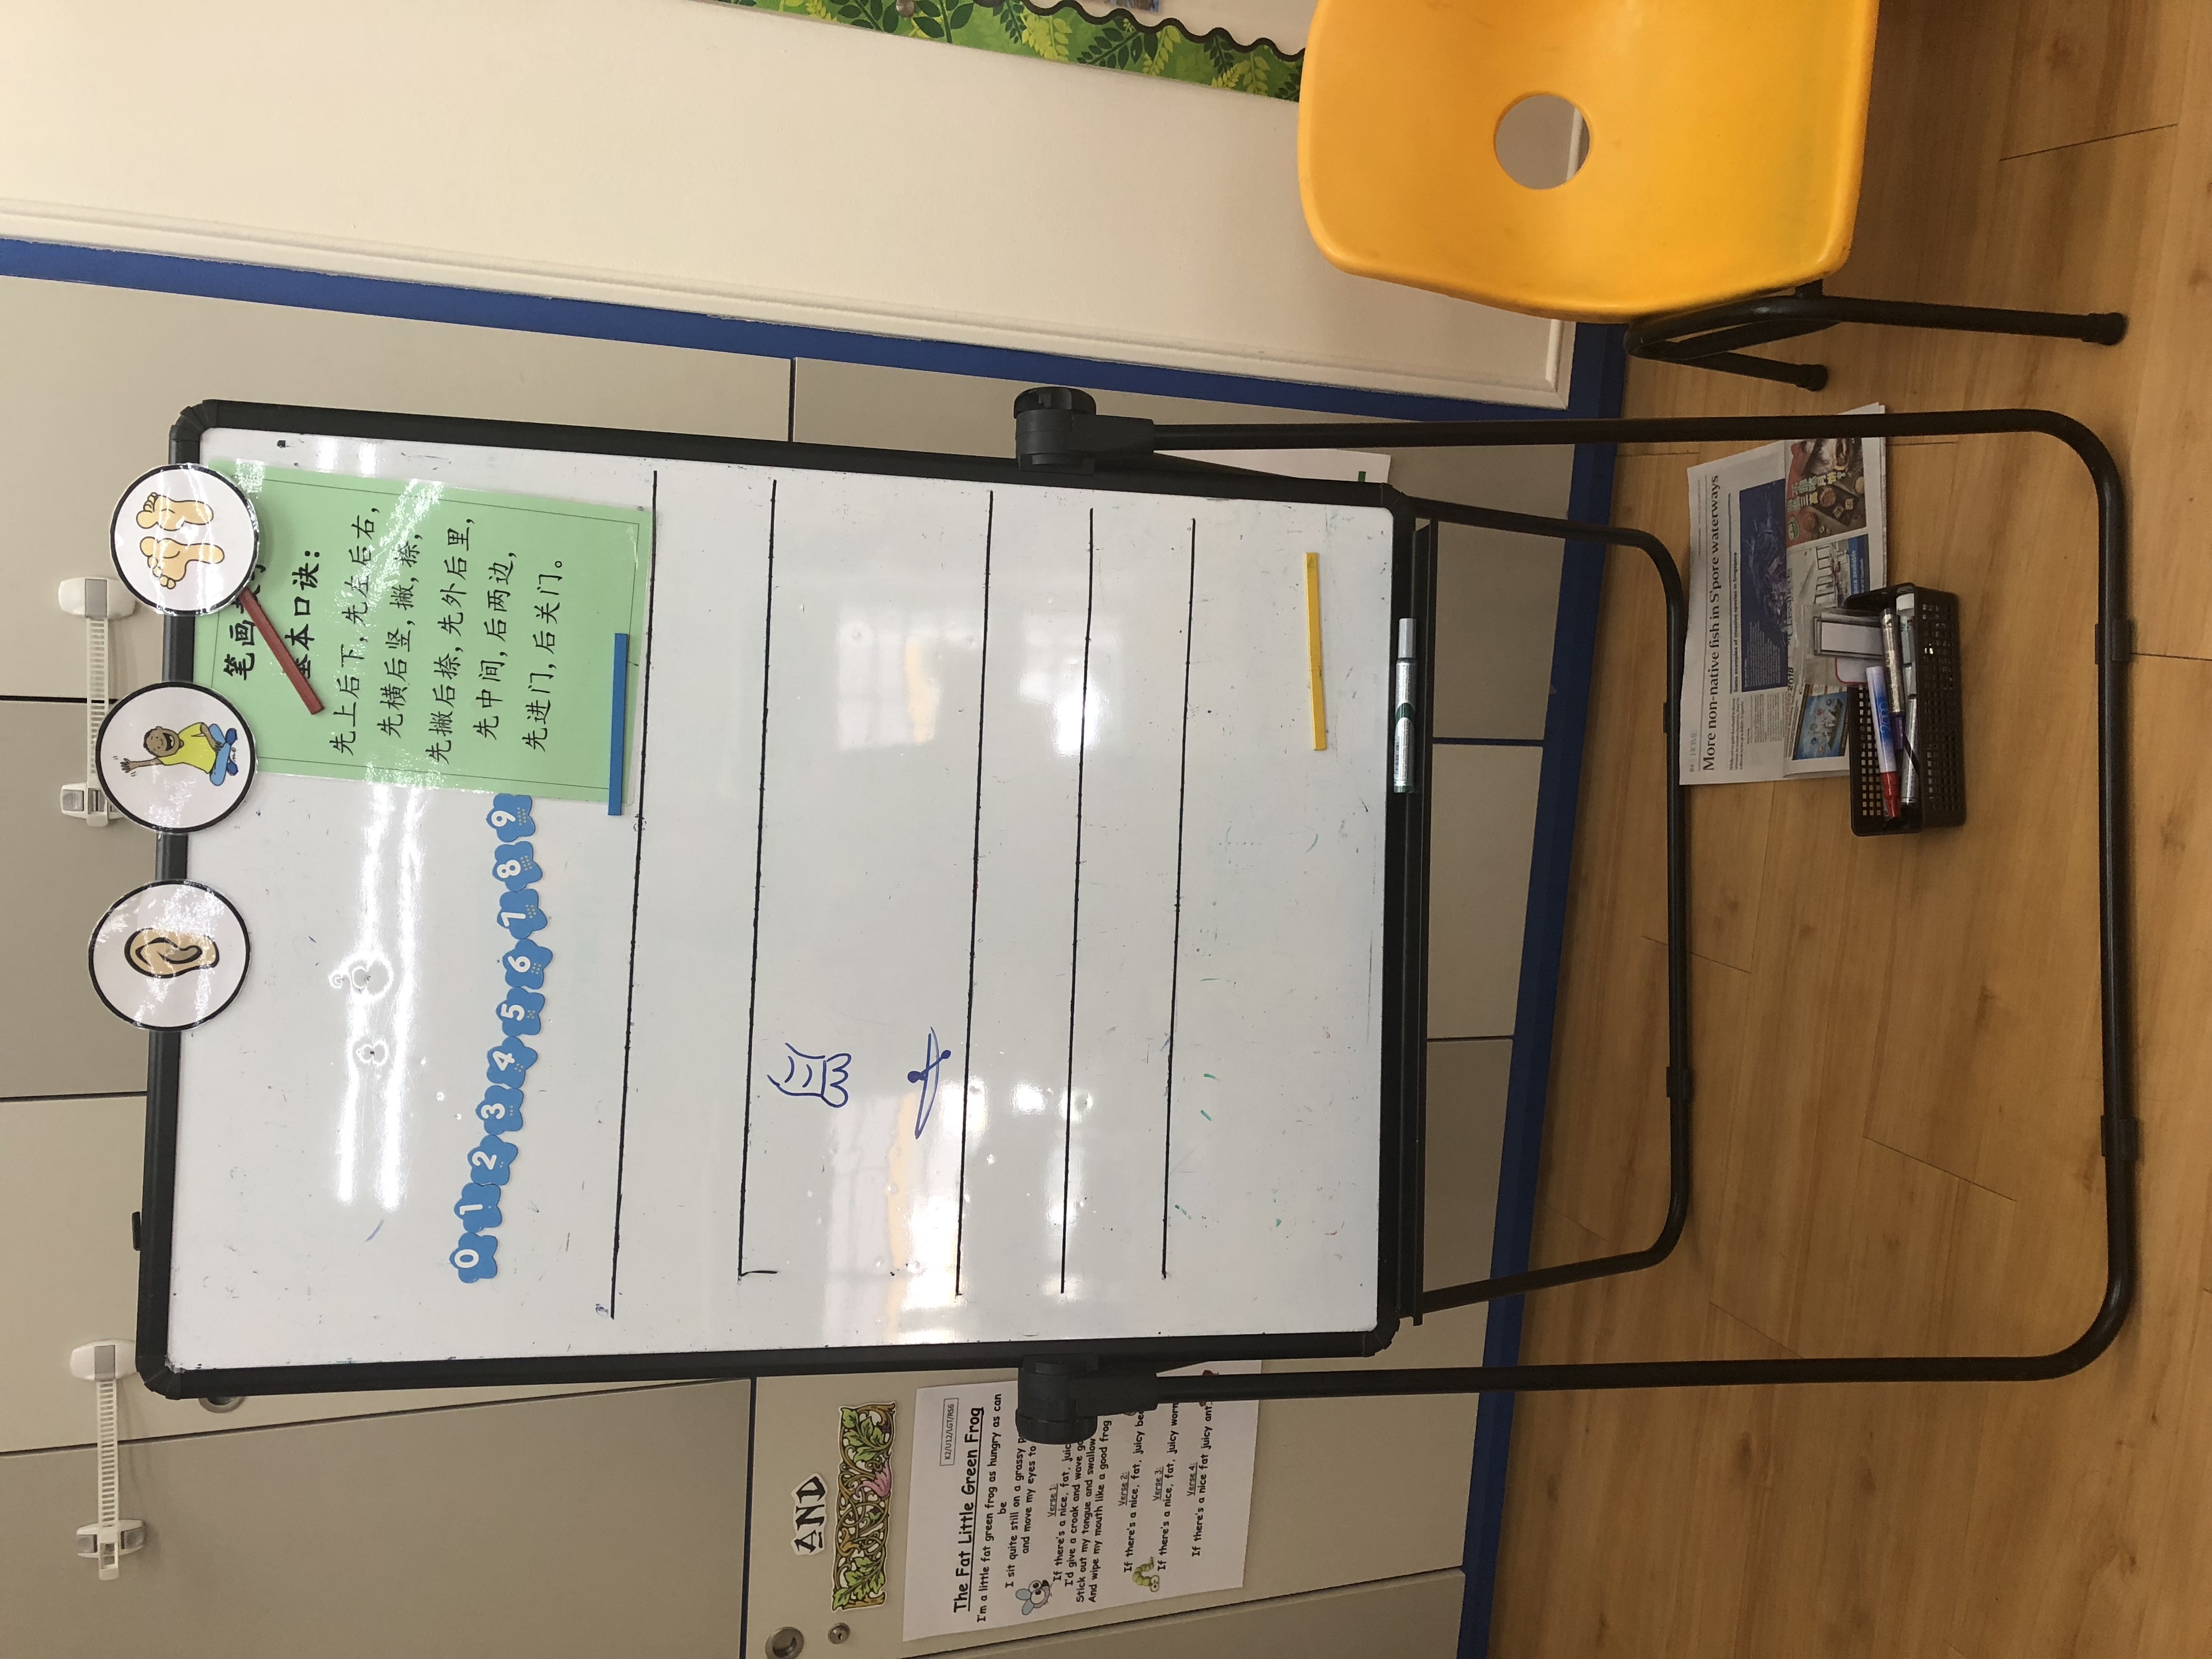
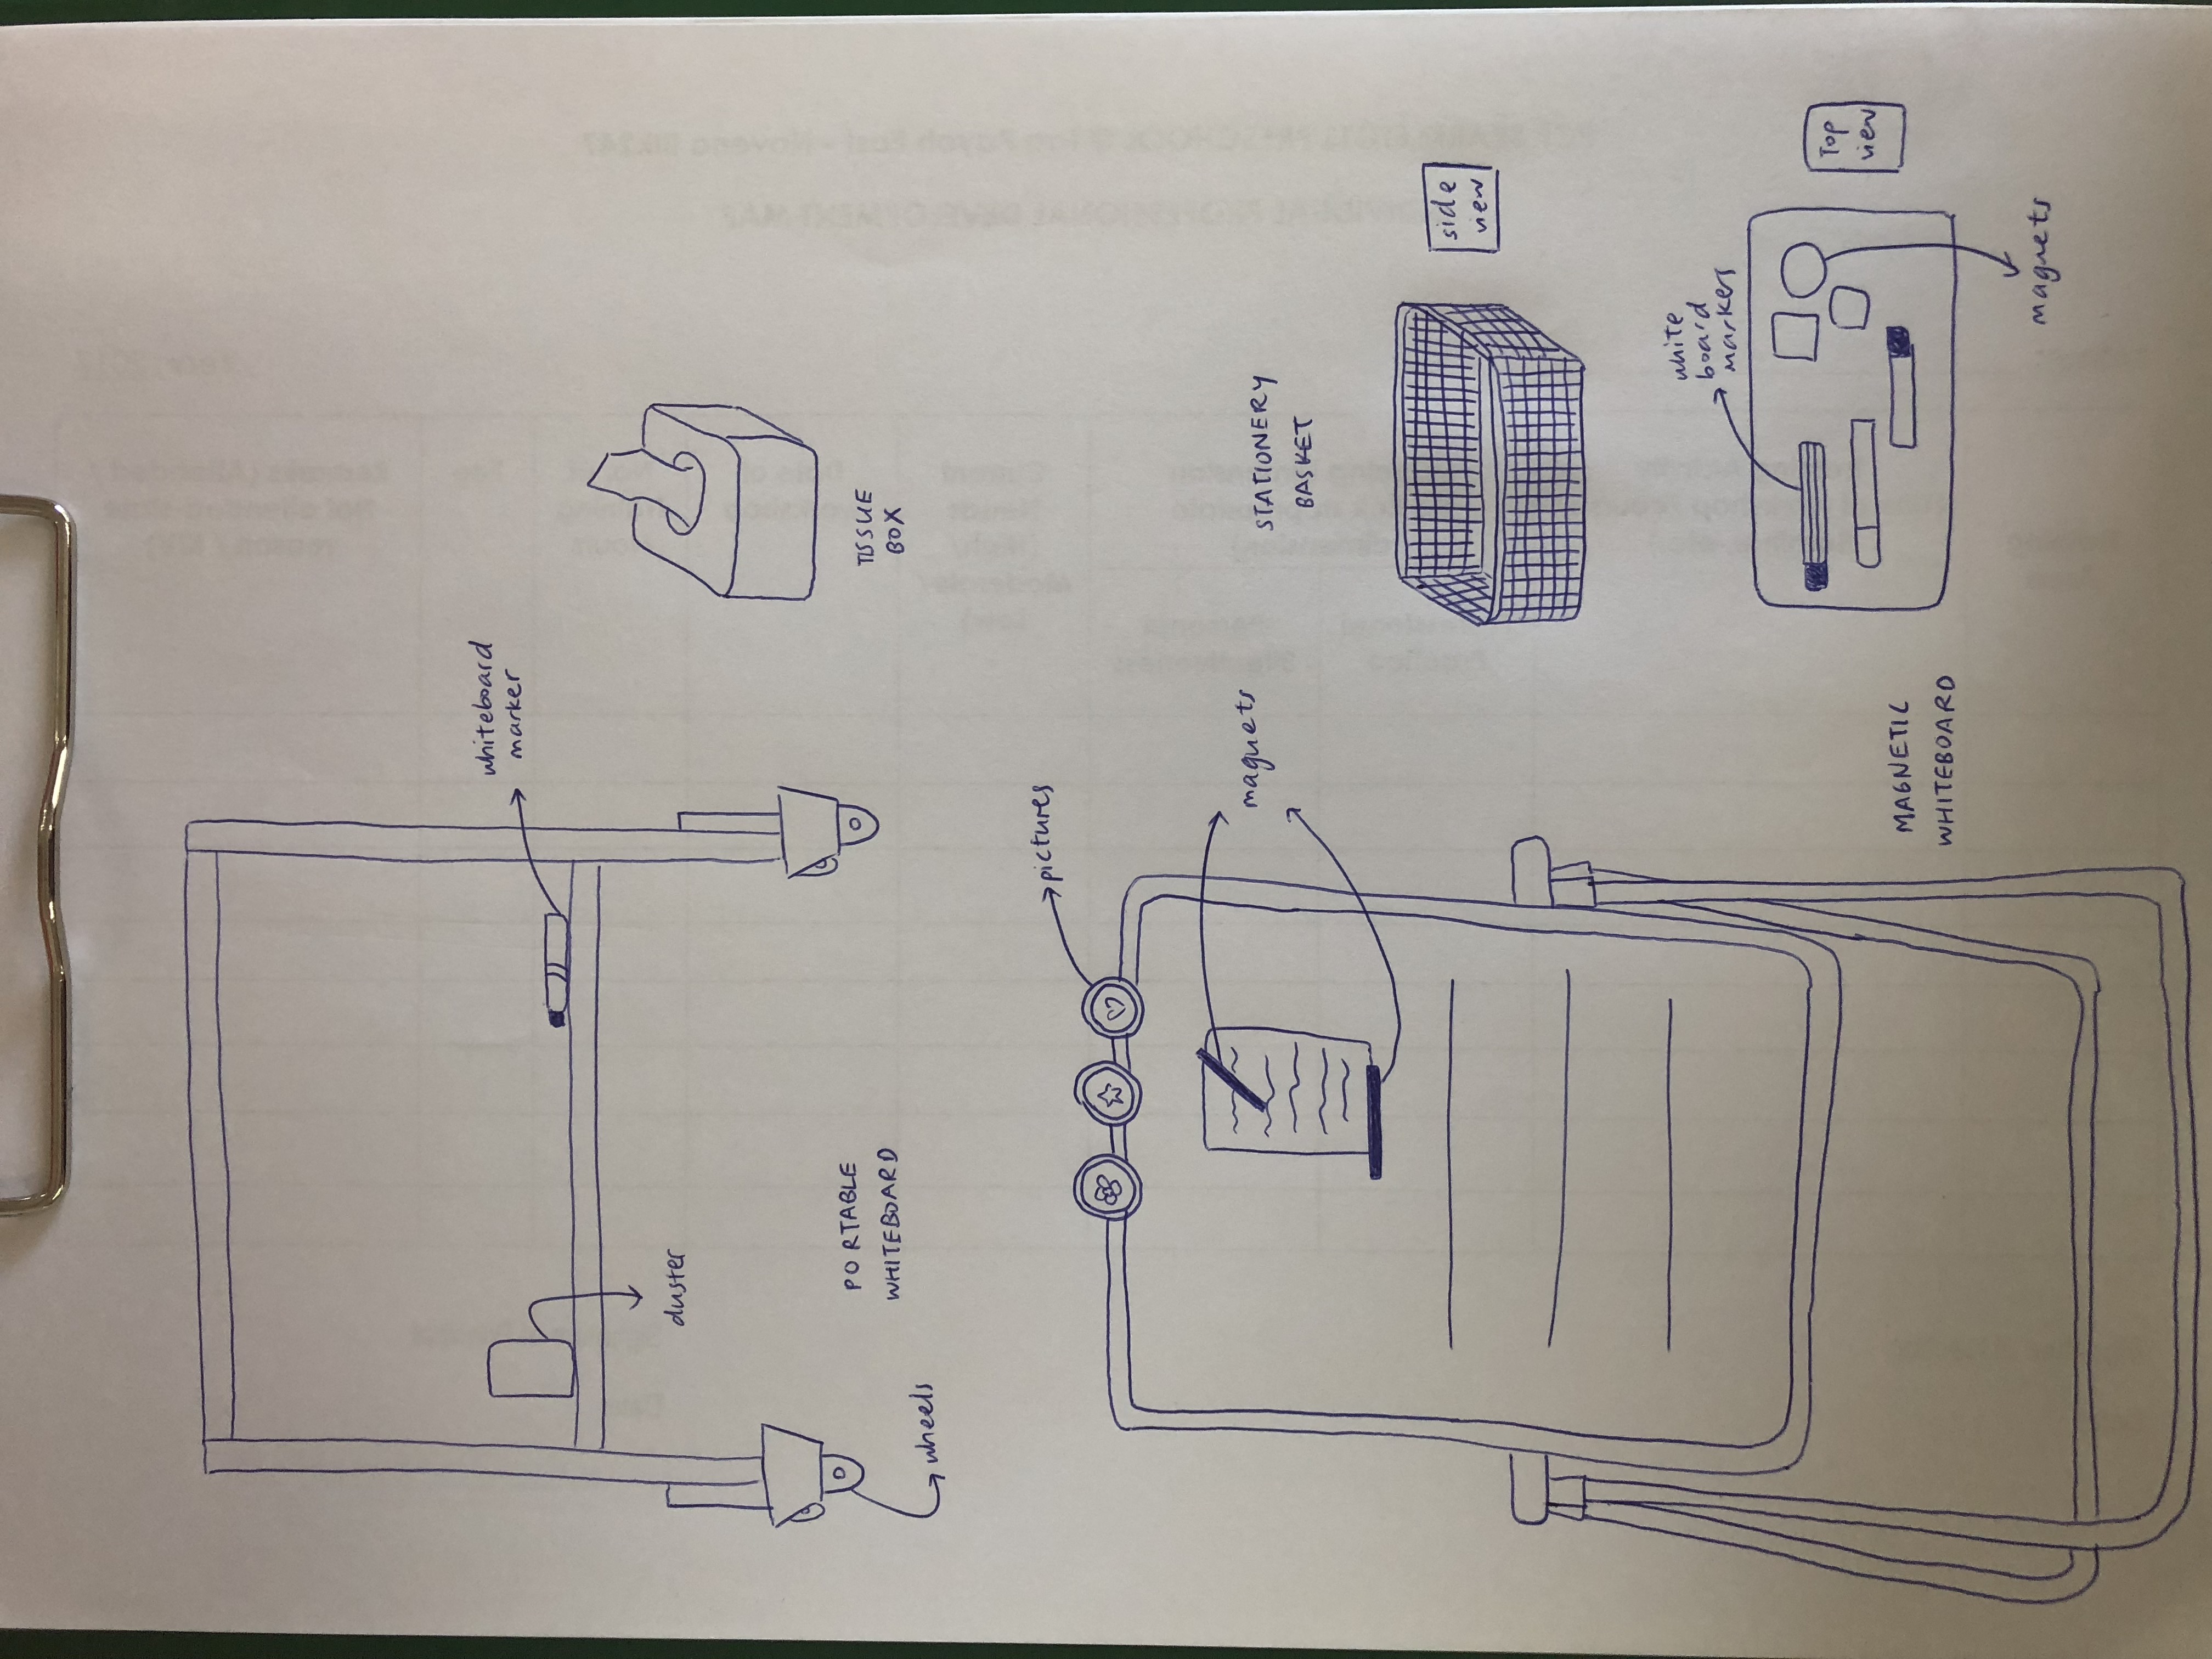
Portable whiteboard
Magnetic whiteboard – for writing or attaching pictures/ news articles to facilitate the lesson
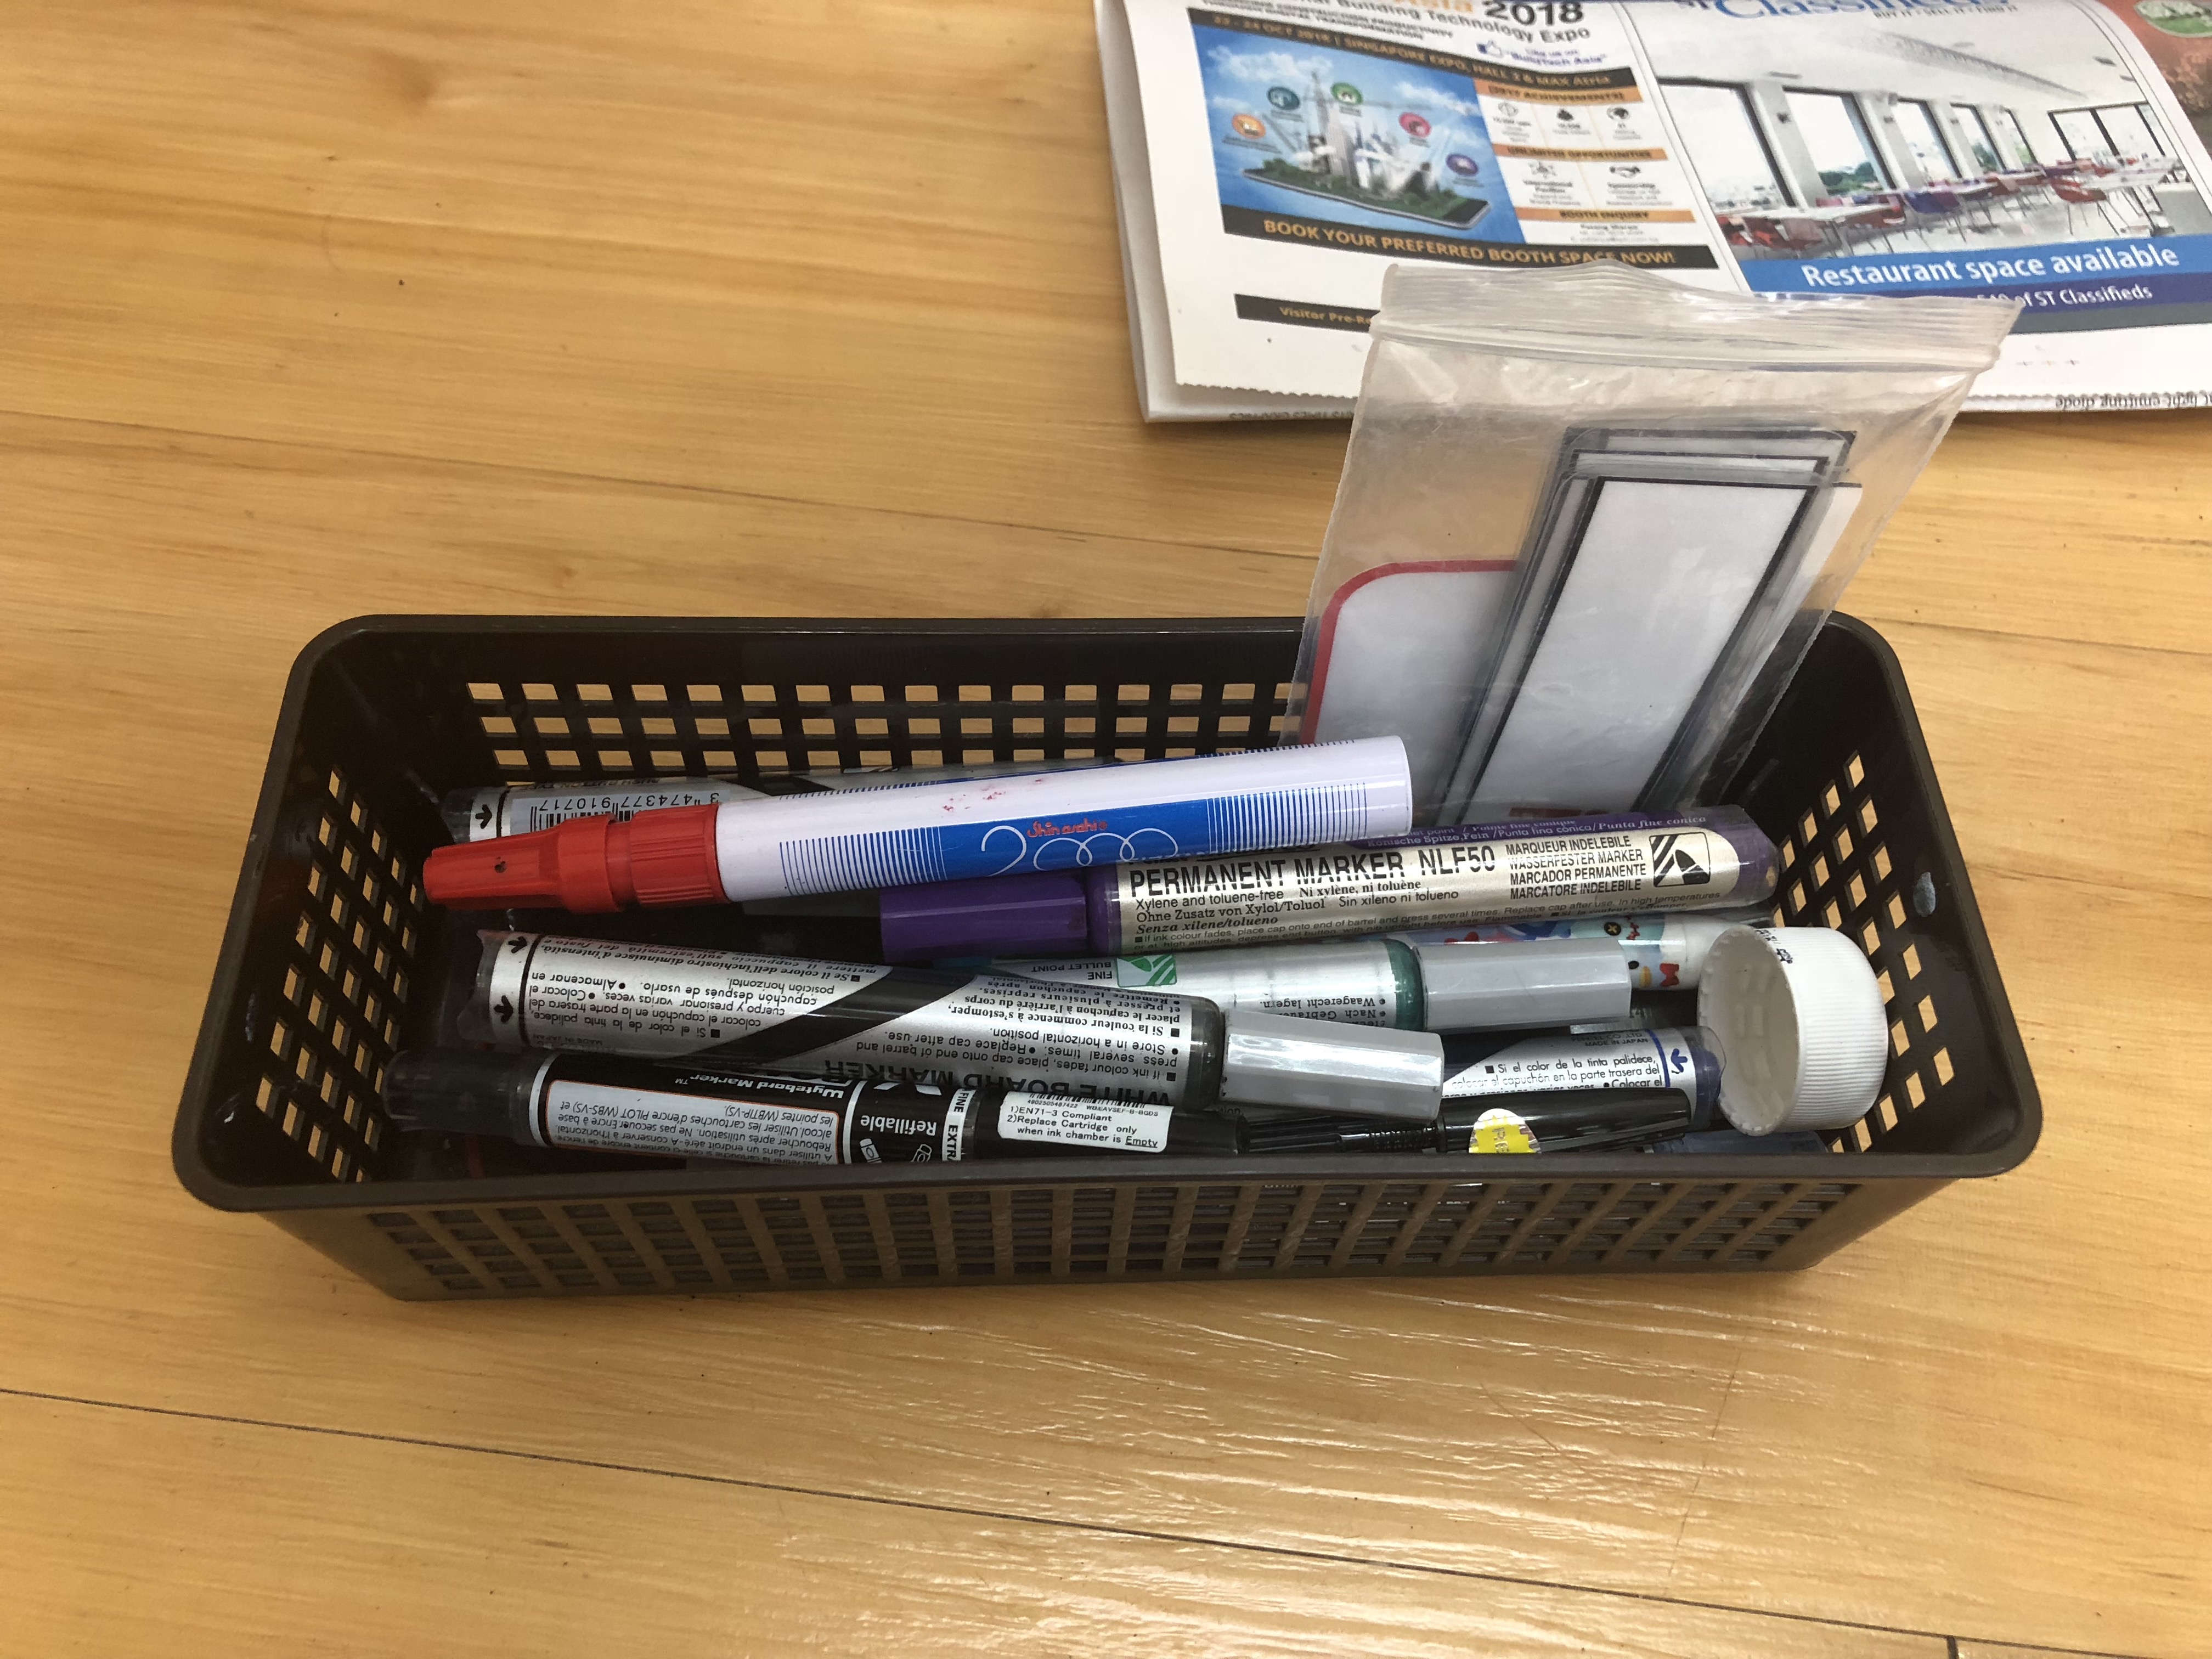
Stationery basket – contains whiteboard markers of different colours and magnets
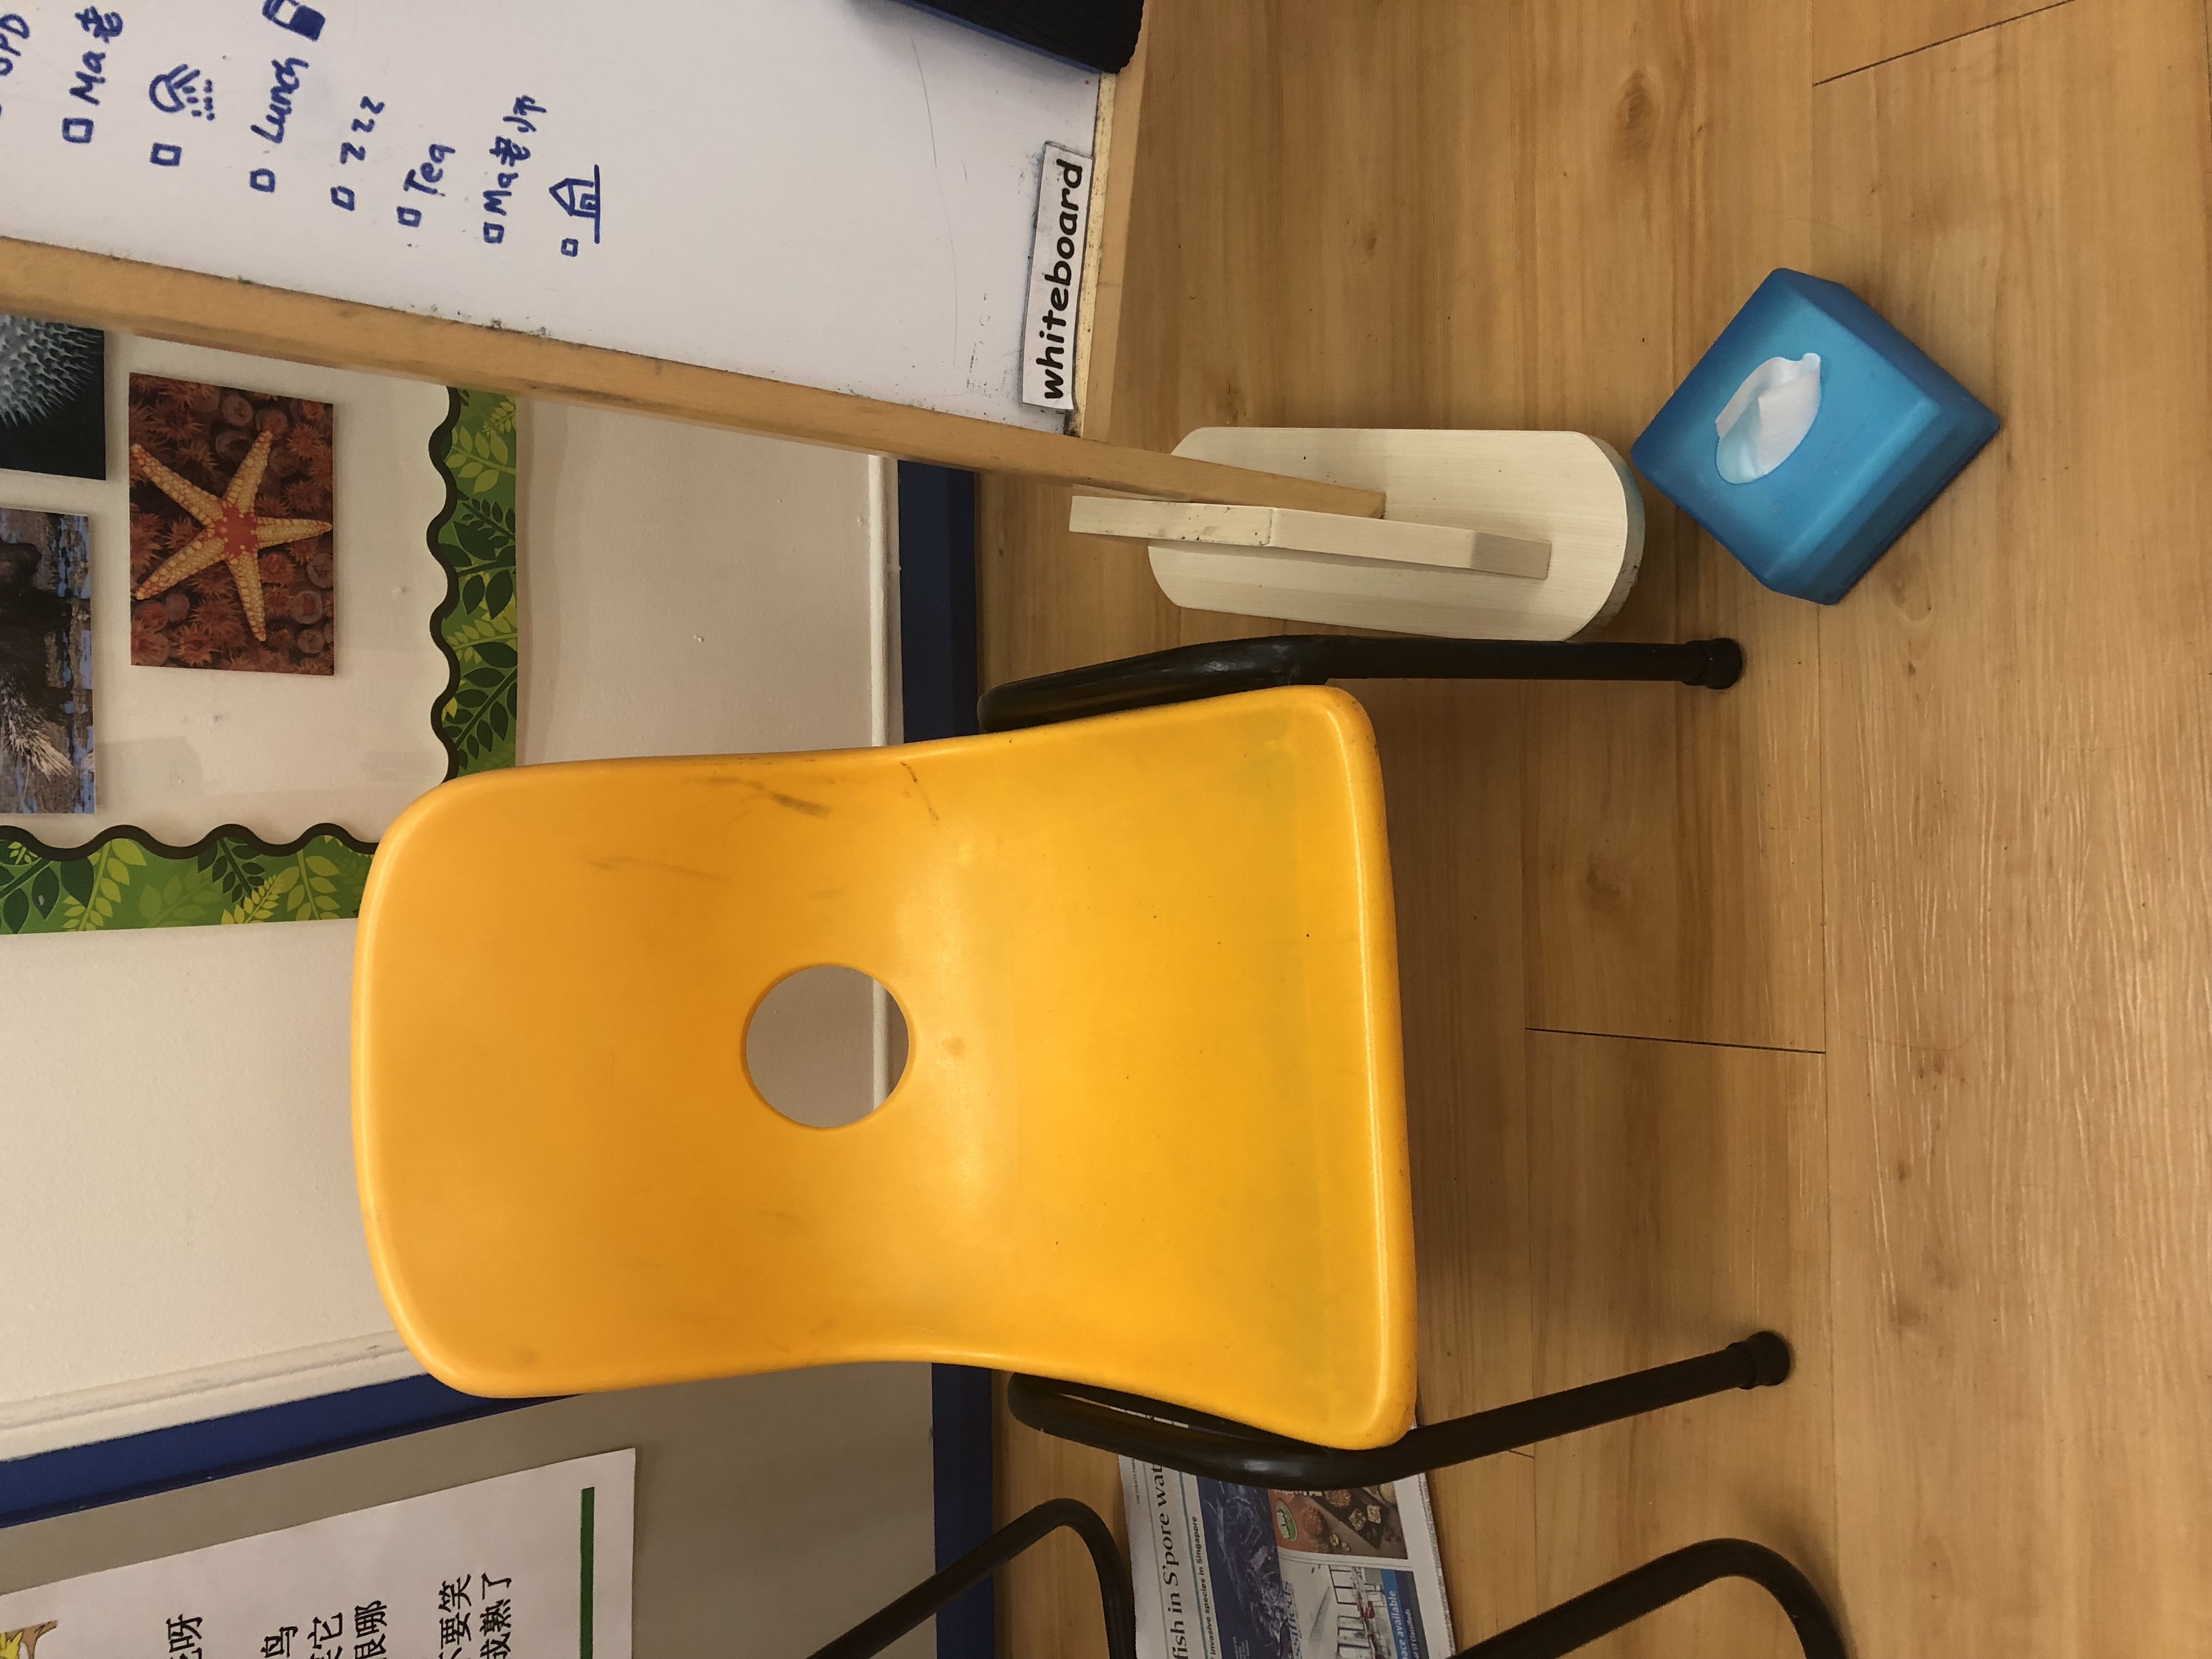
Chair
Tissue box – to clean up after the children
Evaluation of tools used In my opinion, the stationery basket is a little inconvenient because it has no handles for the teacher to grab on to. In addition, the basket has no lid, thus increasing the risk of all the stationery falling out of the basket if the teacher does not hold it properly. Furthermore, although other tools like whiteboard markers, duster and tissue box are placed near to the teacher, she still has to look around for them whenever she needs them, while paying attention to the kids at the same time.
Portable whiteboardMagnetic whiteboardStationery basketChair and tissue boxSketches of tools used
Worksite Documentation
The classroom is generally organised as everything is packed neatly in the shelves. The kids’ bags and water bottles are also placed nicely in the cubby holes provided. However, since everything is placed in different shelves, whenever the teacher needs something other than the tools stated above, she would need to walk to the shelves to take it.
Personal Insights
Apart from sitting in for the class, I was also given the wonderful opportunity to conduct a short lesson. Since I’m not a professionally-trained preschool teacher, I could only conduct a drawing lesson. Also, since I was not familiar with where everything was kept, I had to ask the teachers and this made the process slightly more time consuming.
In my opinion, since the kids can be rather unpredictable, it is better for the teachers to have a portable toolbox, or a wearable kit, with all the tools that they need. This way, the teachers can spend less time searching for the things they need and they can pay more attention to the kids around them.
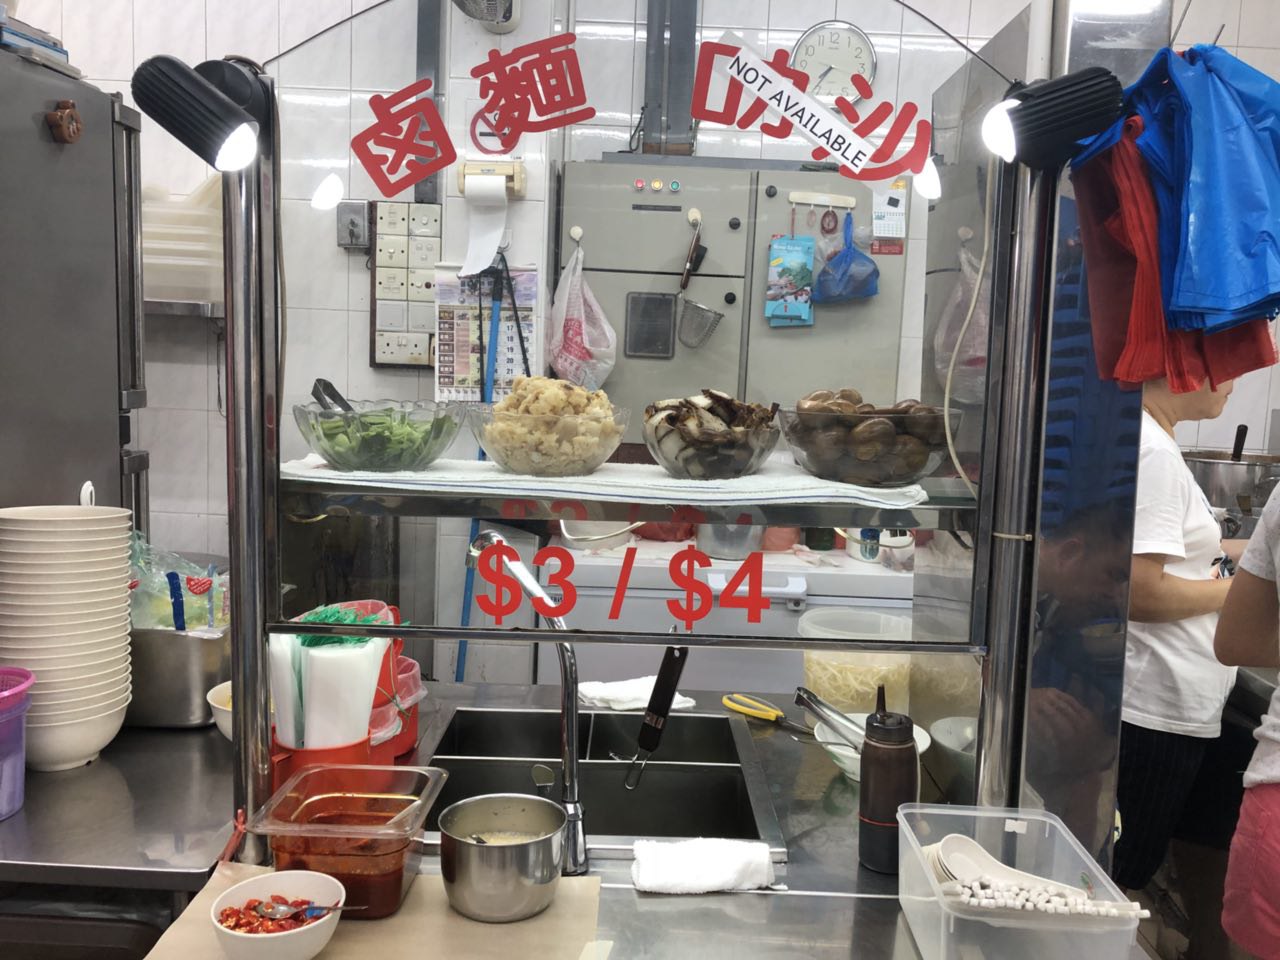
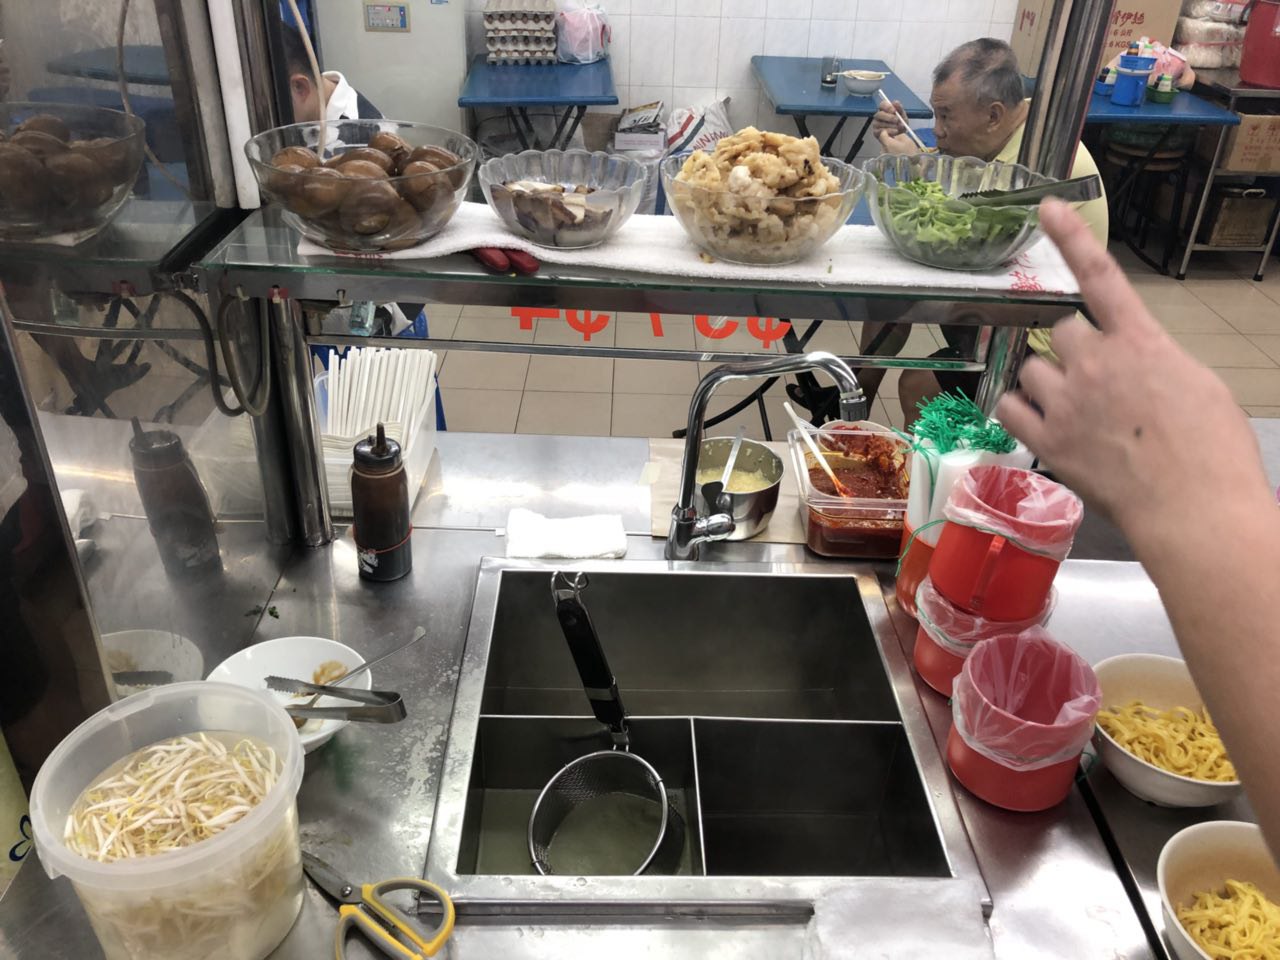
I have always been very supportive of Singapore’s hawker culture as I always visit hawker centers when I am craving some comfort food or a taste of nostalgia. Hence, for my first practitioner, I decided to approach a family friend who owns a coffeeshop, to teach me how to make one of my favourite dishes – lor mee, which literally translates to “braised noodles”.
Process Documentation
Usually, the chef wakes up at 1am to prepare the gravy beforehand! After the gravy is done, she will move on to prepare the toppings for the noodles. Below is a short video of how a typical bowl of lor mee is prepared and served to customers.
Preparing a bowl of lor mee involves a systematic and arduous process. Here are the steps according to the video above:
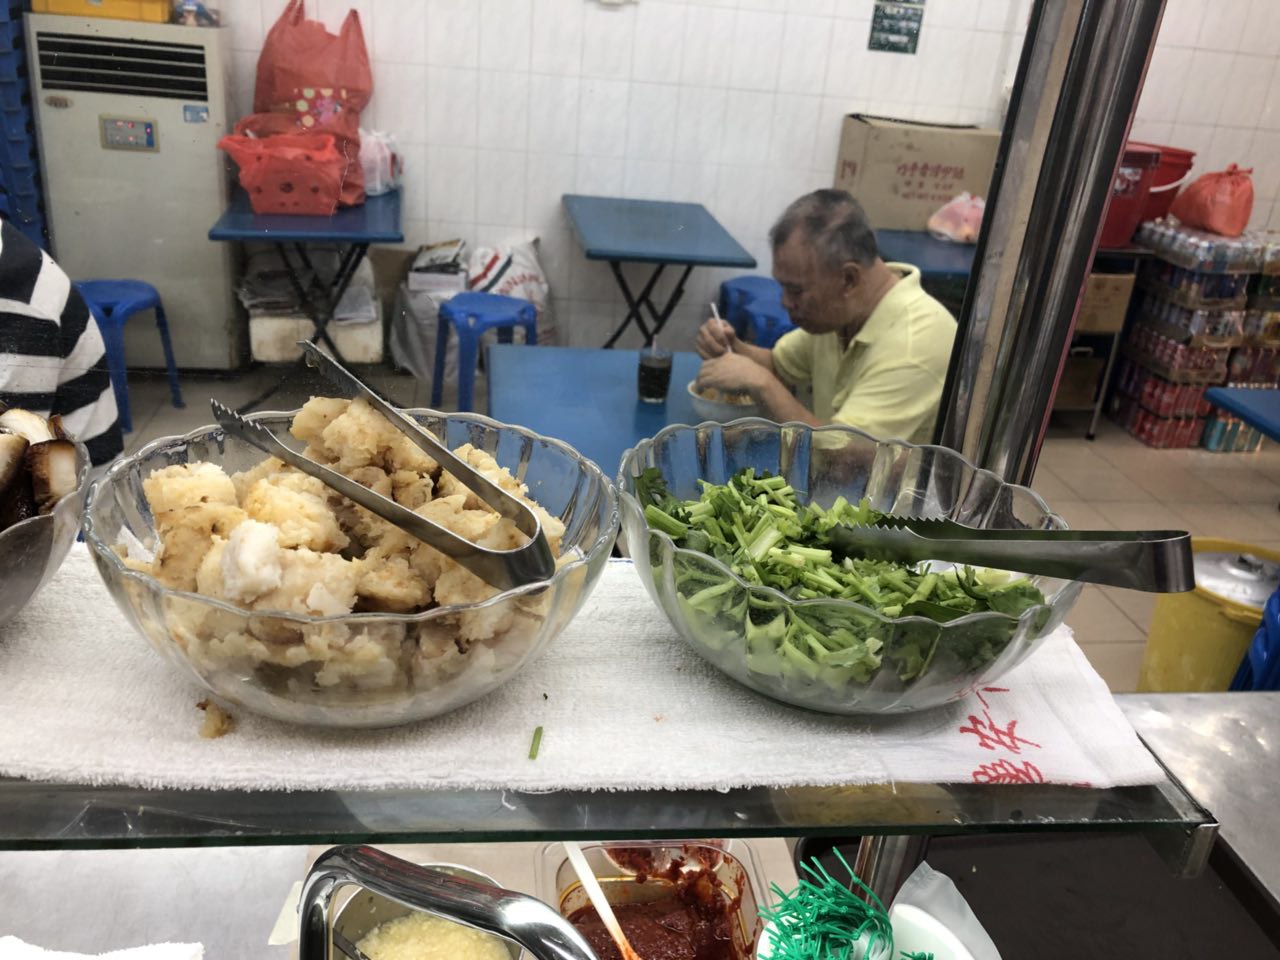
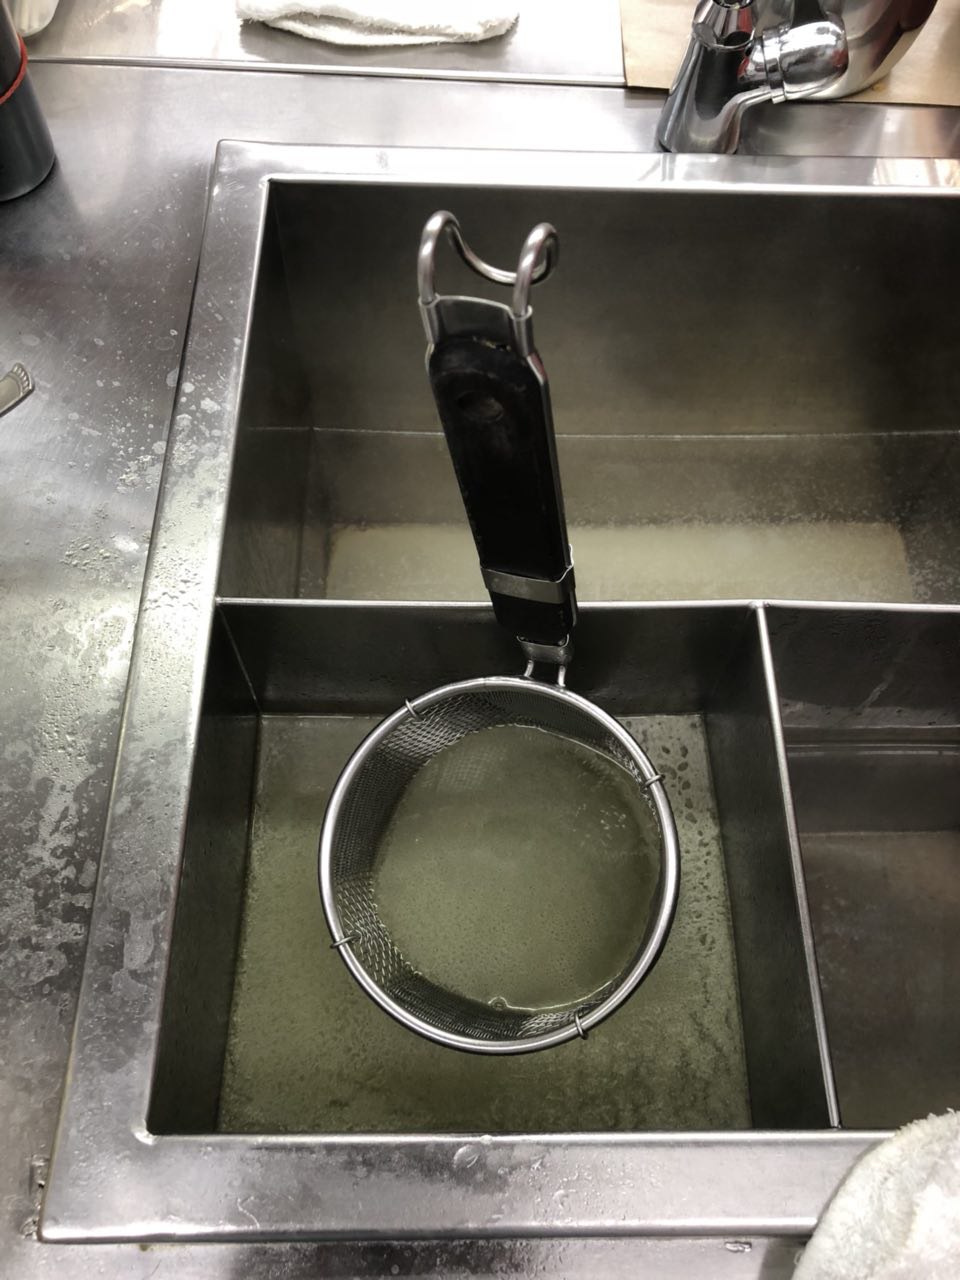
Firstly, the amount of noodles and beansprouts are estimated by hand and placed into a noodle strainer, before being blanched in piping hot water.
After the noodles are cooked, 1 1/2 ladles worth of thick, sticky gravy is poured on top of the noodles, just enough to cover the noodles.
Next, toppings such as braised egg, fried fish, braised pork and parsley are added to the bowl.
Last but not least, condiments like black vinegar, chilli paste and minced garlic are added before serving the bowl of noodles to the customer.
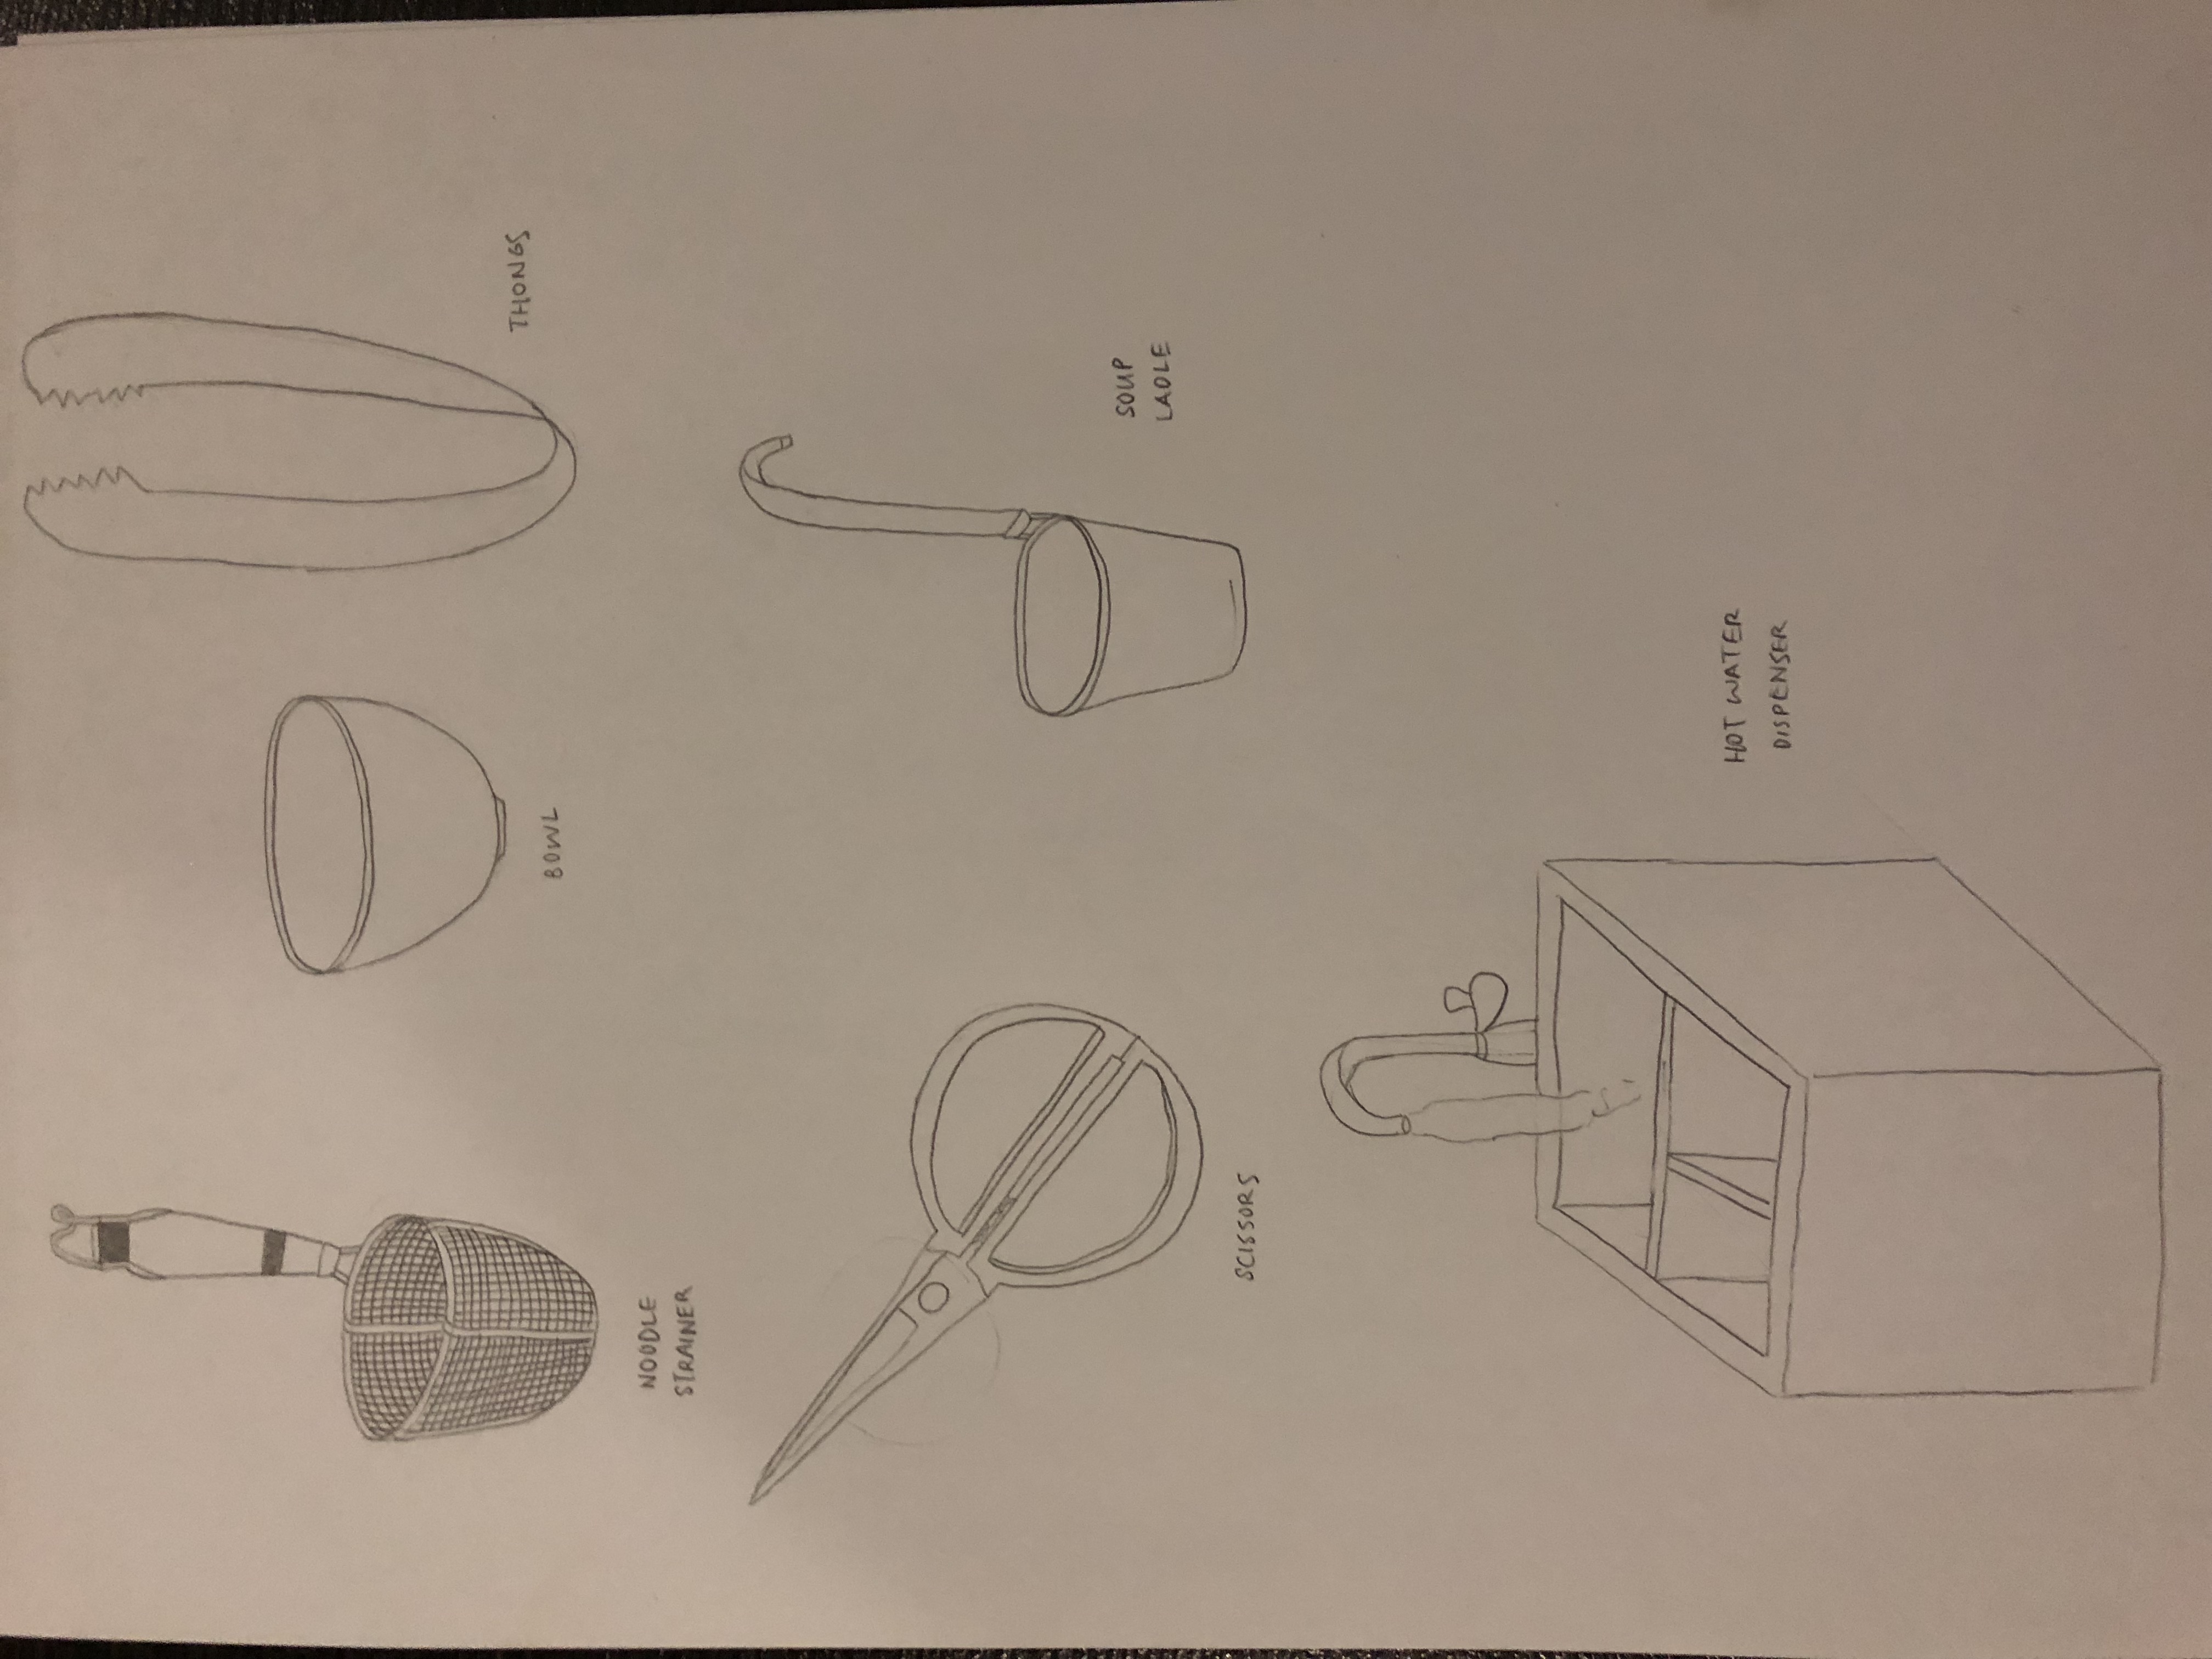
Tools used
Stainless steel noodle strainer
Thongs
Ladle
Bowl
Scissors
Hot water dispenser
Thongs usedNoodle strainer usedSketches of tools used
Worksite Documentation
The worksite is a small and humble space, and it also very clean and organised. Below are a few photos I took of the worksite.
Personal Insights
After attempting to prepare a bowl of lor mee by myself, I took down some notes regarding my experience. The most challenging part would be straining the water out of the noodles, because I need to leave the right amount of water in the noodles, and if there is too much water retained in the noodles, it will become too soggy. In my opinion, it takes a lot of time and experience for one to master this step. On the other hand, I learnt that preparing a humble bowl of noodles is actually a very laborious and meticulous process, and almost no machines or pre-made food are used. Everything from the braised egg to the braised pork are made with love by the chef and kitchen staff.
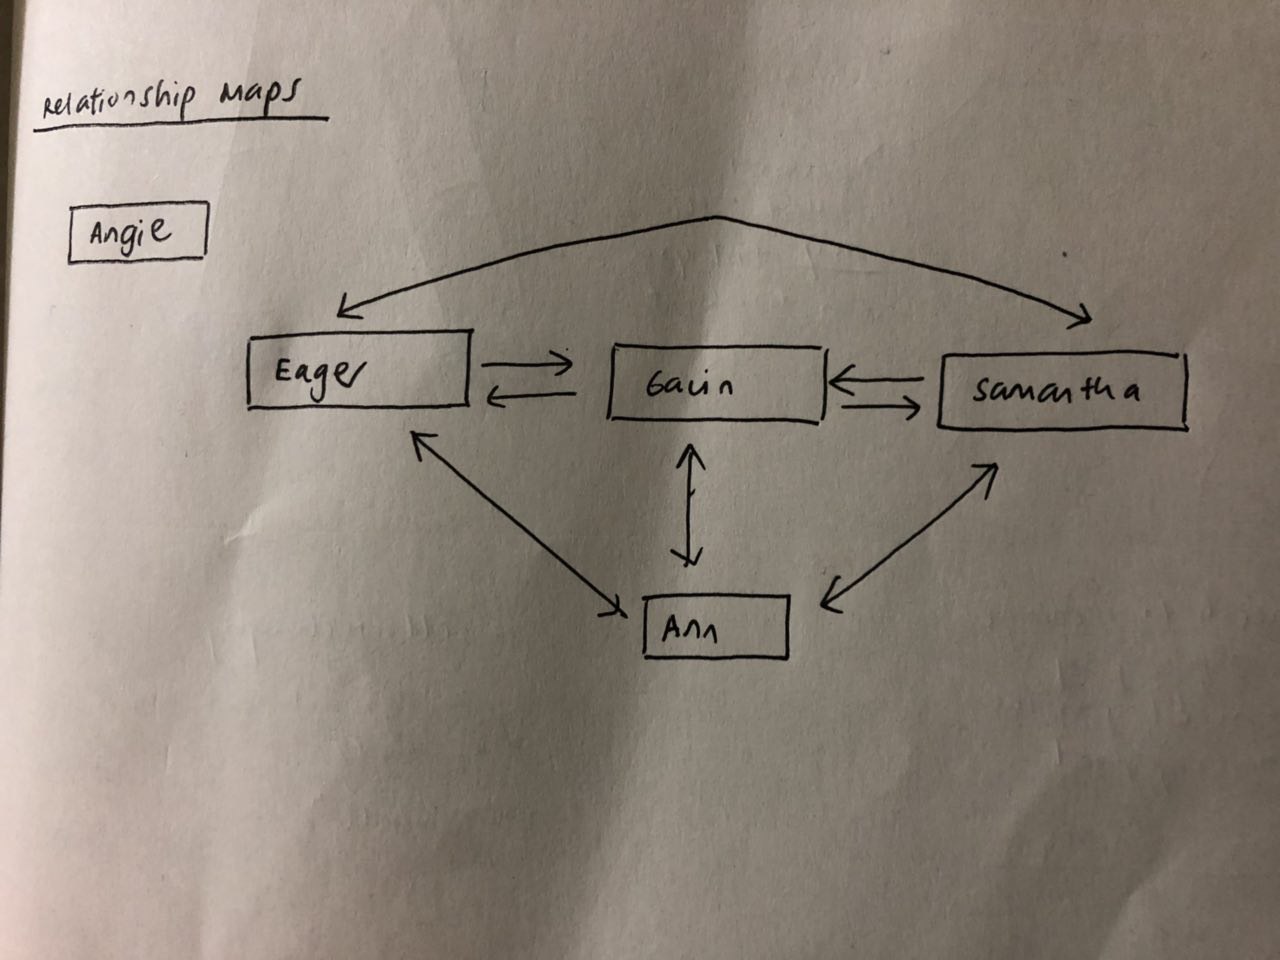
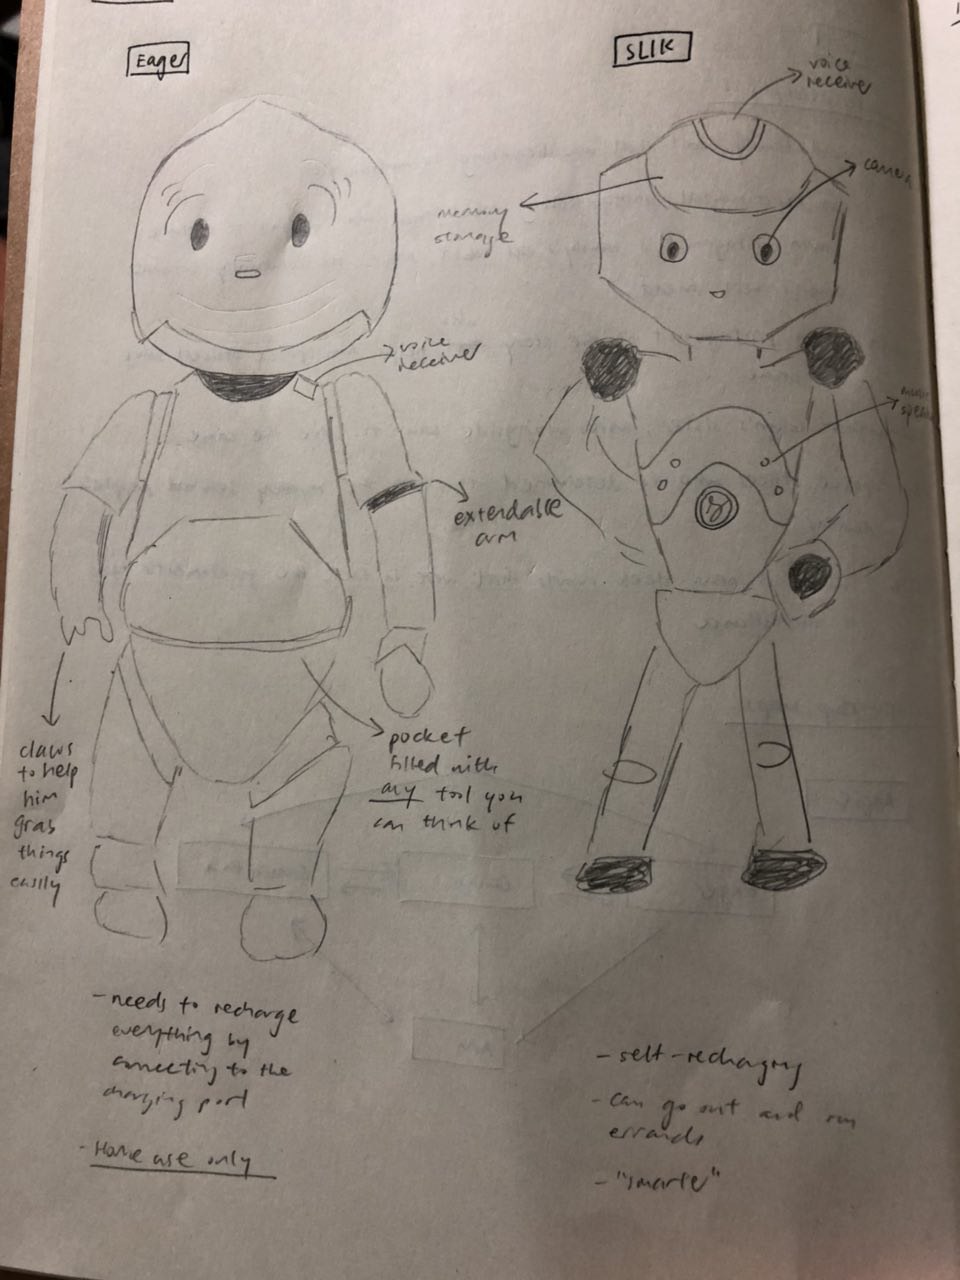
CharacterDescriptions: – Angie: old family robot that was beginning to malfunction – Eager: an experimental, goofy-looking robot that was bought to replace Gavin’s old family robot, Angie. He eventually becomes Gavin’s best friend – Gavin: main protagonist of the story; helps Ann to uncover the truth behind the mysterious deaths – Samantha: Gavin’s sister; works alongside Gavin and Ann to solve the crime – Ann: police officer who was put in charge of the recent series of mysterious deaths – SLIK Robots: batch of newer, sleek robots that were rolled out to replace the old batch of family robots.
Relationship Maps:
ImportantTechnology: – AI system that runs the smart robots – Advanced sensory and biometric technologies – Surveillance cameras that were installed inside the SLIK robots
Antecedent Technology:
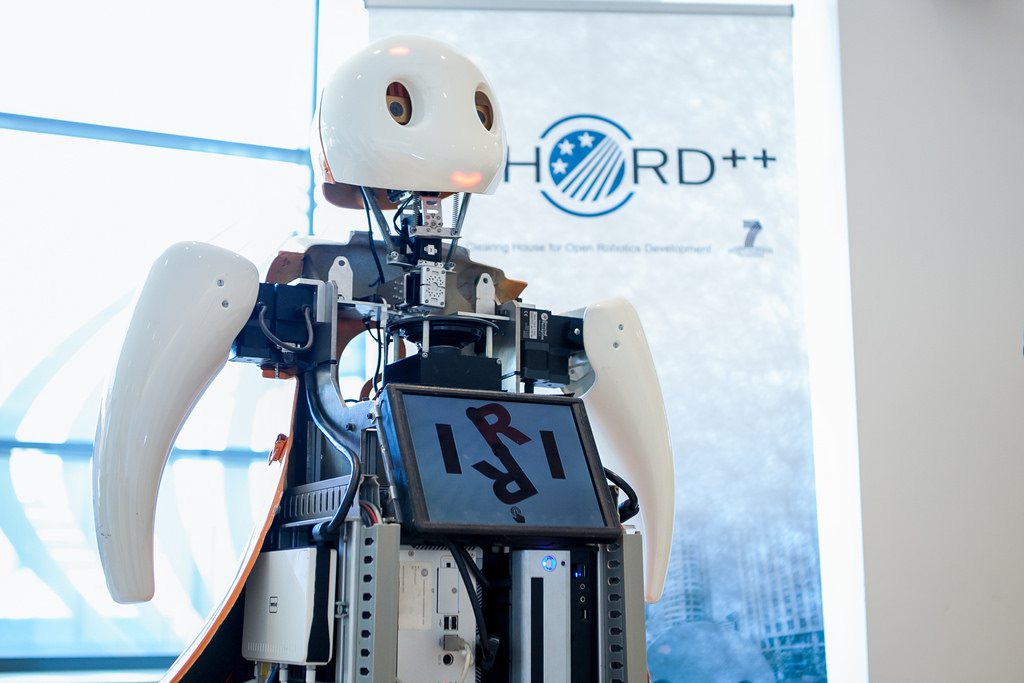
Smart robots designed to serve families already exist in today’s world, ranging from the Aeolus Robot which is able to move household objects and adapt to changing environments, to Ubtech Robotics’ Walker, which offers a complete “home butler” service. However, these robots can only provide assistance to humans at home.
Equipped with an advanced GPS system and recognition function, the SLIK robots in this storyworld are able to run errands for their owners outside of the house. With highly advanced sensory and biometric technologies, it can also recognise and differentiate between an unlimited number of people, places and items.
Image source: https://www.flickr.com/photos/cor-photos/34571264585 Sketches of Eager (experimental robot) and SLIK robots (more advanced robots)
2. Genre Sci-Fi/ Thriller
3. Story
In the late 22nd century, rising sea levels and natural disasters from global warming have wiped out many coastal cities and the world’s population was tremendously reduced. Due to a severe lack of manpower, robots were created to serve families and take over jobs. In Washington, a new batch of robots called SLIK was rolled out to replace the old batch.
One day, Gavin’s family robot, Angie, starts malfunctioning. Since Gavin’s family is unable to afford a SLIK robot, they decided to get one of the cheaper, experimental robots – Eager. Eager and Gavin quickly became best friends.
Weeks later, Eager and Gavin were watching the news together – there was a series of mysterious deaths in the state. People who opposed the governments started dying mysteriously without any signs of struggle, and the SLIK robots that belonged to the victims were destroyed as well.
Suddenly, Eager started glitching and a vision of his past reappeared, showing the employees from SLIK installing mysterious-looking devices into the SLIK robots. Gavin, Samantha and Ann worked together to uncover the truth behind these mysterious deaths and found out that those mysterious-looking devices were in fact surveillance cameras planted by the government in the SLIK robots, for purposes of “national security”. The government, which only wanted only their supporters to survive, installed the robots with a unique voice recognition function that will alert the government whenever the robots’ owners mention keywords like “hate the government”. Since the government had full control over the SLIK robots, they were able to make the robots self-destruct, while standing beside their owners, killing them as a result. In the end, Ann, Samantha, Gavin and Eager found the main control station that controlled all the robots in the state, and managed to turn off all the robots in the country, including Eager.
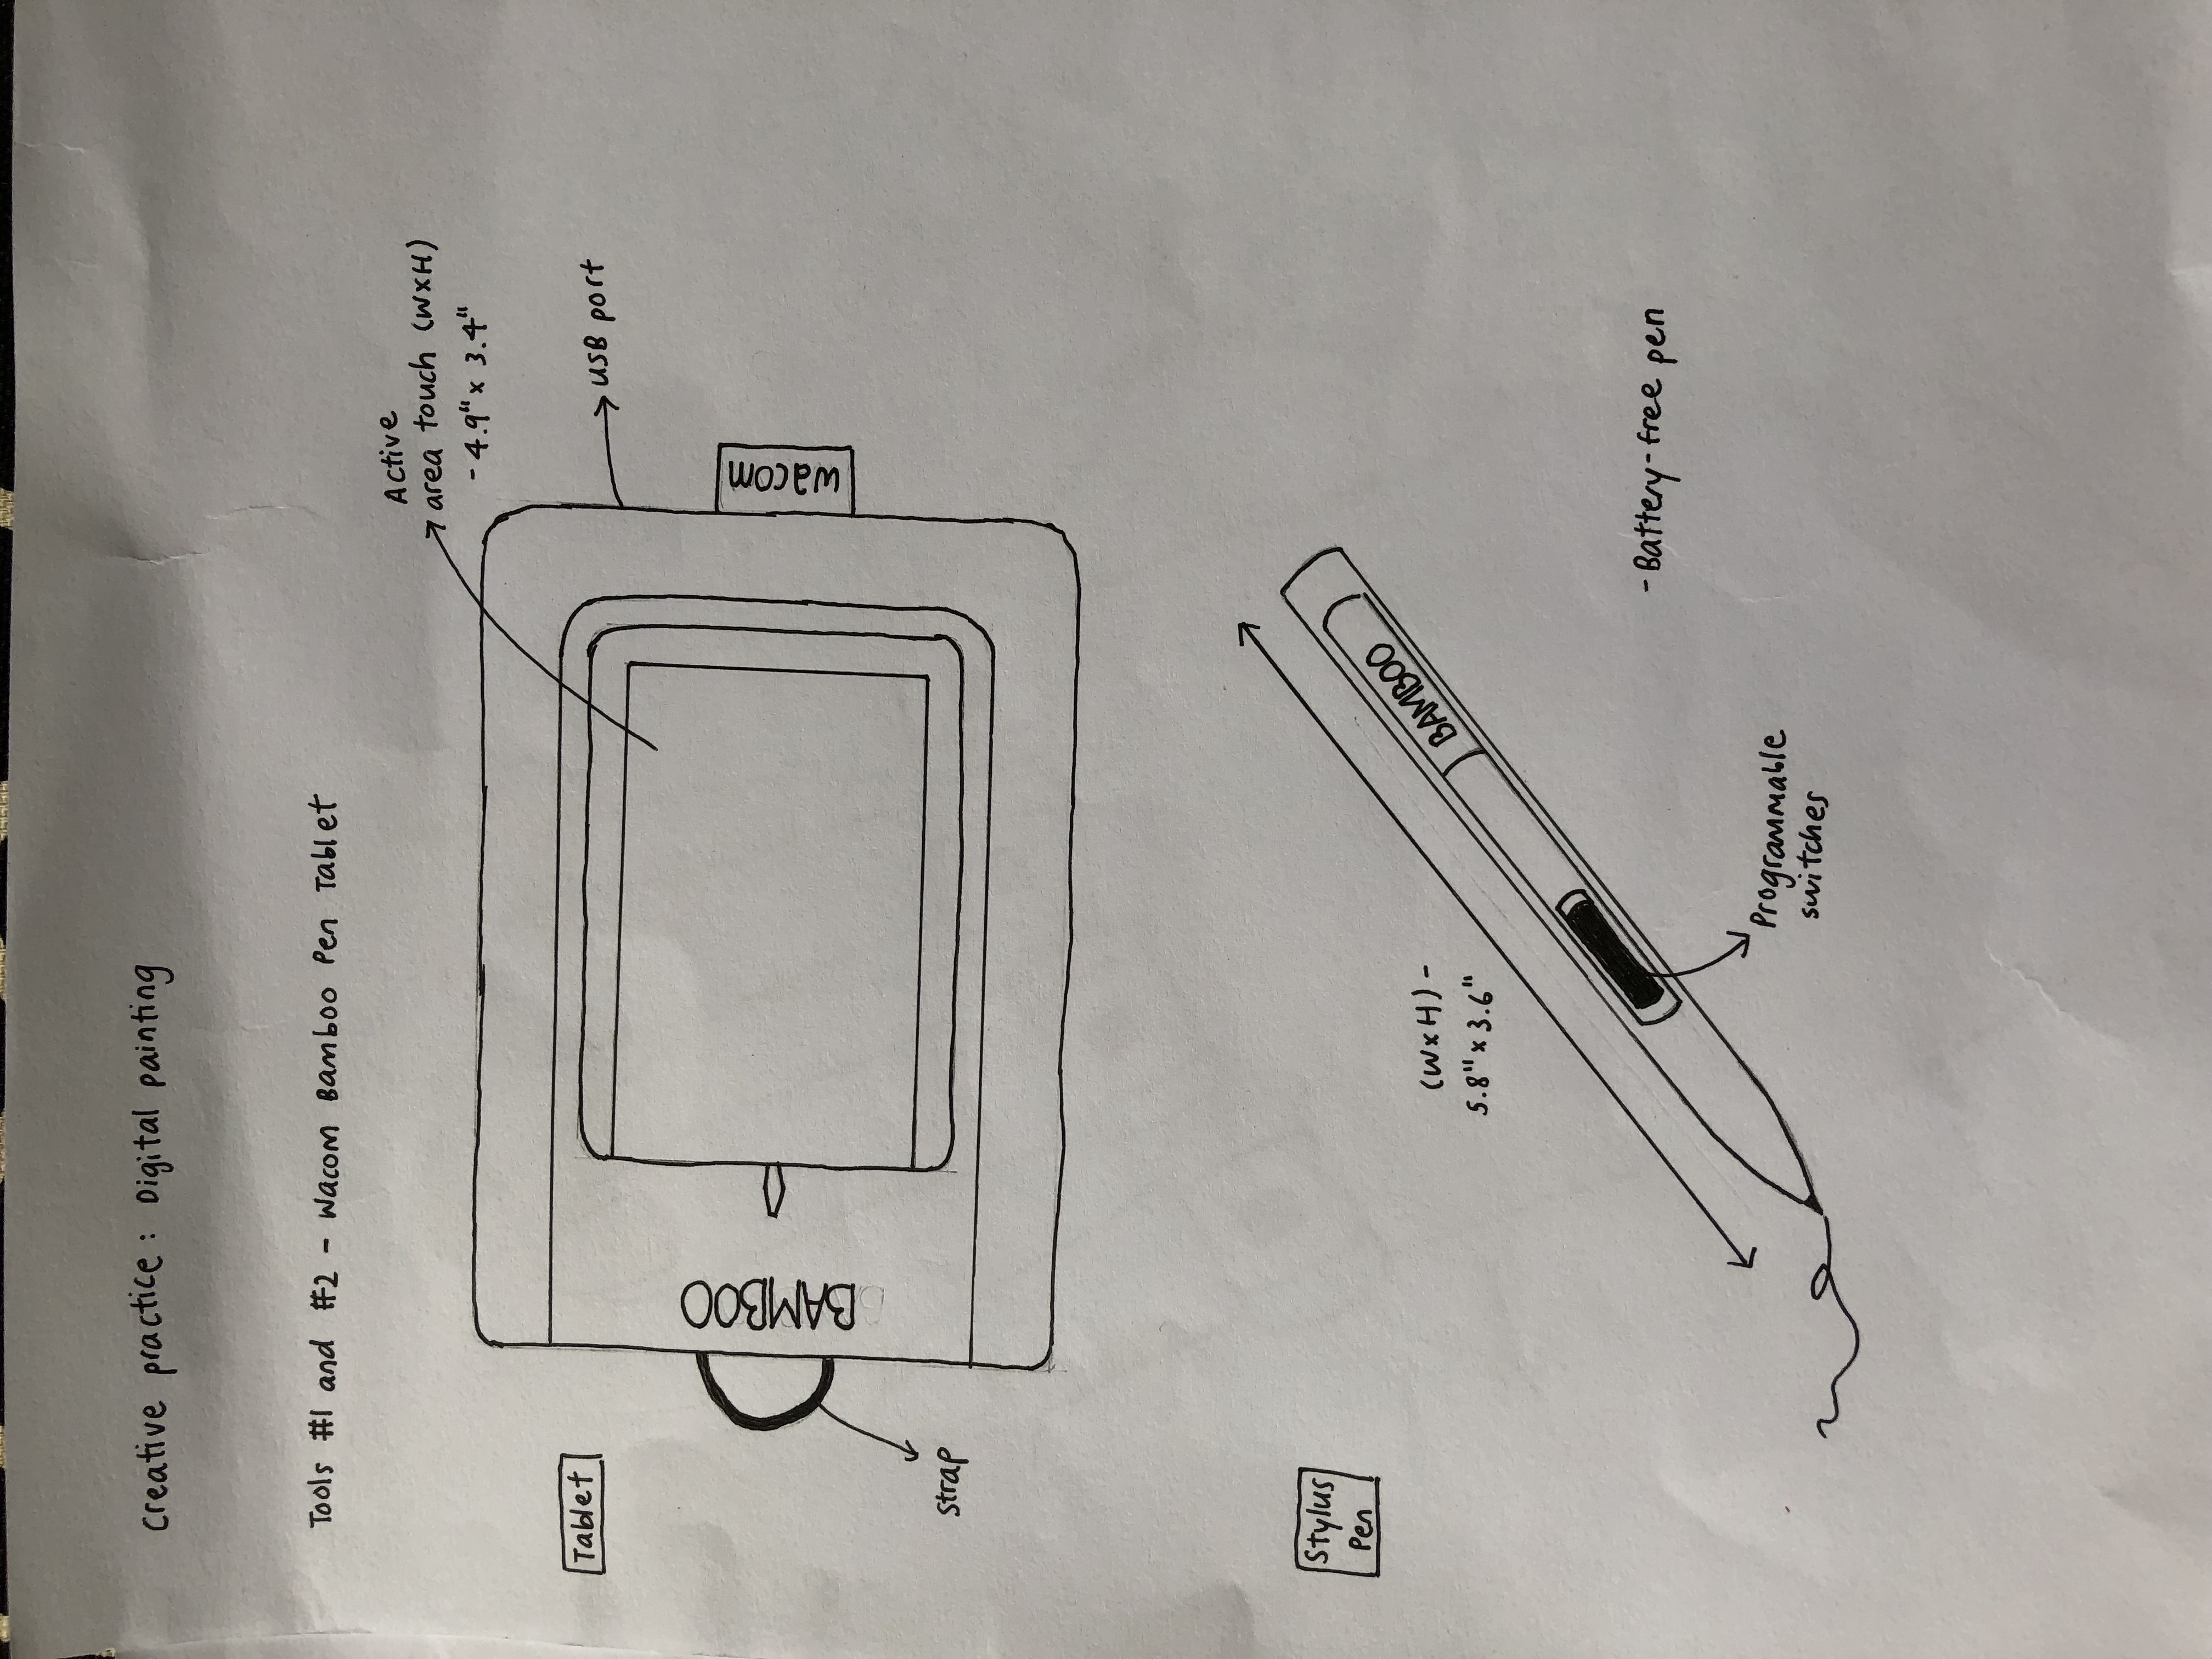
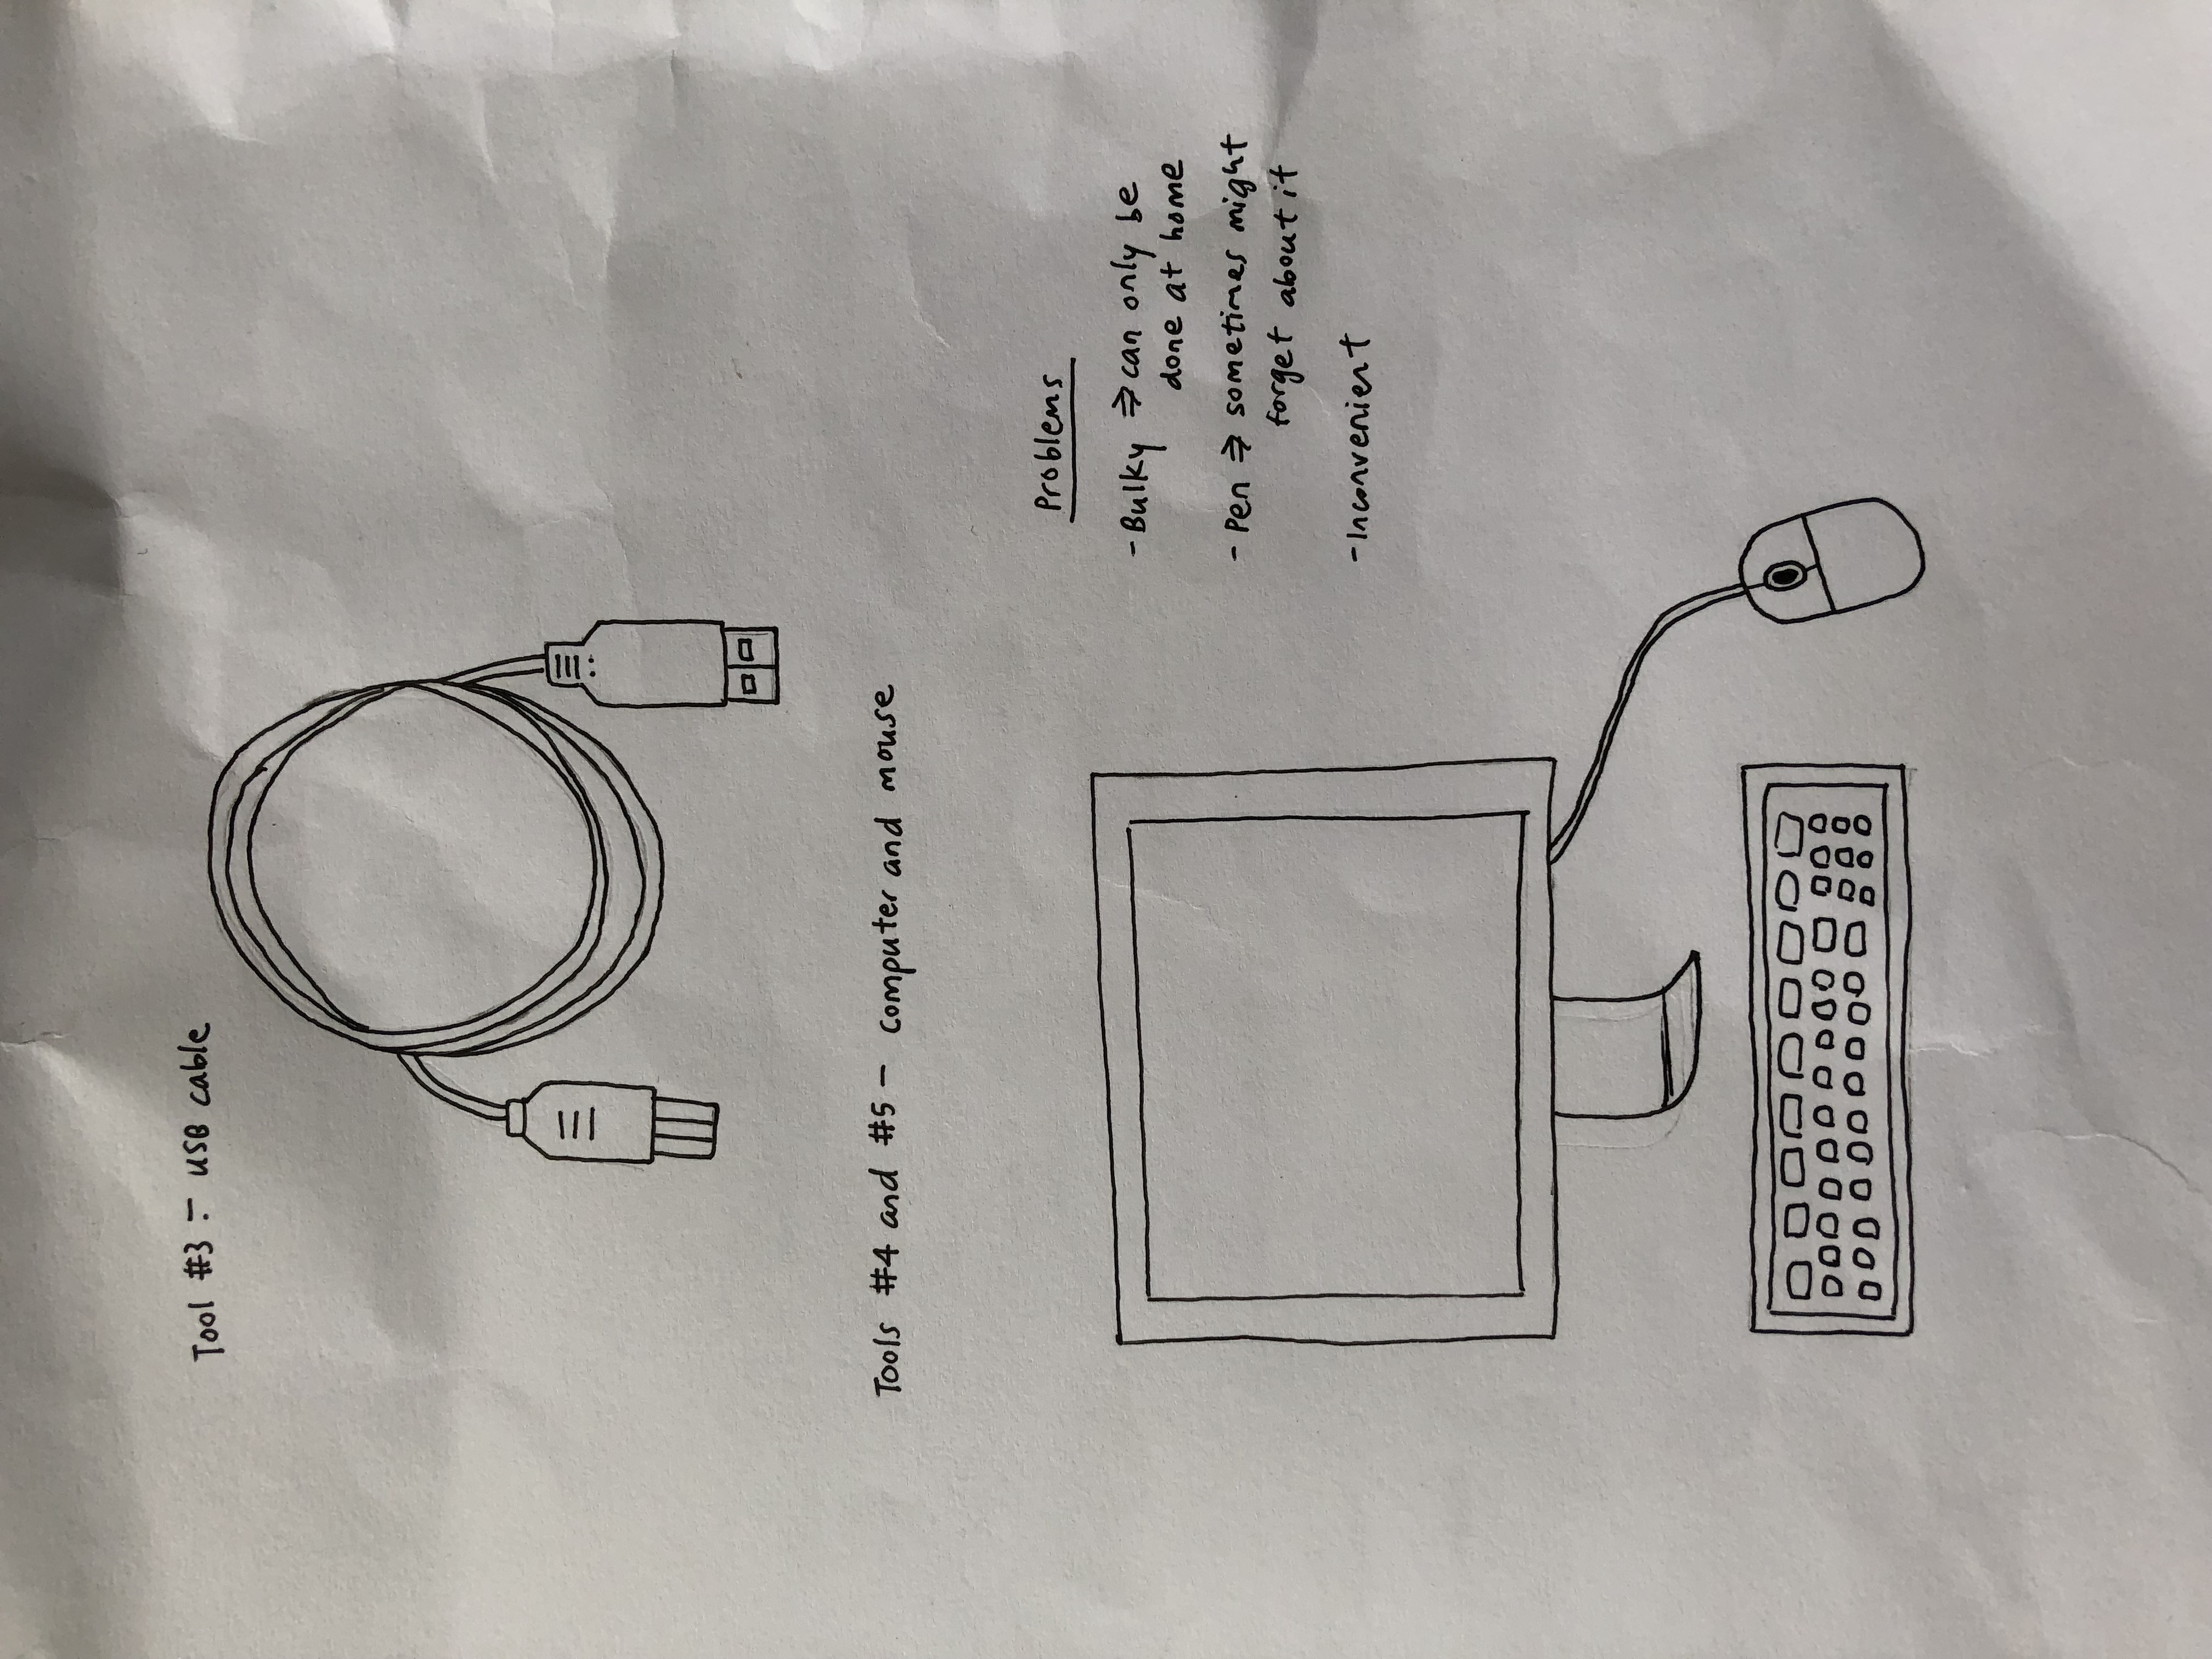
Toolsused 1. Wacom Bamboo Pen Tablet 2. Stylus pen 3. Computer 4. USB cable (to connect the tablet to the computer)
Problems faced by the practitioner 1. Inconvenience: The tablet needs to be connected to a computer for it to work. Since the computer and tablet can be quite bulky and heavy, the practitioner can only do digital painting at home and not anywhere outside. 2. Stylus pen may get lost: Since the pen is quite small and there is no cord connecting it to the tablet, the practitioner may sometimes lose it if she’s not careful enough.
Sketches of tools used (Tablet and pen) Sketches of tools used (Computer and USB cable)
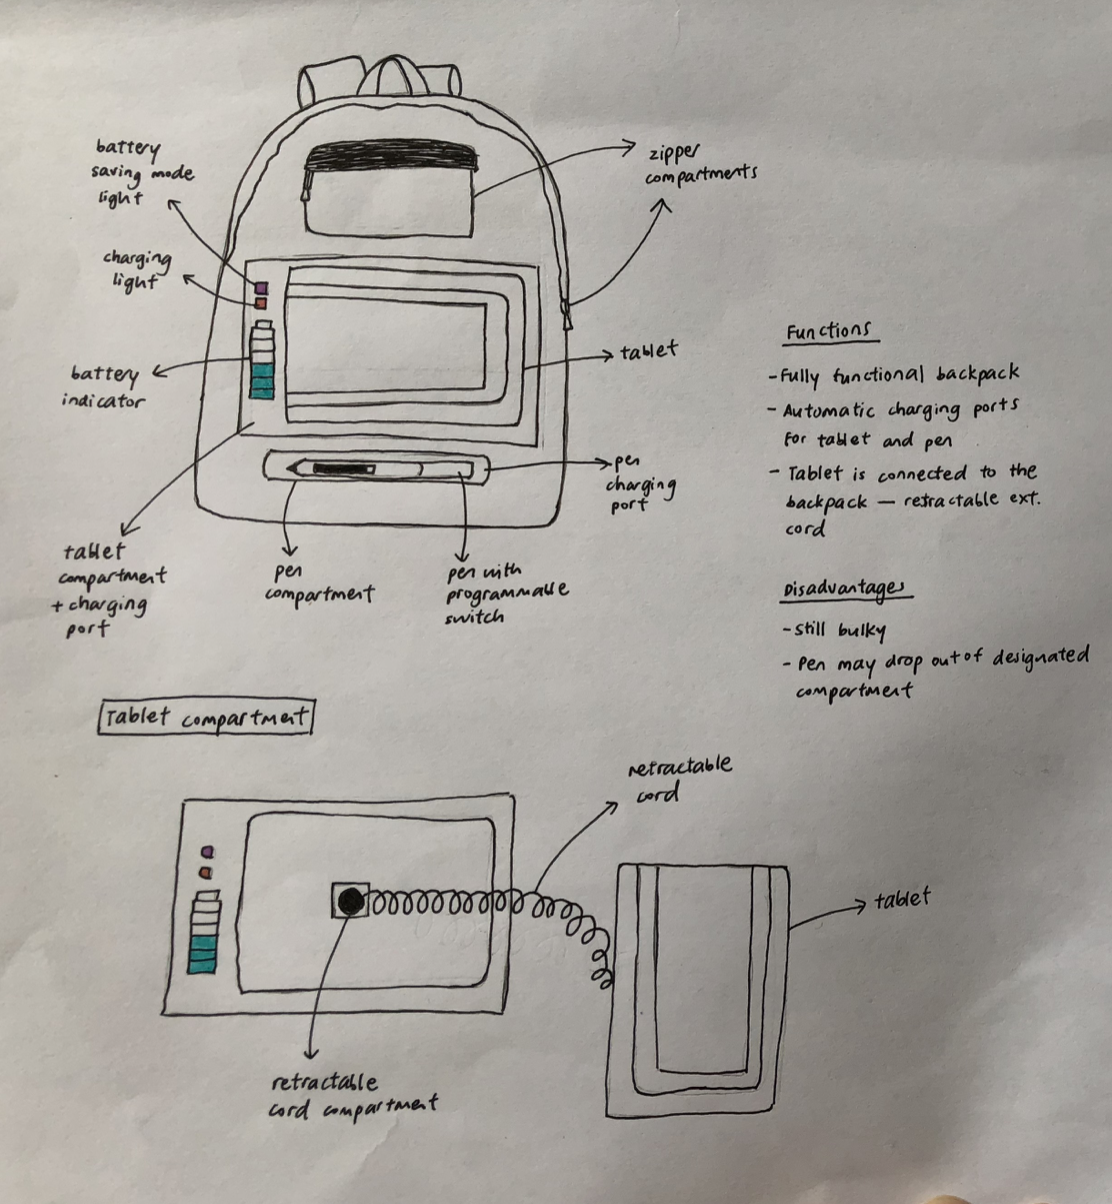
Idea 1 Backpack Pen Tablet
My first idea is to embed automatic charging ports for both the tablet and pen into a fully functional backpack, and this aims to combat the problem of inconvenience. The tablet is connected to the backpack with a retractable extension cord and the user can simply place it back into the charging port once the battery indicator states that its battery is running low.
Although the user can now bring the tablet out on the go, this idea still has a few problems. Firstly, this backpack is still rather bulky. Also, the tablet screen may be scratched when it touches rough surfaces. The pen may also drop out of its designated compartment if it is not securely fastened.
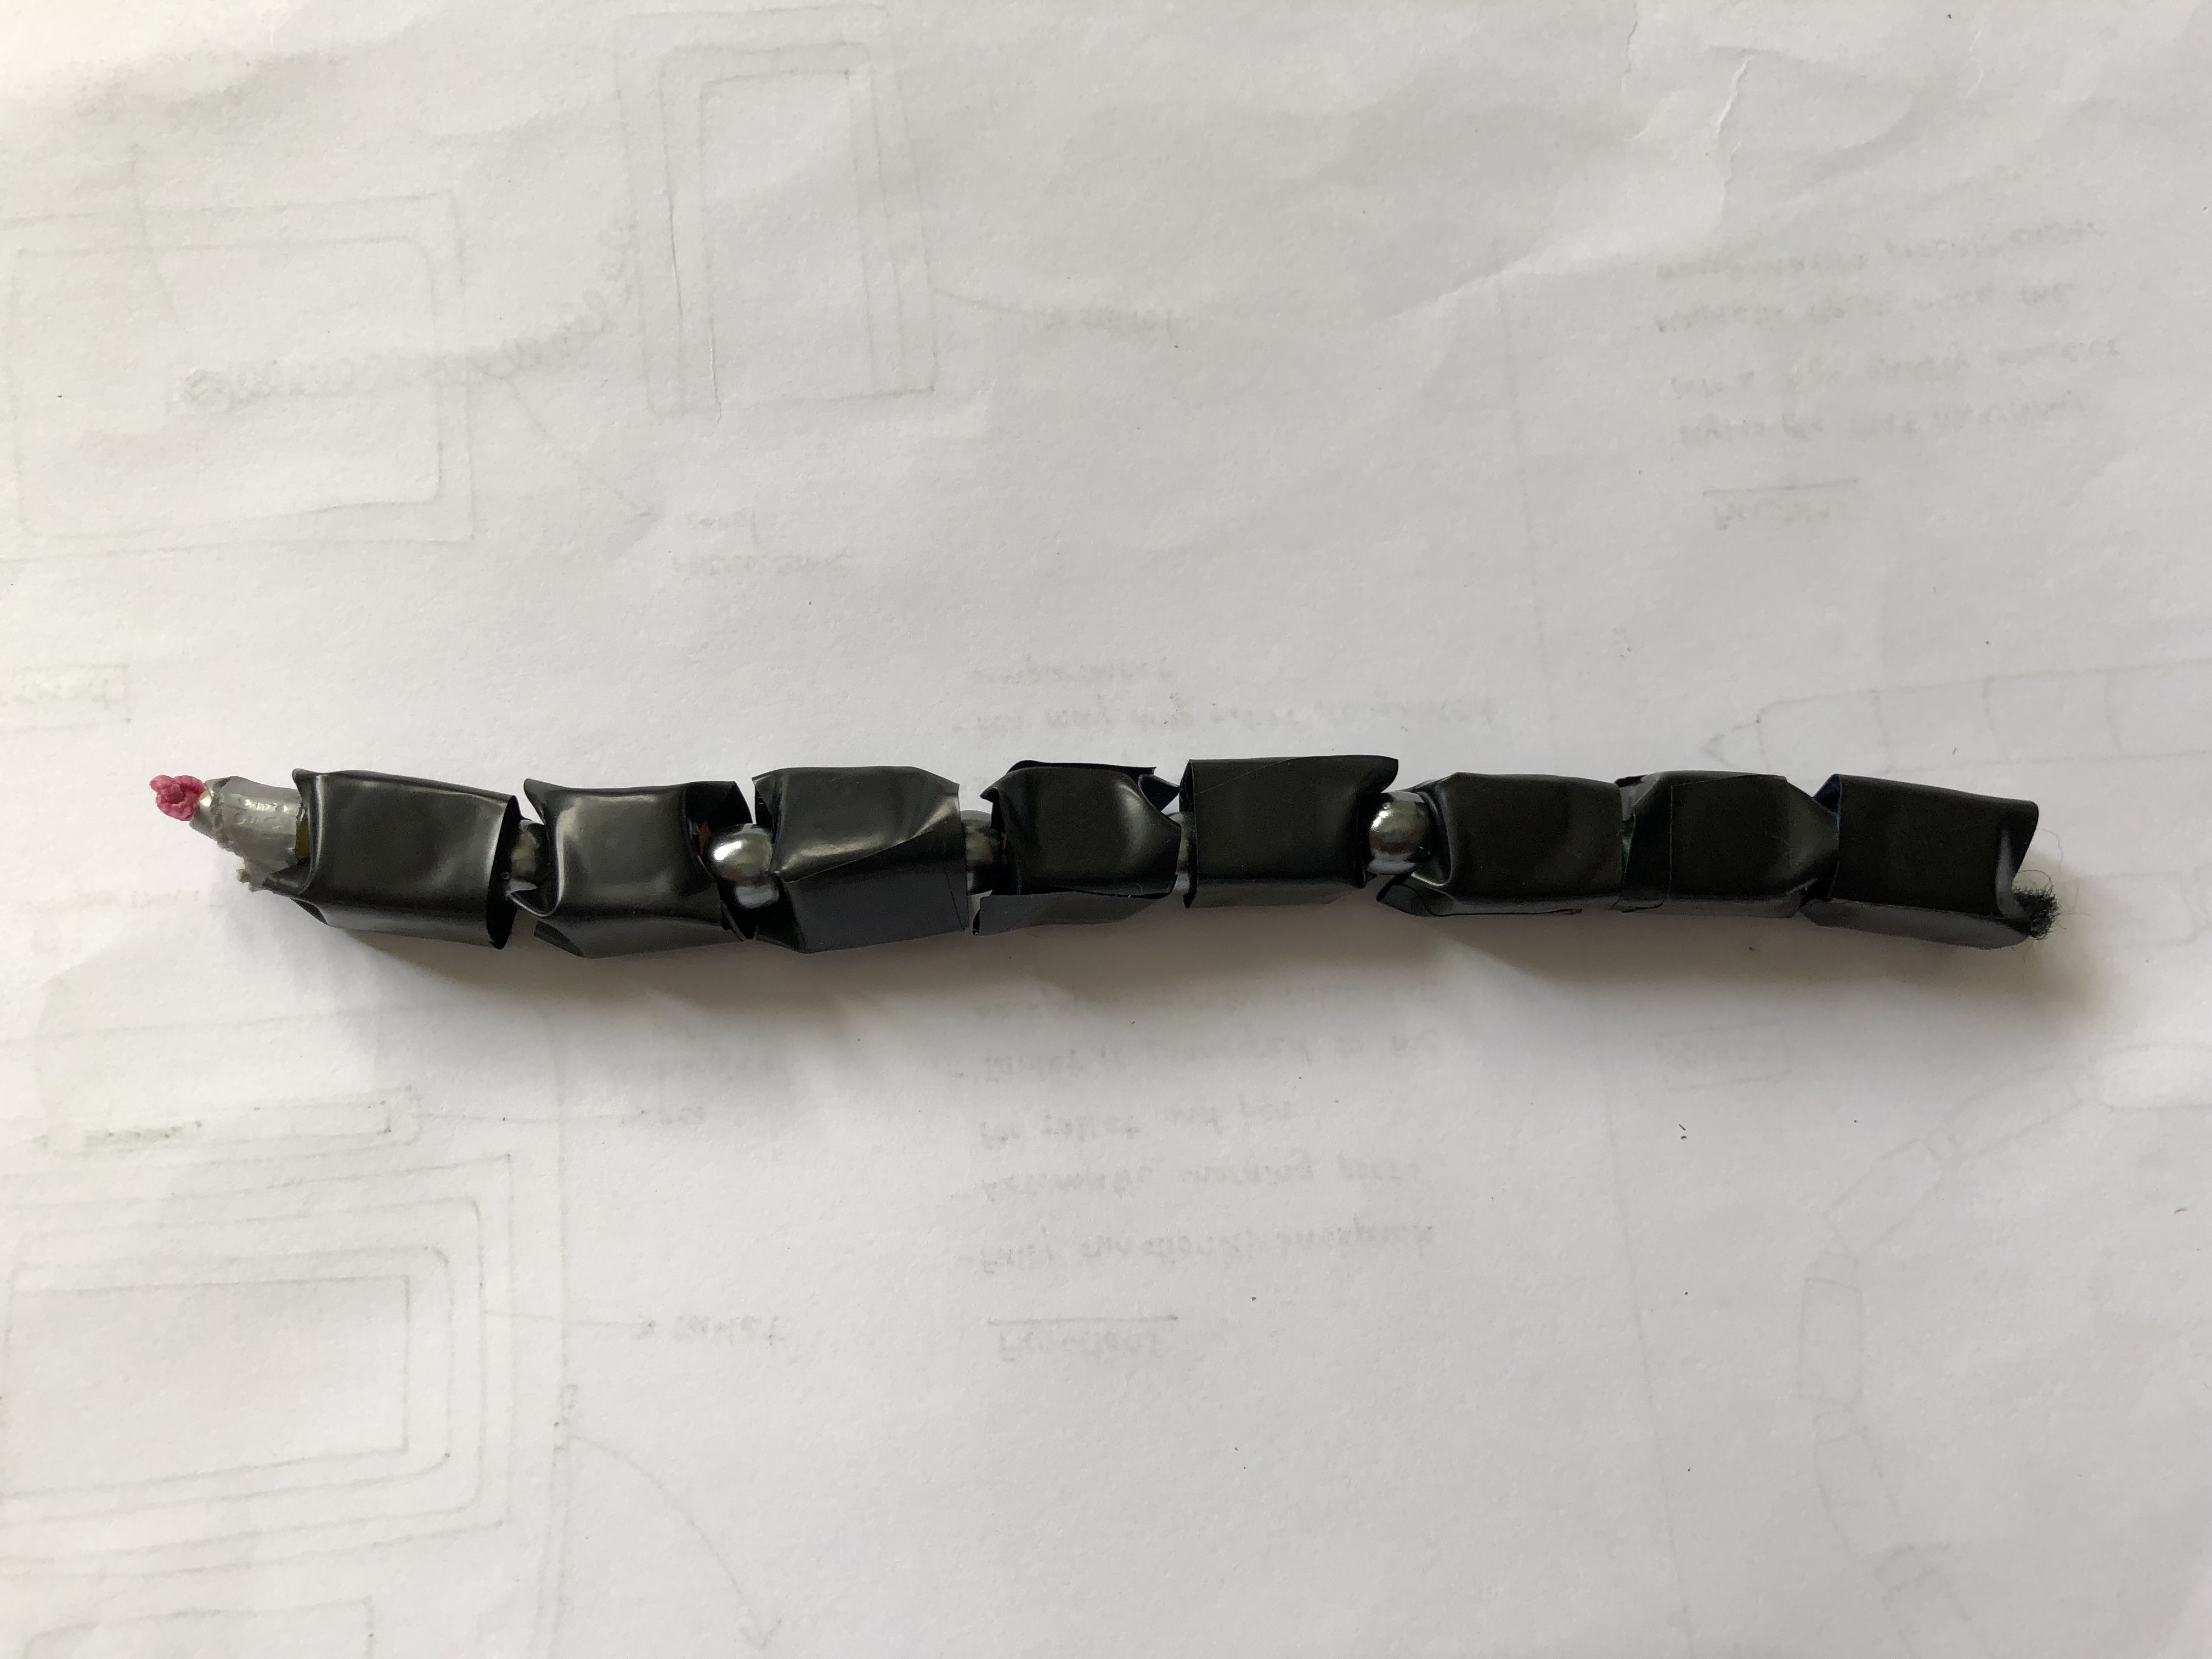
Idea 2 (with model) Wearable Convertible Pen Bracelet
For my second idea, I aim to combat the problem of losing the stylus pen by creating a convertible pen bracelet that the user can wear on the go. The stylus pen can be transformed into a high quality bracelet, couple with a magnetic tip to facilitate the transformation process.
My model (shown below), made out of beads, elastic string and black tape, shows the pen bracelet at its second stage.
Model of Idea 2
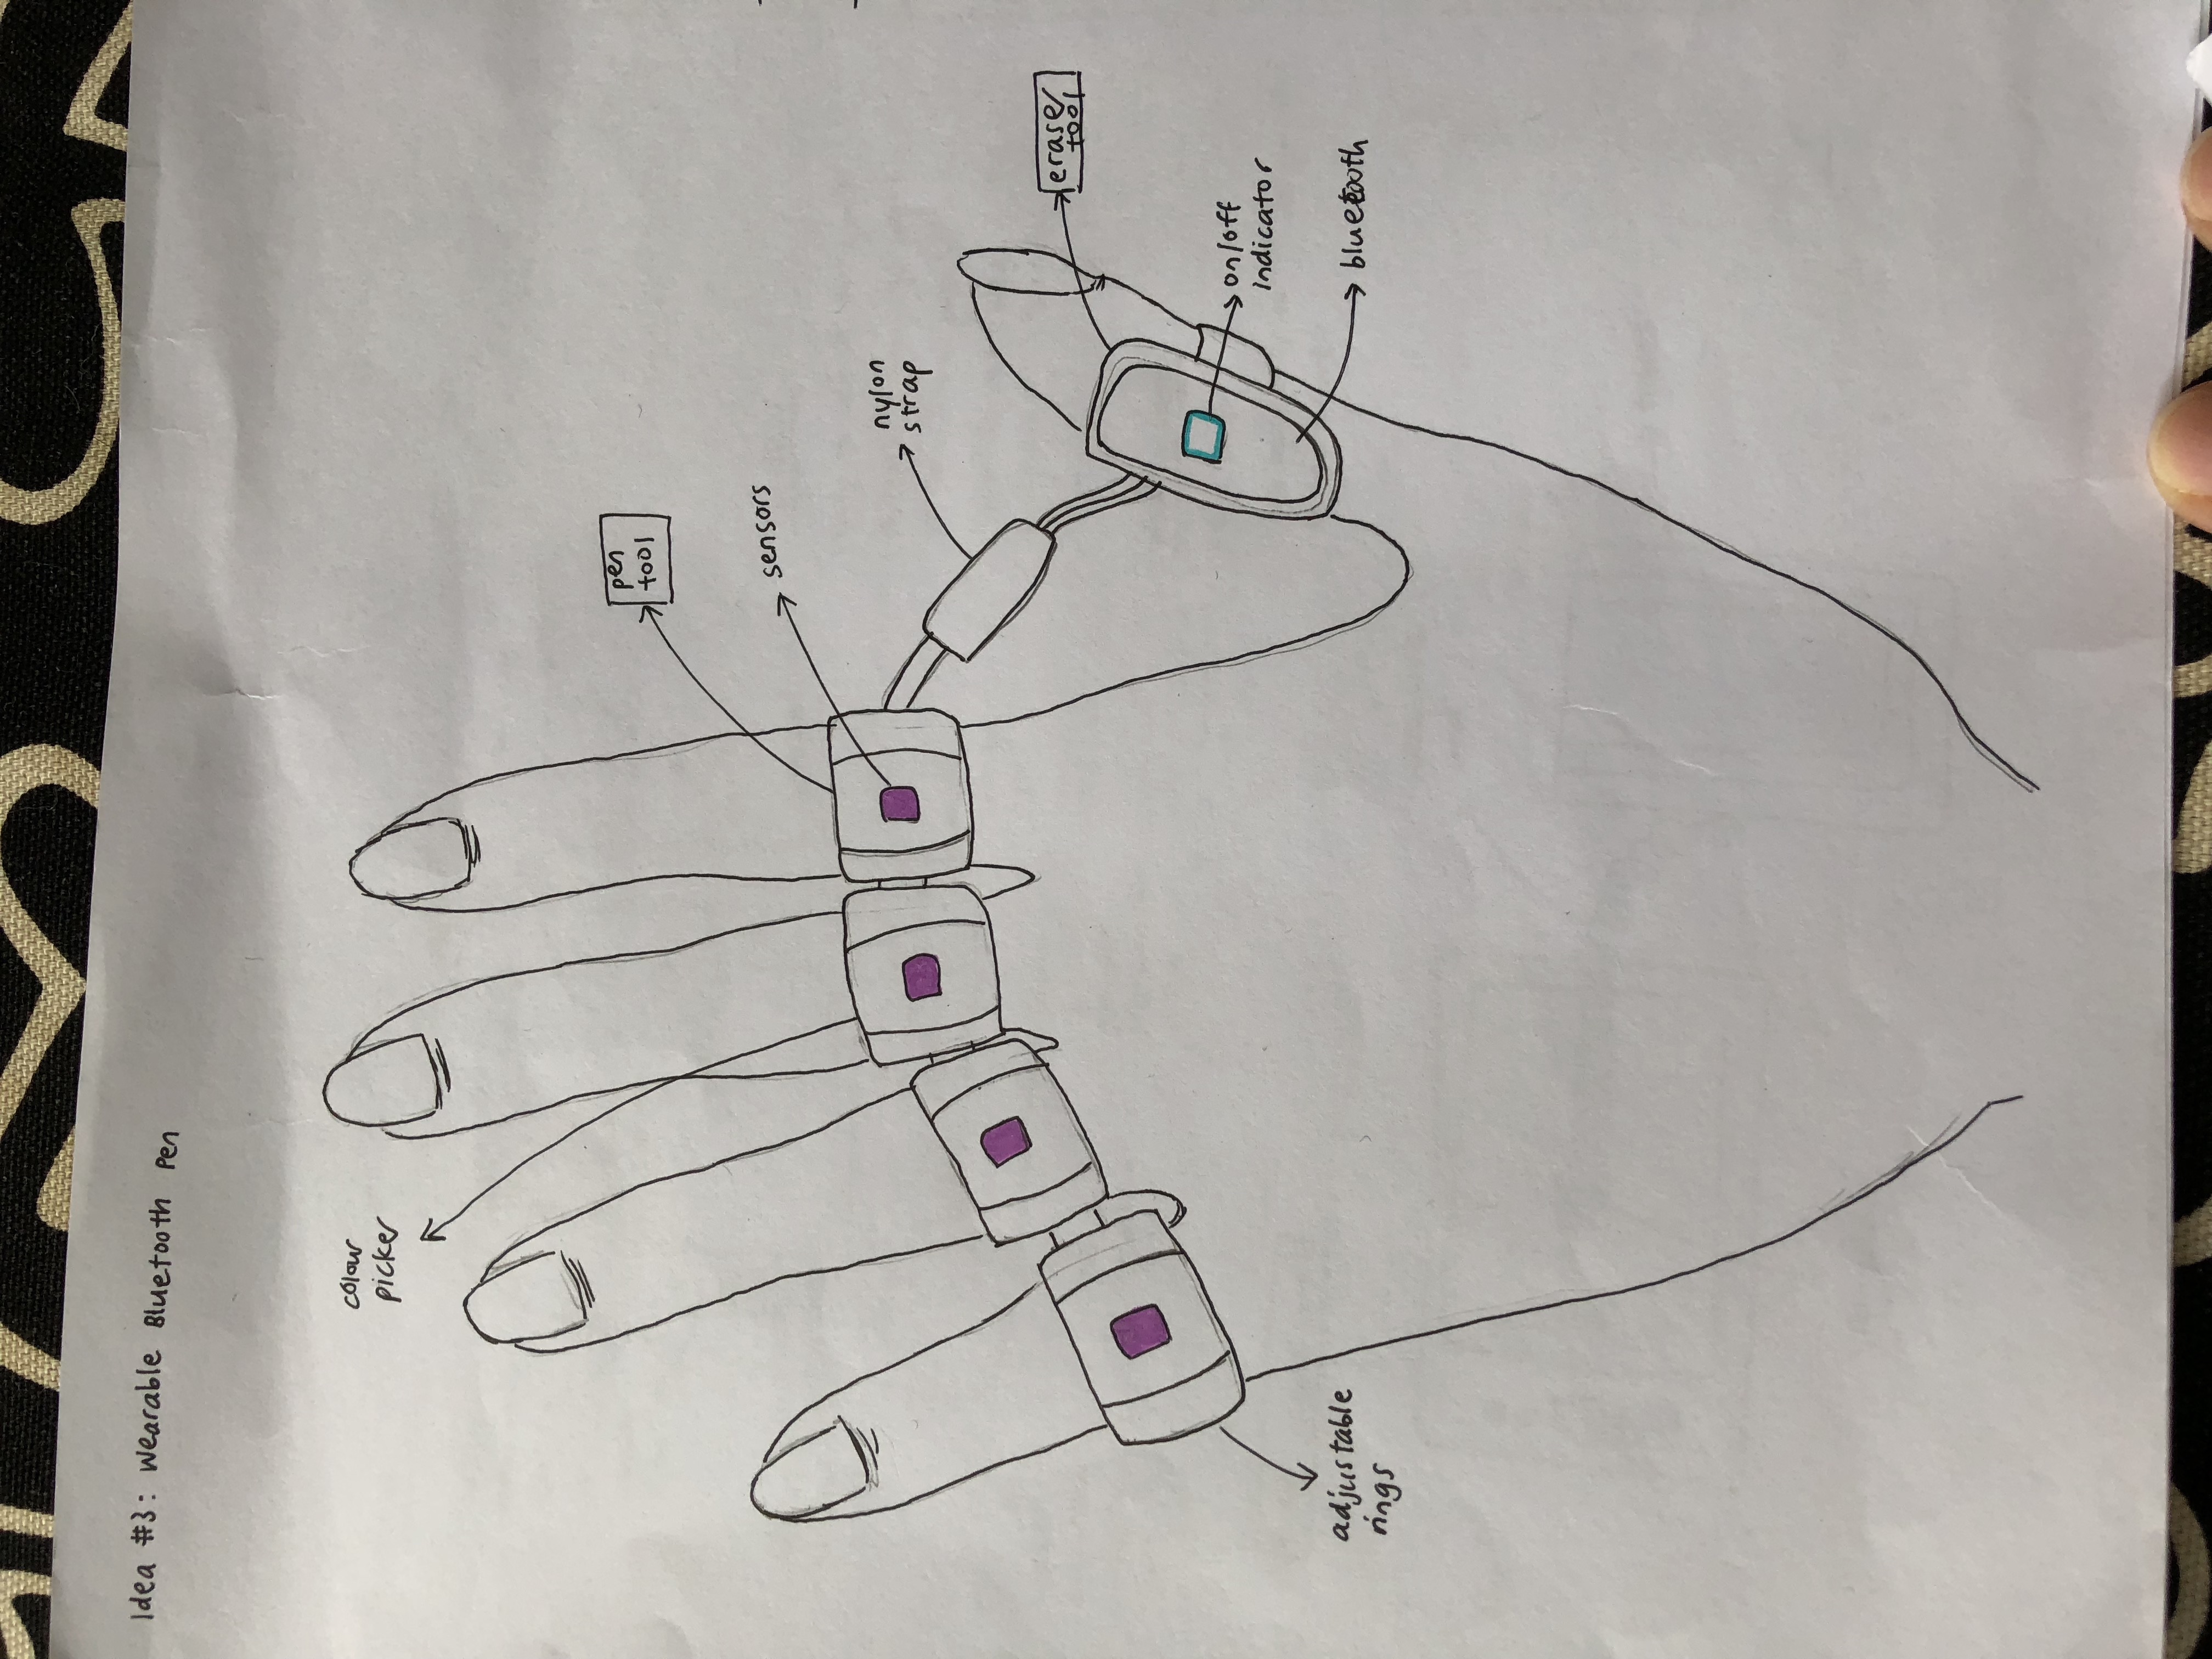
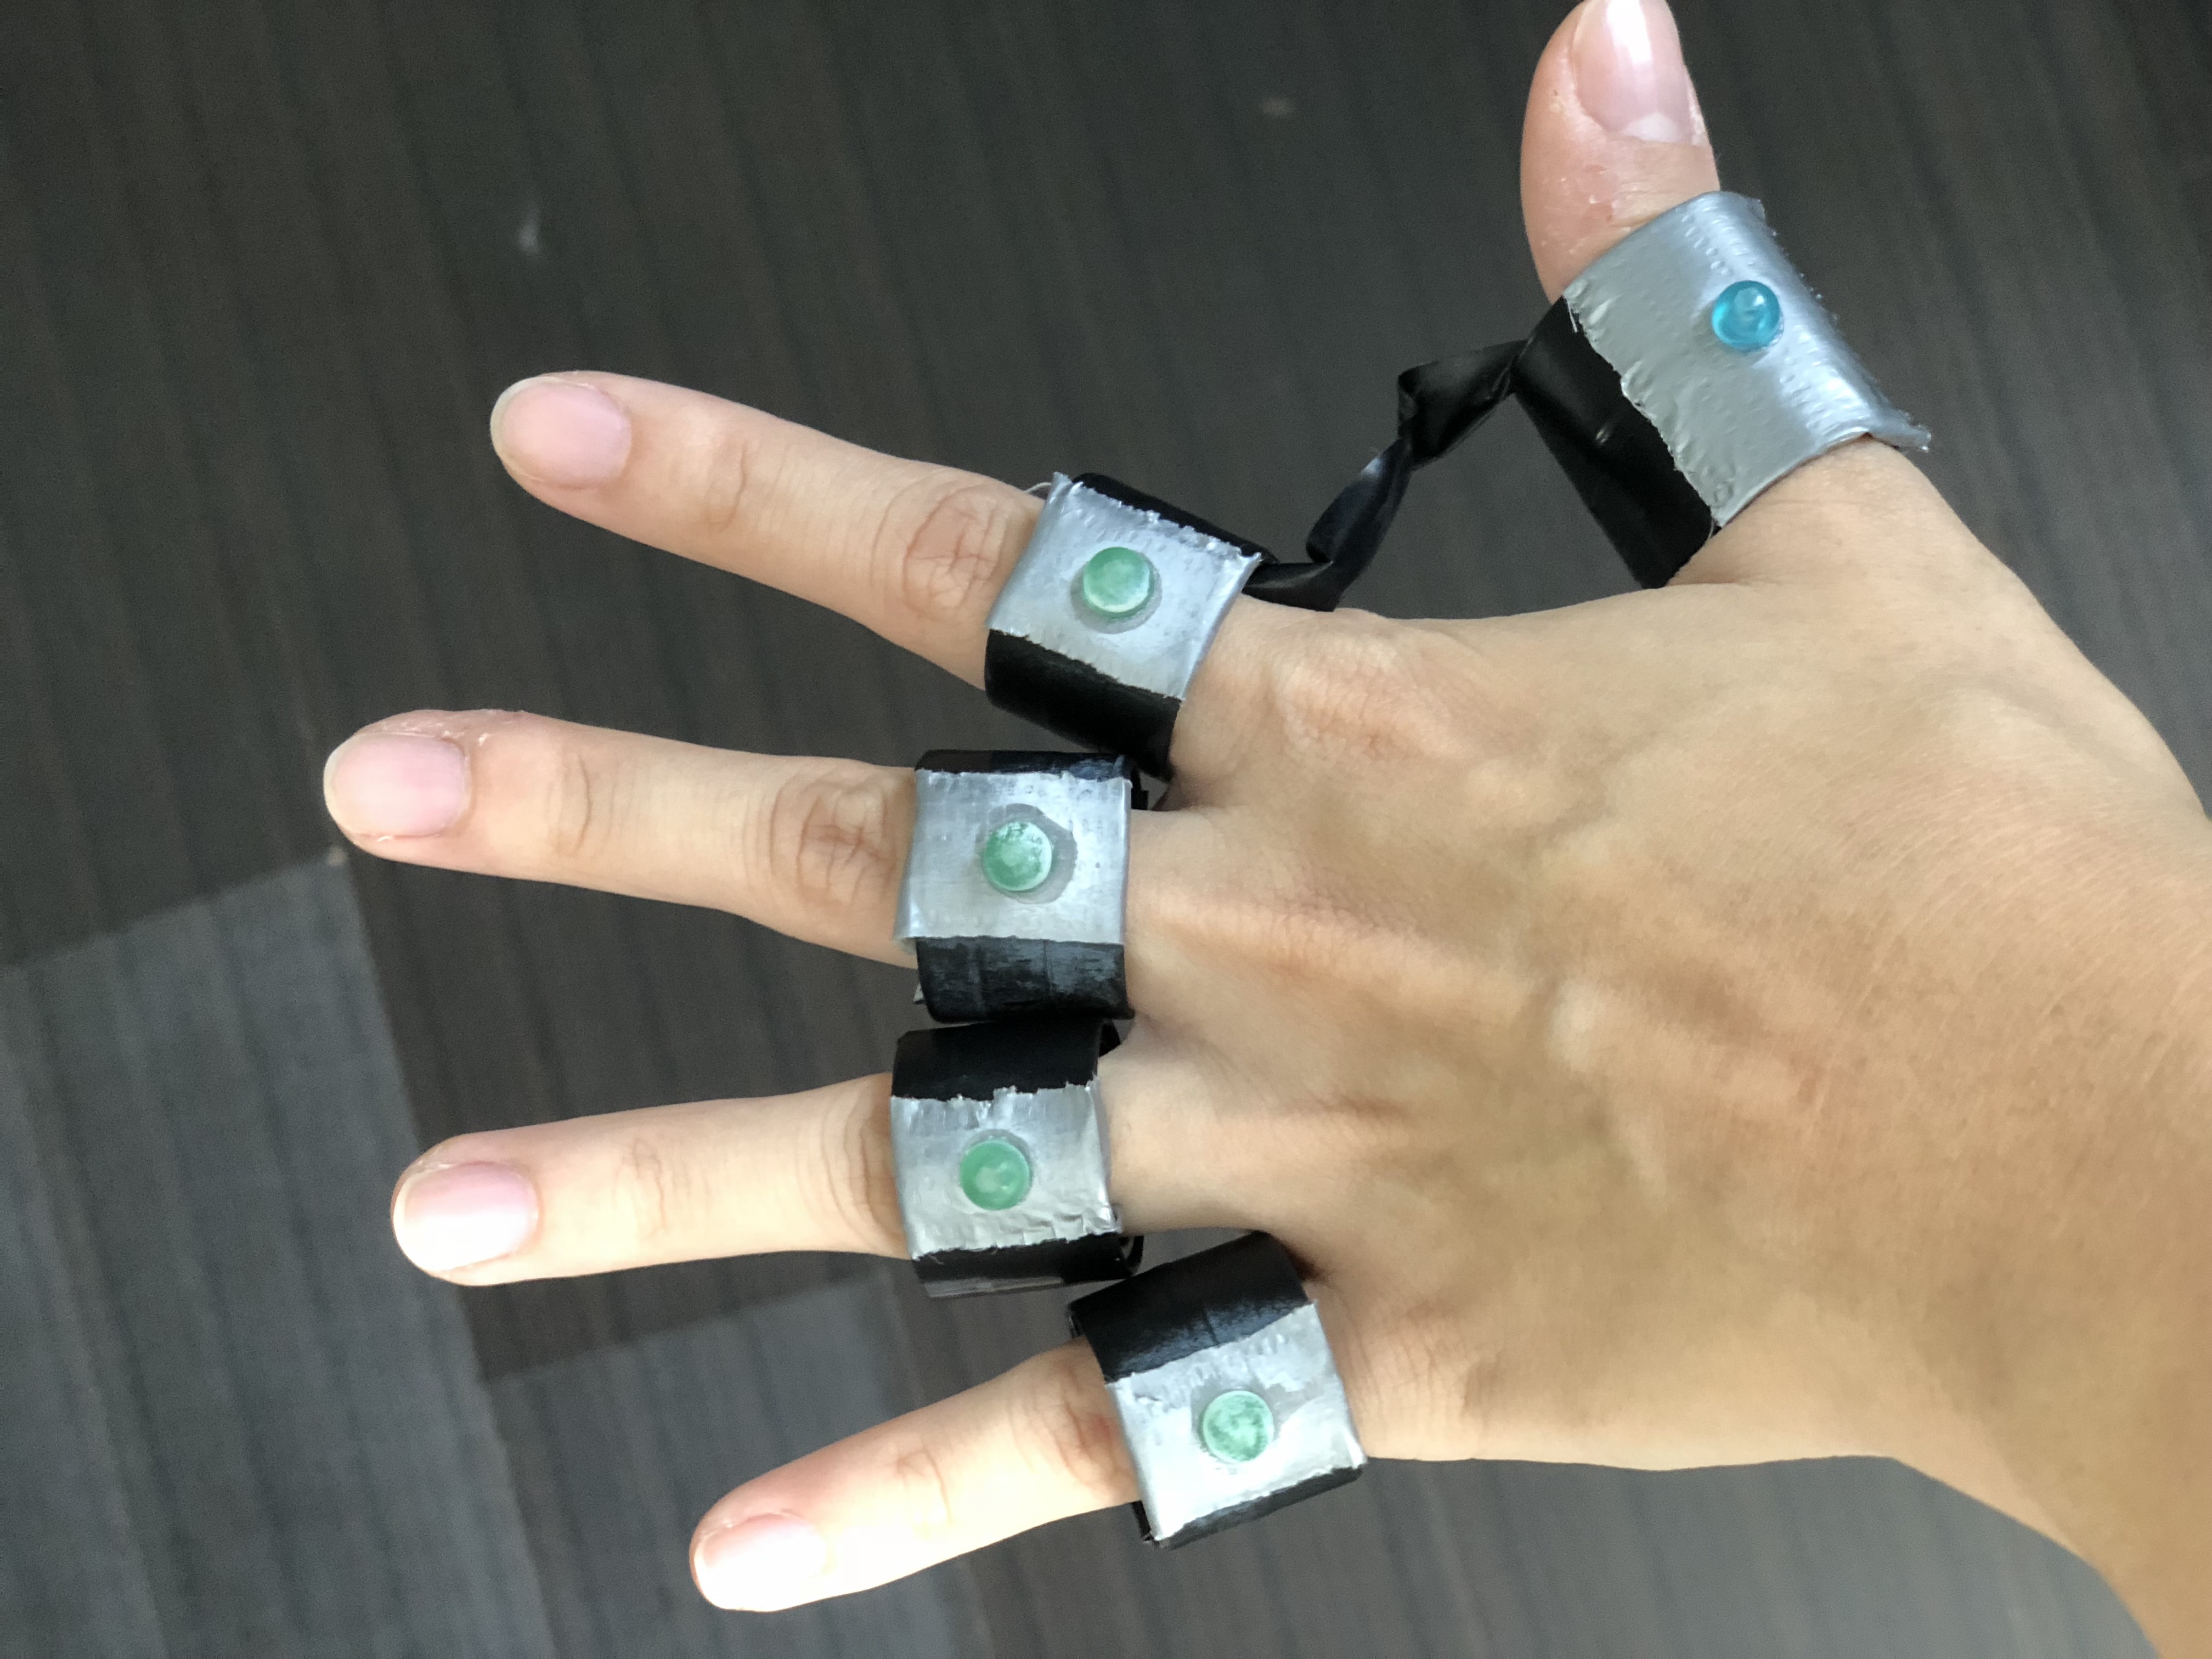
Idea 3 (with prototype) Wearable Bluetooth Pen
Prototype of Idea 3
Last but not least, I created a wearable bluetooth pen with an in-built illustrator software that allows the user to engage in digital painting on the go, as long as there is a flat surface that the user can work with. Each finger represents a different illustrator tool (e.g. the index finger represents the pen tool) and the in-built sensor on each ring senses the user’s finger movements and converts them into the specific tools. The bluetooth function also allows the user to save his or her artworks and sync them to the computer app afterwards. Since the bluetooth pen is battery operated, there will also be a charging case to recharge the device.
However, this idea has its disadvantages as well. Firstly, the user might forget the tools represented by each finger. Also, the usage of fingers might not be precise enough to draw fine lines. Lastly, this device only works on flat surfaces.