We organised a trip to Gillman Barracks for their Art After Dark event, the art precinct’s signature open house event that doubled as a 6th anniversary celebration. Involving artist open studios, exhibition openings, artist talks, and music performances, it allowed us to find out more about various artistic practices through the night.
A list of those who attended the field trip are: – Teo Zi Lin (Organiser) – Jhnn Ymn (Organiser) – Vashon Tnee Rihao – Joey Ng Zhi Yu – Reyna Mae Tamonan Corrales – Leong Jia En, Tracy
Artist Open Studios
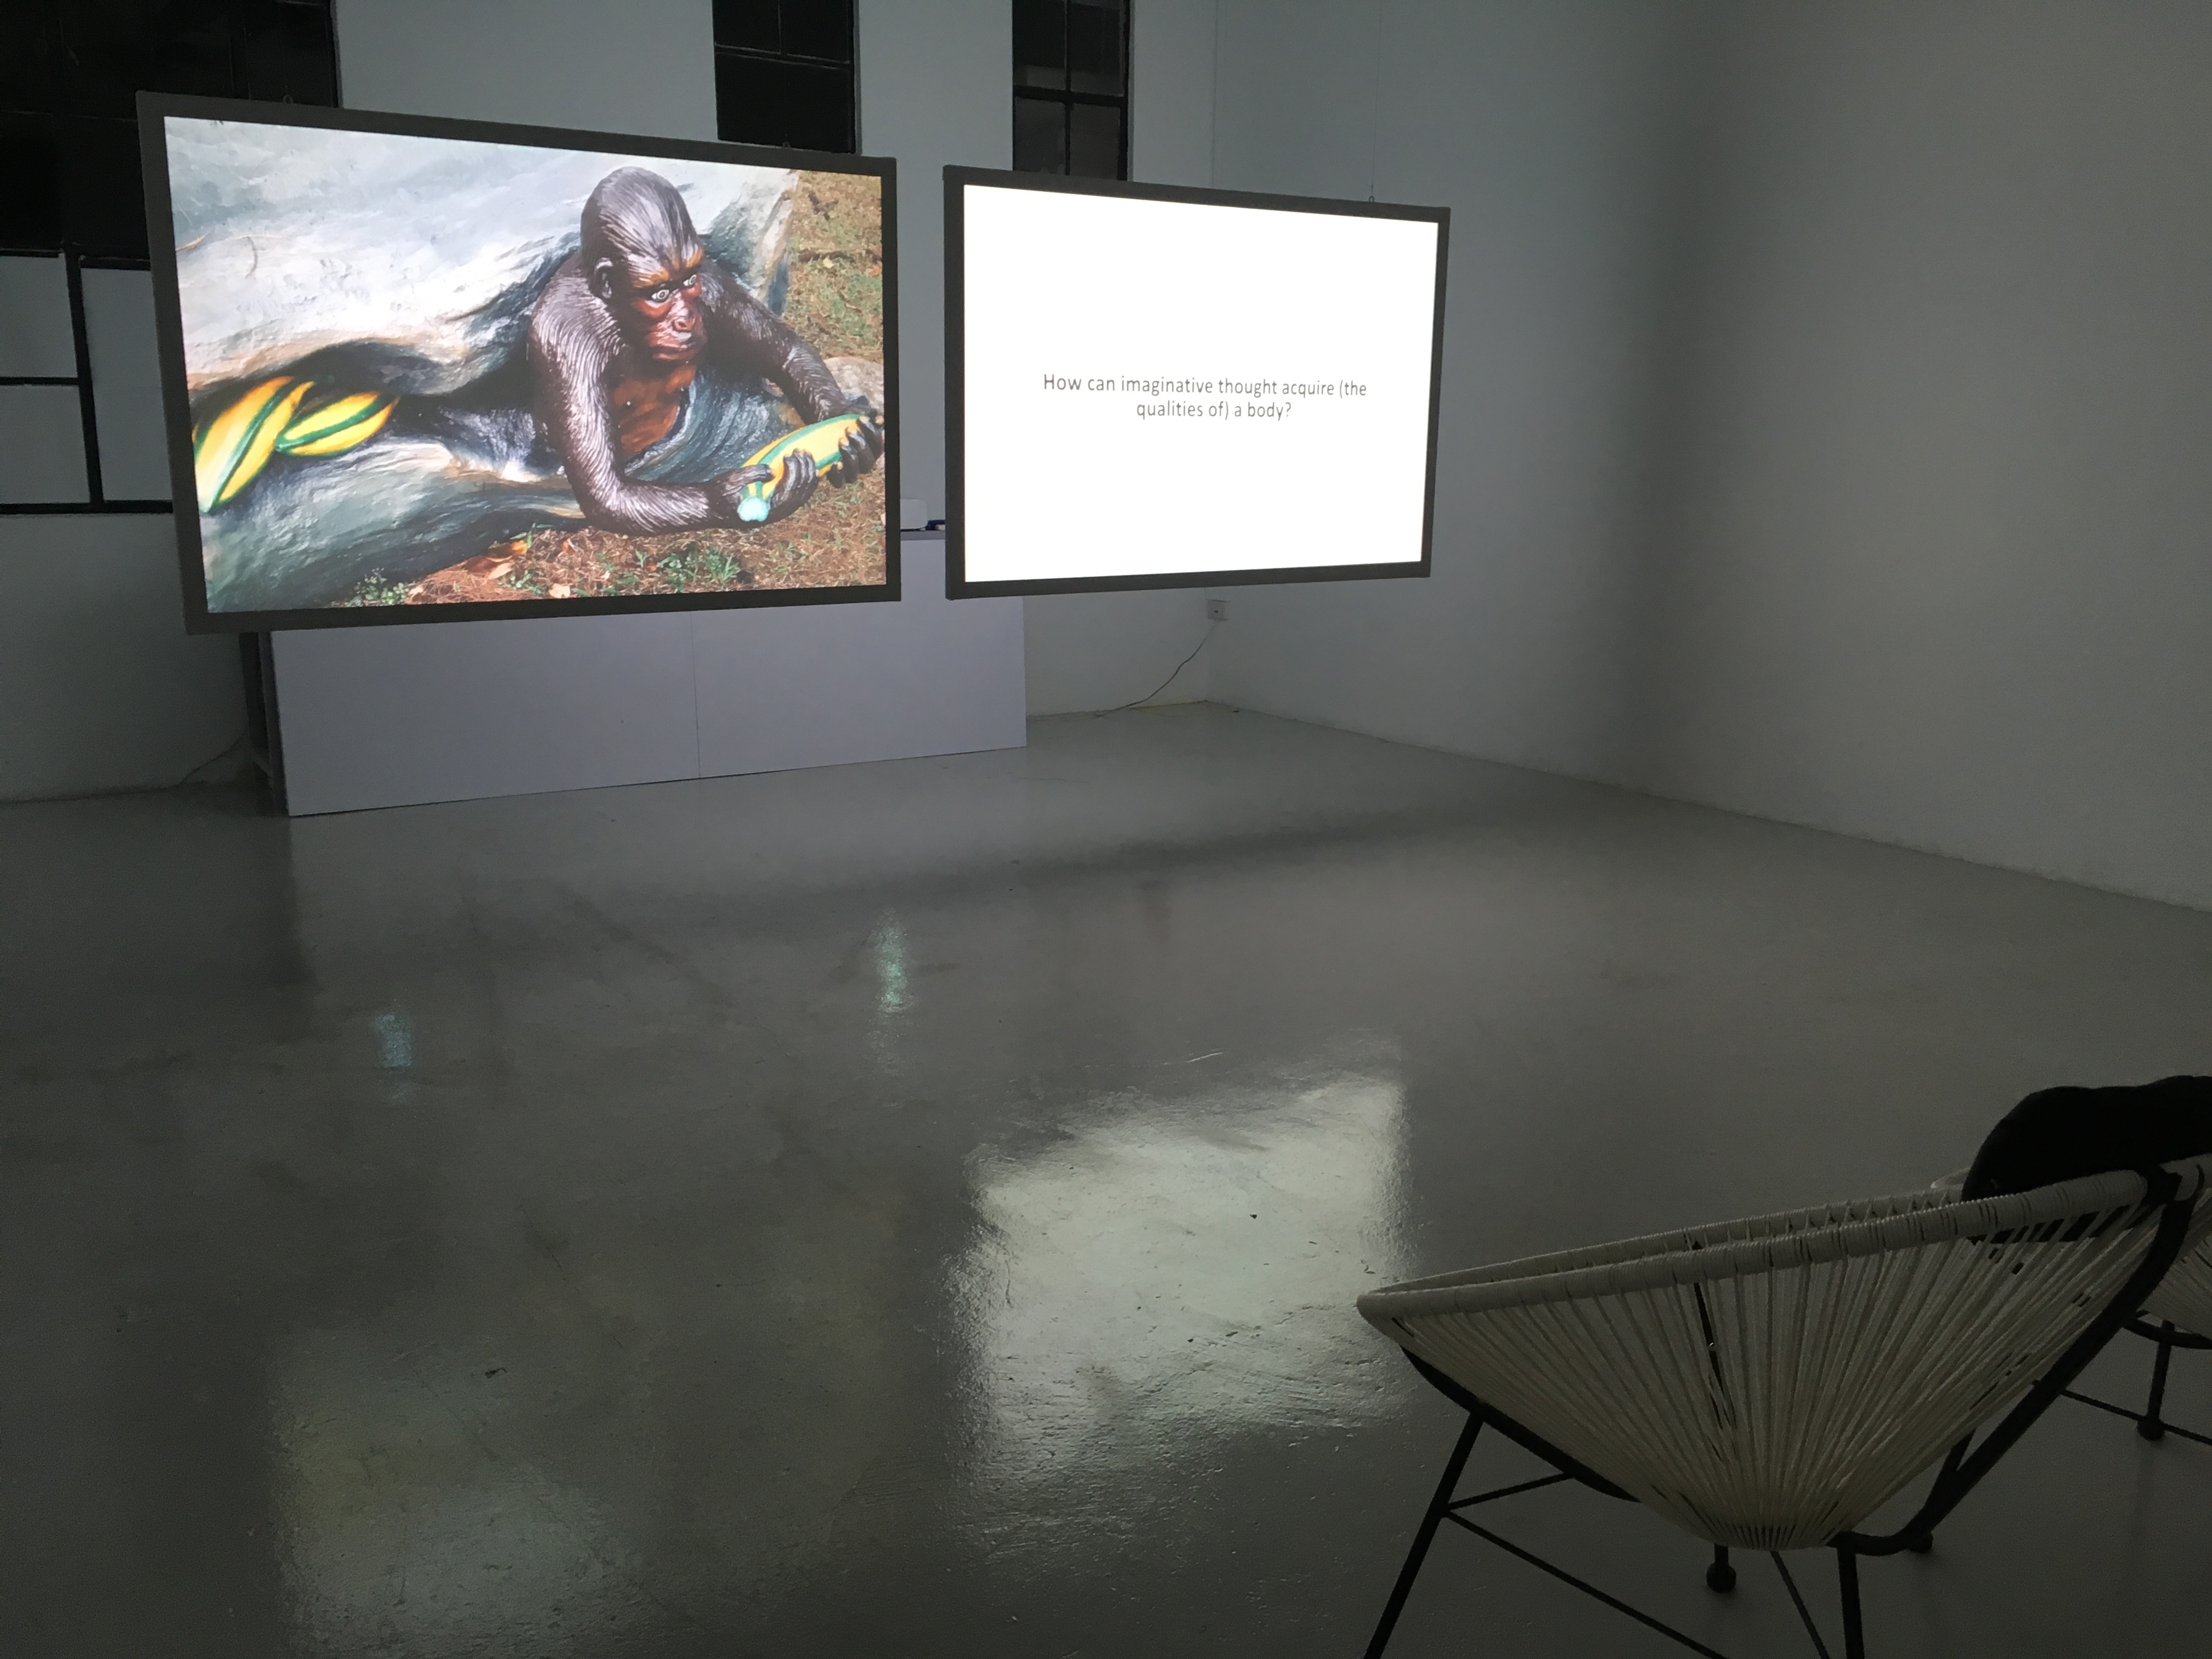
The NTU Centre for Contemporary Art (CCA) held their Residencies OPEN with the Art After Dark event, allowing us a glimpse into the creative process for a range of artistic practices, from found object to animation to soundscape.
It was particularly interesting to note the varying modes with which the artists utilised the studio spaces accorded to them — some simply used projections and screens in a largely empty studio space, while others crammed the space with in-progress sculptural works, texts, and objects. These differing methods suggested the highly individualised manner with which practitioners used studio spaces.
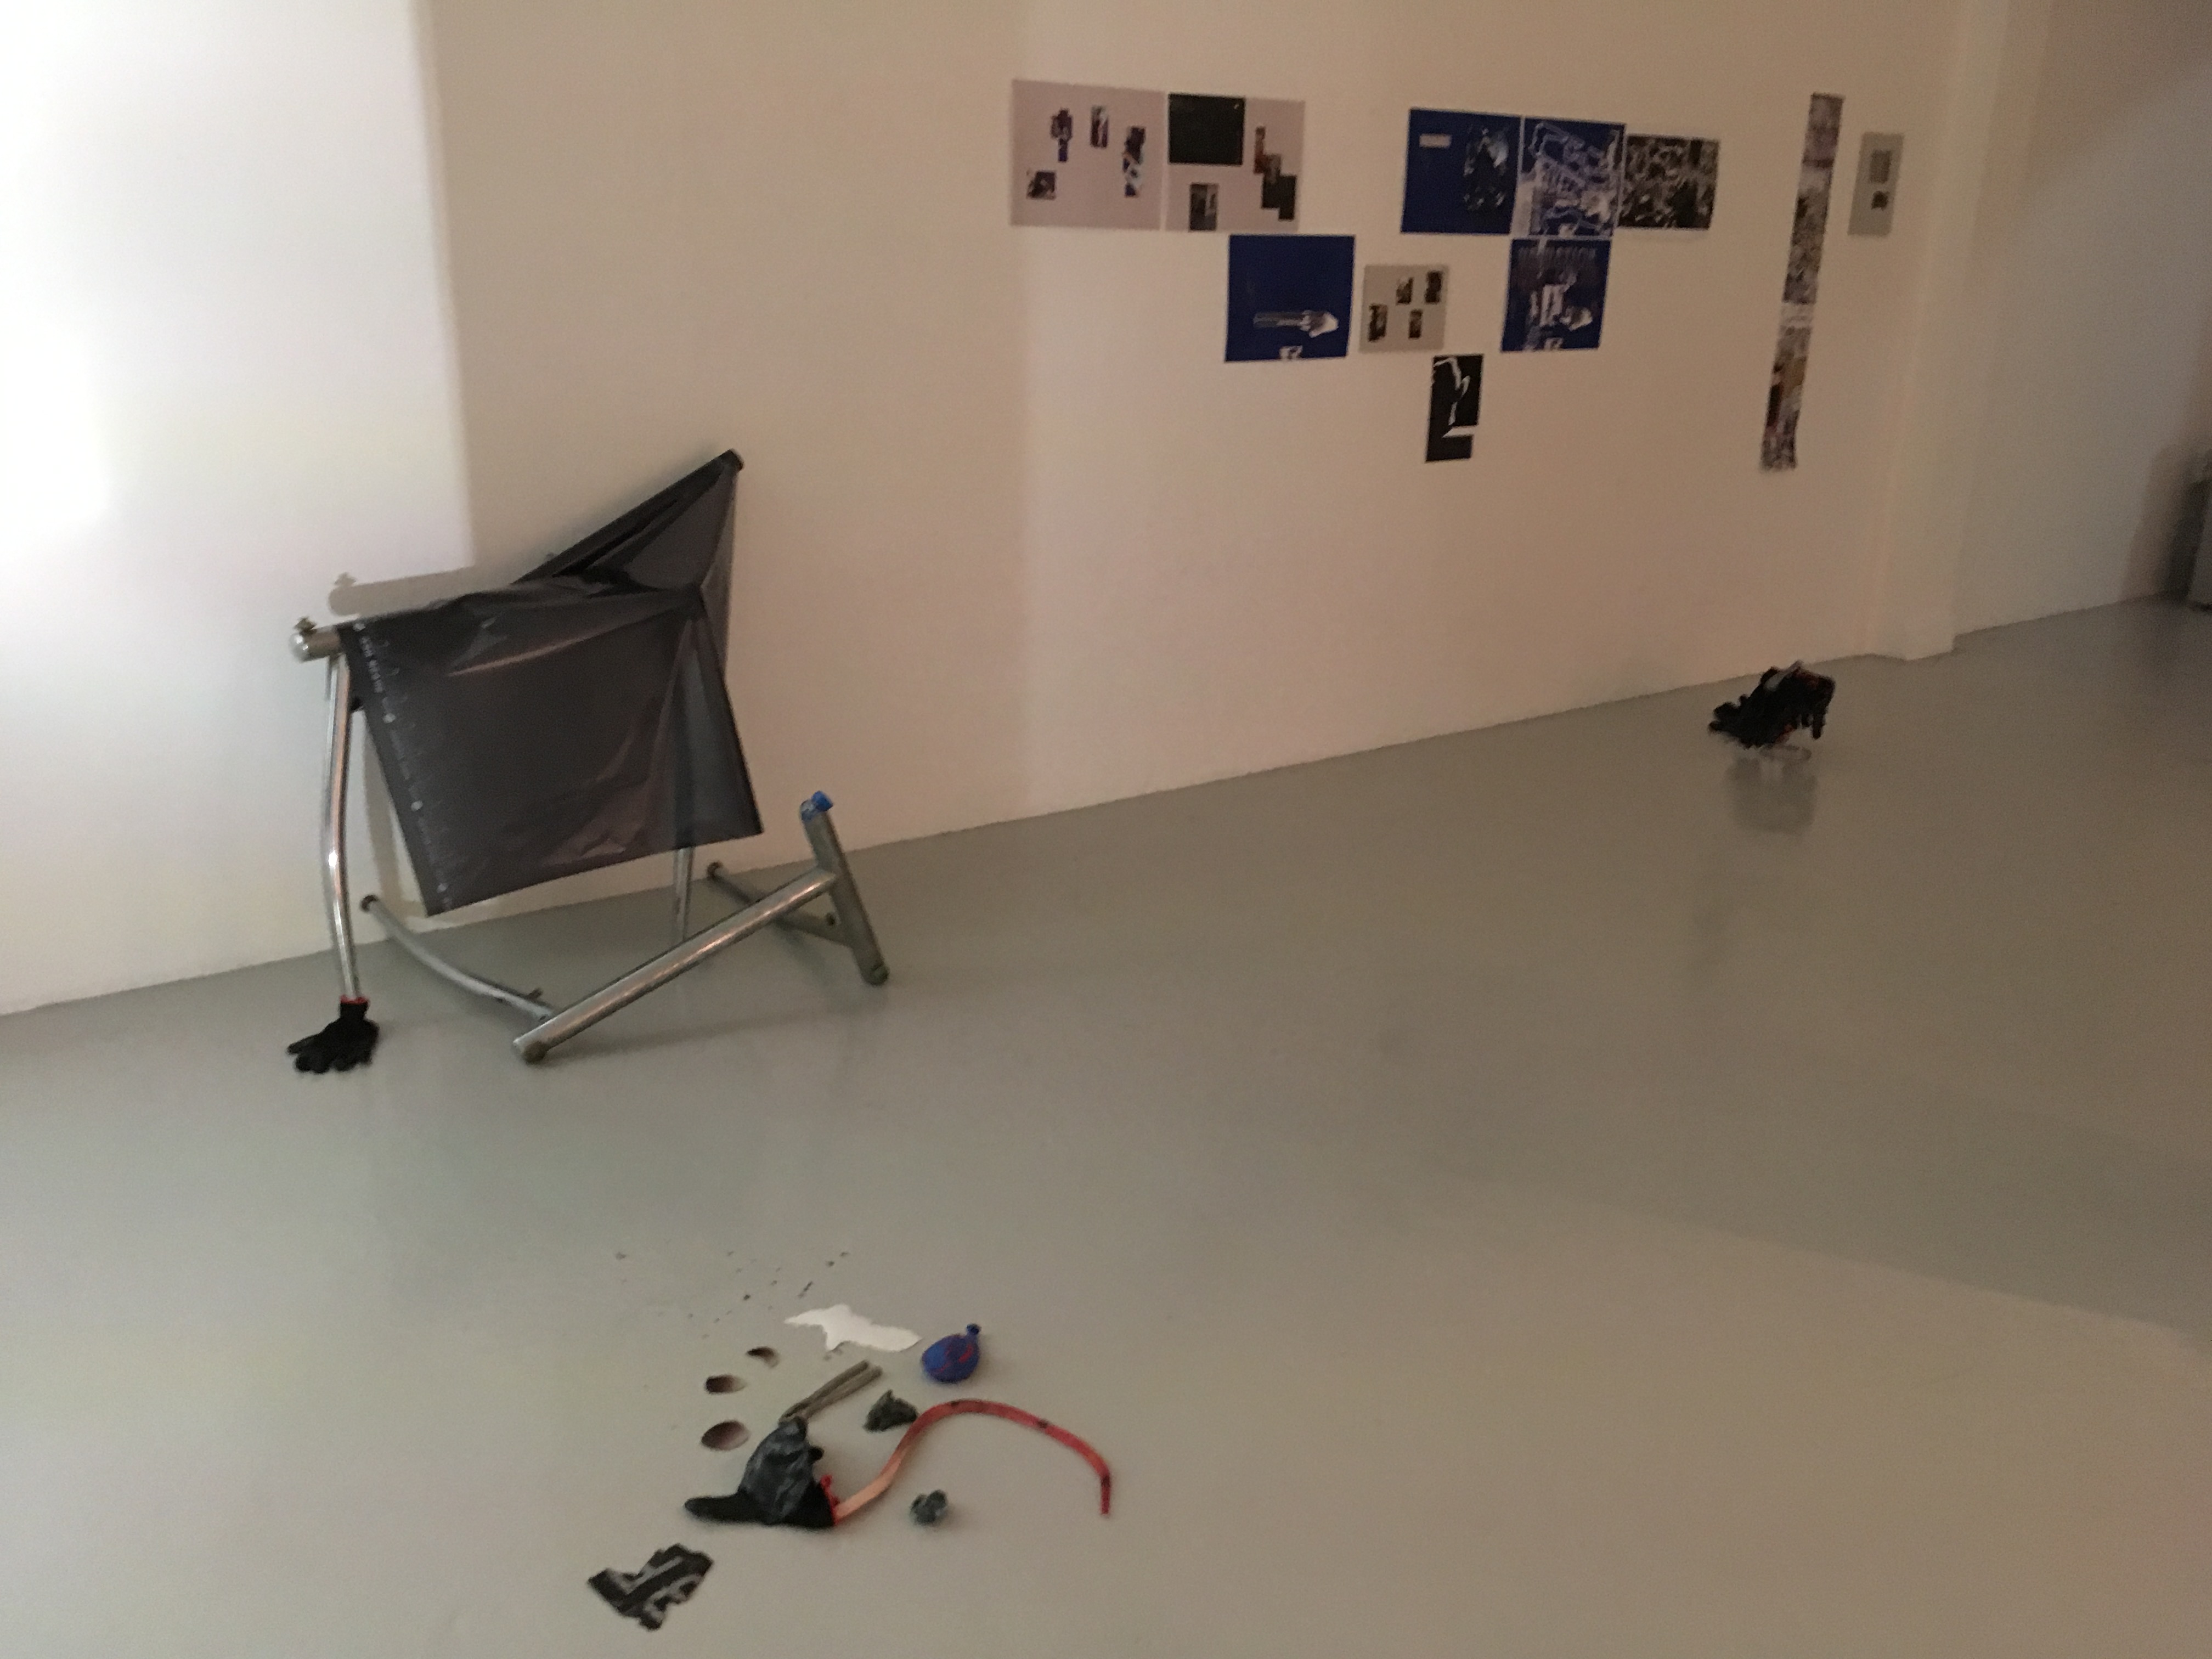
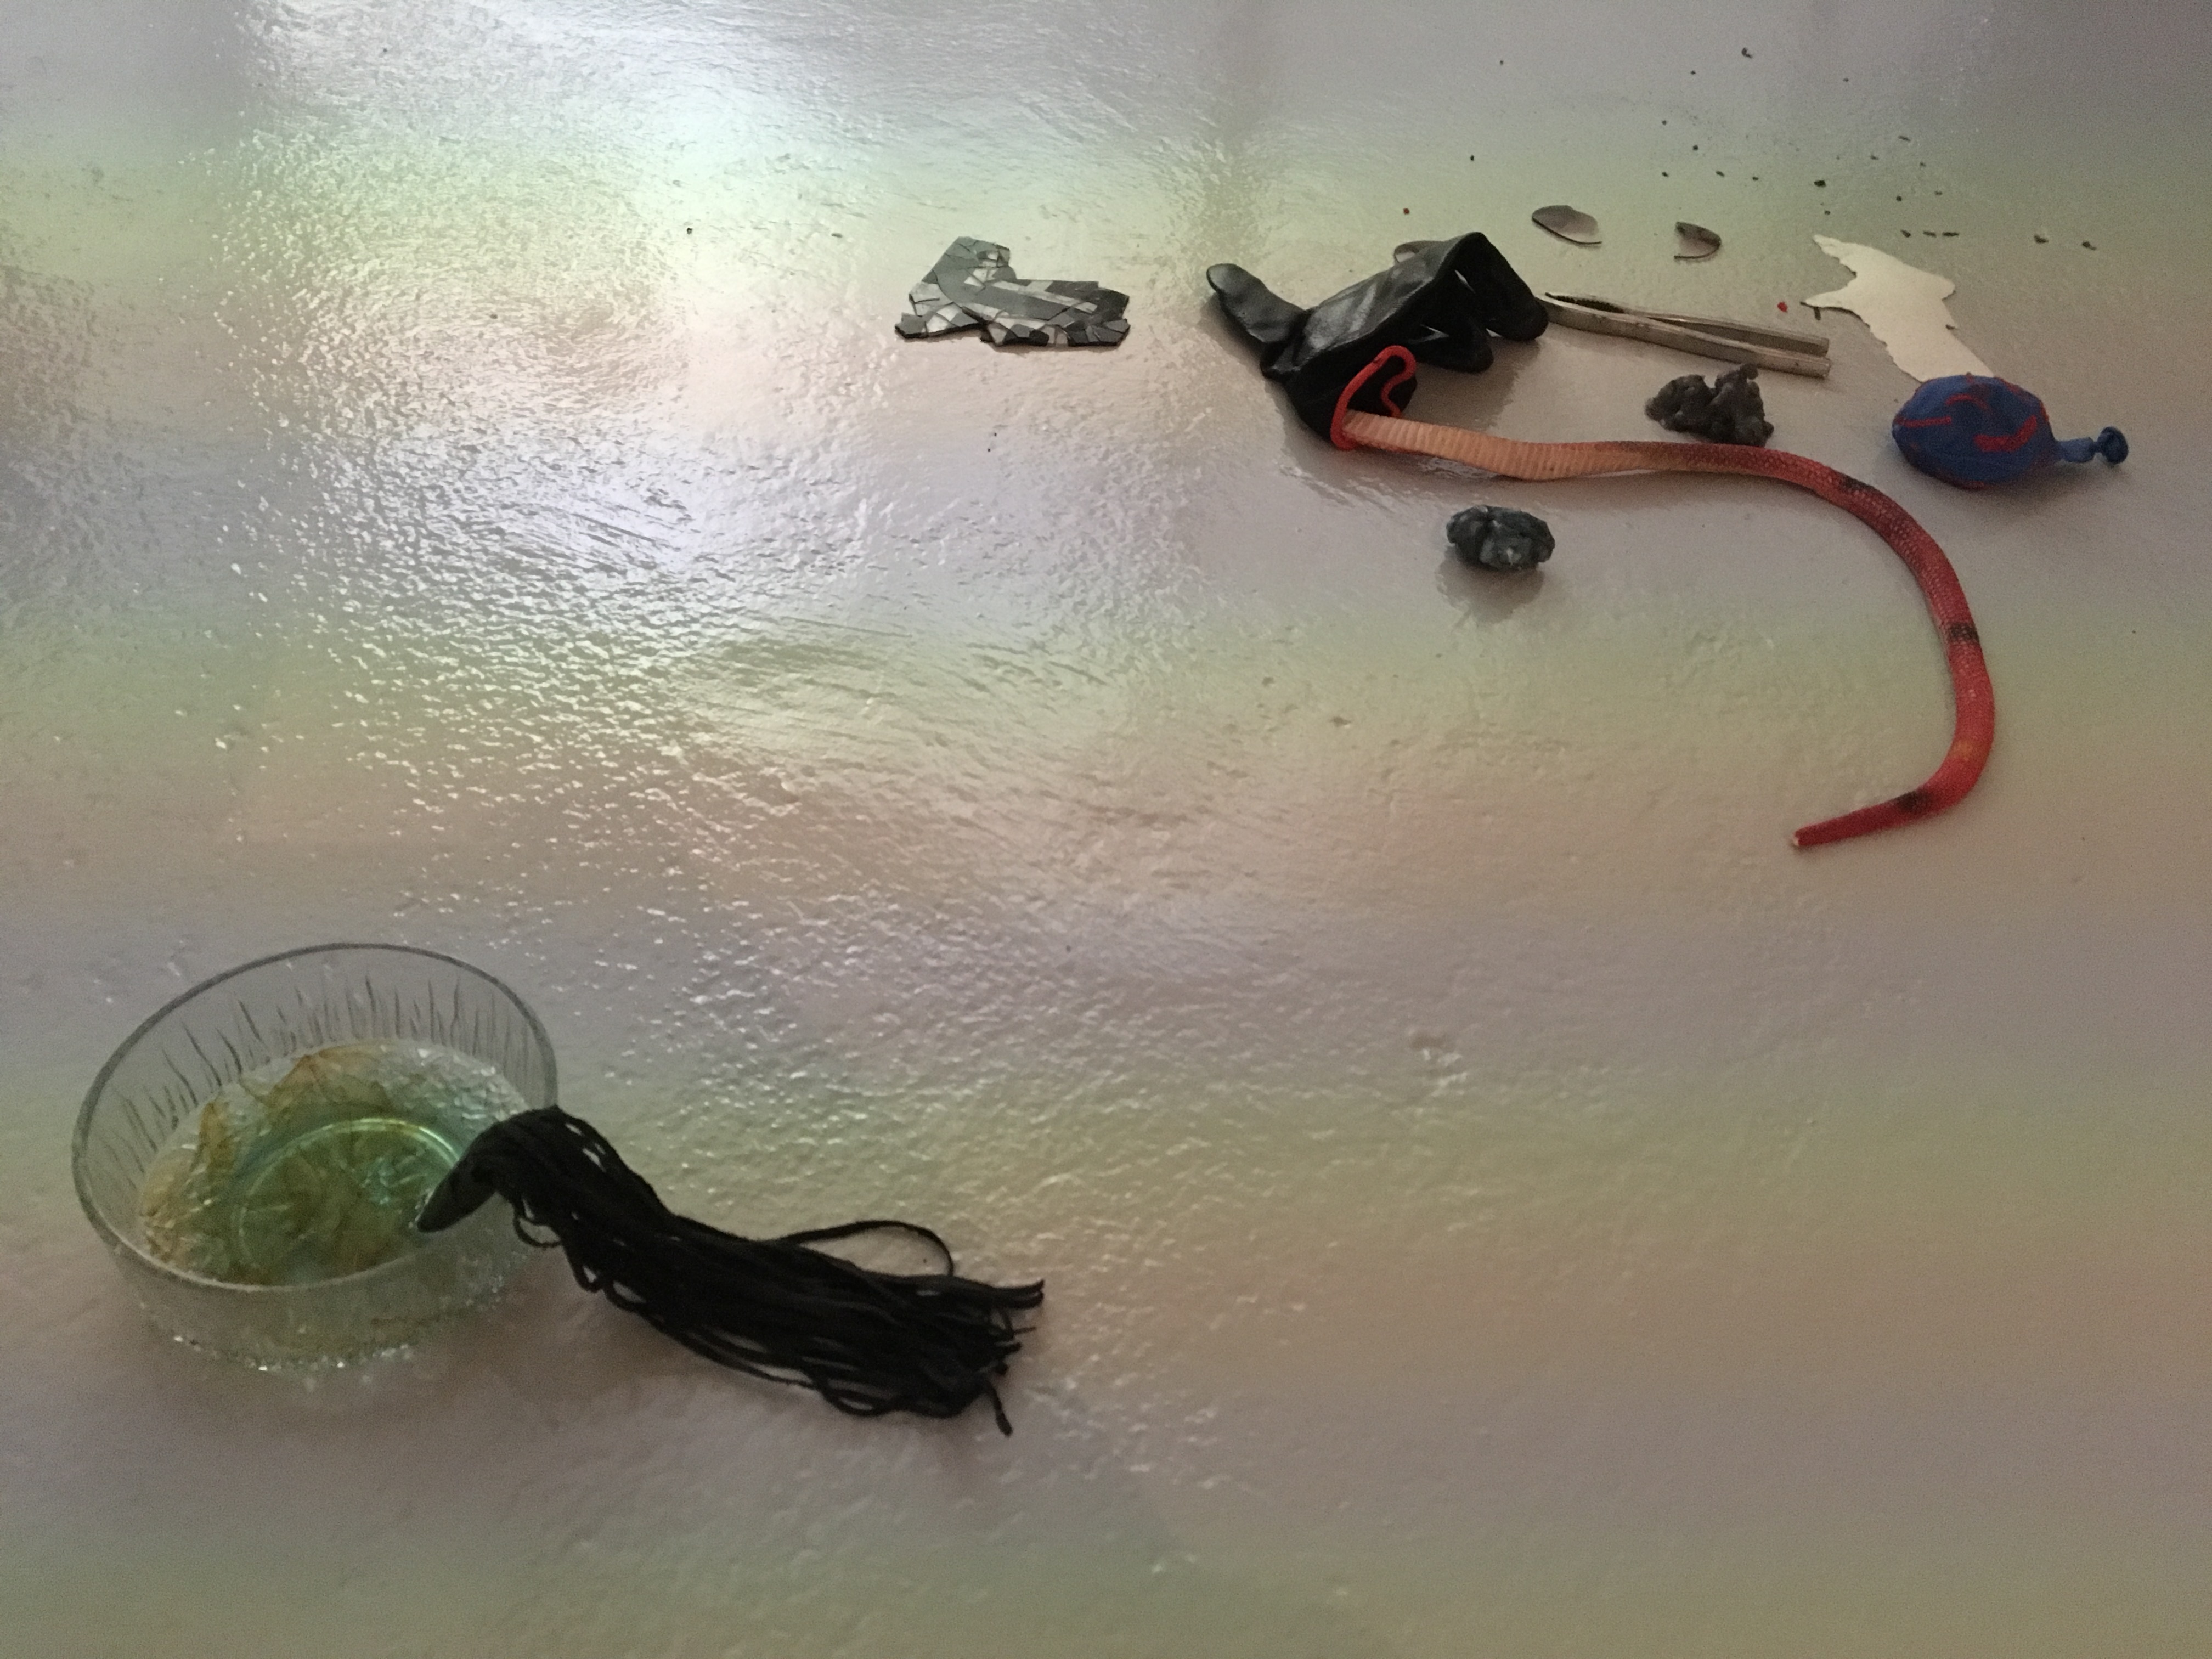
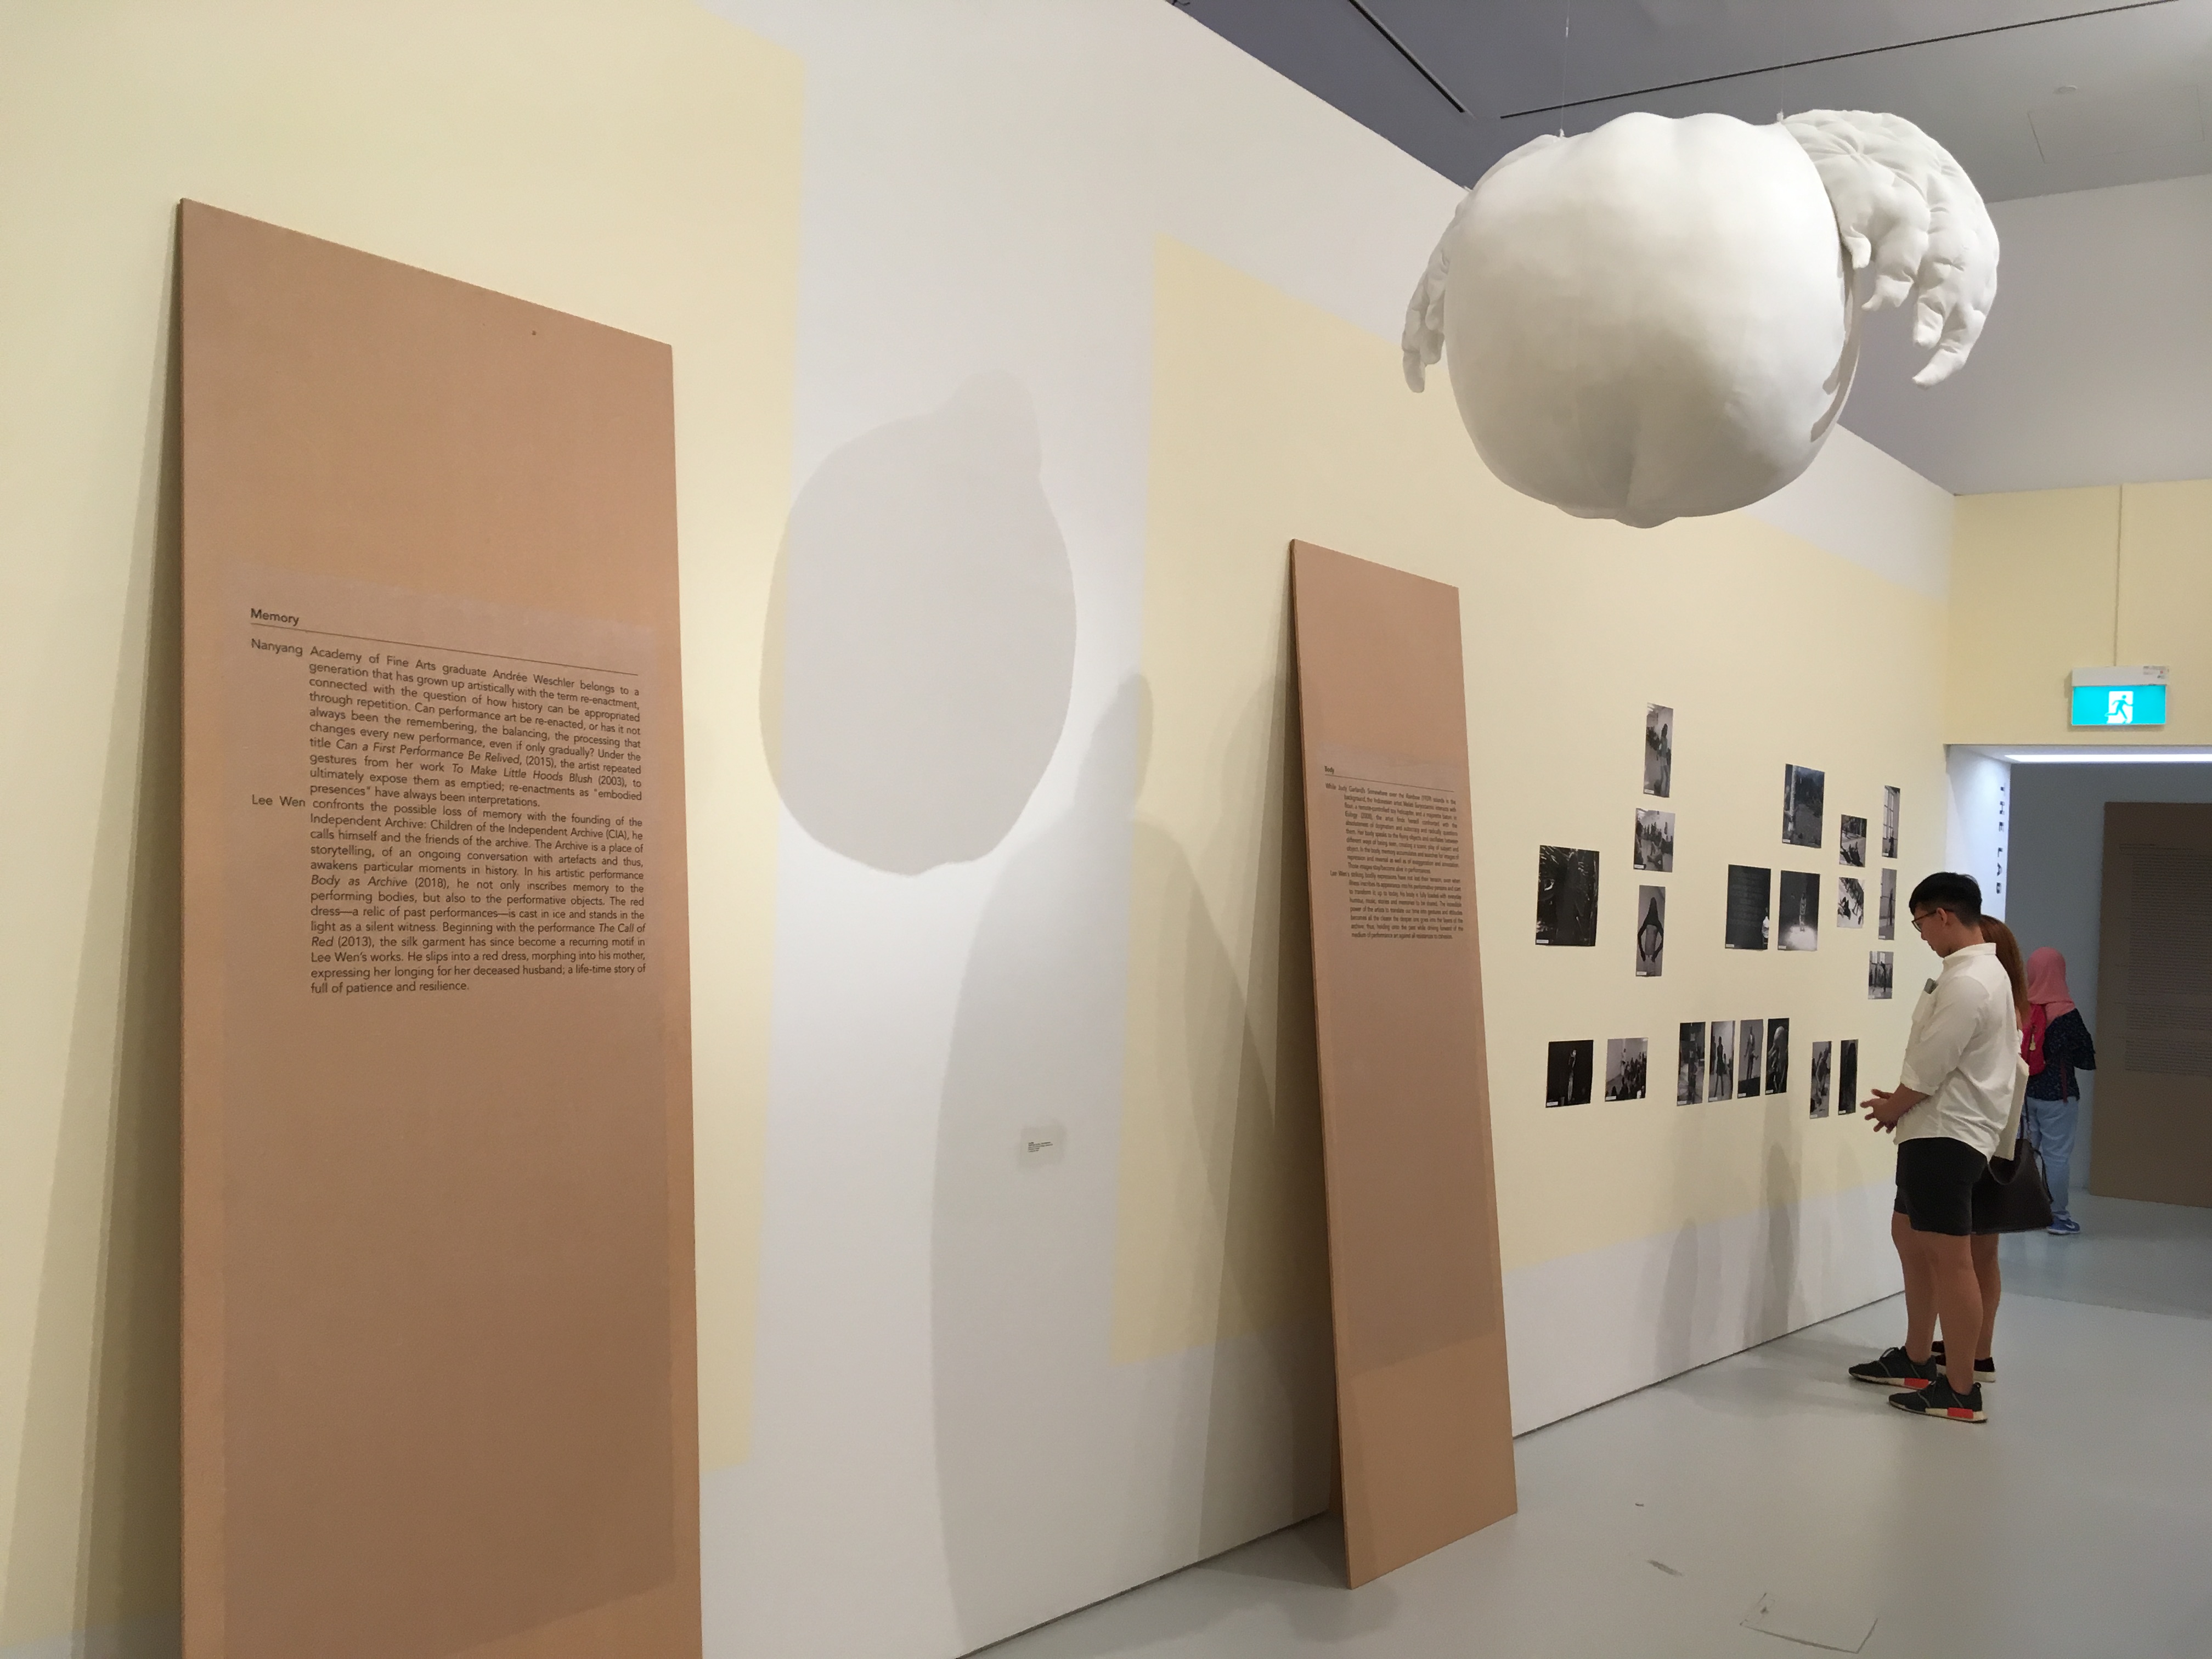
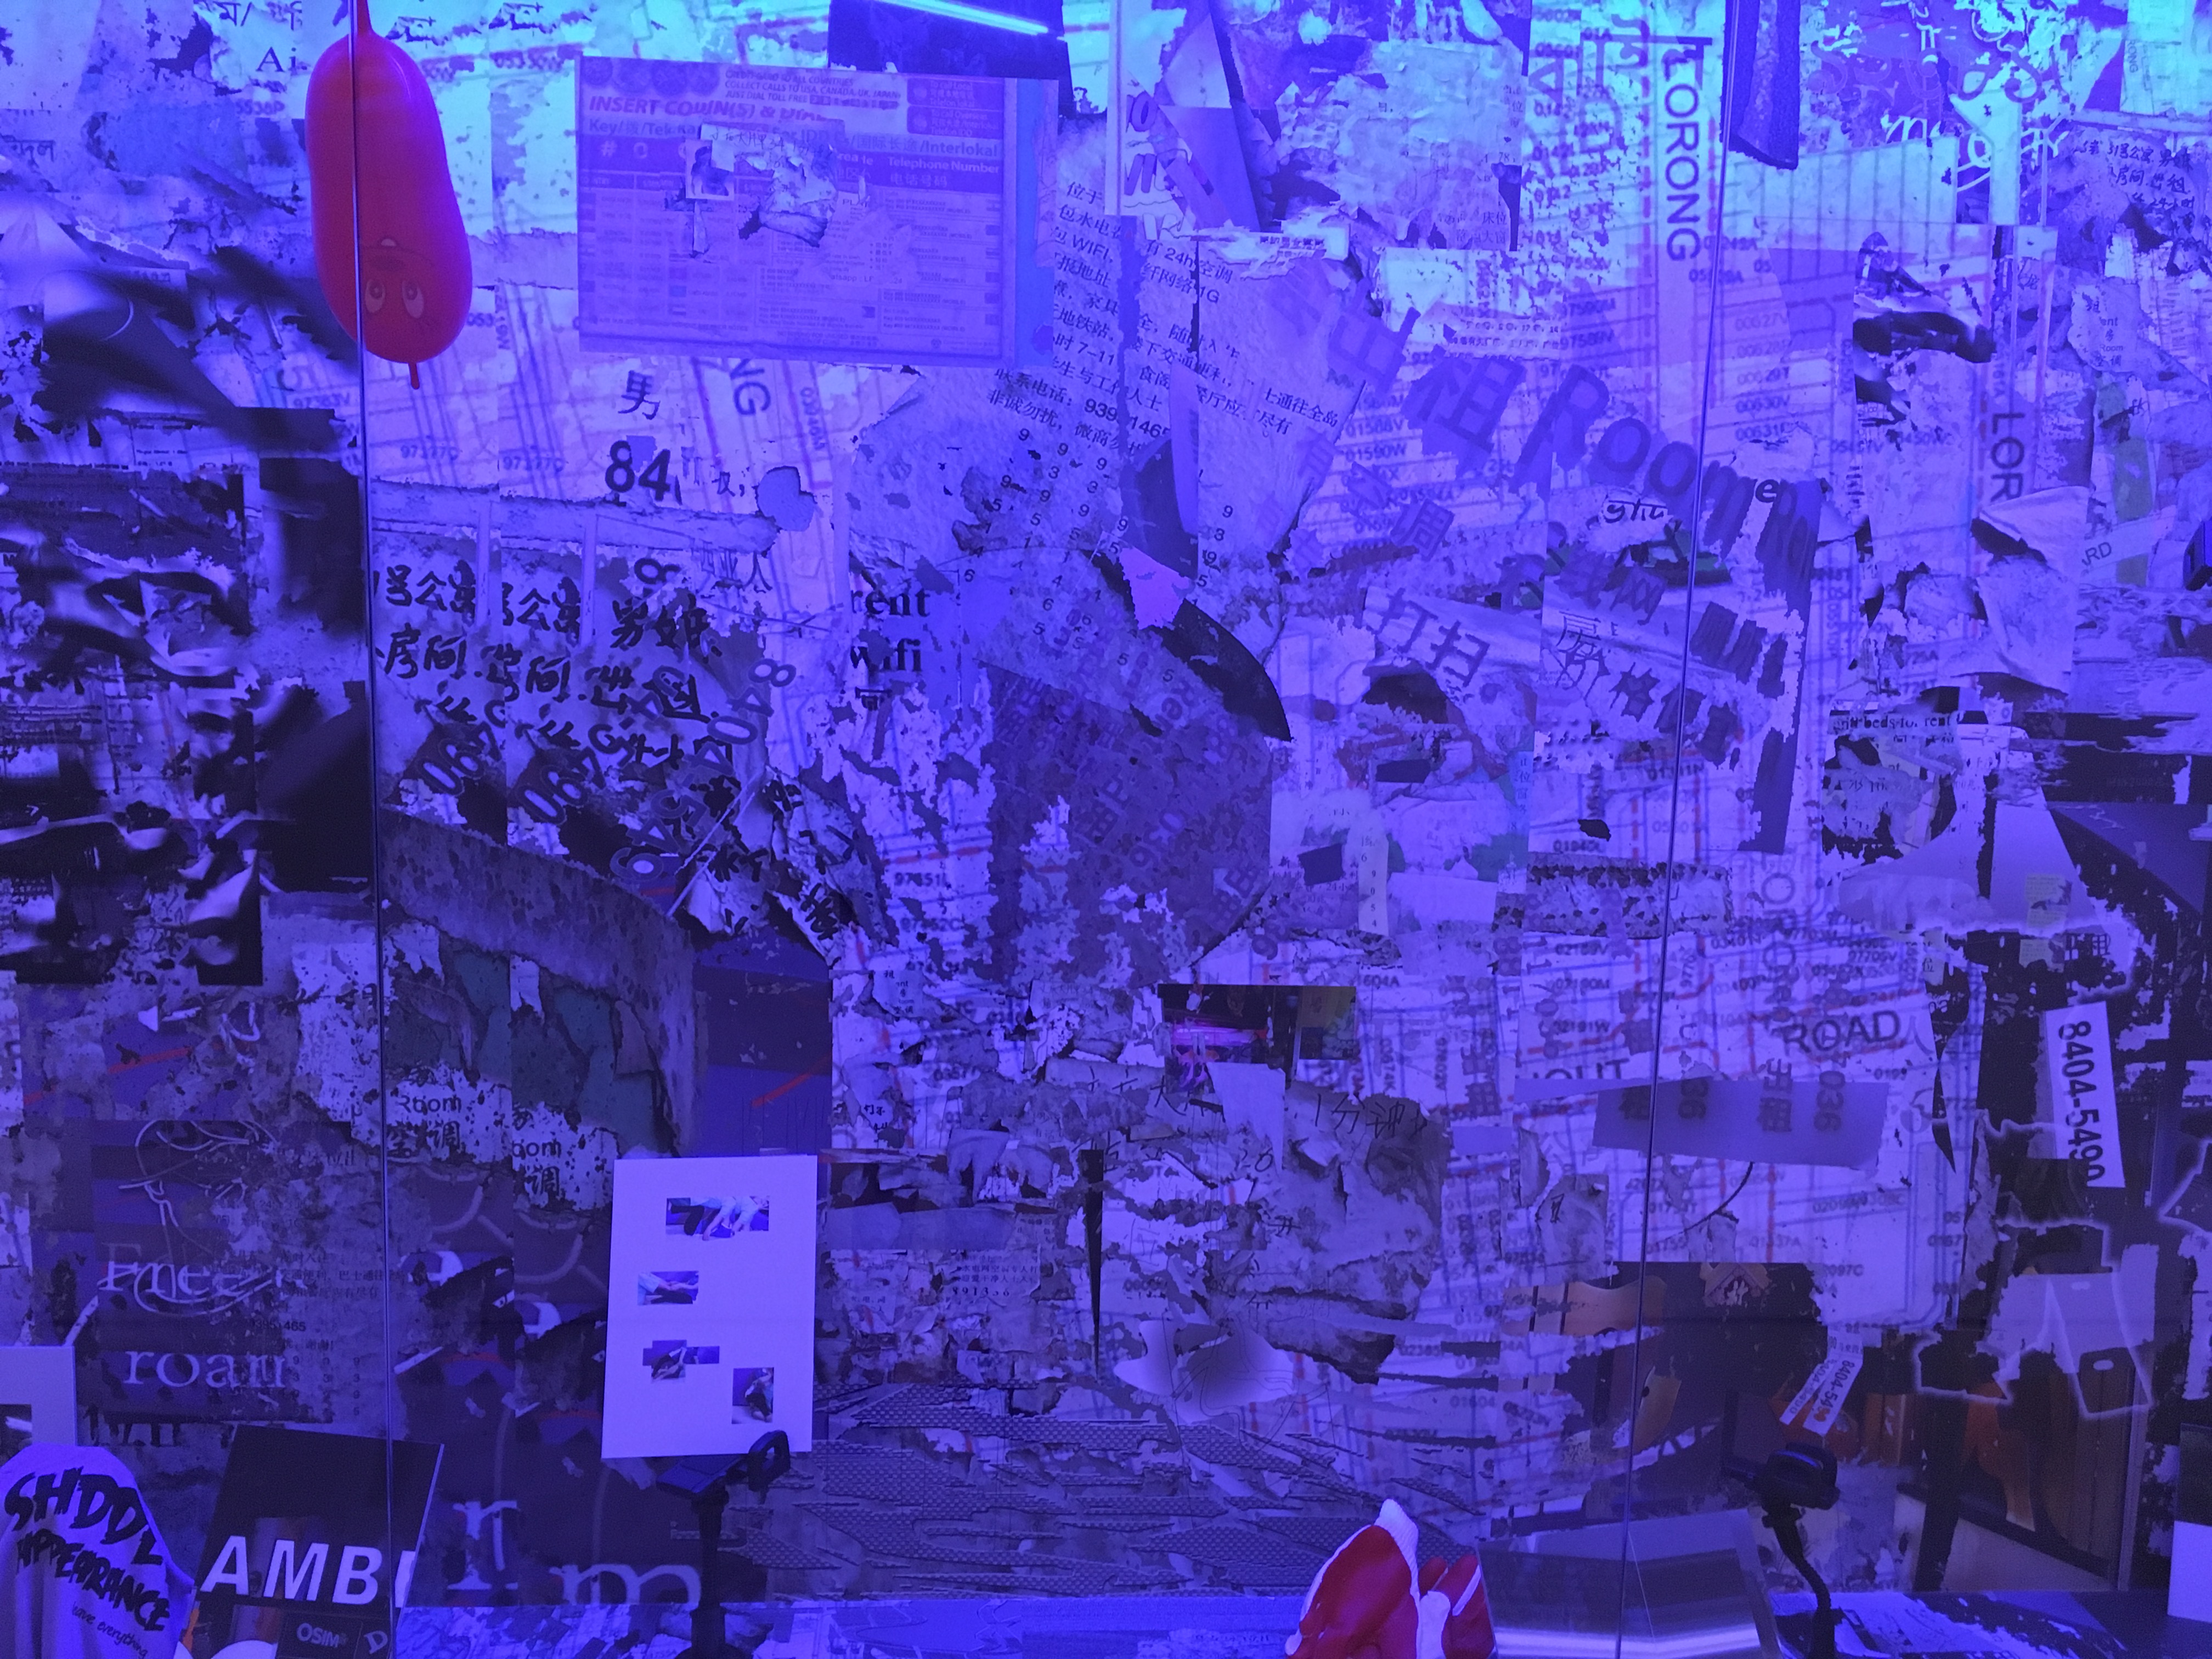
Journey of a Yellow Man. Selected Materials from the Independent Archive at The LabLee Wen, World Class Society, 1999-2000/2018, Video, soft sculpture, badges, questionnaire, dimensions variableLee Wen, World Class Society, 1999-2000/2018, Video, soft sculpture, badges, questionnaire, dimensions variableLuca Lum’s impasse to verbal at The VitrineLuca Lum’s impasse to verbal at The VitrineLuca Lum’s impasse to verbal at The Vitrine
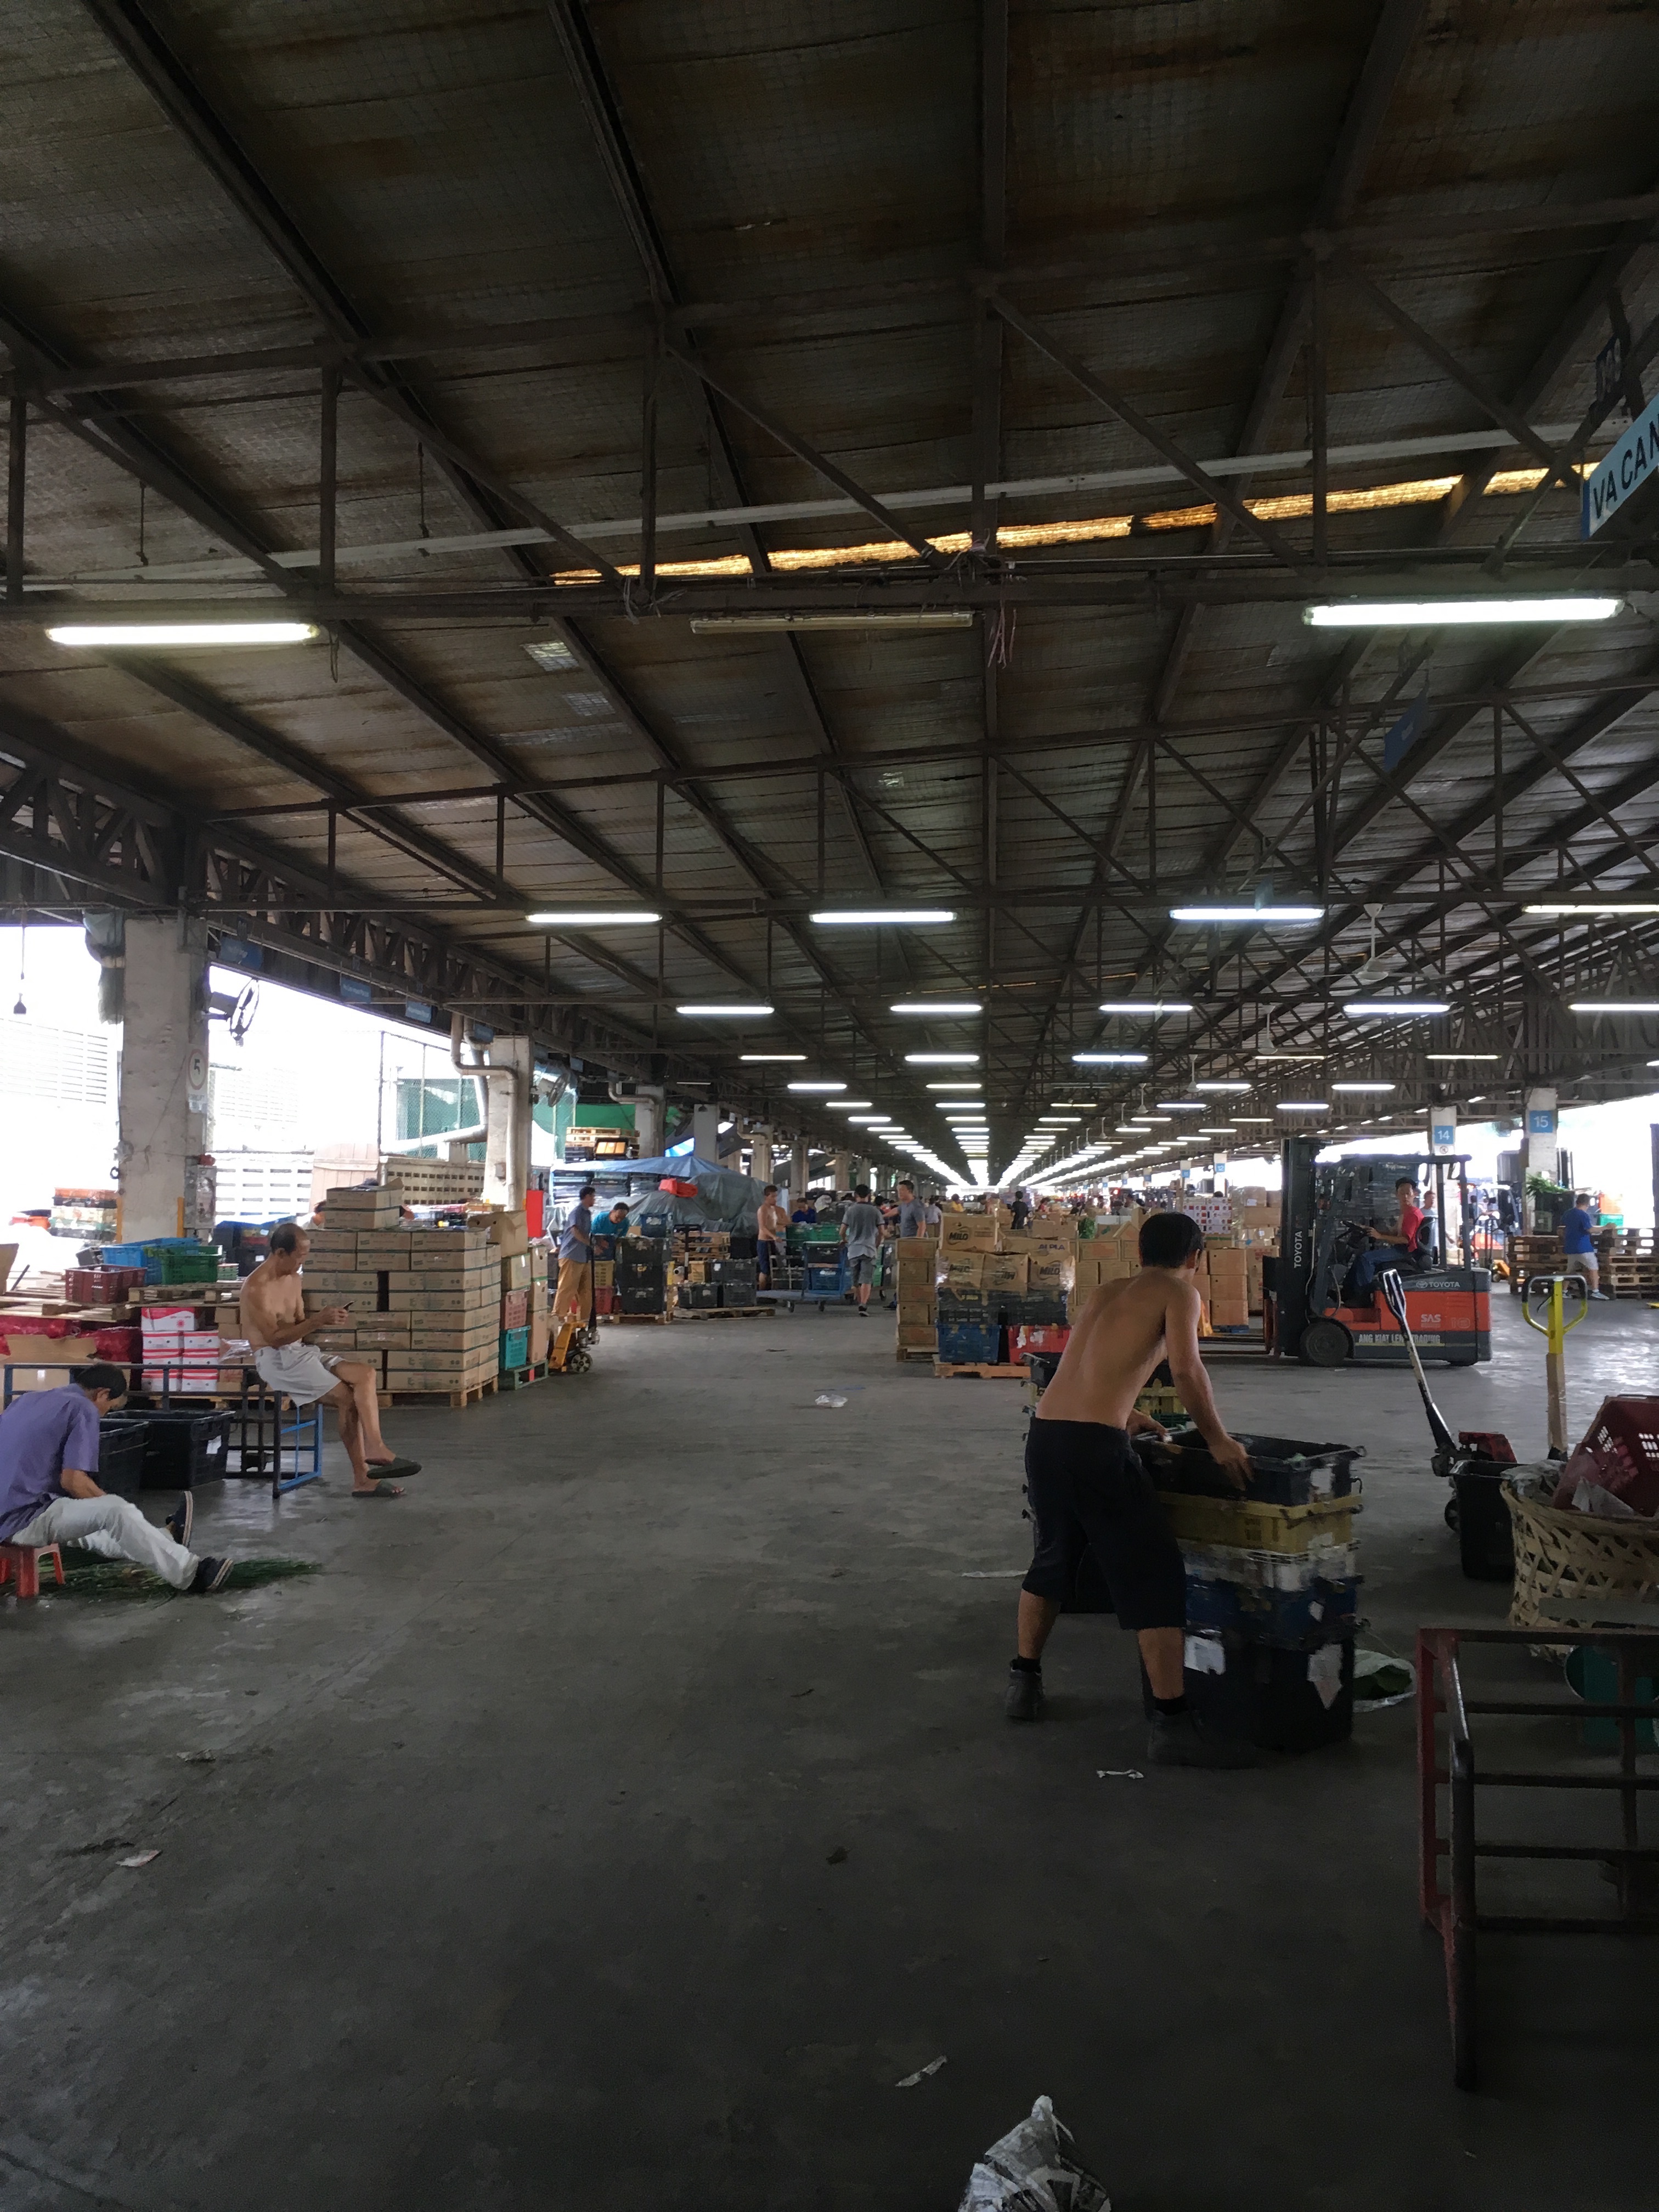
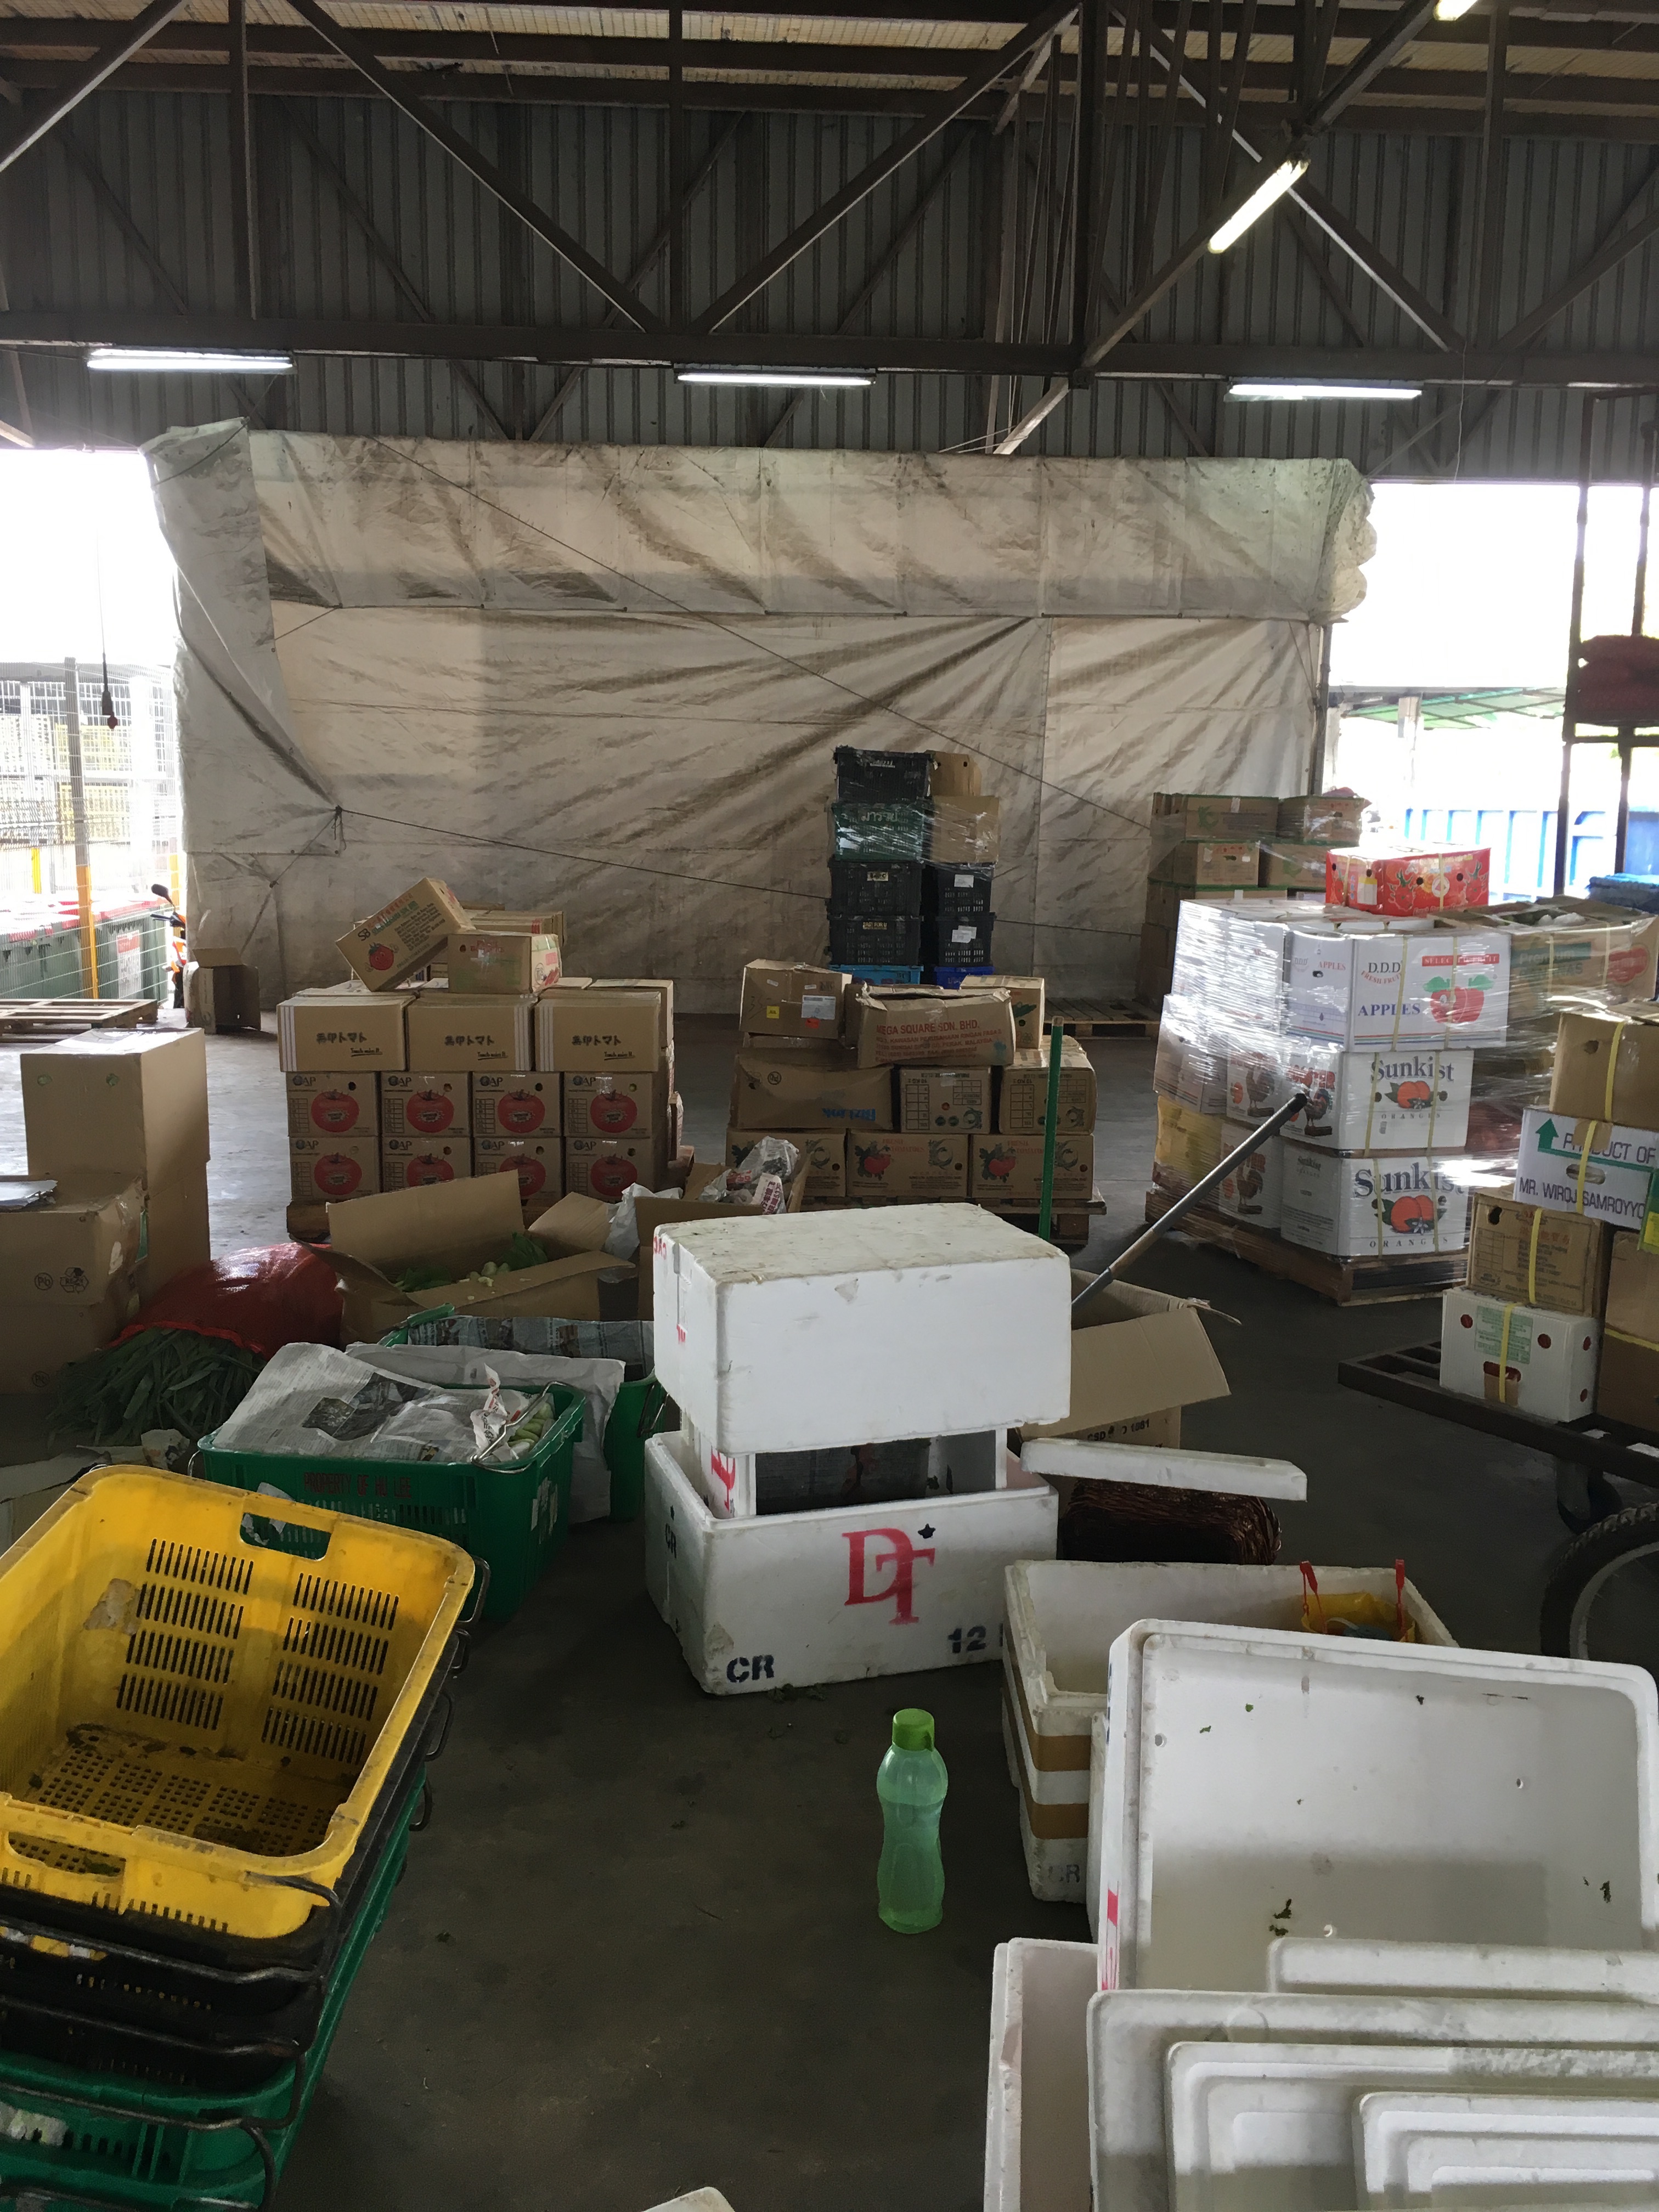
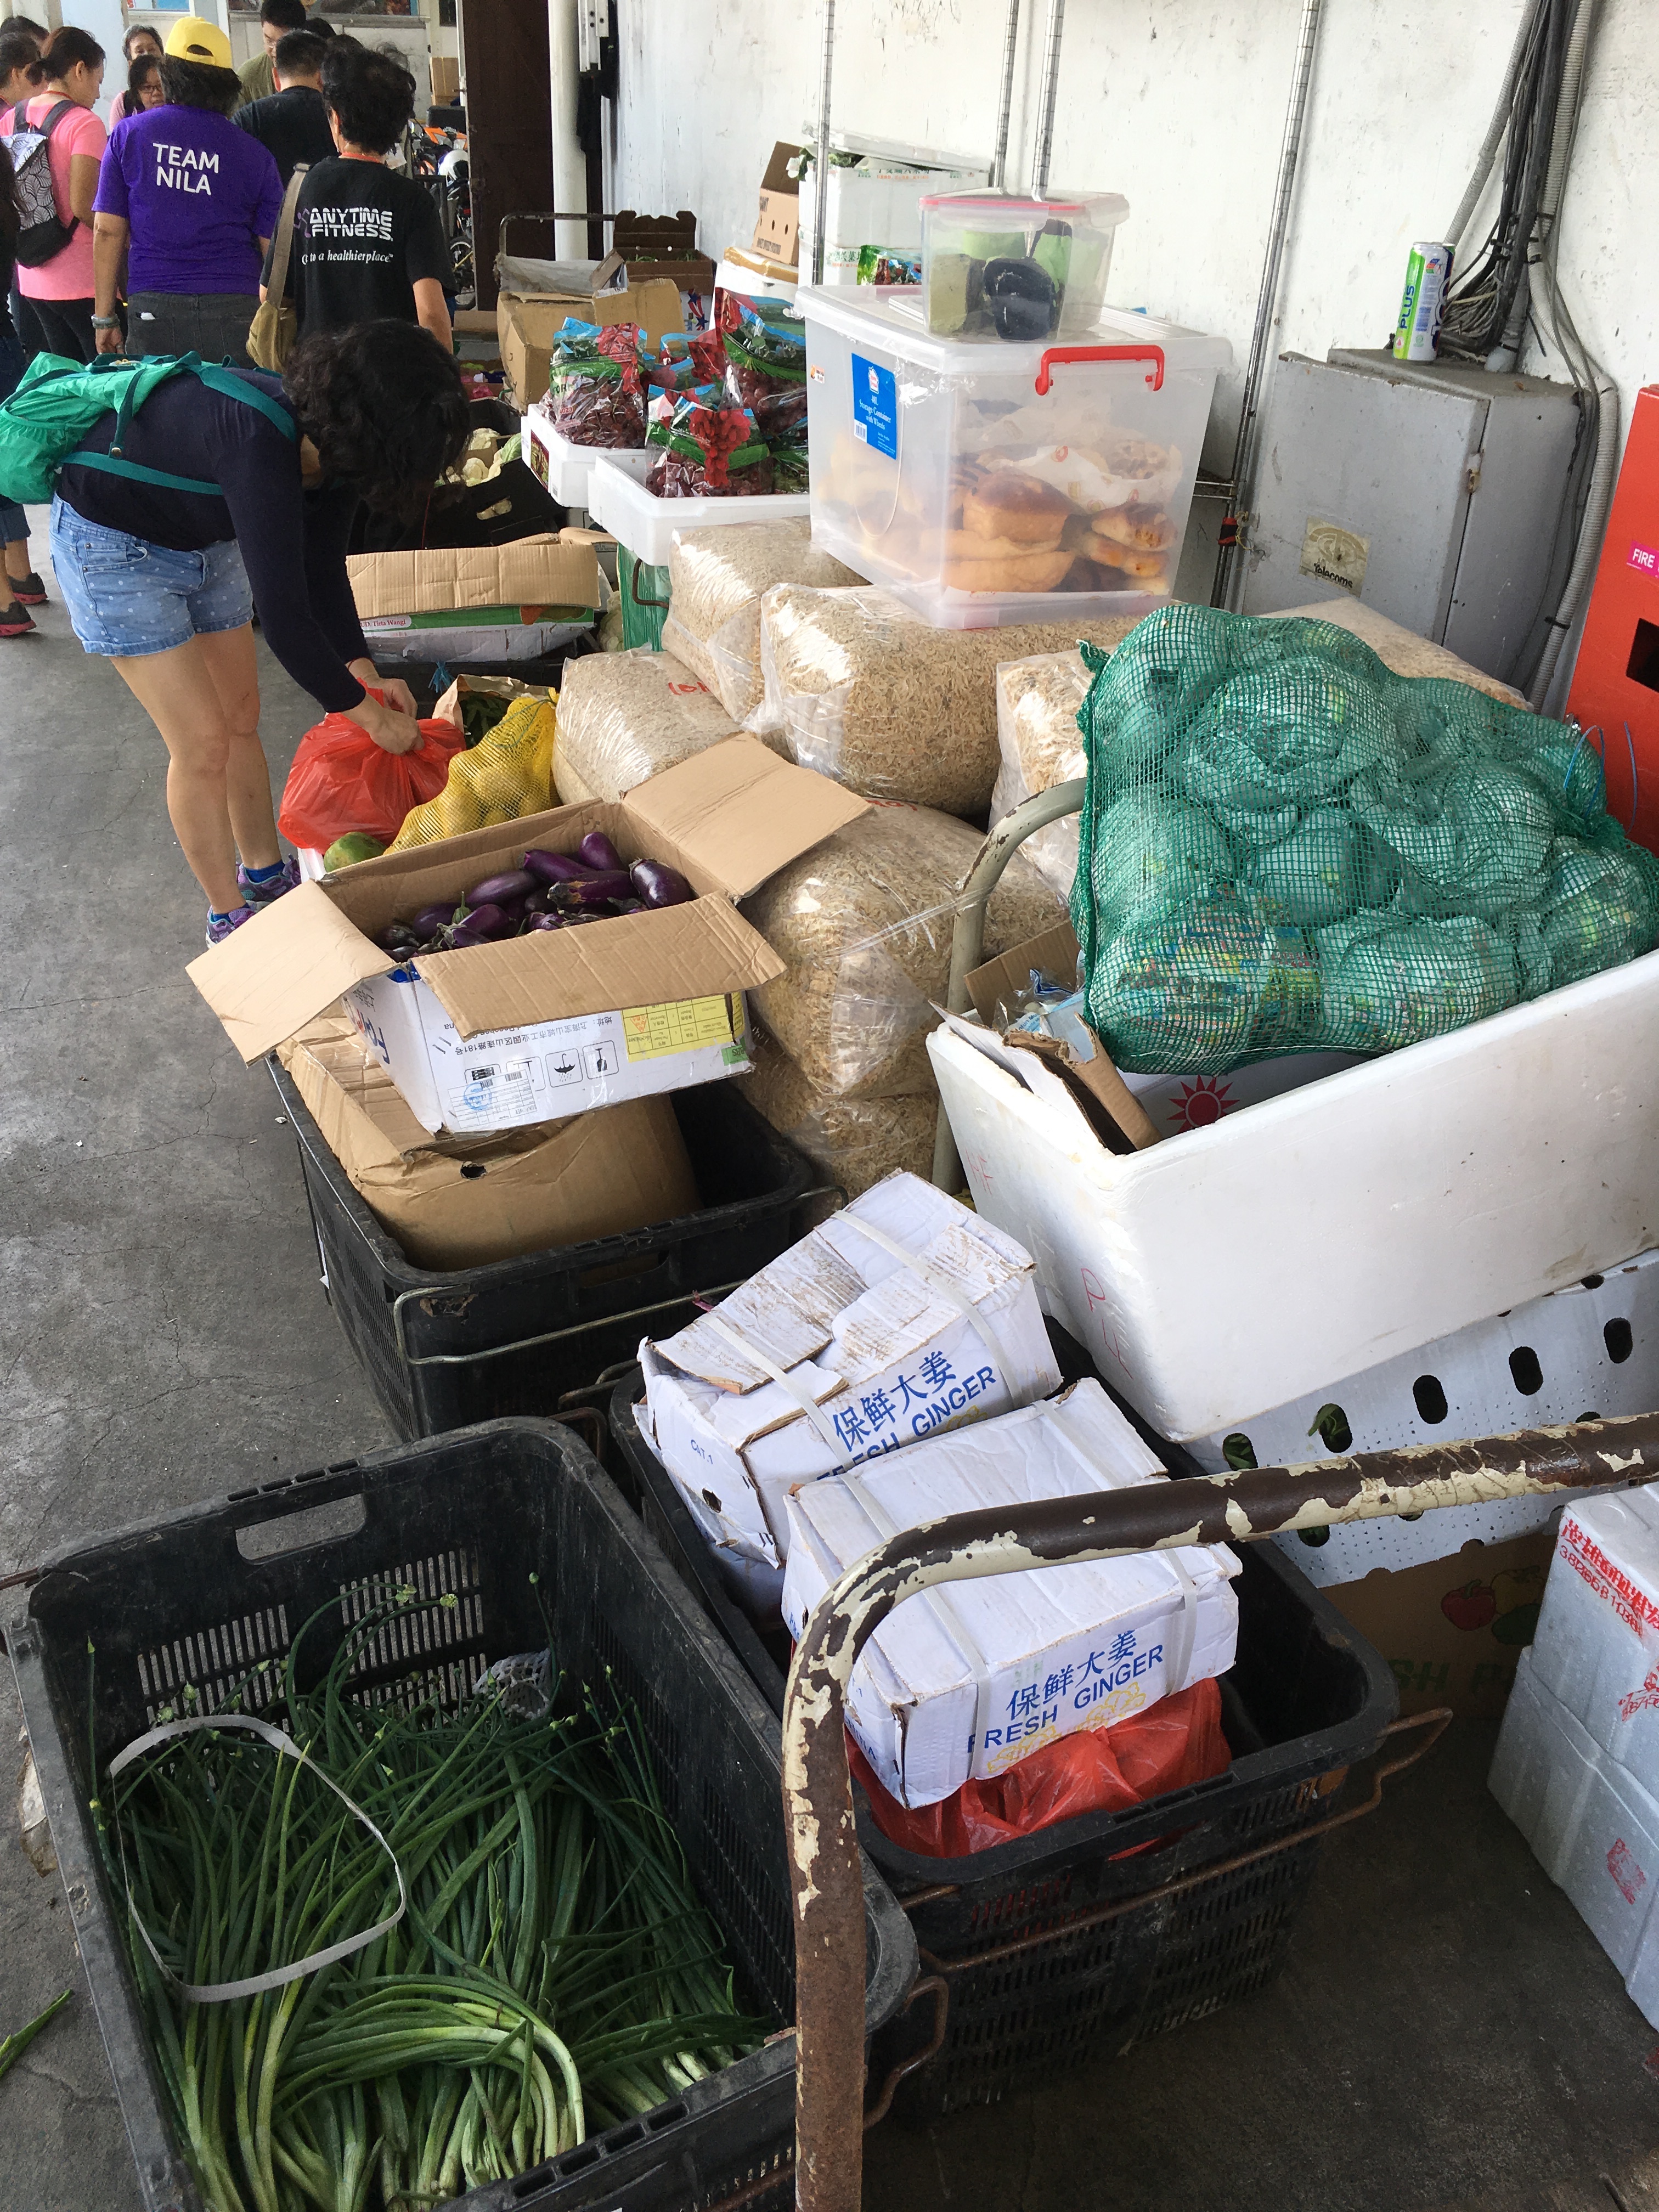
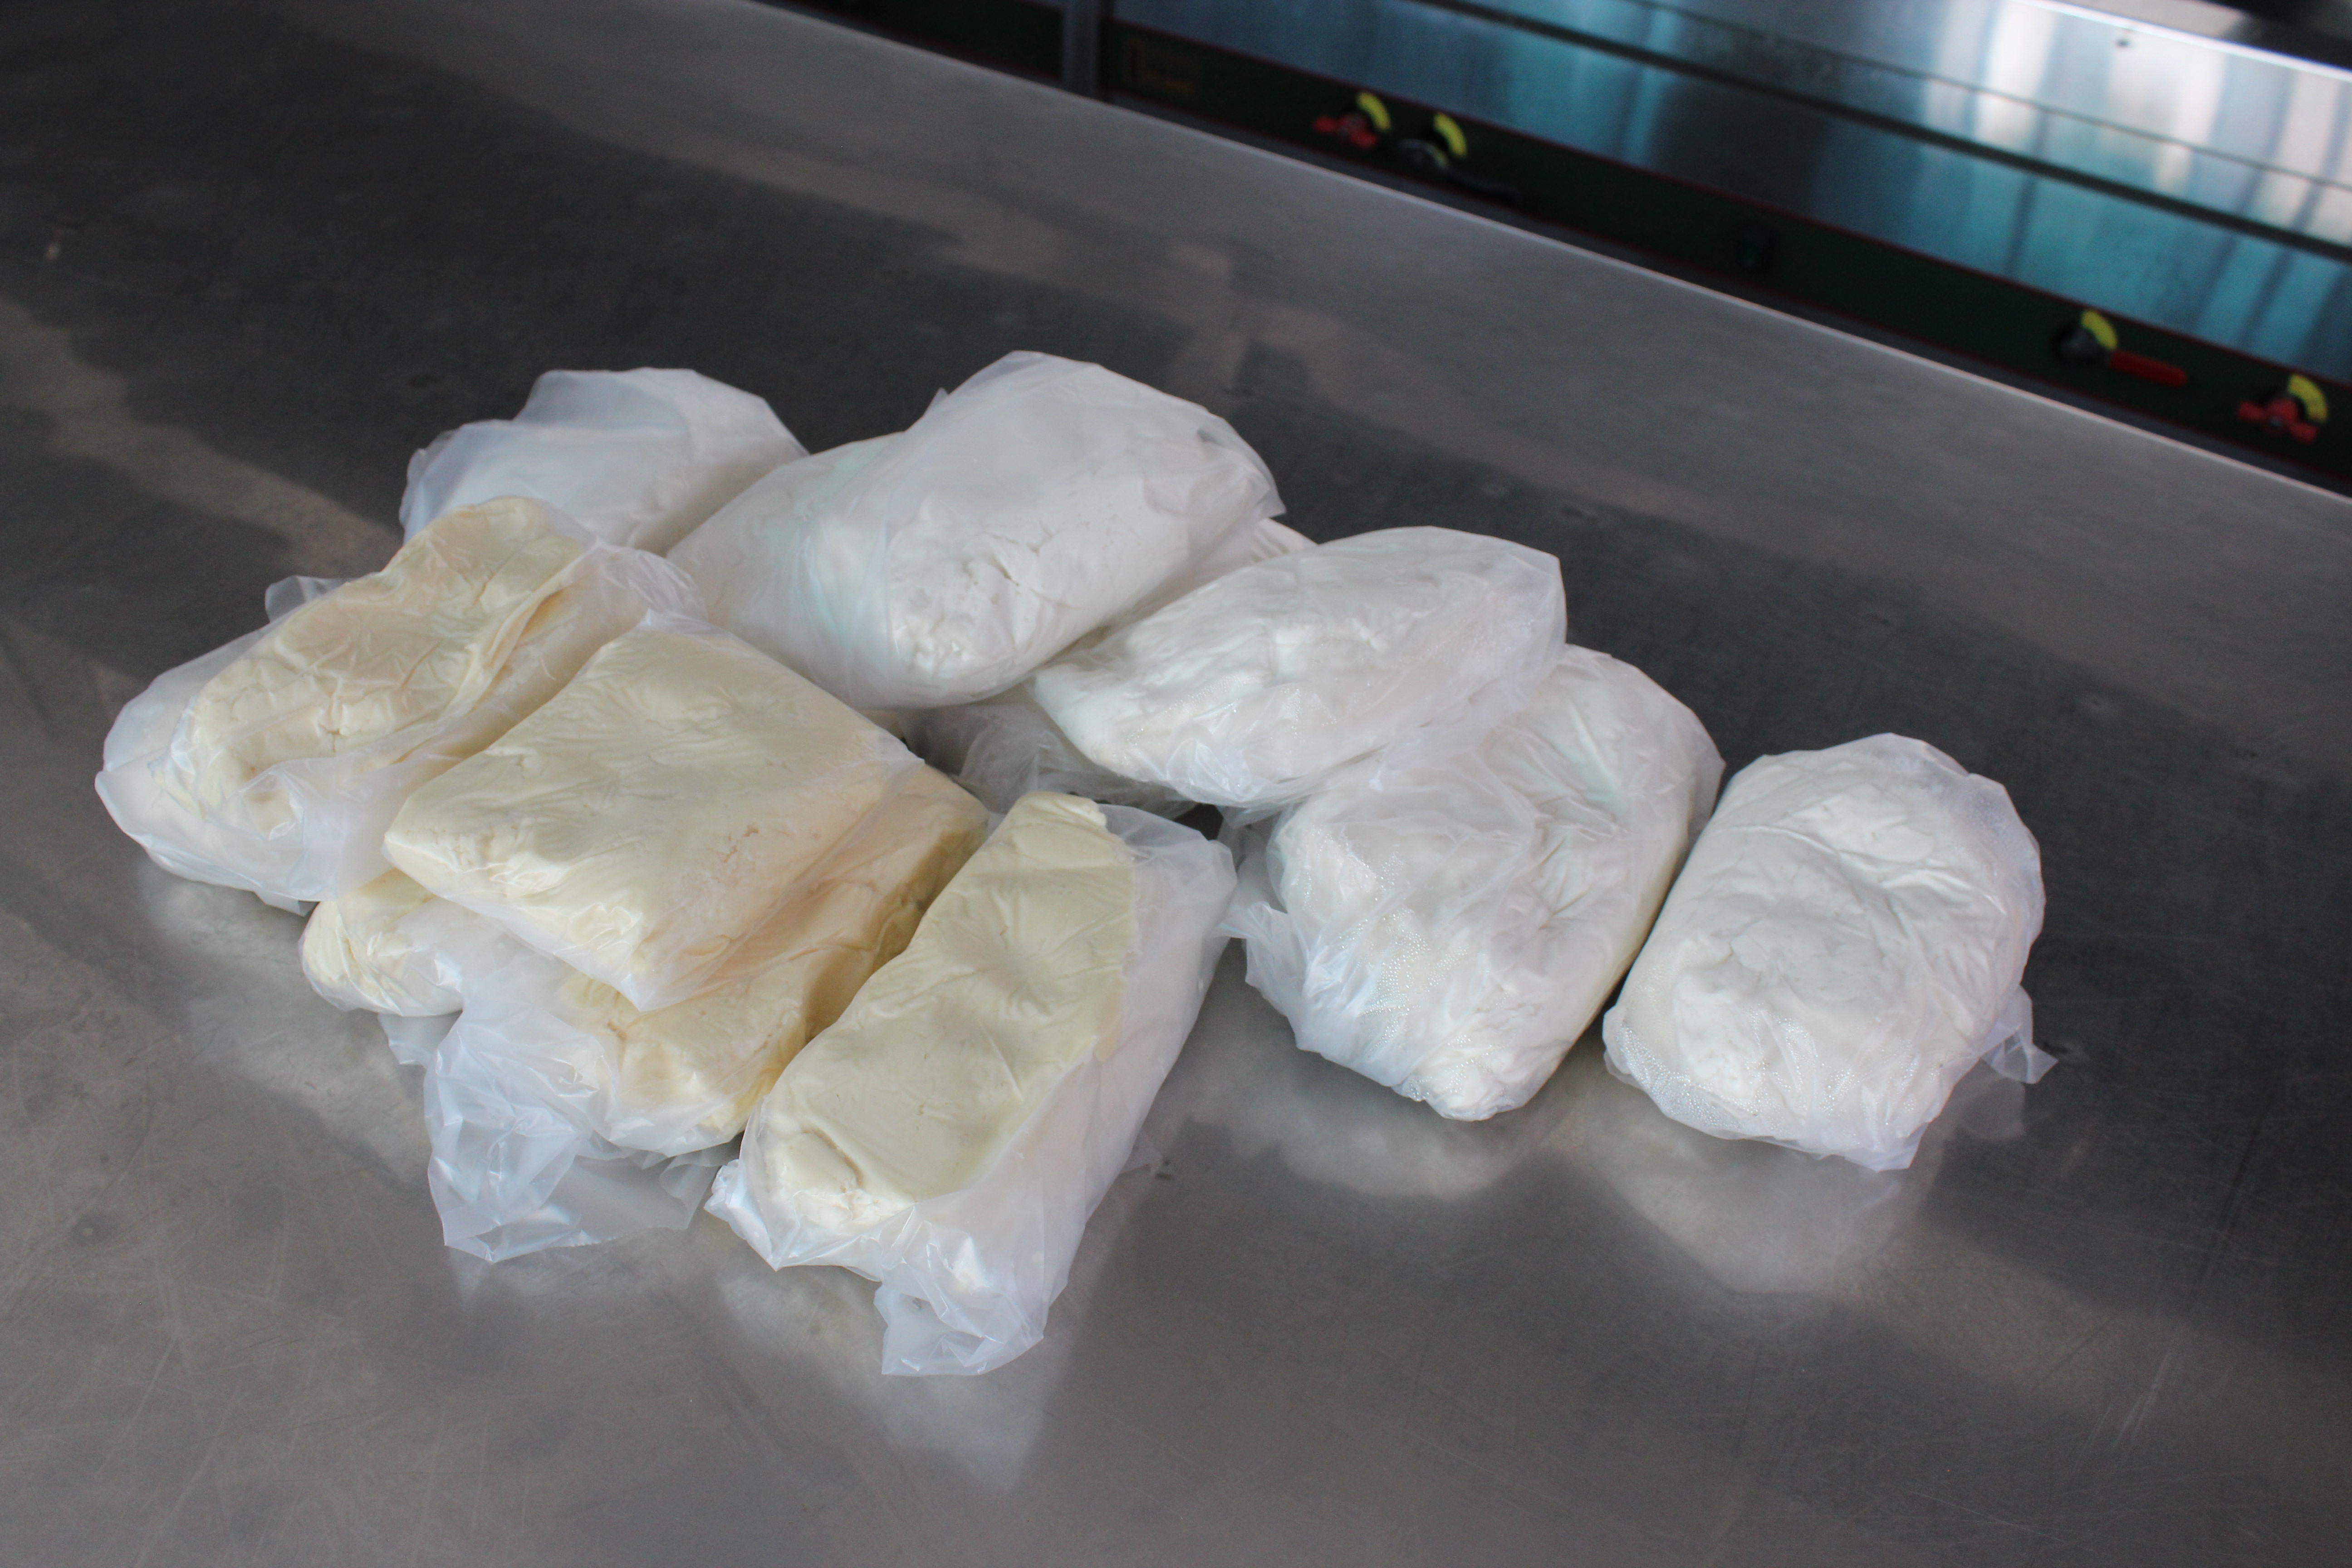
I organised a field trip with SG Food Rescue to save some veggies and fruits from their fate of going into the thrash bins at Pasir Panjang Wholesale Centre. The field trip happened on 4 October 2018, from 10am to 2pm.
A list of those who attended the field trip are:
Teo Zi Lin (Organiser)
Allison Kapps
Yau Wee Nee
Vashon Tnee Rihao
Joey Ng Zhi Yu
Stephanie Yeo Xin Yi
Wendy Neo Hui Ting
We approached shopkeepers and wholesalers and asked them to give us the vegetables and fruits that they no longer want. These included fruits and veggies that were not in the perfect conditions for sale, but still largely edible. Such veggies and fruits were first distributed among Food Rescuers for their own consumption. The majority of the collection then got channelled to soup kitchens and charitable organisations that feed the needy. Below are some pictures of the field trip!
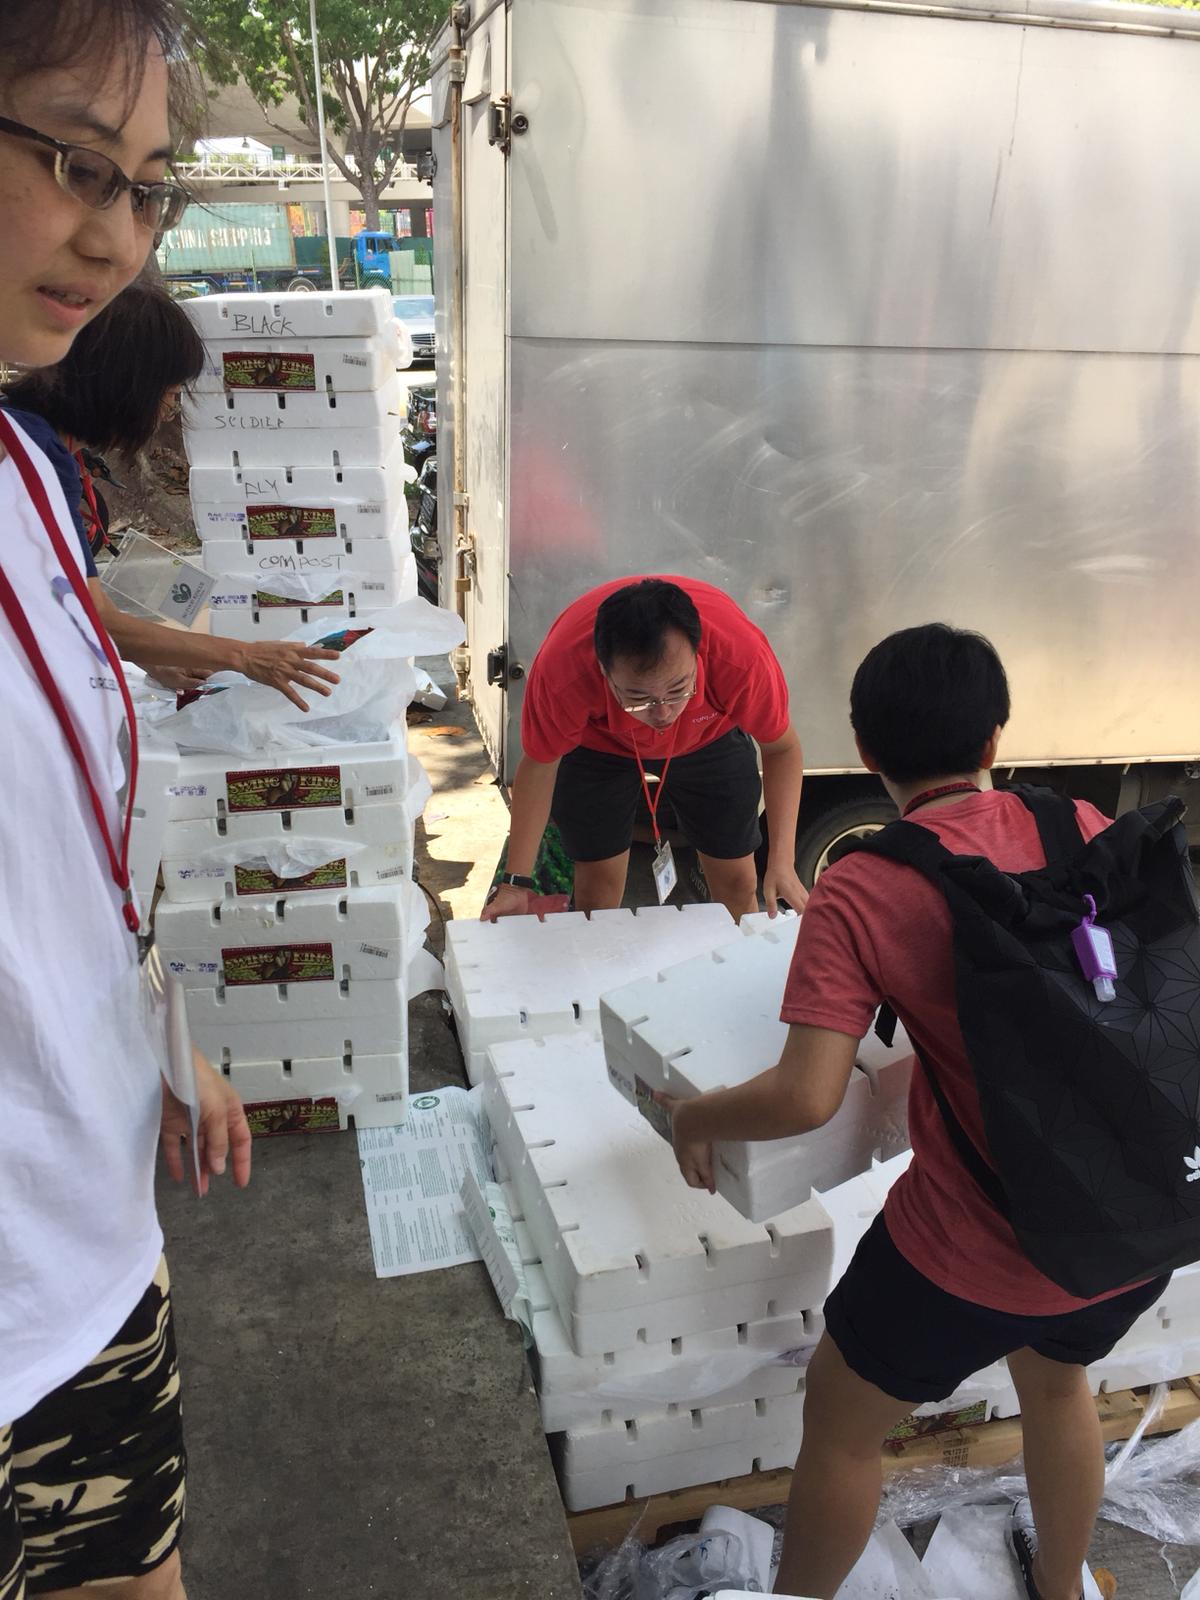
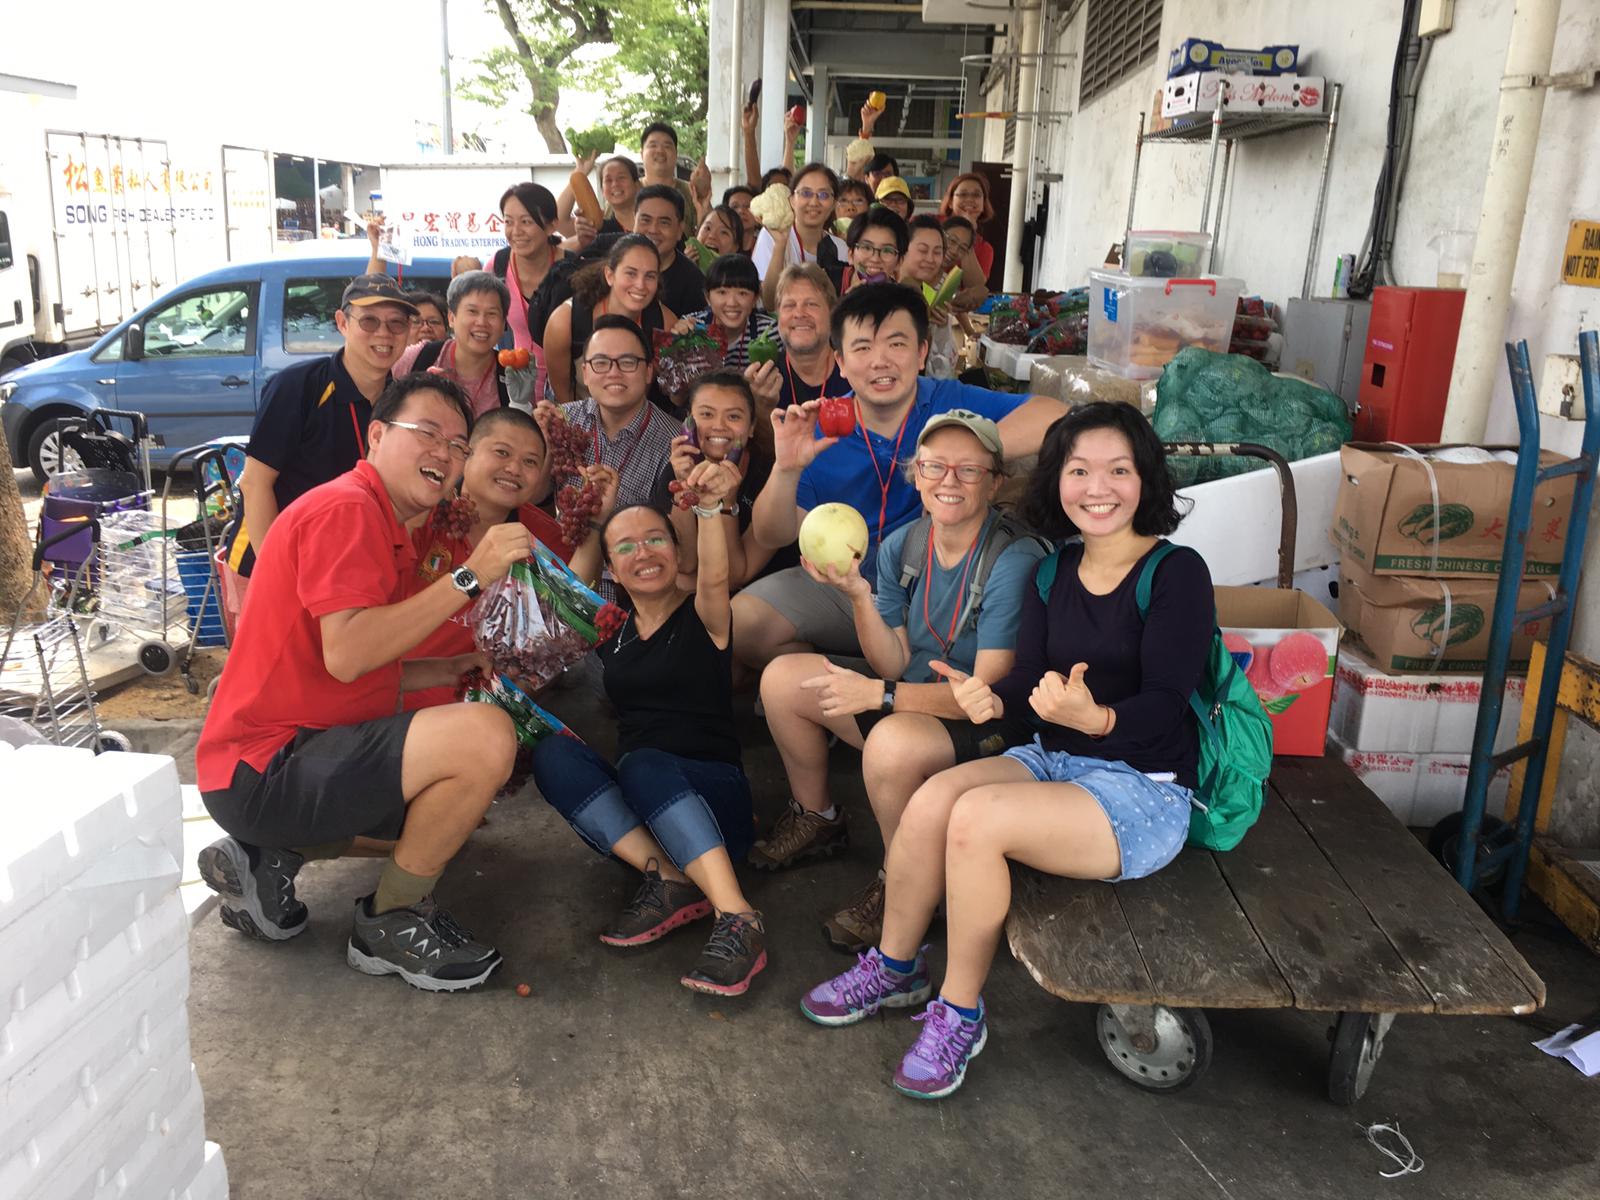
It was a bustling period for wholesalers even on a Thursday morning.A typical scene of what happens when a wholesaler sorts out their goods.We saved several tonnes of fruits and veggies in a mere 2 hours. We were frankly shocked by the amount of food wastage in the food supply chain. If these were initially fated to be in the bins in just 2 hours, imagine the amount of perfectly edible food thrown away everyday. That’ll be as much as Mount Faber in just a couple of months!Working hard to load the rescued veggies and fruits into the truck for transport!Group photo to celebrate our very bountiful fruits and veggies rescue!
Science Fiction Movie: USS Callister (Black Mirror Season 4 Episode 1)
The small design decision I noticed in this movie is that the protagonist, Robert Daly, harvested DNA from saliva on a lollipop to steal Walton’s son’s DNA and create a clone for his virtual reality game. This cleverly illustrates the potential of saliva to replace blood (which is the golden standard) for DNA analysis in the near future, unbeknown to many. In fact, collecting DNA from saliva is less expensive than DNA from blood, and saliva yields high quantity high-molecular weight DNA. (Read more facts about pros and cons of using saliva for DNA analysis here: http://blog.dnagenotek.com/8-facts-most-people-dont-know-about-dna-from-saliva)
Technological development Wearable thermoelectric generators for human body heat harvesting. Researchers at North Carolina State University have developed a new design for harvesting body heat and converting it into electricity for use in wearable electronics. The experimental prototypes are lightweight, conform to the shape of the body, and can generate far more electricity than previous lightweight heat harvesting technologies. (read article:https://news.ncsu.edu/2016/09/wearable-teg-heat-harvesting-2016/) (read research paper: https://www-sciencedirect-com.libproxy1.nus.edu.sg/science/article/pii/S0306261916312594)
Storyworld genre Dystopian
Storyworld description A discriminating and divided society where heritage tradition practitioners (traditionalists) are scorned and ridiculed by modernists who think they are too cool for traditions. Exacerbating the issue is a law that ruled all forms of traditional/heritage arts and crafts illegal. As a result, all physical spaces and shops for such practices were seized by the government. Passionate traditionalists who refused to succumb and let their practices die out developed a wearable studio for their own practice. They continued to hone their crafts in the dark, while being wary of the modernists and heritage breakers (police force that apprehend traditionalists who carry out illegal practices) constantly hot on their heels.
Selected microfiction of the 3
A hot piping traditional Teochew yam mooncake sits in the middle of Yun’s palms, warming her hands as she wrapped her fingers around it. It is December, and the murky water of the underground sewage was still as rock, frozen. However, Yun’s heart was warm. “There is nothing like home and heritage,” Yun muttered under her misty breath, smiling as she gazed earnestly at the traditional pastry that she is so proud of.
“Damned traditionalists!” A hostile voice pierced through the silence and broke Yun’s gaze of fondness. Without hesitation, Yun packed up her equipments that she used to make the mooncake in mere seconds. When she developed her own wearable studio for making traditional Teochew yam mooncakes, she has already prepared for the worst scenario, and made sure that the design allowed her to keep the items quickly and efficiently while escaping from modernists and heritage breakers. Yun ran in the opposite direction of where the voice came from. However, she was soon surrounded by a team of modernists who left her with no escape route in the dark.
“Stop!” Yun cried to no avail as the modernists seized her wearable tools while pinning her to the ground. One of them took her glove with thermoelectric generators, attached the sensors that harvest human body heat rapidly to himself, and started burning her equipments while laughing menacingly. Yun can only watch helplessly amidst the tears forming in her eyes. “You are next, vermin.”
Complete revision (background information)
Storyworld genre Utopian
Storyworld description In an idealistic world where weaponry and militarism are obselete, when conflict arises, people settle their differences through a battle of traditional heritage pastry making. The one who is better at the craft wins, and the other accepts defeat without argument.
As a result of such conflict resolution methods, traditional heritage pastry making became the gentlemen’s arts. The trend of making traditional heritage pastry revived and went rampant. Everyone wants to hone their craft so that they can win during challenges. Seeing an opportunity for consumerism, a capitalist company, The Hare, developed a wearable studio and tools, called GentleHare, for making traditional Teochew yam mooncake. The wearable studio and tools were an instant hit and sold like hot cakes. People can now battle one another on the go in the streets to resolve conflicts, instead of being restricted to the kitchen.
Complete revision (microfiction)
“Let’s settle this like gentlemen, and let our craft speak for itself,” said the man in front of me. I nodded my head, straightening my GentleHare fedora and vest, ready for battle.
I was out to buy a birthday present for my Mum. While picking out a pendant in the shop, another man eyed the same piece of jewellery and both of us reached out to it at the same time. Unfortunately, that pendant was the last piece, and I really wanted to buy it for my Mum. I figured that the other guy must have really wanted to purchase it for his loved one as well. Unable to reach a compromise, we knew that there was only one way out – to settle this like gentlemen.
“10 minutes start now.” I proceeded to make a traditional Teochew yam mooncake, confident in my skills imparted to me by my Dad. After all, my Dad is a renowned chef and pastry maker, dubbed as the “Gentleman of all Gentlemen”. He has never lost a single challenge. To add on, I have the latest edition of GentleHare that boasts improved thermoelectric generators for harvesting human heat more efficiently. This allows me to save time off the deep drying process to focus on the other steps. There is no way I would lose. I remembered my Dad’s words like the holy grail, and made sure that every single step of the mooncake making process is flawless. As I stole a glance at the other man, he stumbled over making the spiral shape of the mooncake. At that moment, I knew my victory was secured.
Cover art
For my cover art, I decided to manipulate images instead of illustration, to show that my storyworld is realistic and not too far into the future. Except the pink rabbit ears taken from ebay (https://www.ebay.co.uk/p/Easter-Bunny-Ears-White-Rabbit-Headband-Tail-Fancy-Dress-Hen-Party-Night/1457241127), I own the rights to use all the other pictures as I have an Envato Elements subscription.
Inspired by Kevin Chiam, who designed and invented kitchenware to allow the blind and visually impaired to cook safely (read more here: https://www.channelnewsasia.com/news/cnainsider/designer-folks-kevin-chiam-invents-kitchen-products-blind-10762318), I decided to come up with a scrapbooking template that allows the blind to write and make their own gift cards. This will be based on my experience when I partook in the scrapbooking practice with my friend Elena.
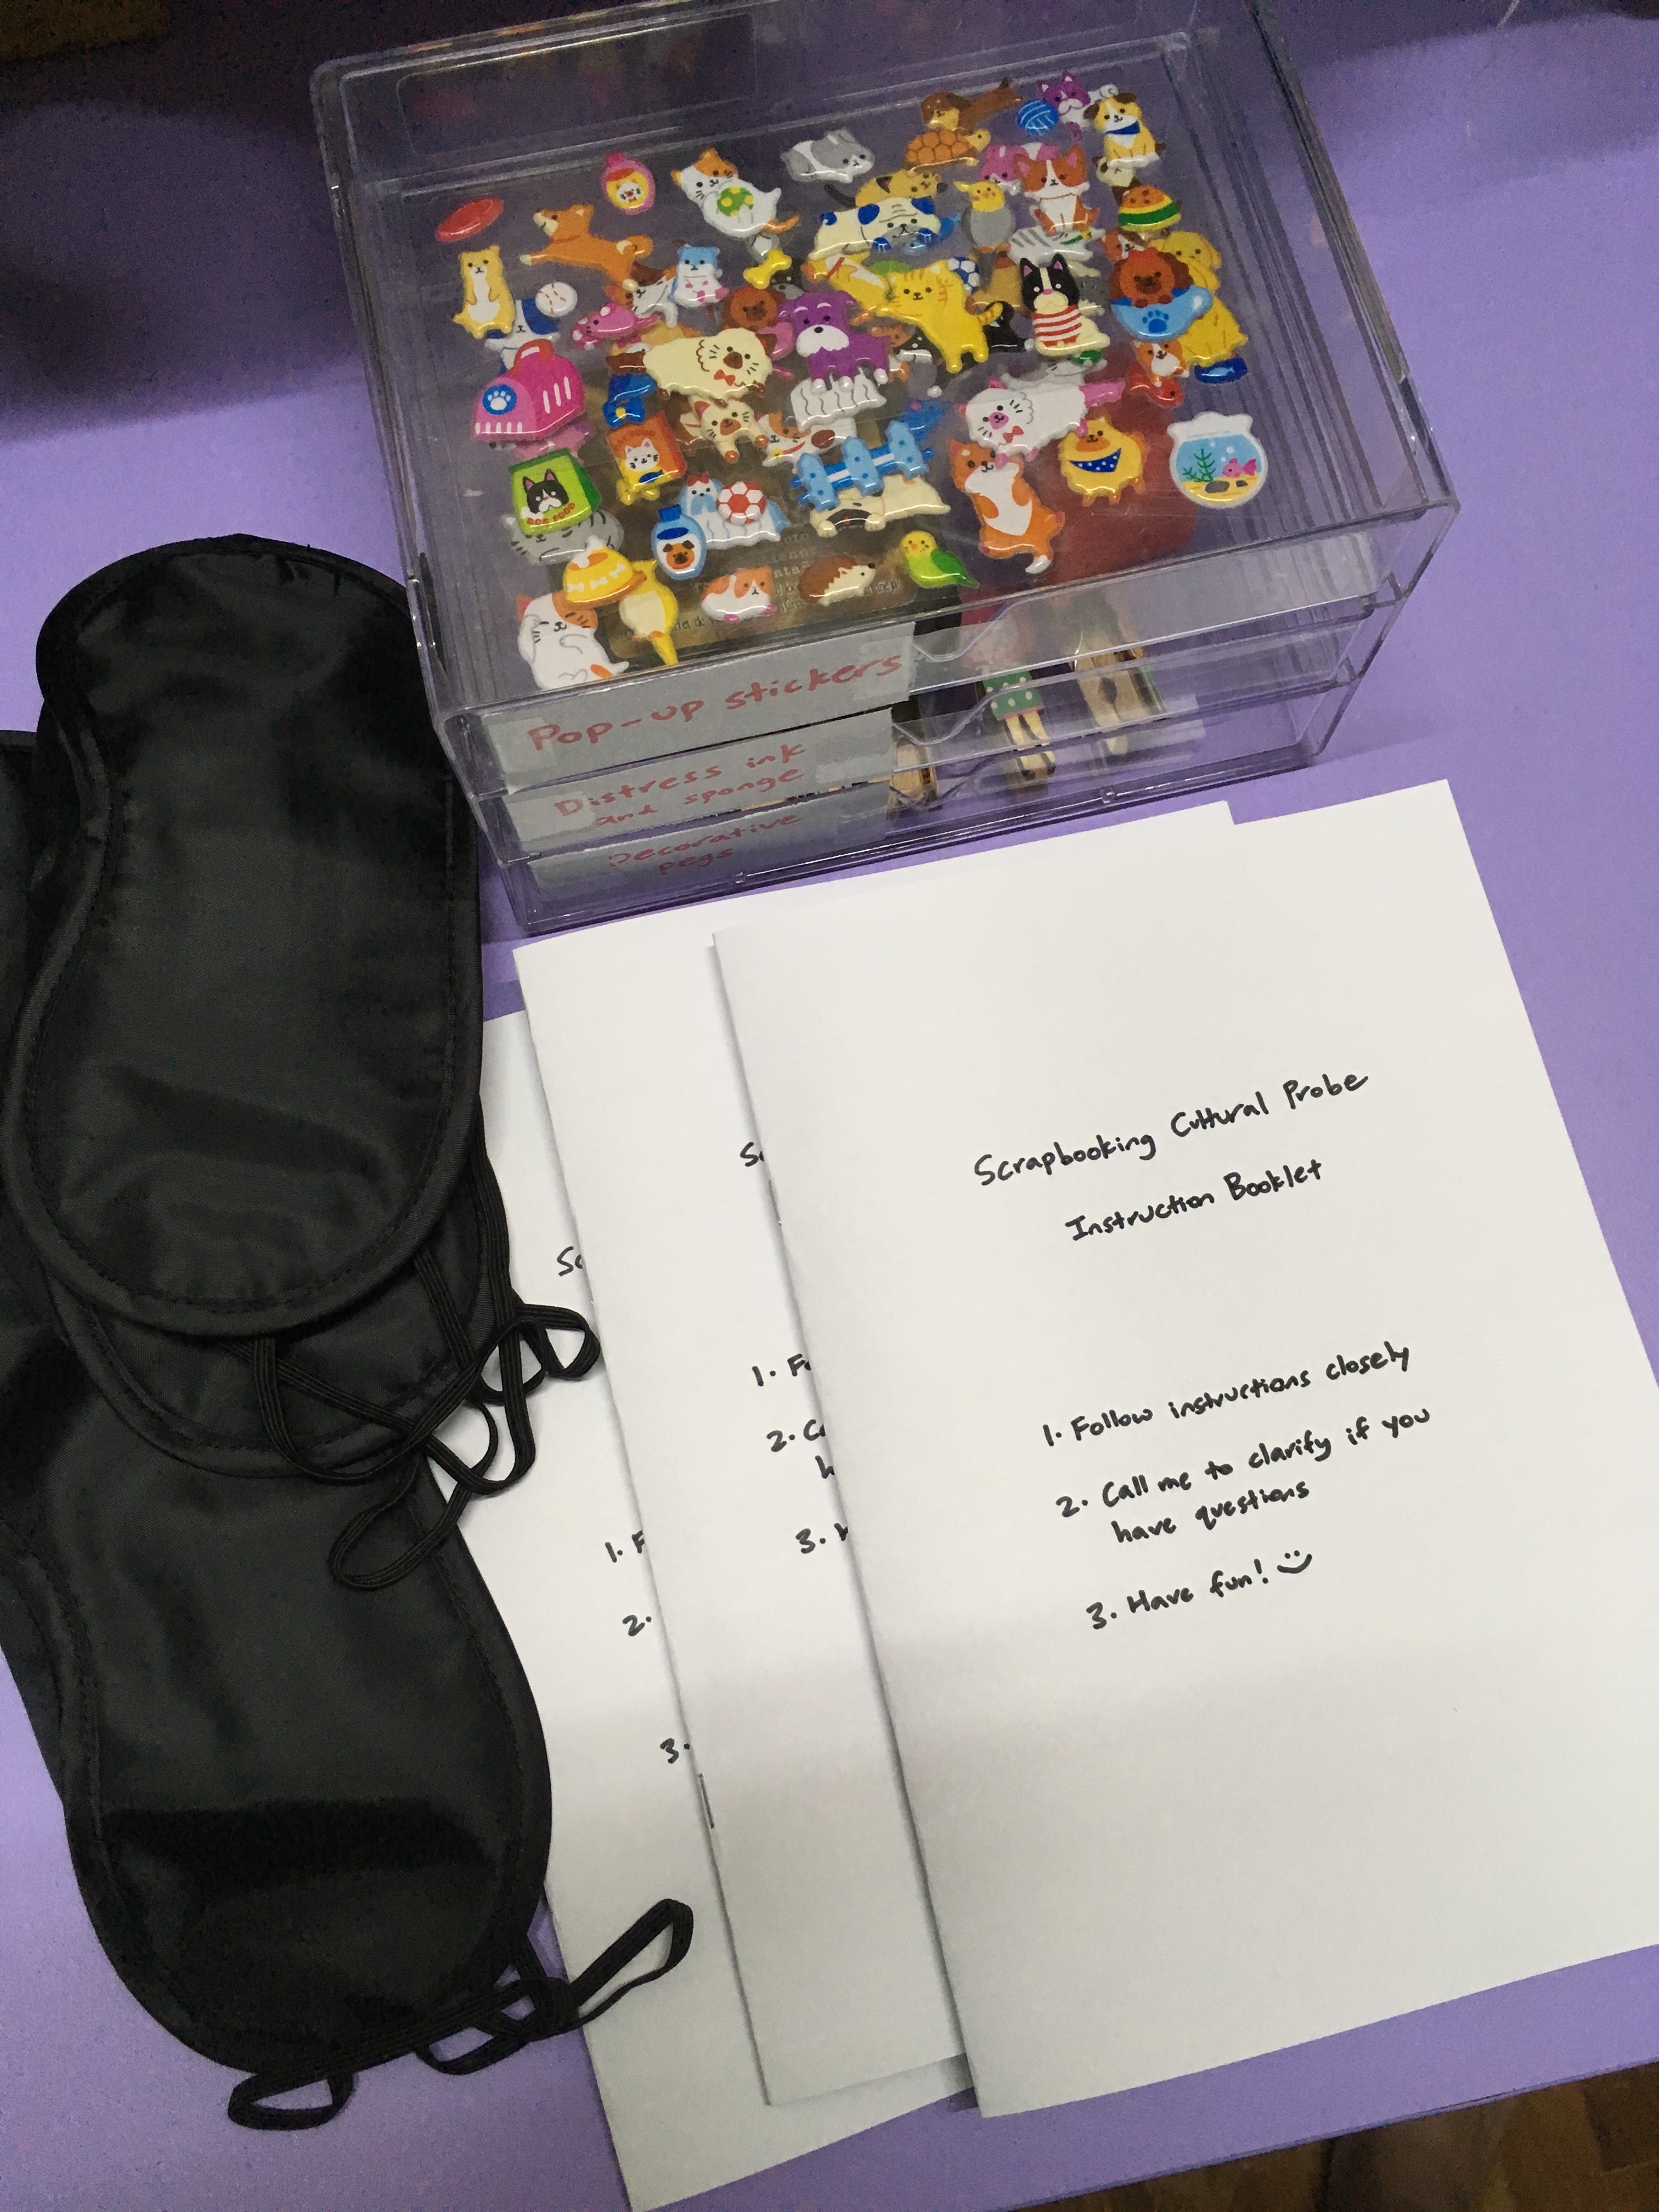
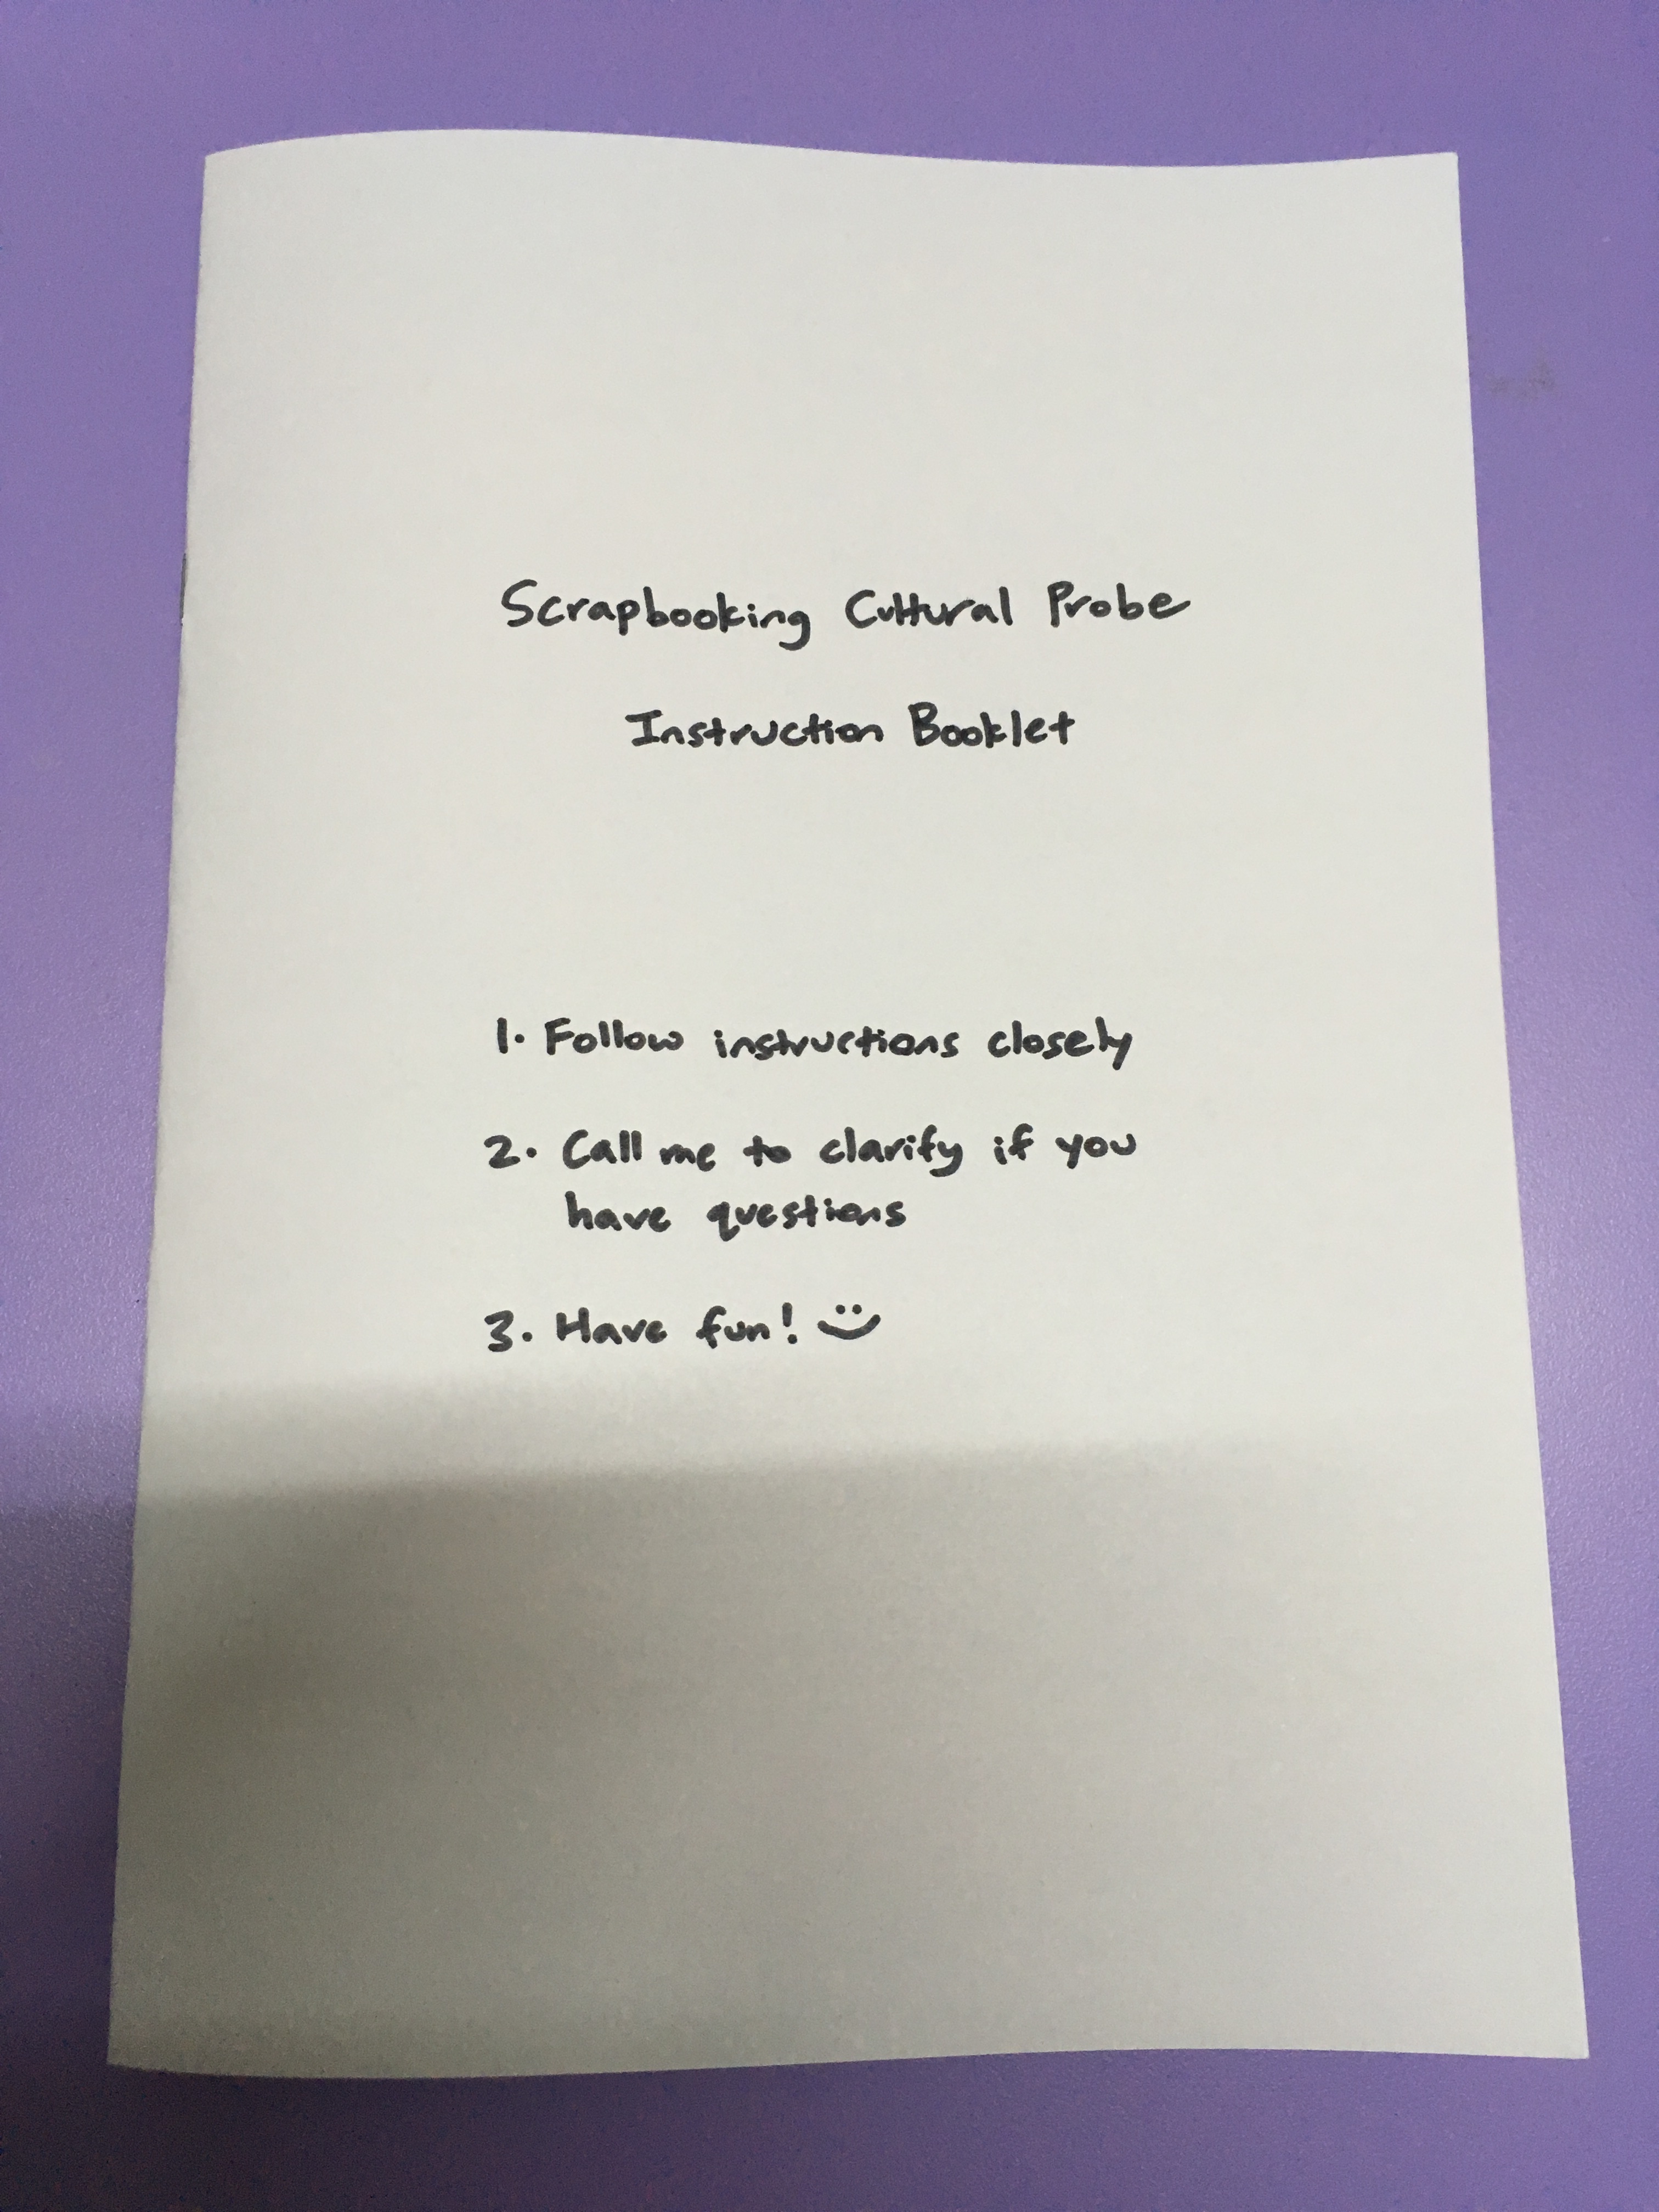
Design probes (kit)
My probe kit includes the following items:
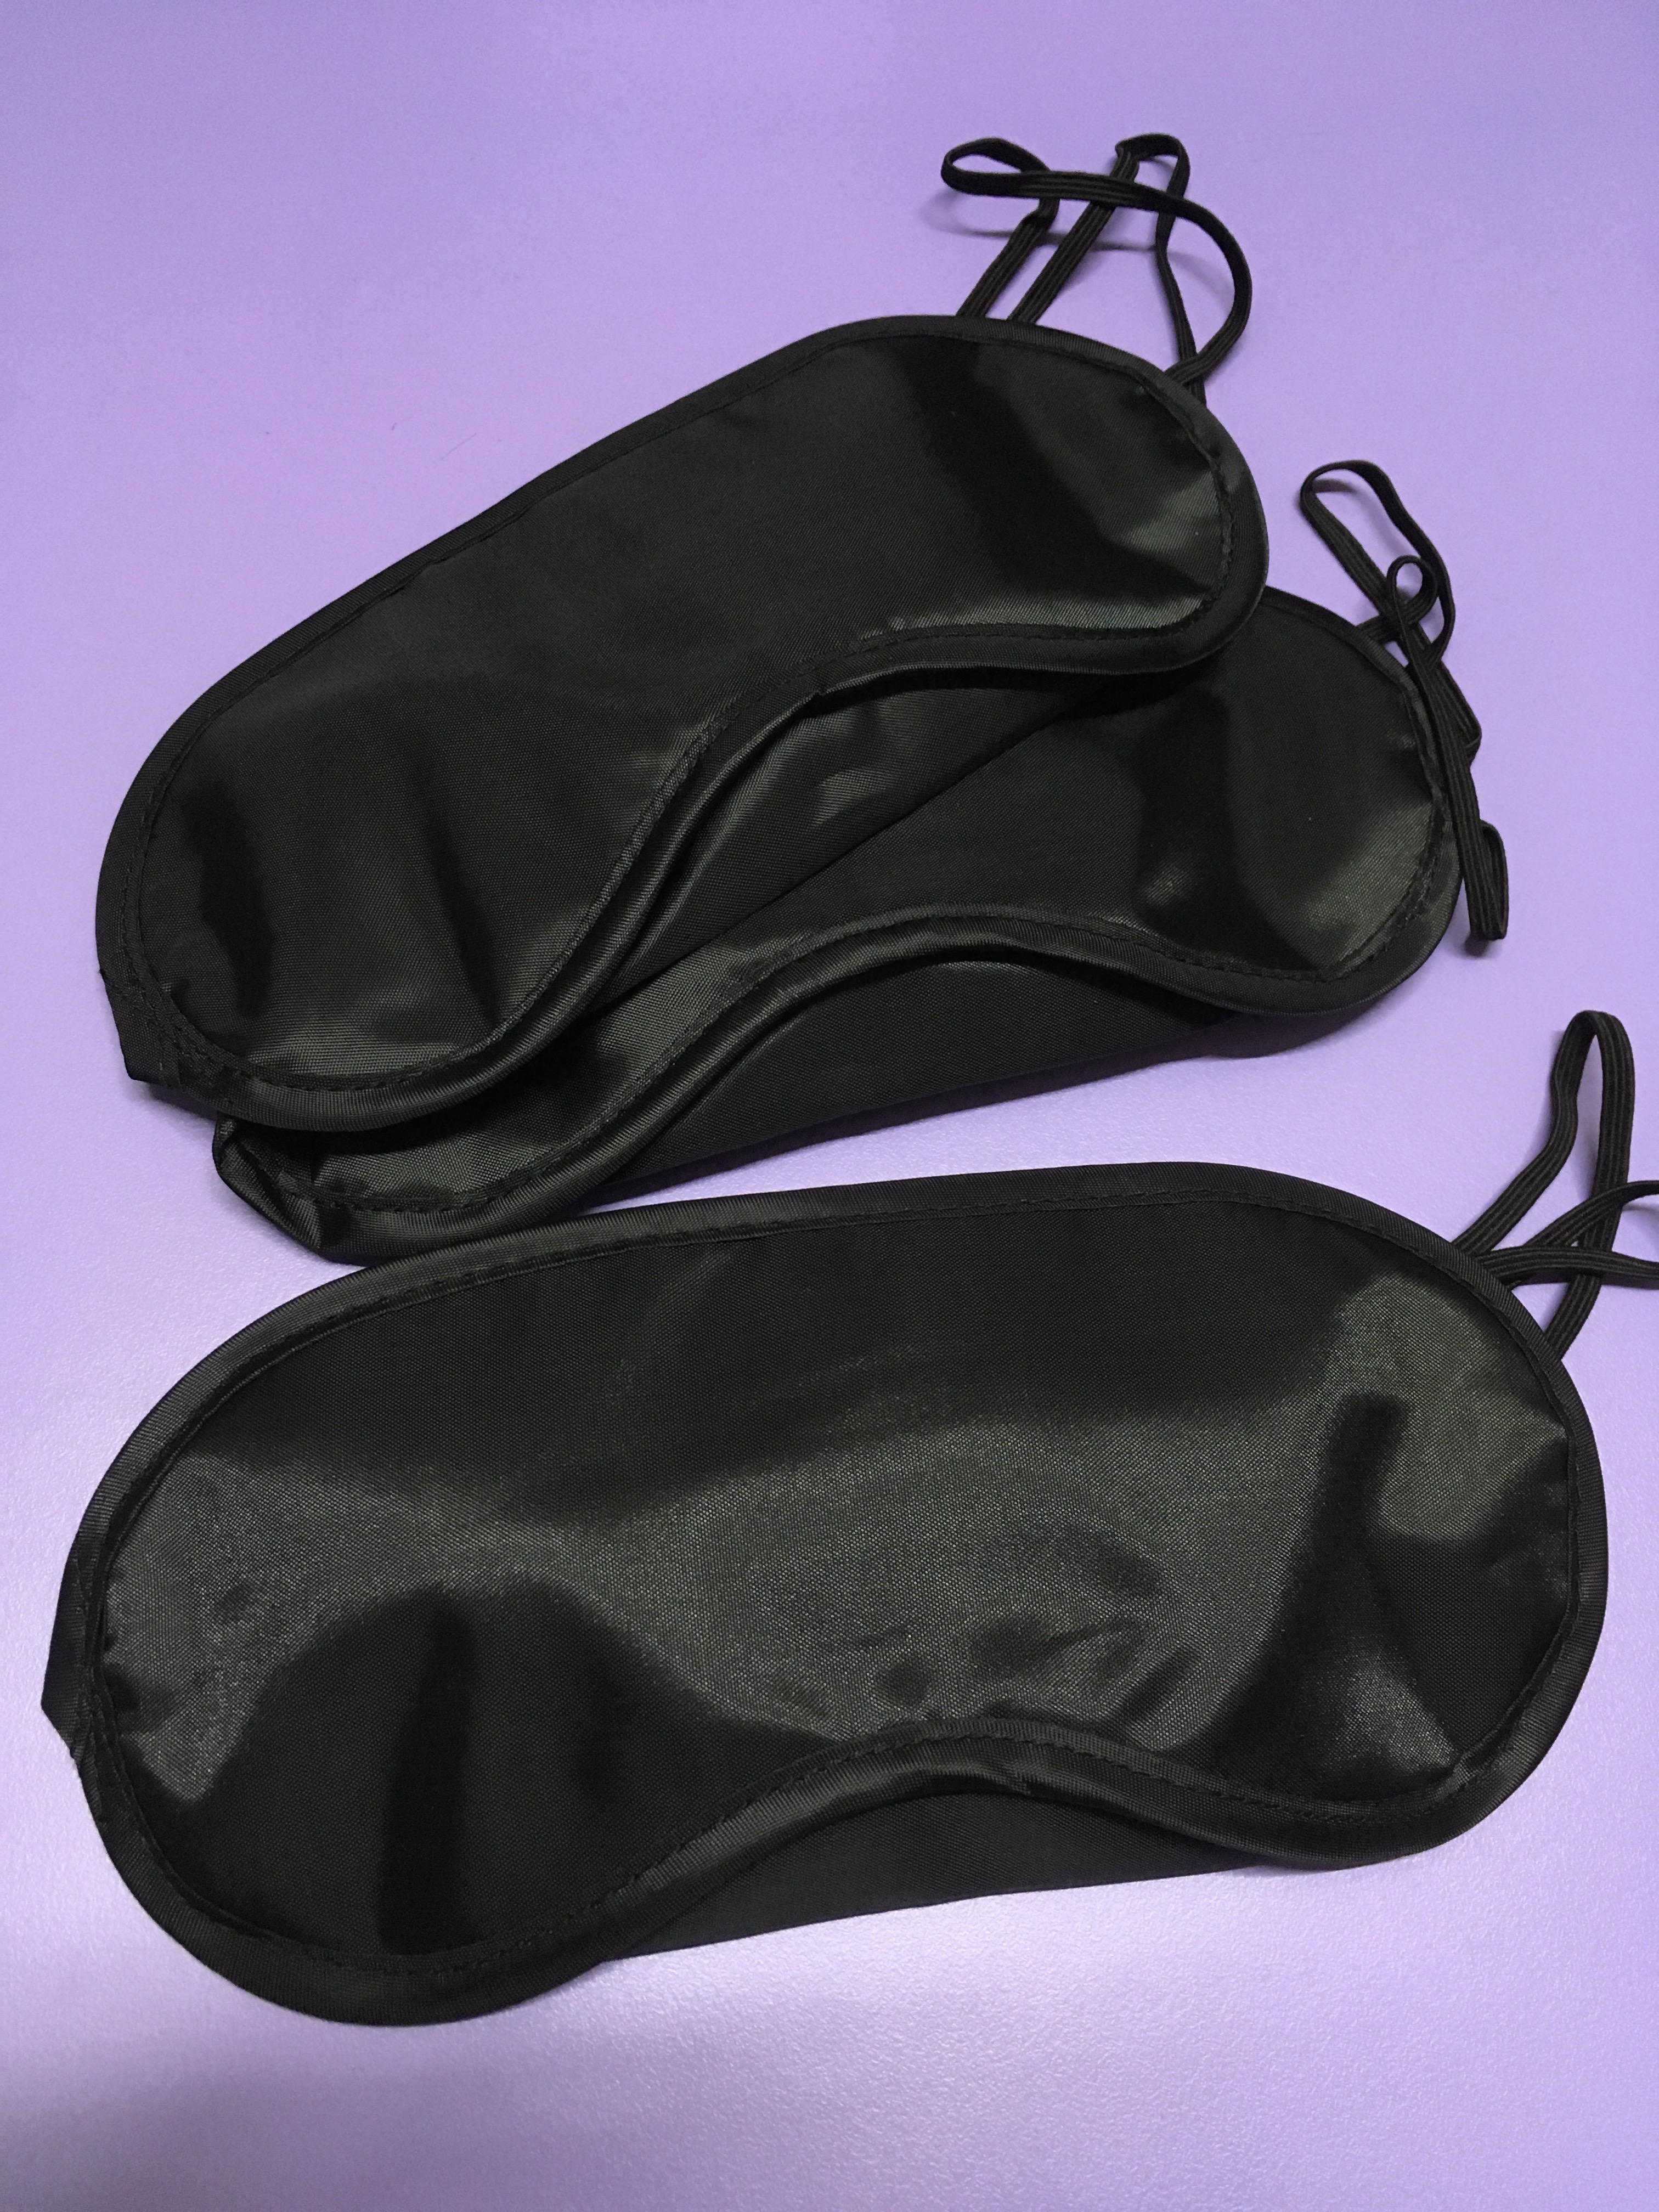
Blindfold (to simulate blindness)
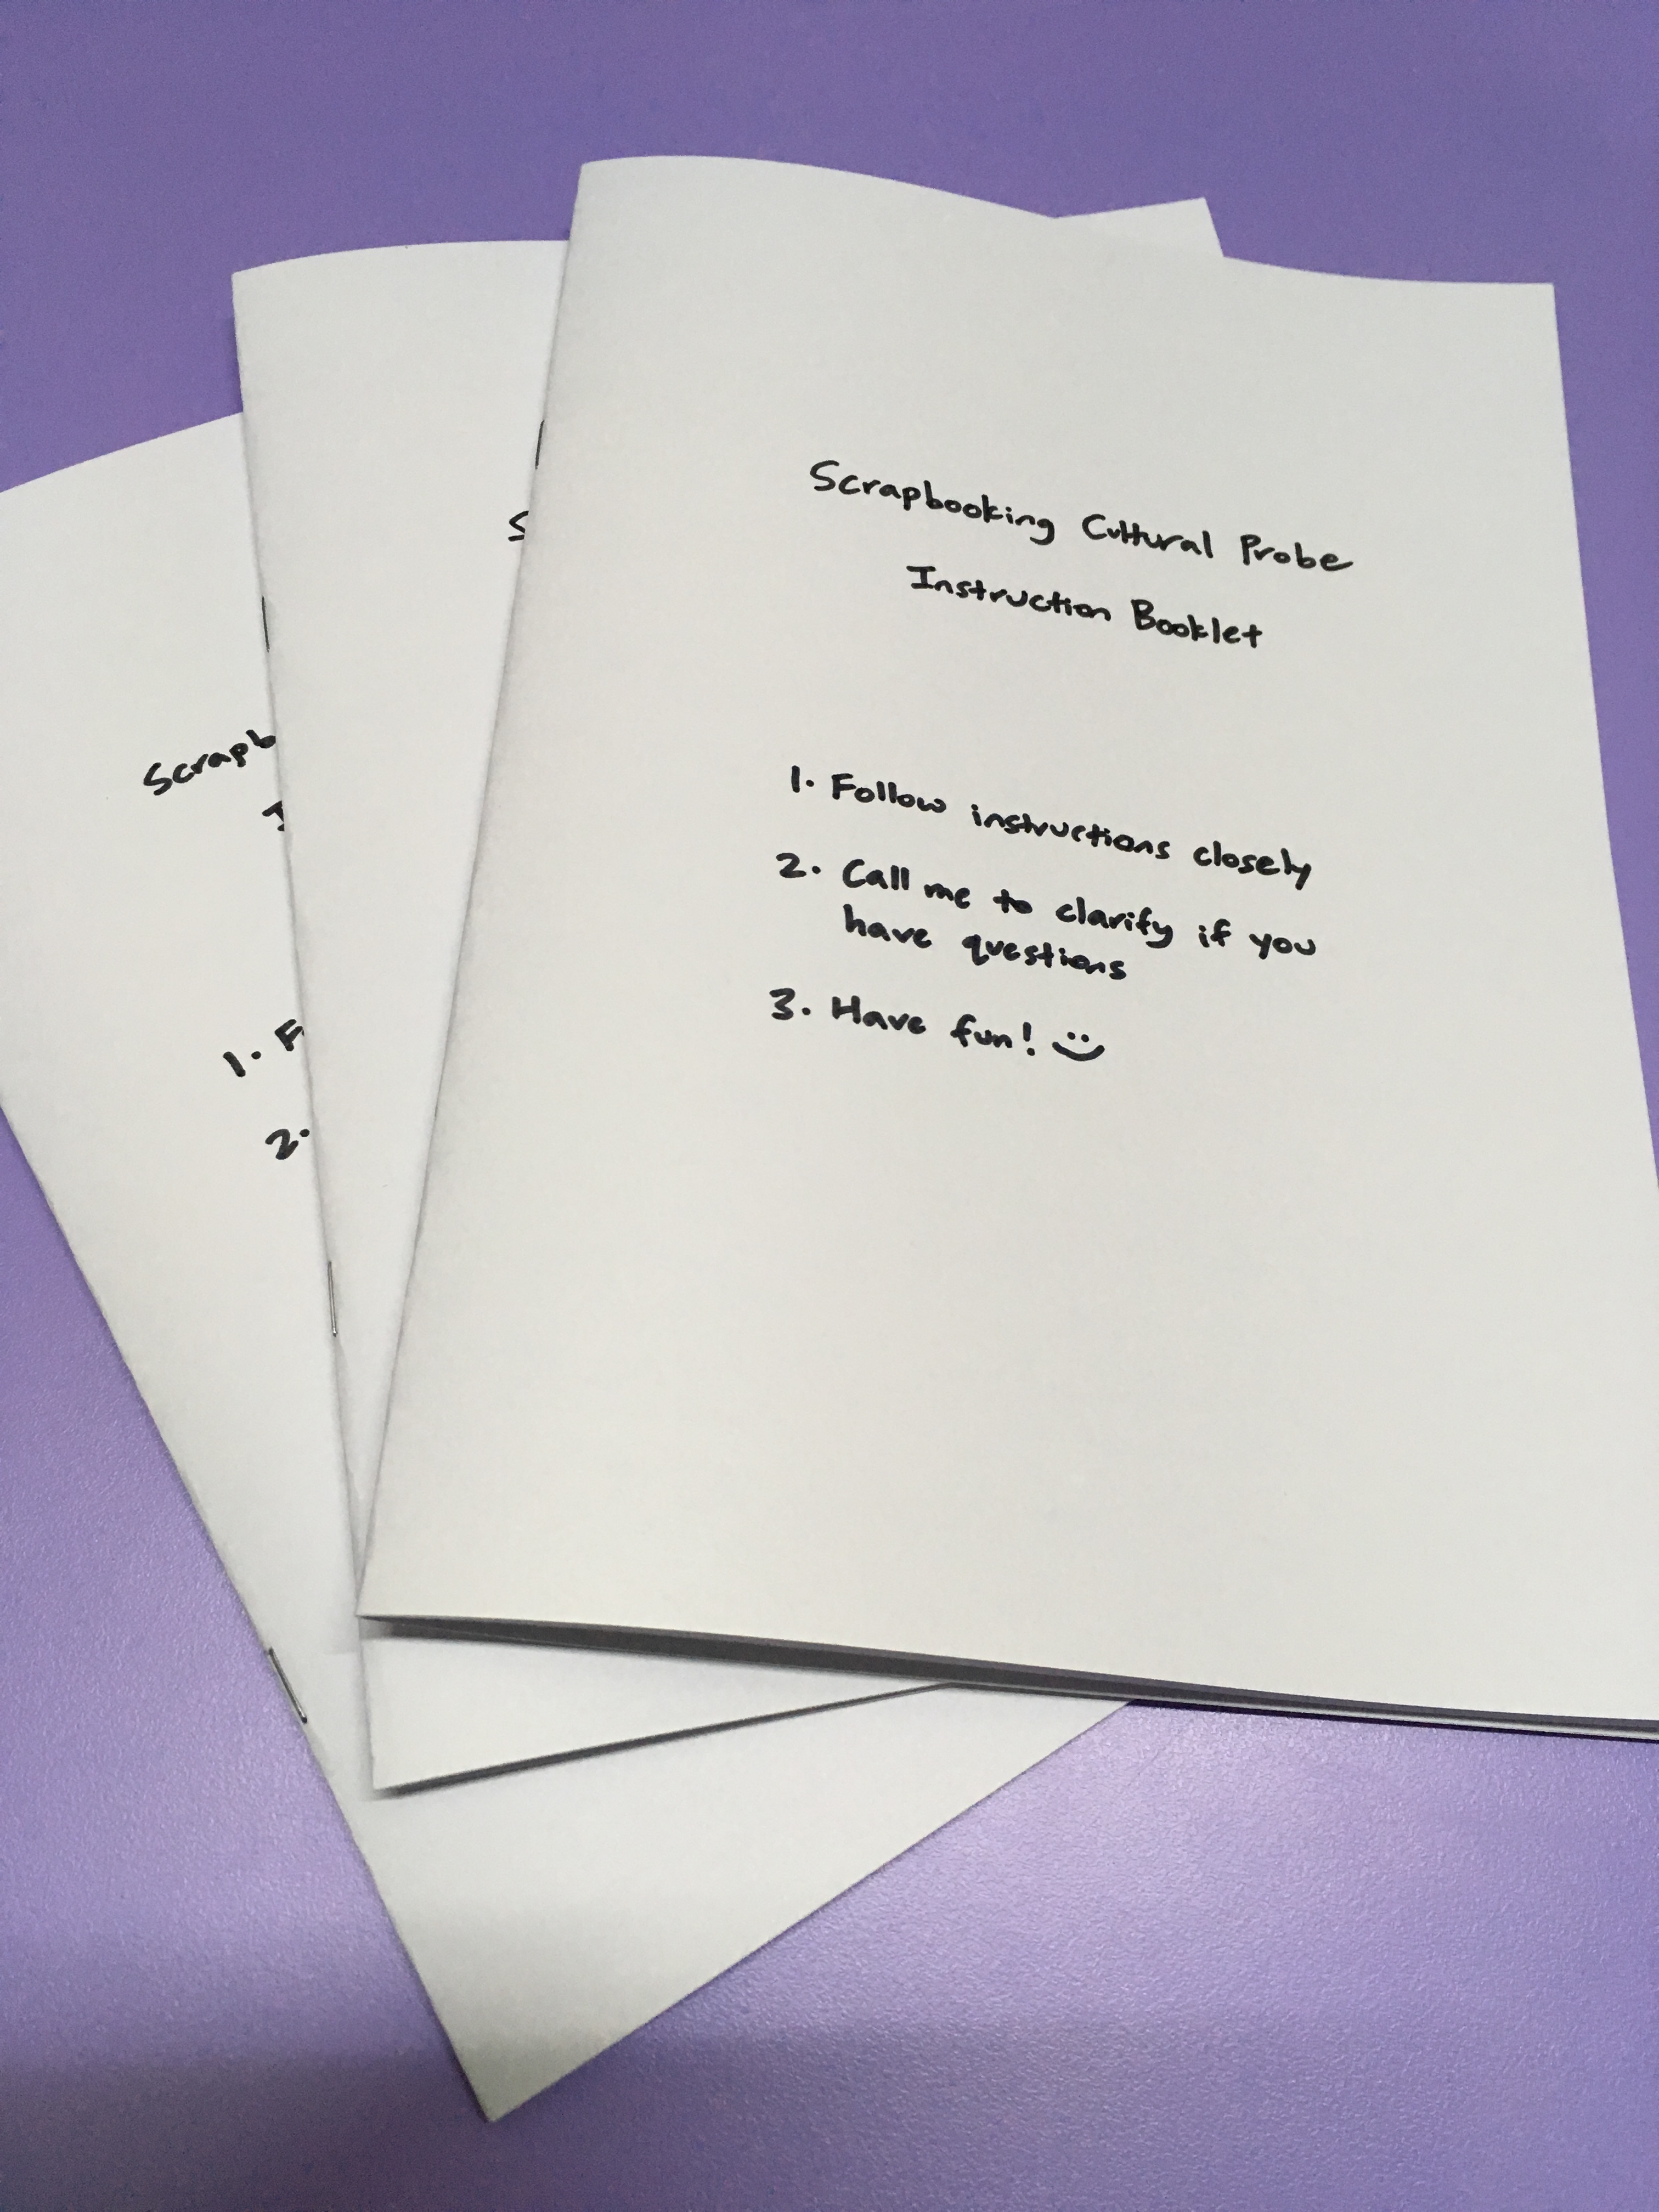
2. Instruction booklet with various tasks
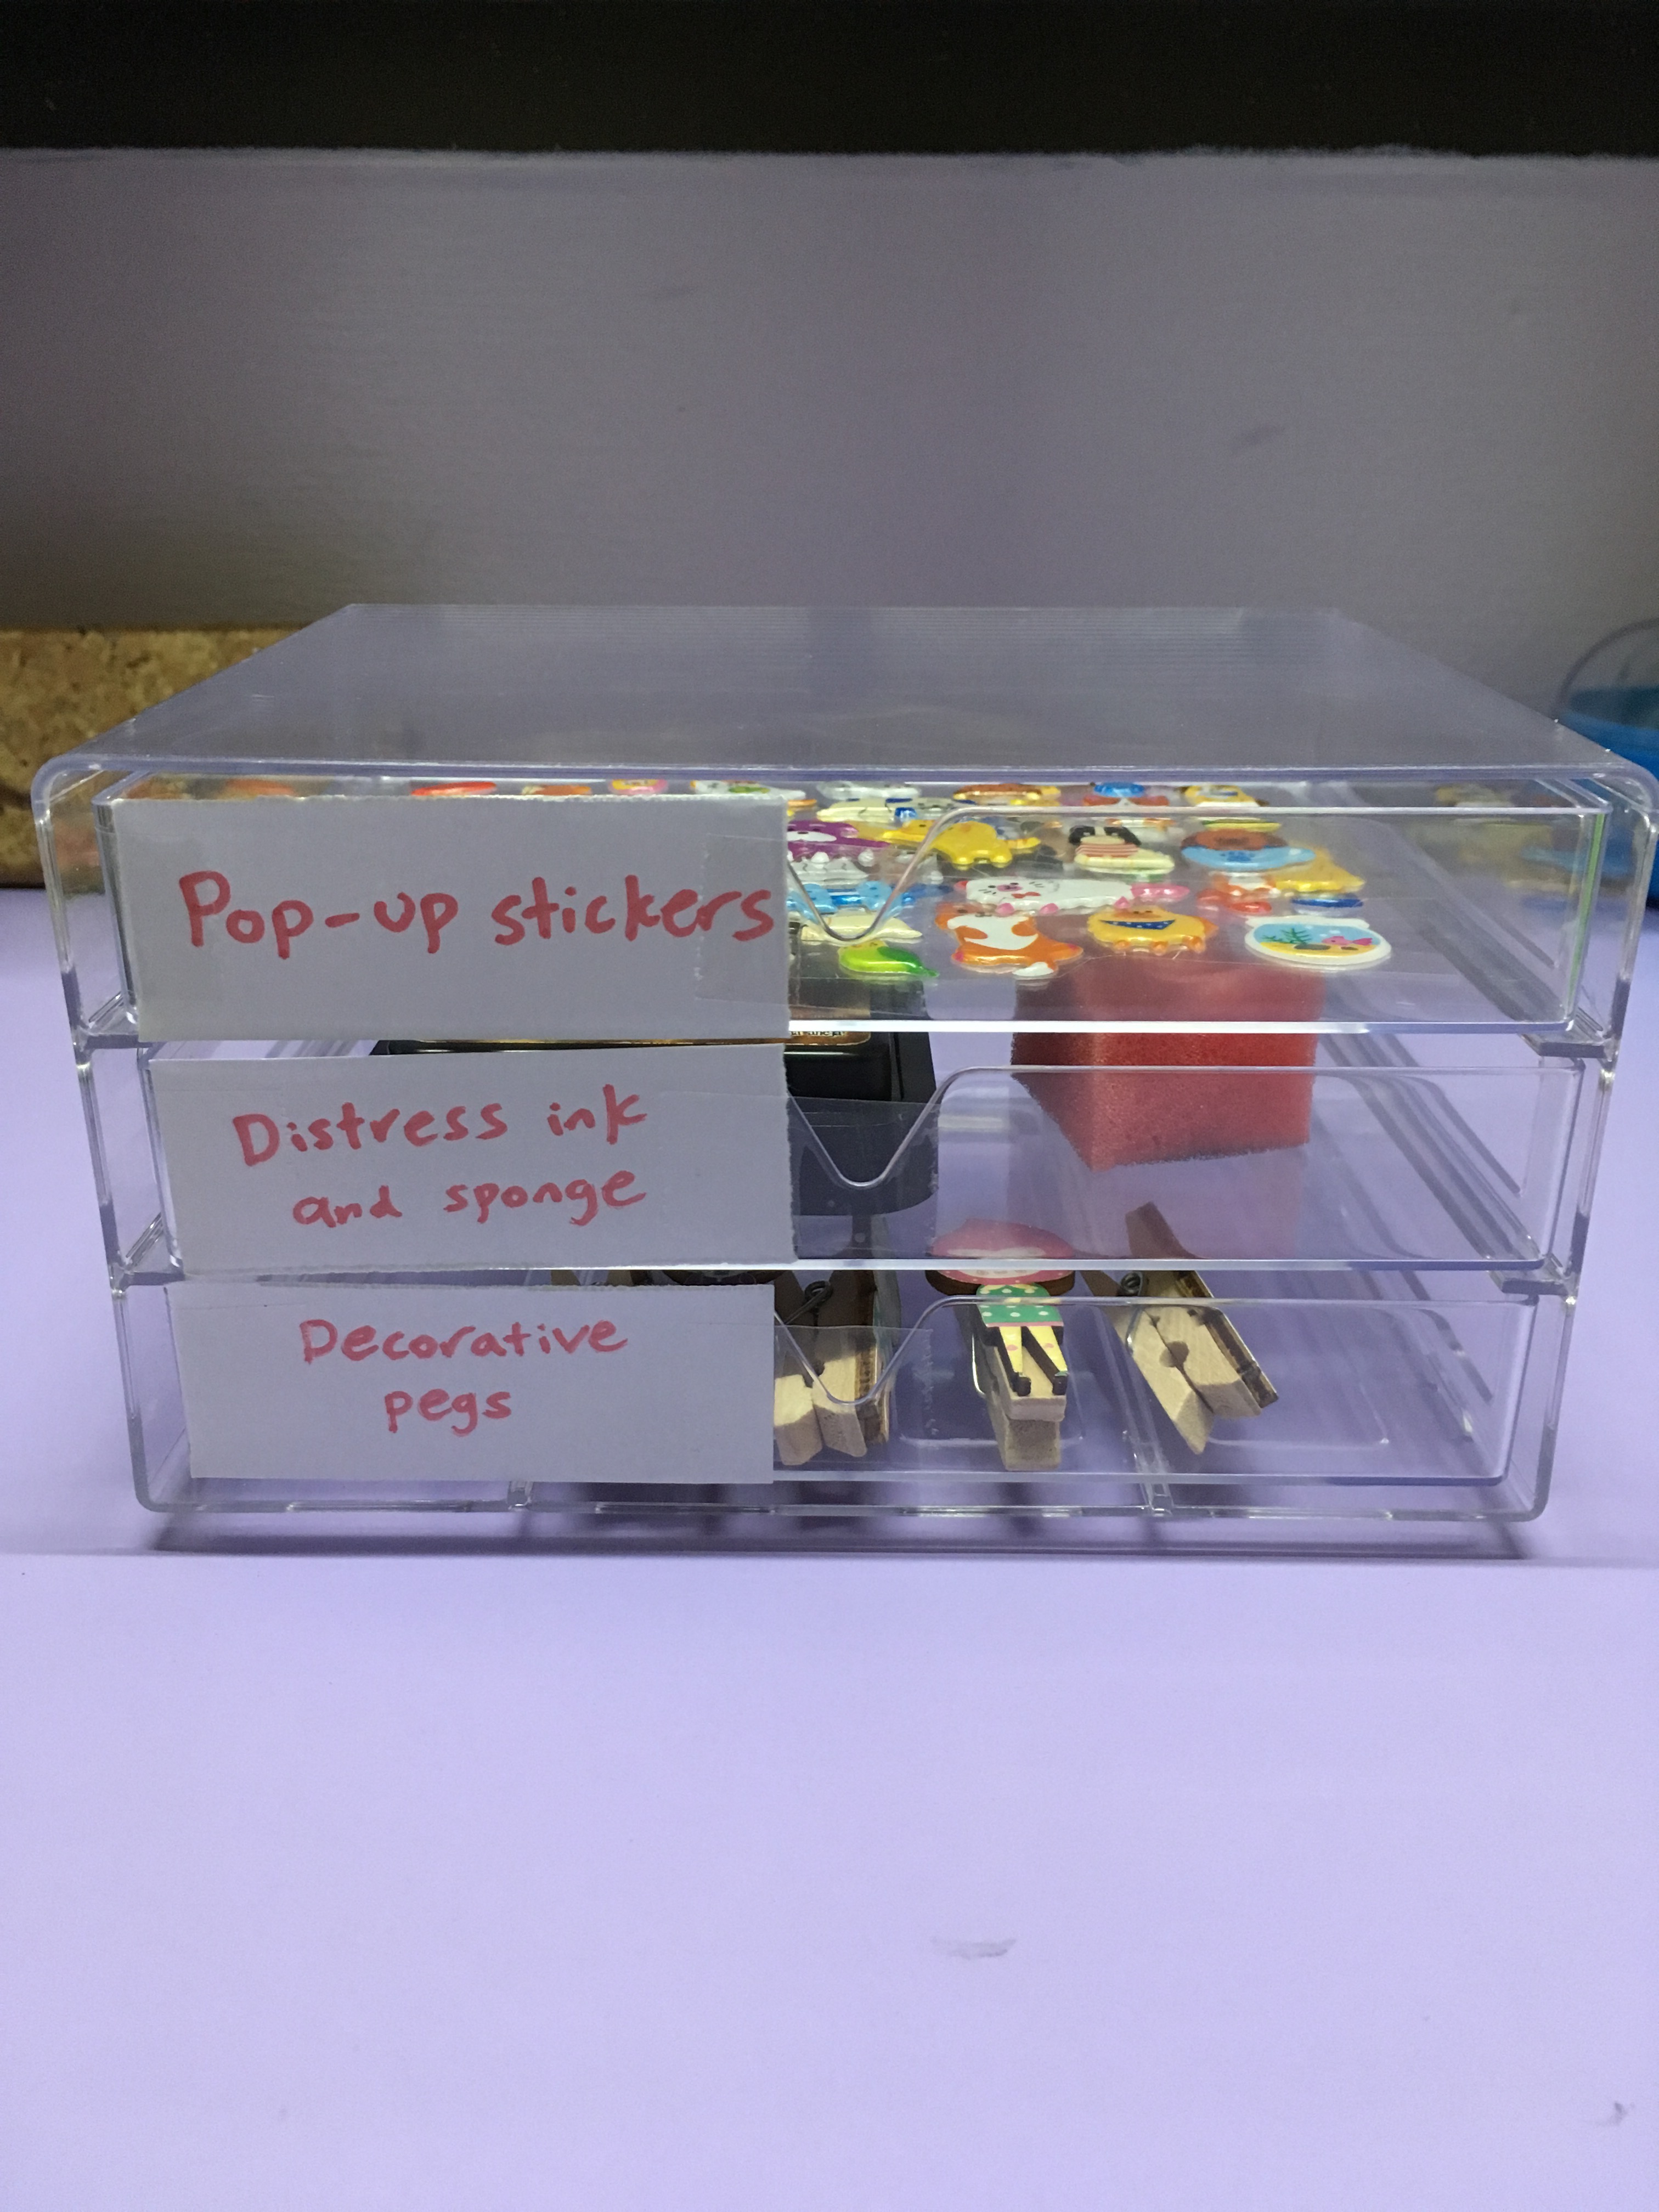
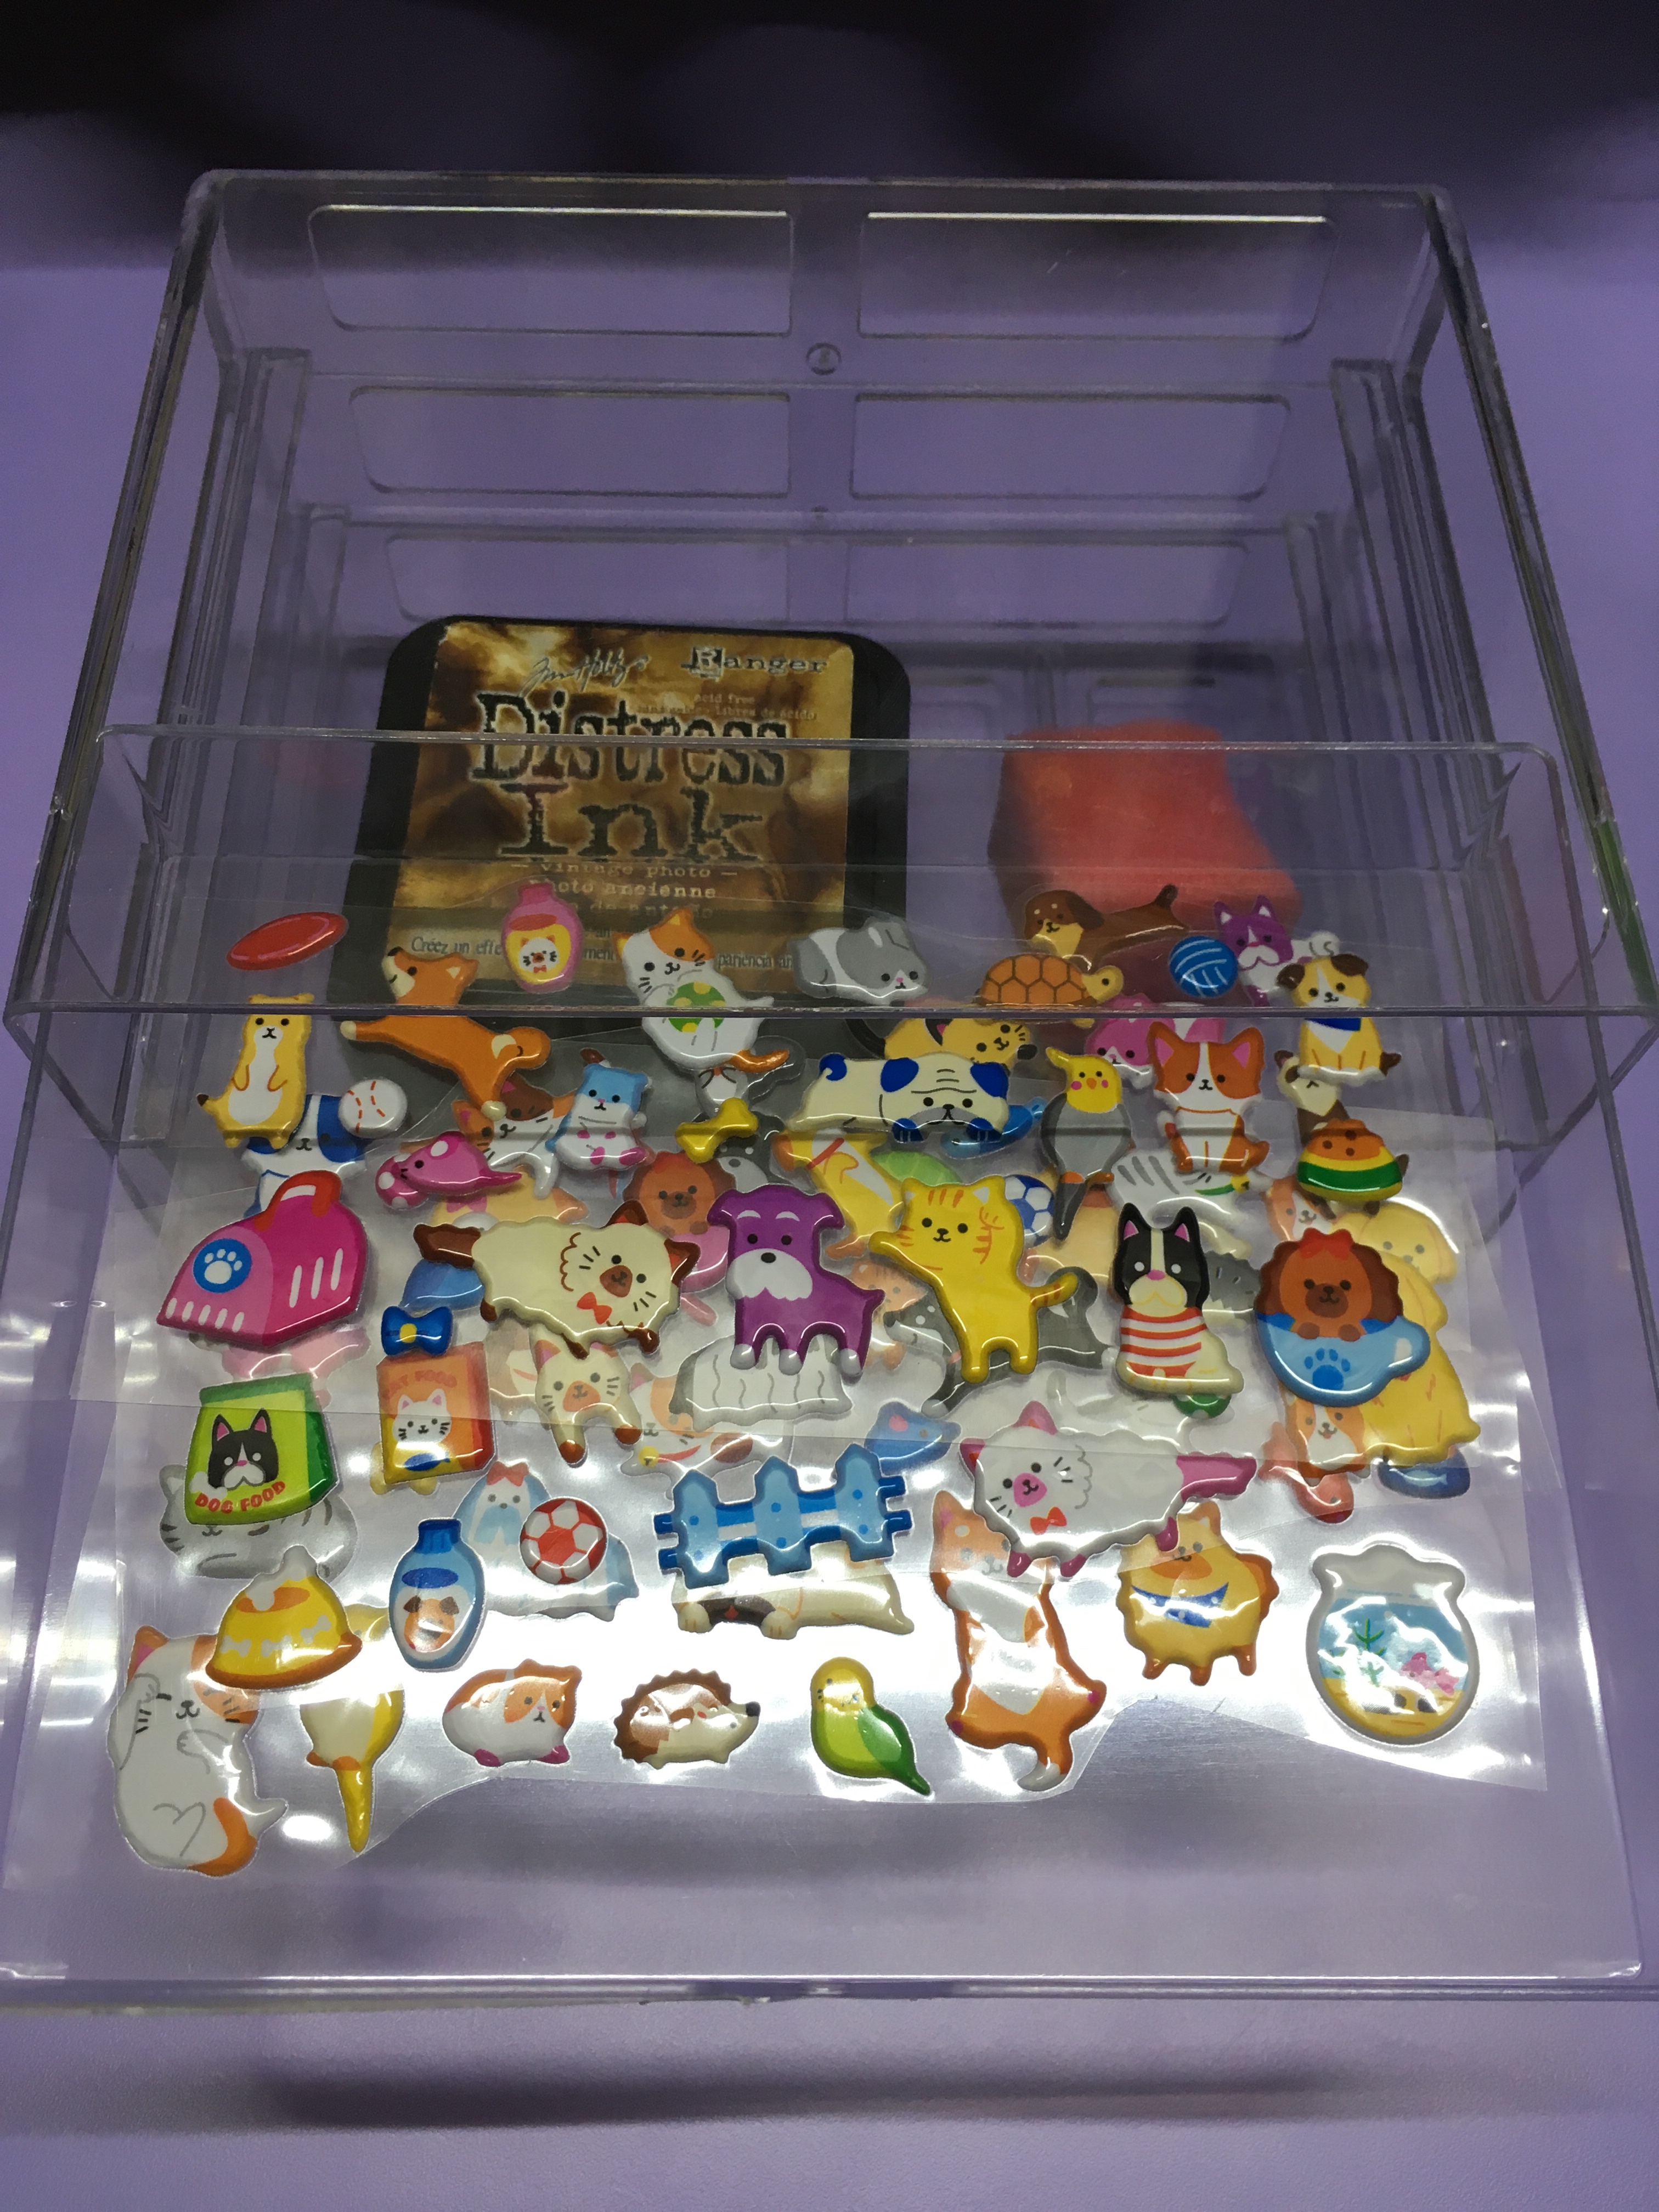
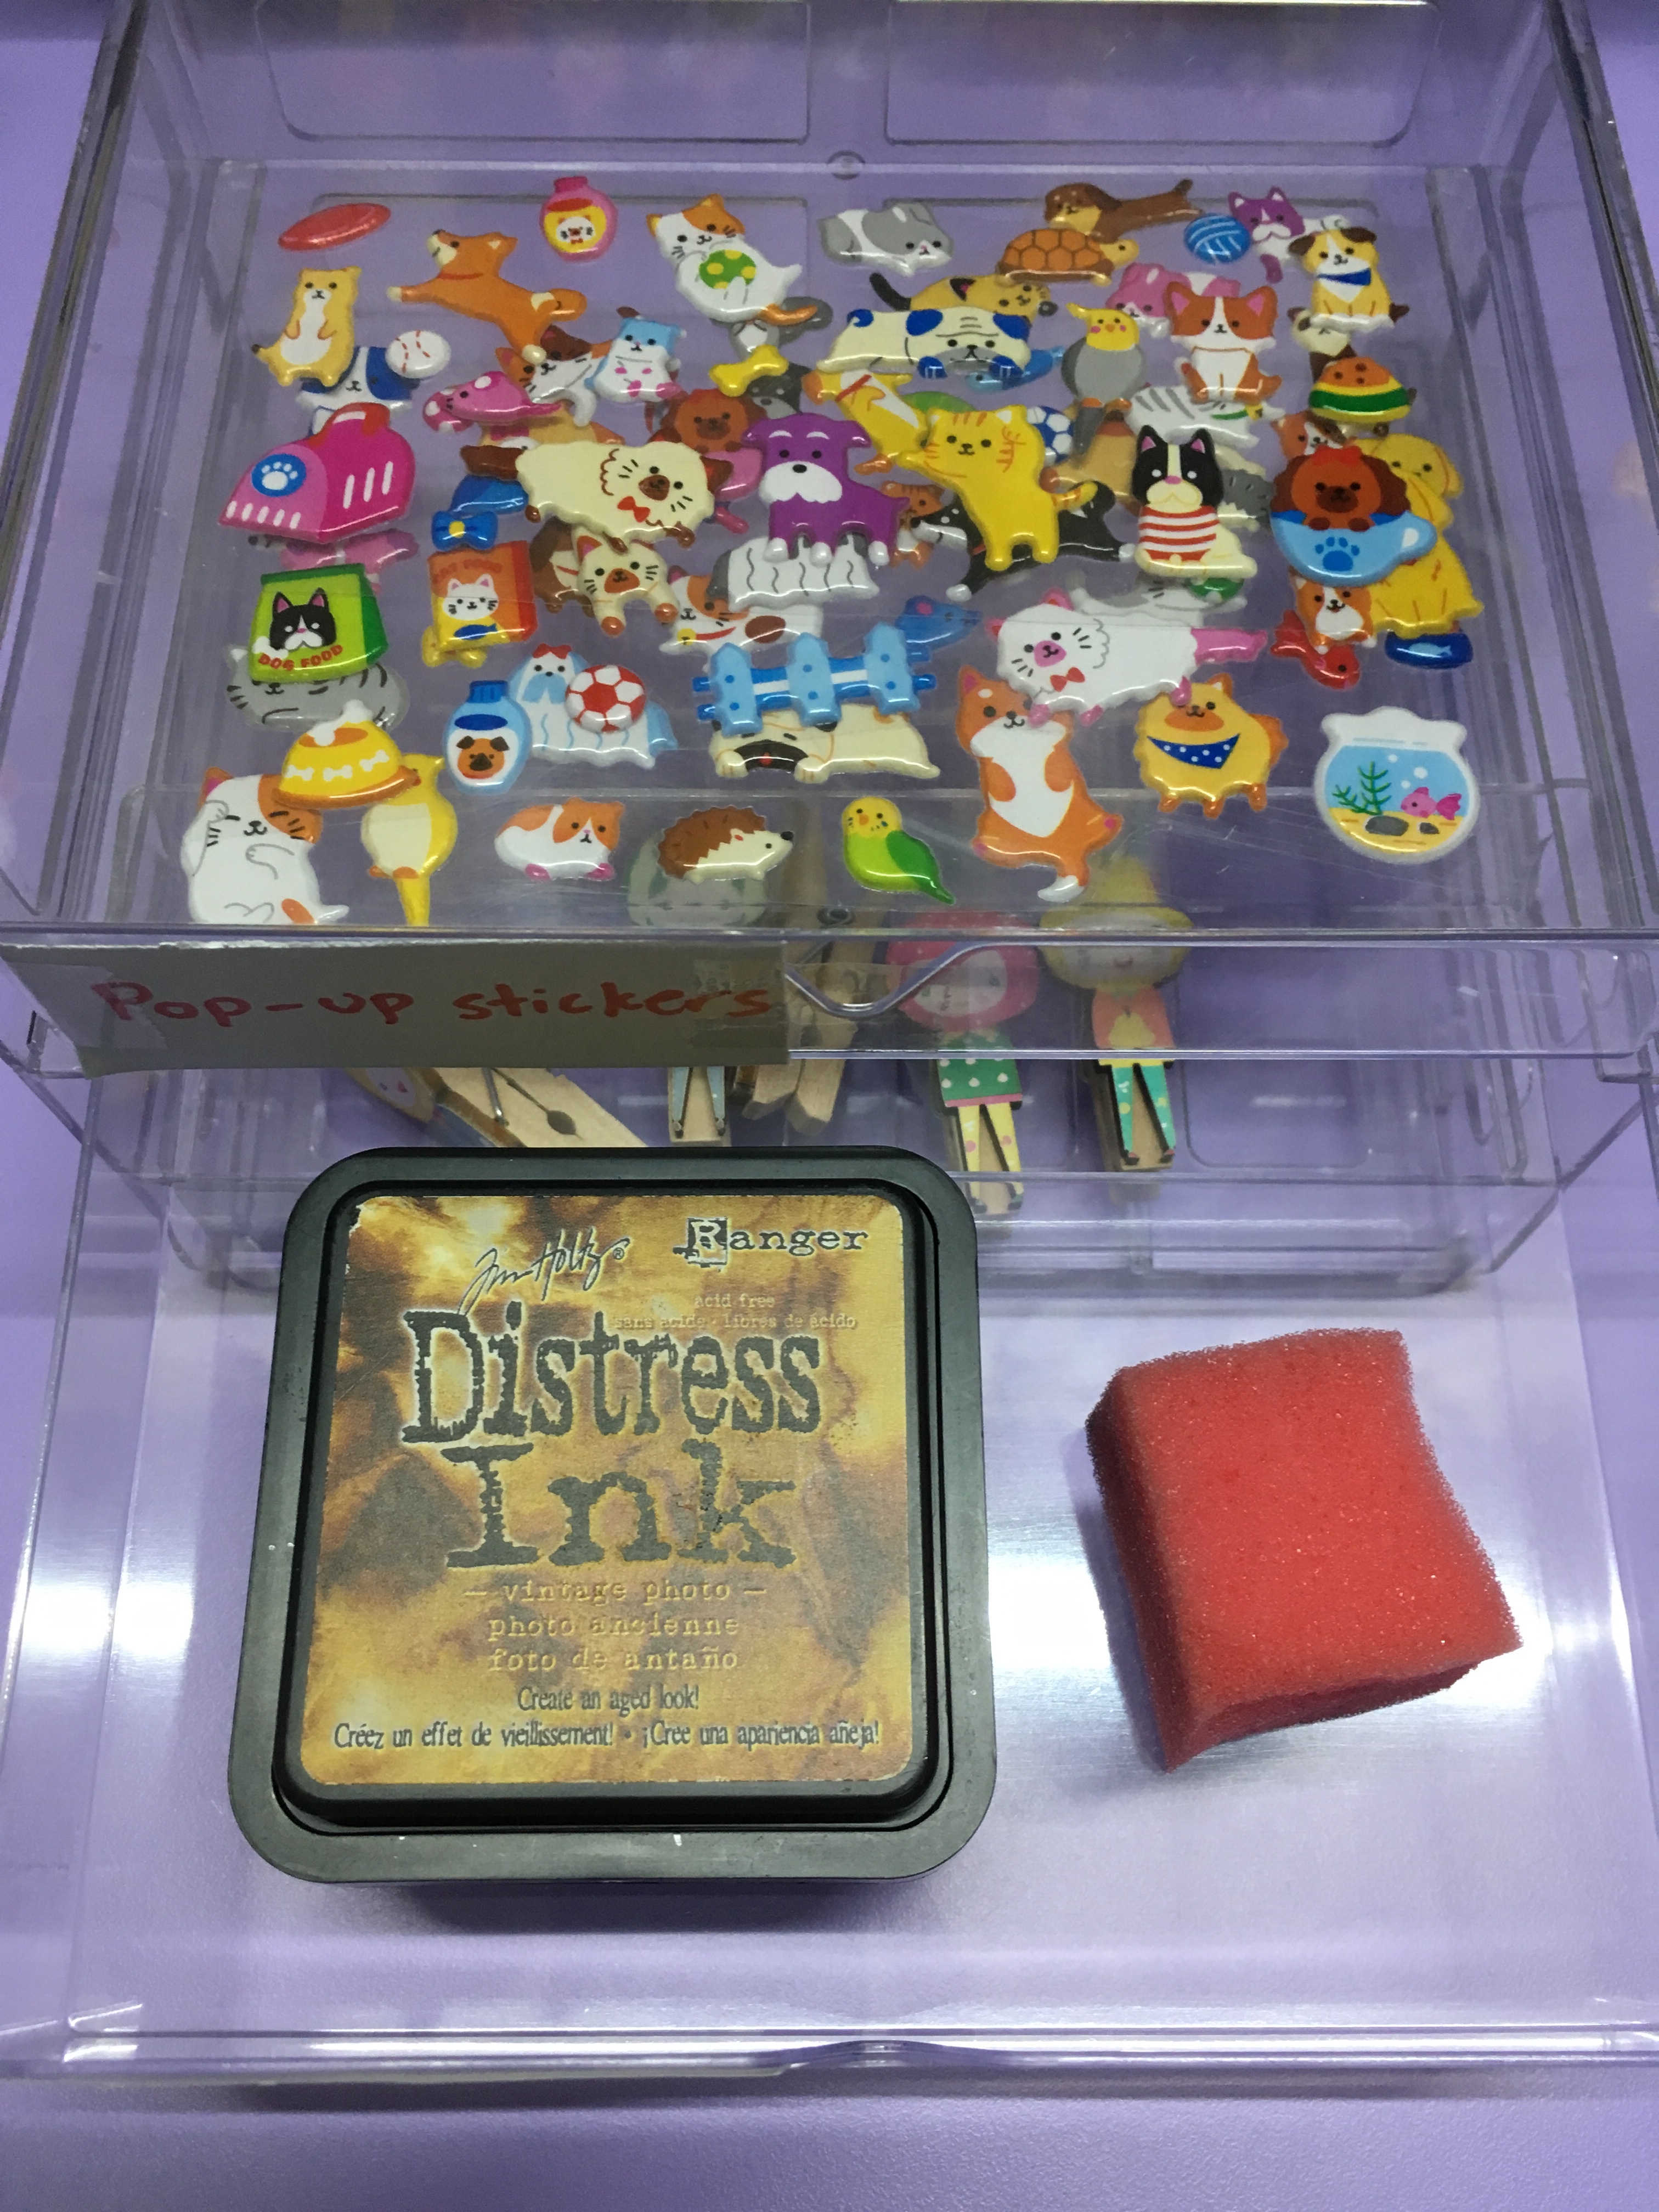
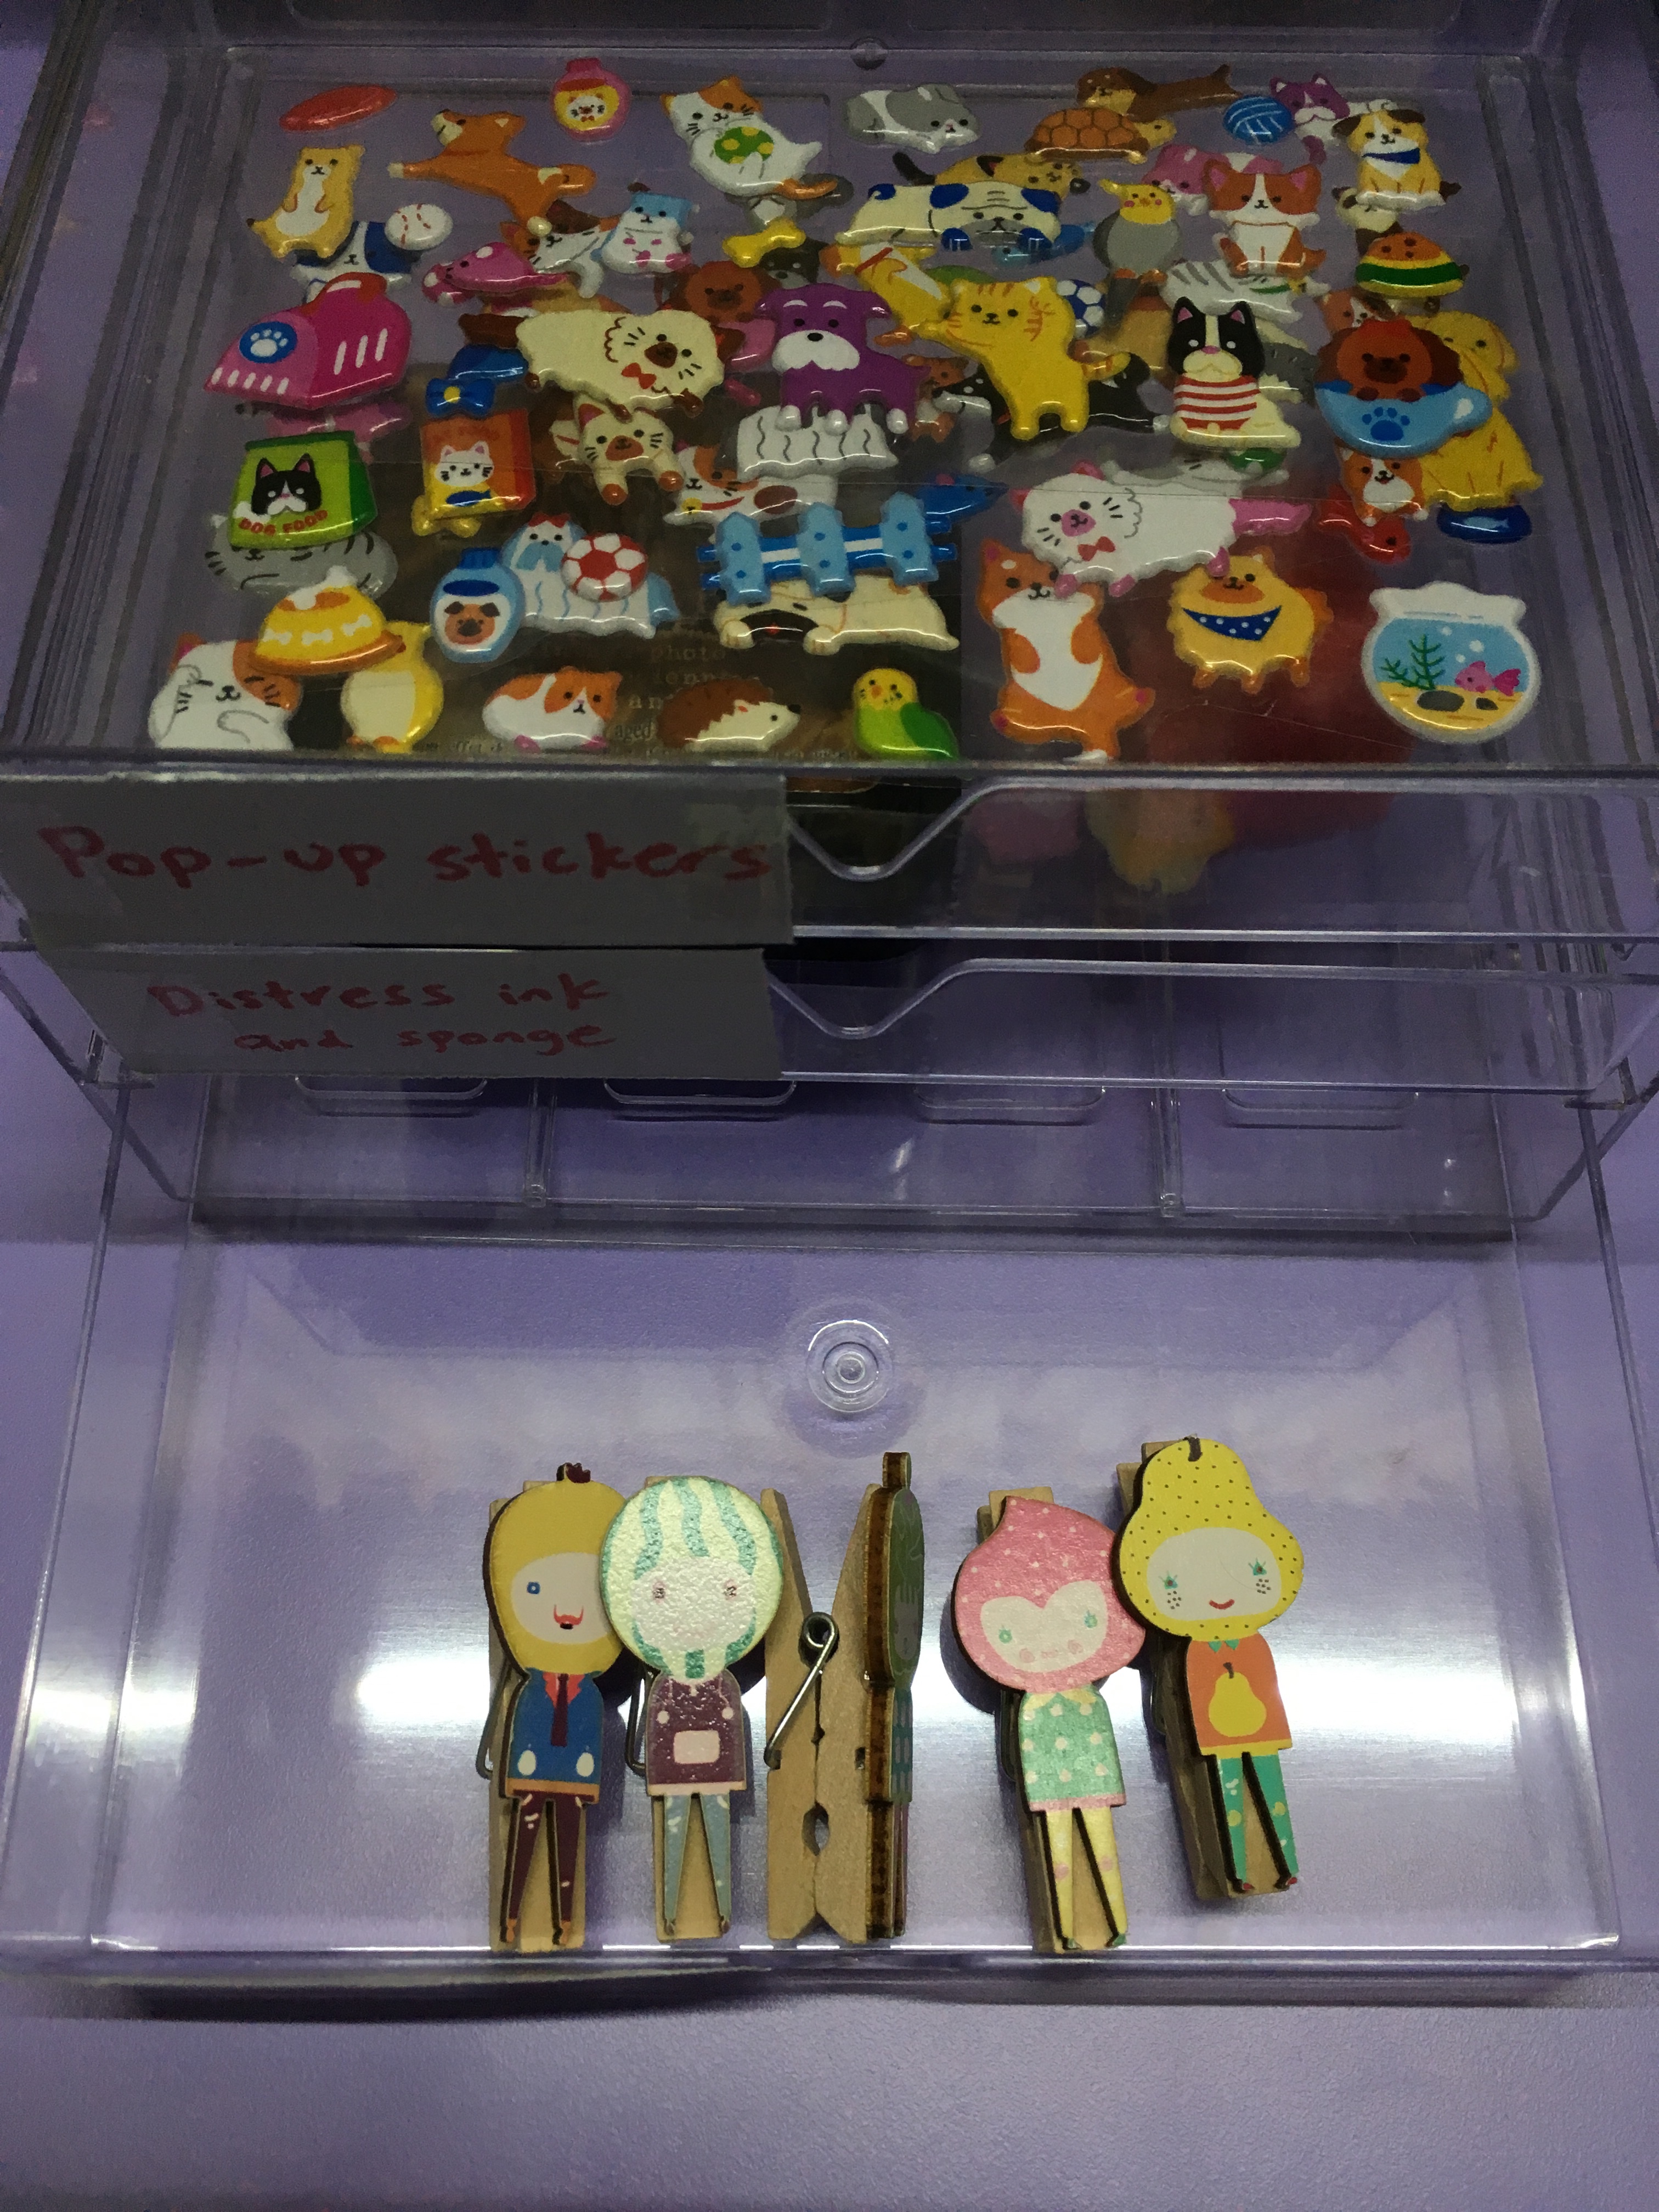
3. 3-drawer case (to act as an organisation system for scrapbooking, as one of my pain points when participating in the practice included the organisation of the many tools/decorative stuffs used in scrapbooking, which can potentially be a huge problem for those who are blind. Without an organisation system, the blind may take very long to find the item he/she wants to use for a card, especially without their sense of sight. However, a mini drawer case labelled with braille will help them find the item they want to use easily, such as stickers or distress ink. For this probe, I labelled the drawer with normal paper labels as my participants cannot read braille)
4. Pop-up stickers in drawer 1 (it is important to use pop-up stickers so that the blind can figure out what the sticker is and its orientation more easily. If flat stickers were used, it can be quite challenging to do so)
5. Distress ink and sponge in drawer 2
6. Decorative pegs in drawer 3
As the blind rely on other senses, such as sense of touch, hearing, smelling, to go about completing tasks, I decided to capitalise on the individual’s sense of touch in my probes. Below are the tasks that I included in the instruction booklet, which have to be completed blindfolded.
Design probes (tasks)
Front page
Basic instructions: 1. Follow instructions closely. 2. Call me to clarify if you have questions. 3. Have fun! 🙂
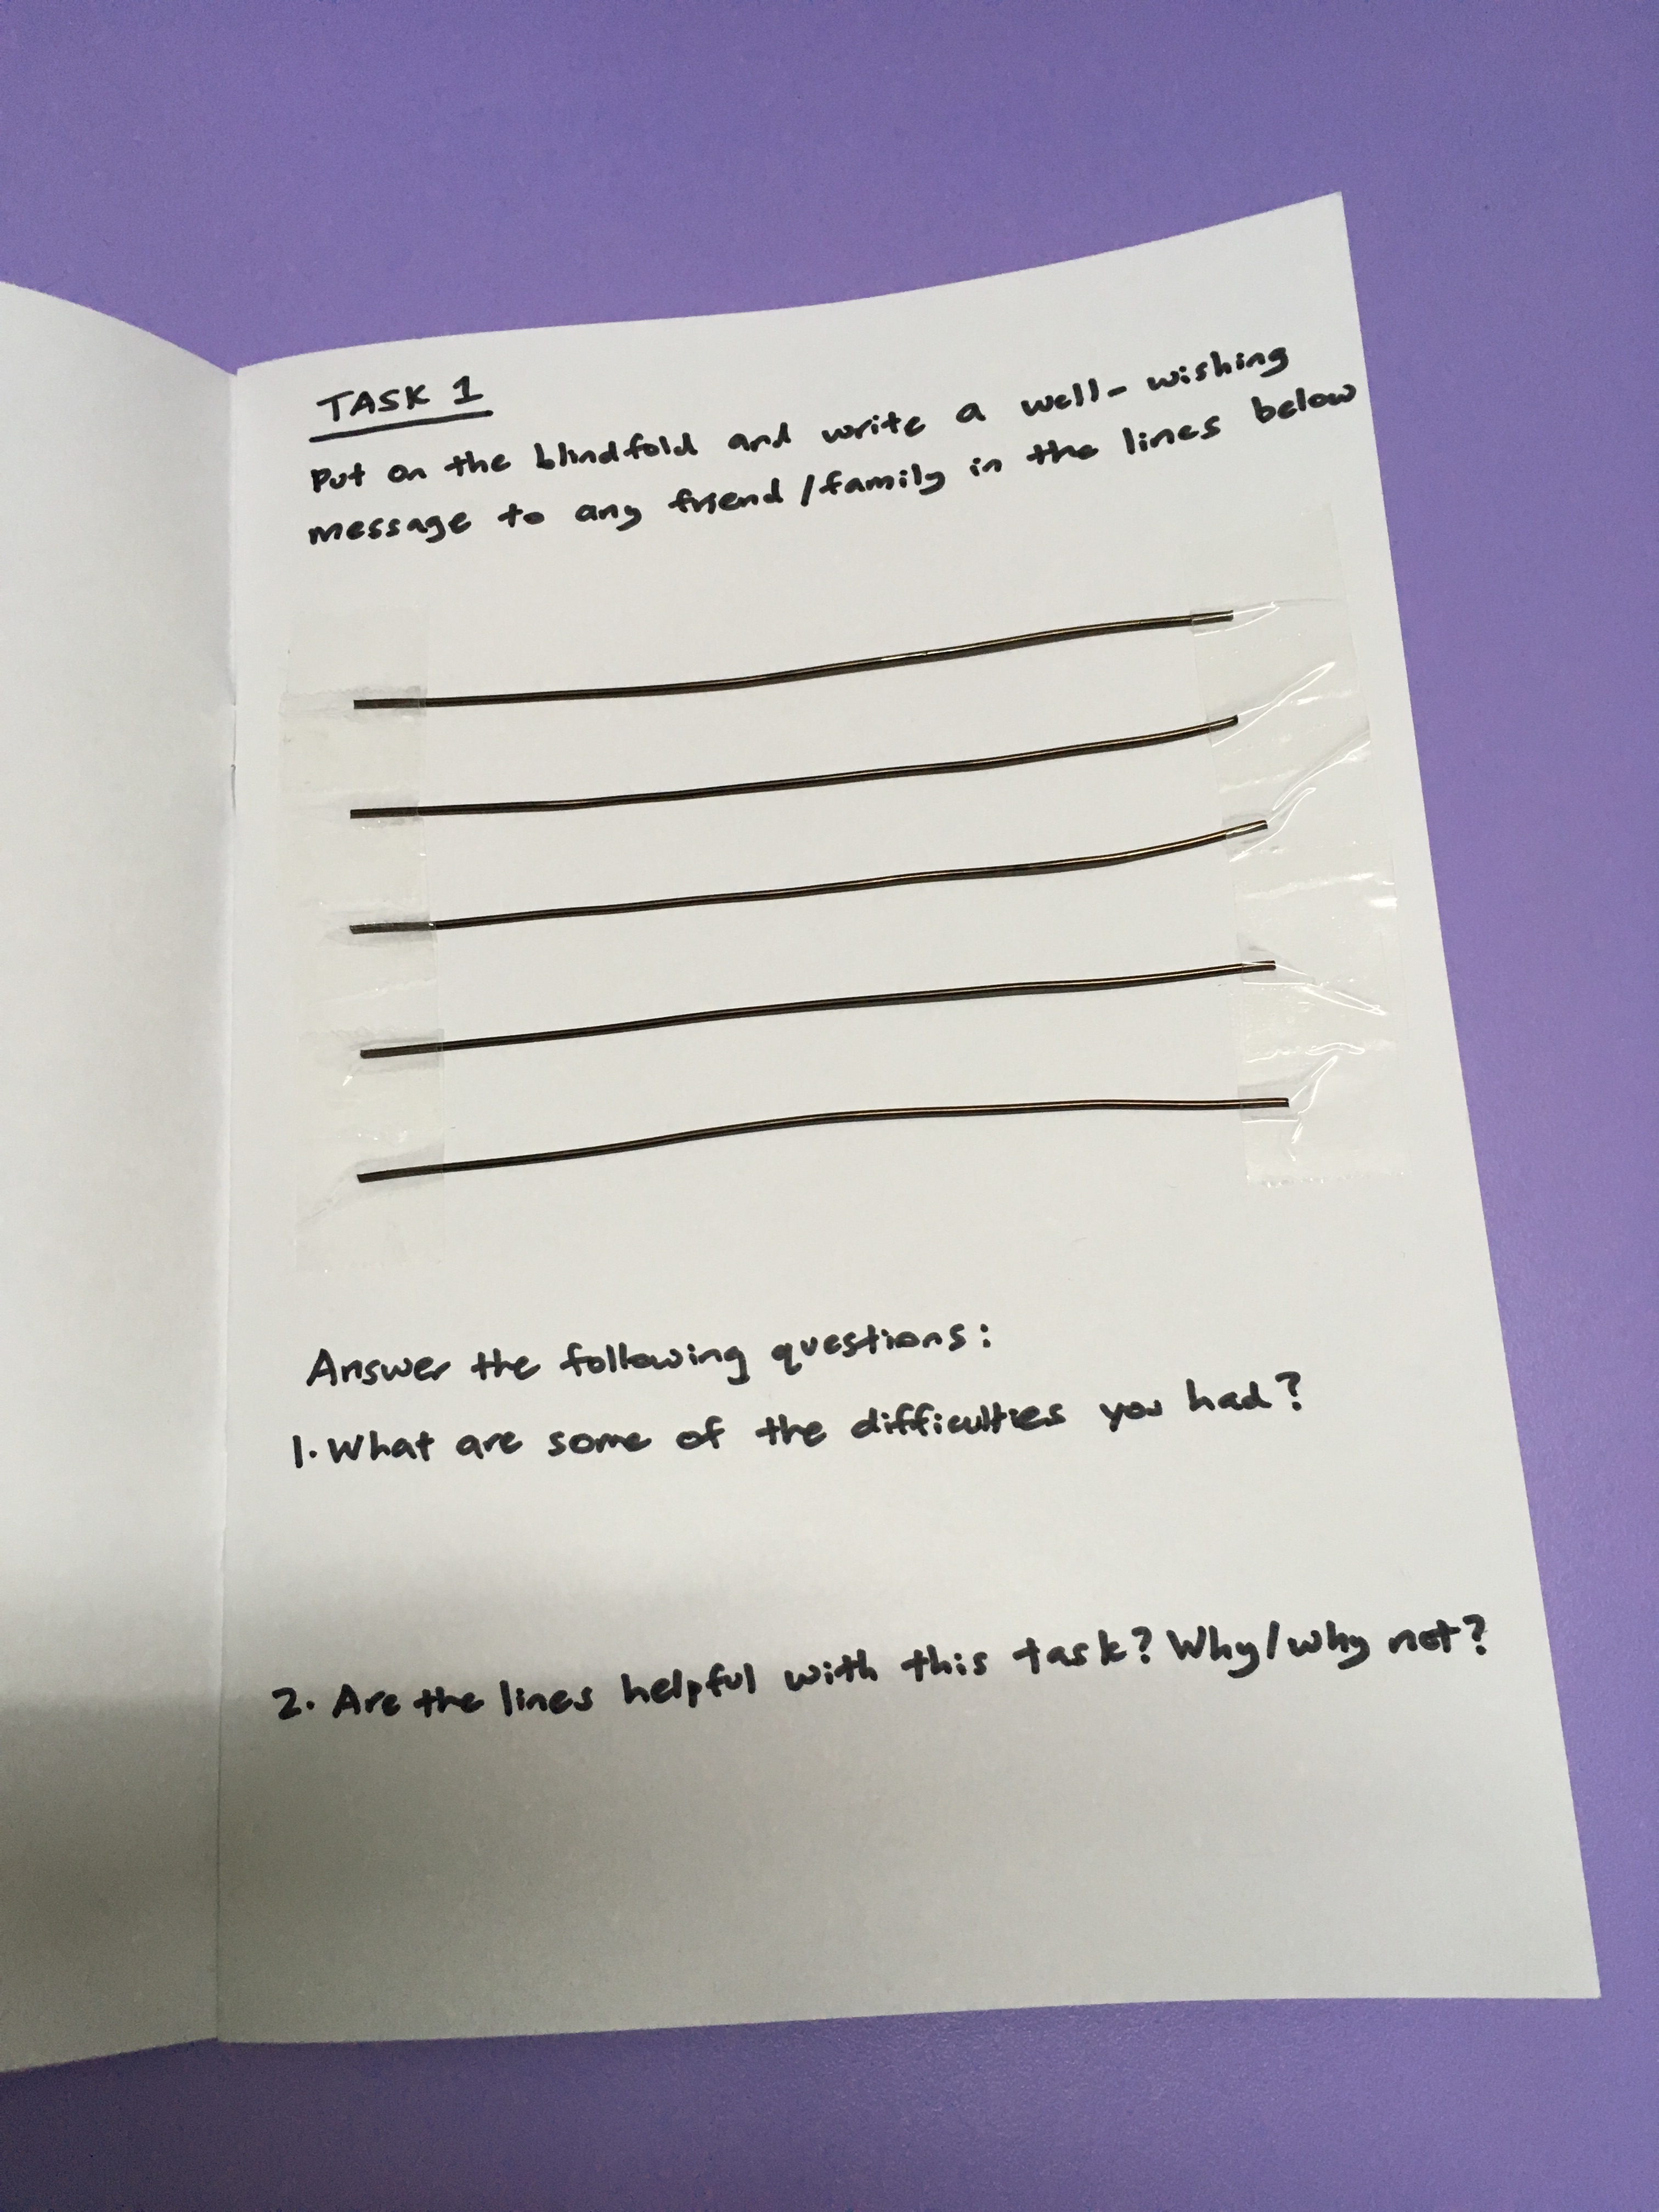
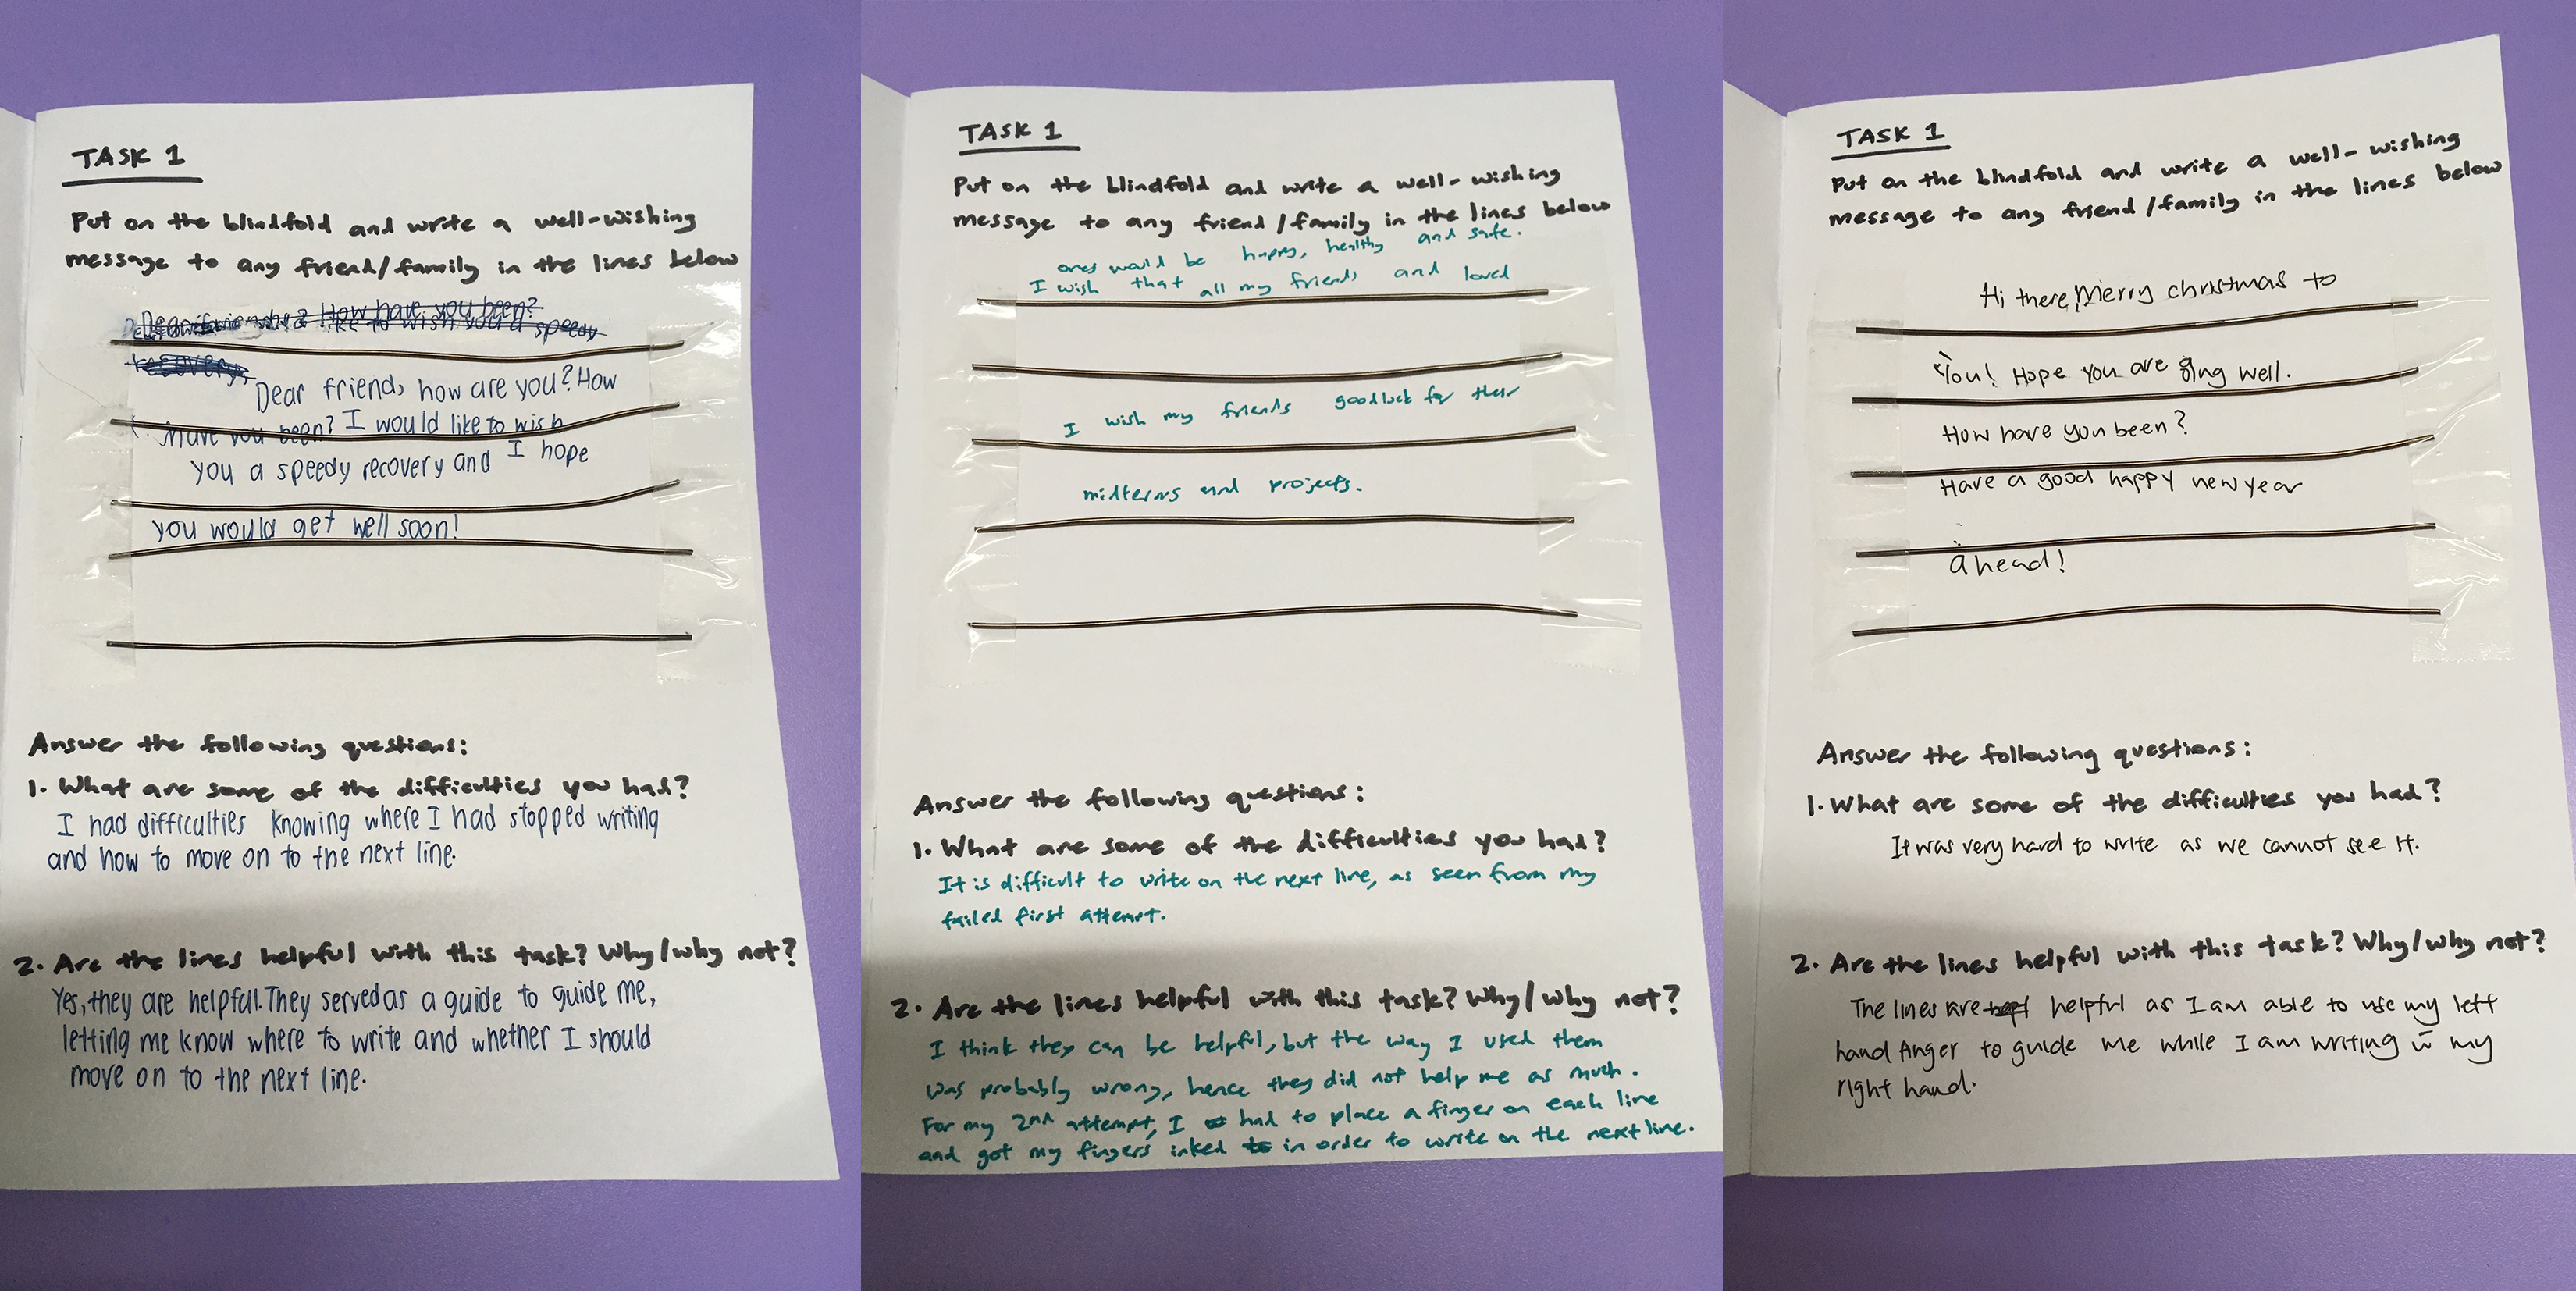
Task 1
Instructions: Put on the blindfold and write a well-wishing message to any friend/family in the lines below. Answer the following questions: 1. What are some of the difficulties you had? 2. Are the lines helpful with this task? Why/why not?
Rationale for this task: To find out whether lines constructed with aluminimum wire helps the blind write a message more neatly, as they can use their sense of touch to guage the writing area and write in straighter lines.
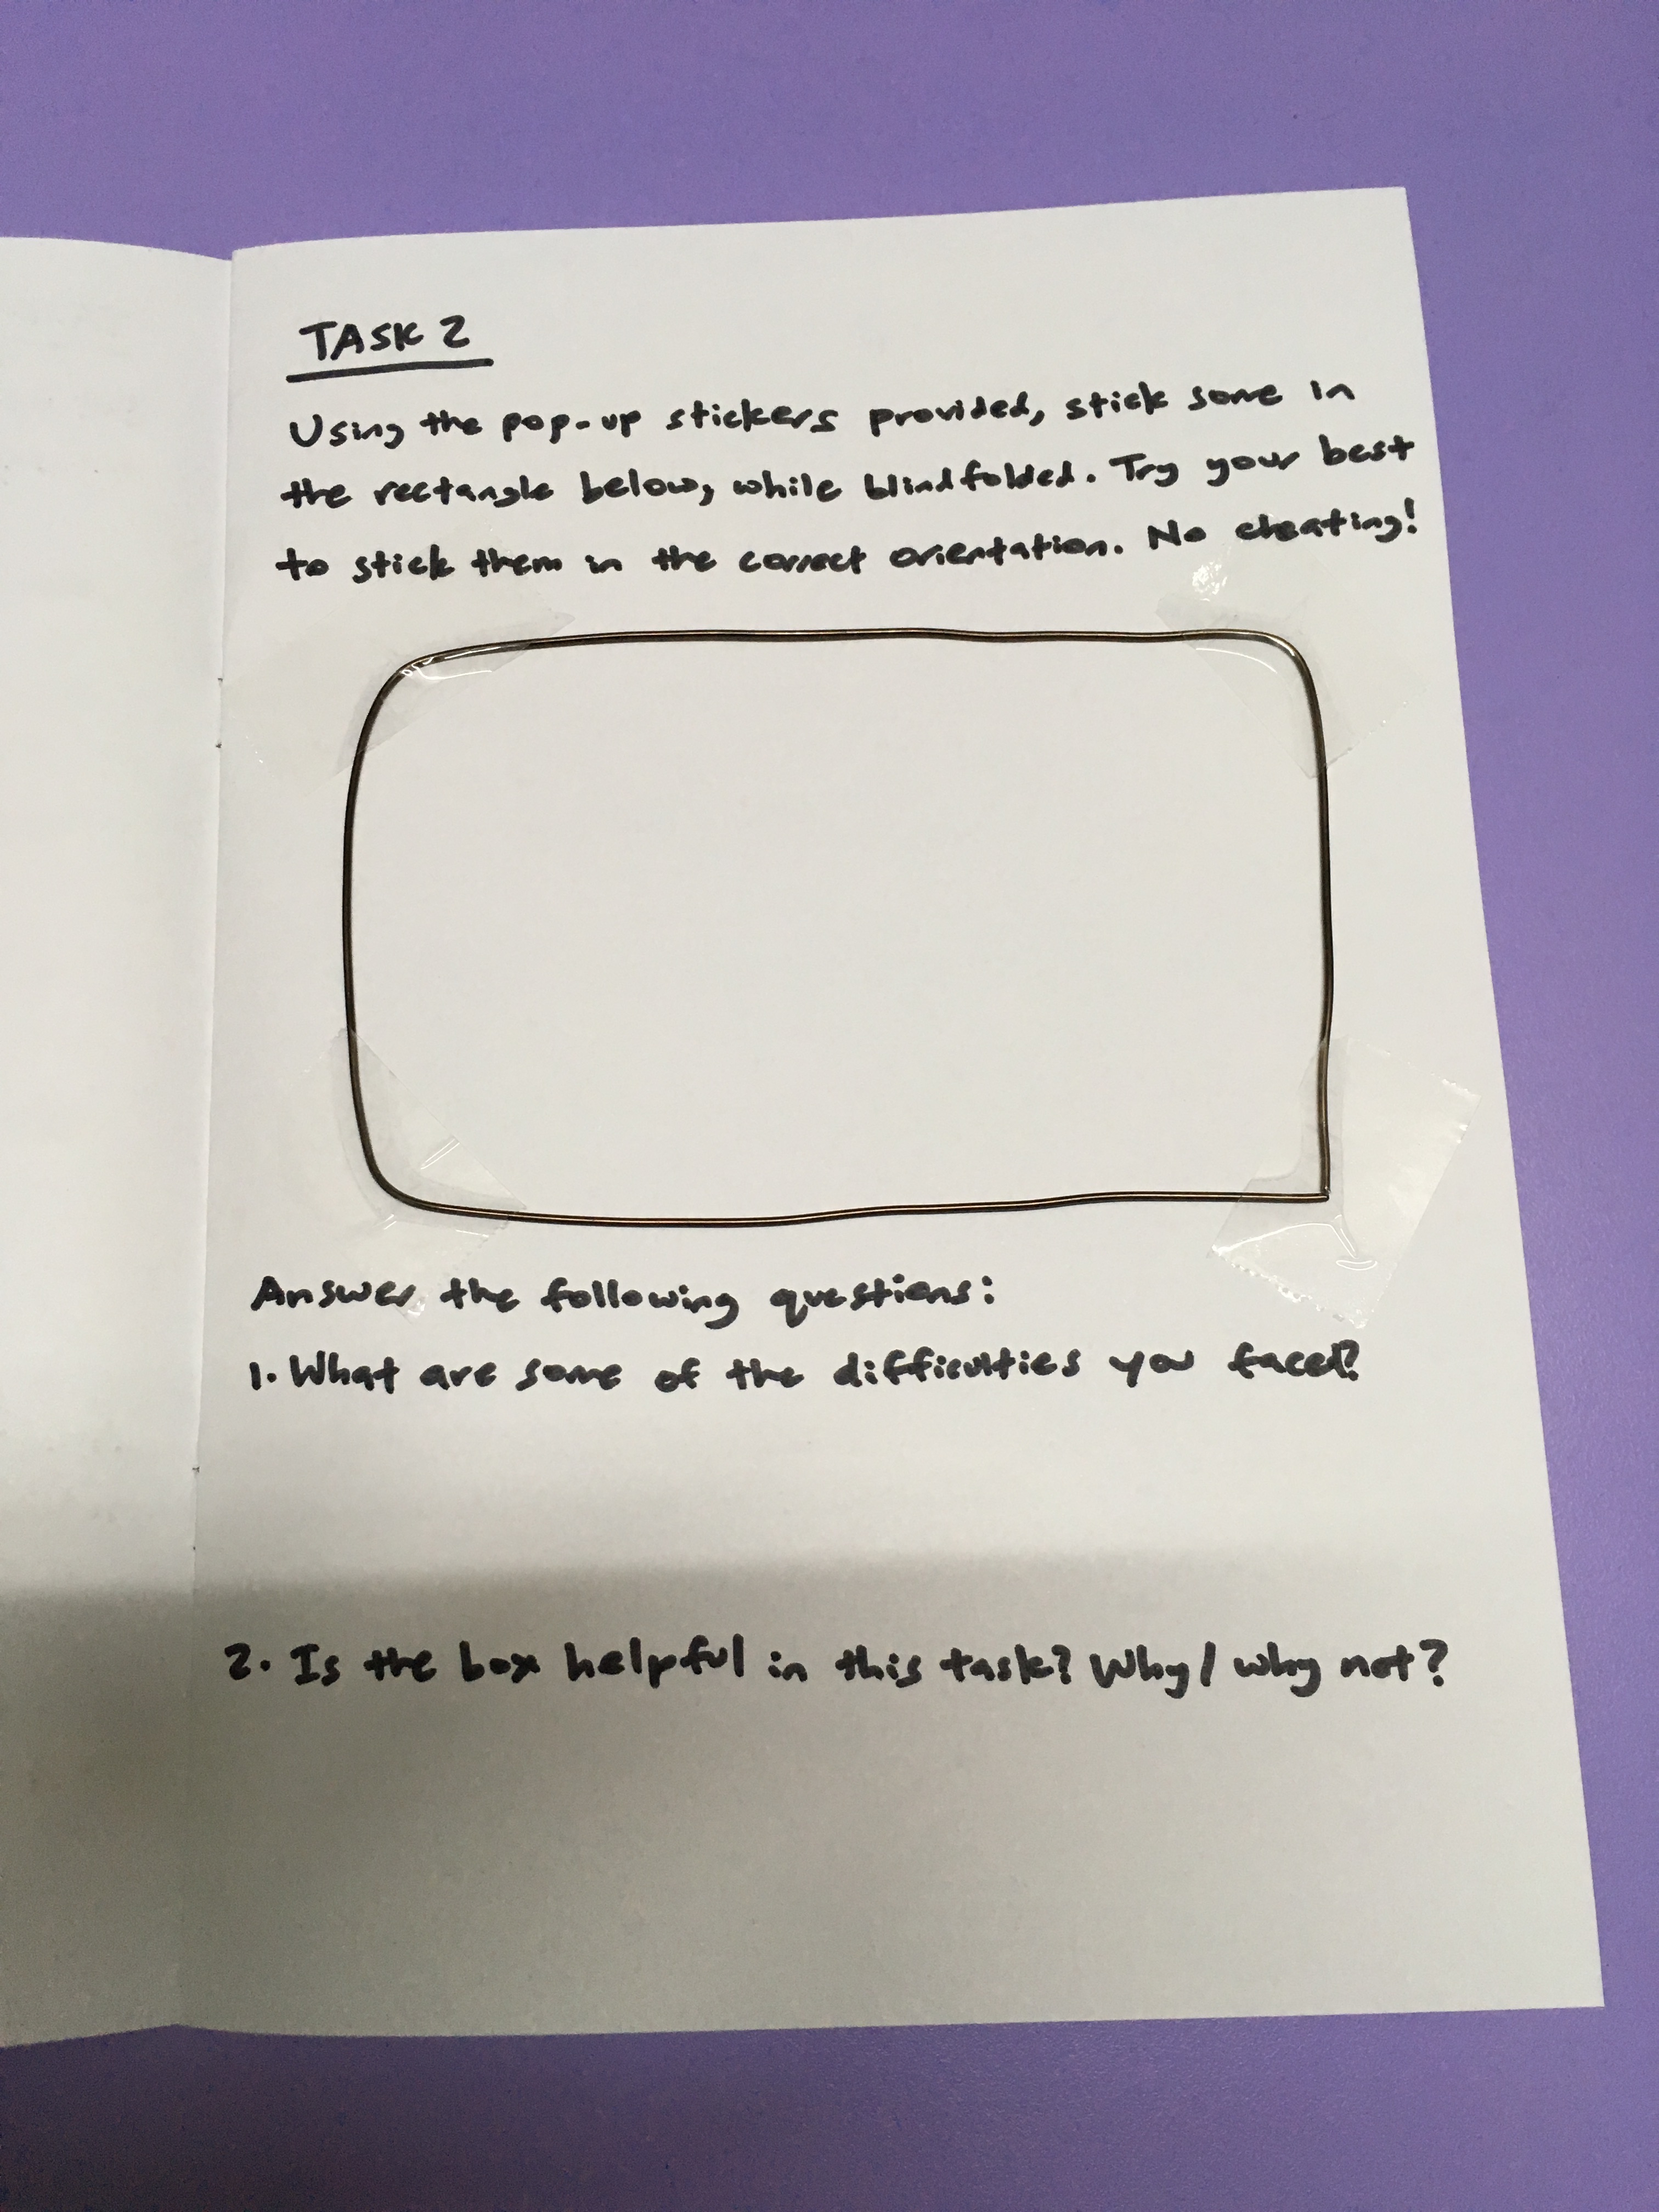
Task 2
Instructions: Using the pop-up stickers provided, stick some in the rectangle below, while blindfolded. Try your best to stick them in the correct orientation. No cheating! Answer the following questions: 1. What are some of the difficulties you had? 2. Is the box helpful in this task? Why/why not
Rationale for this task: To find out whether a box constructed with aluminimum wire helps the blind paste stickers more easily, as they can use their sense of touch to guage the pasting area.
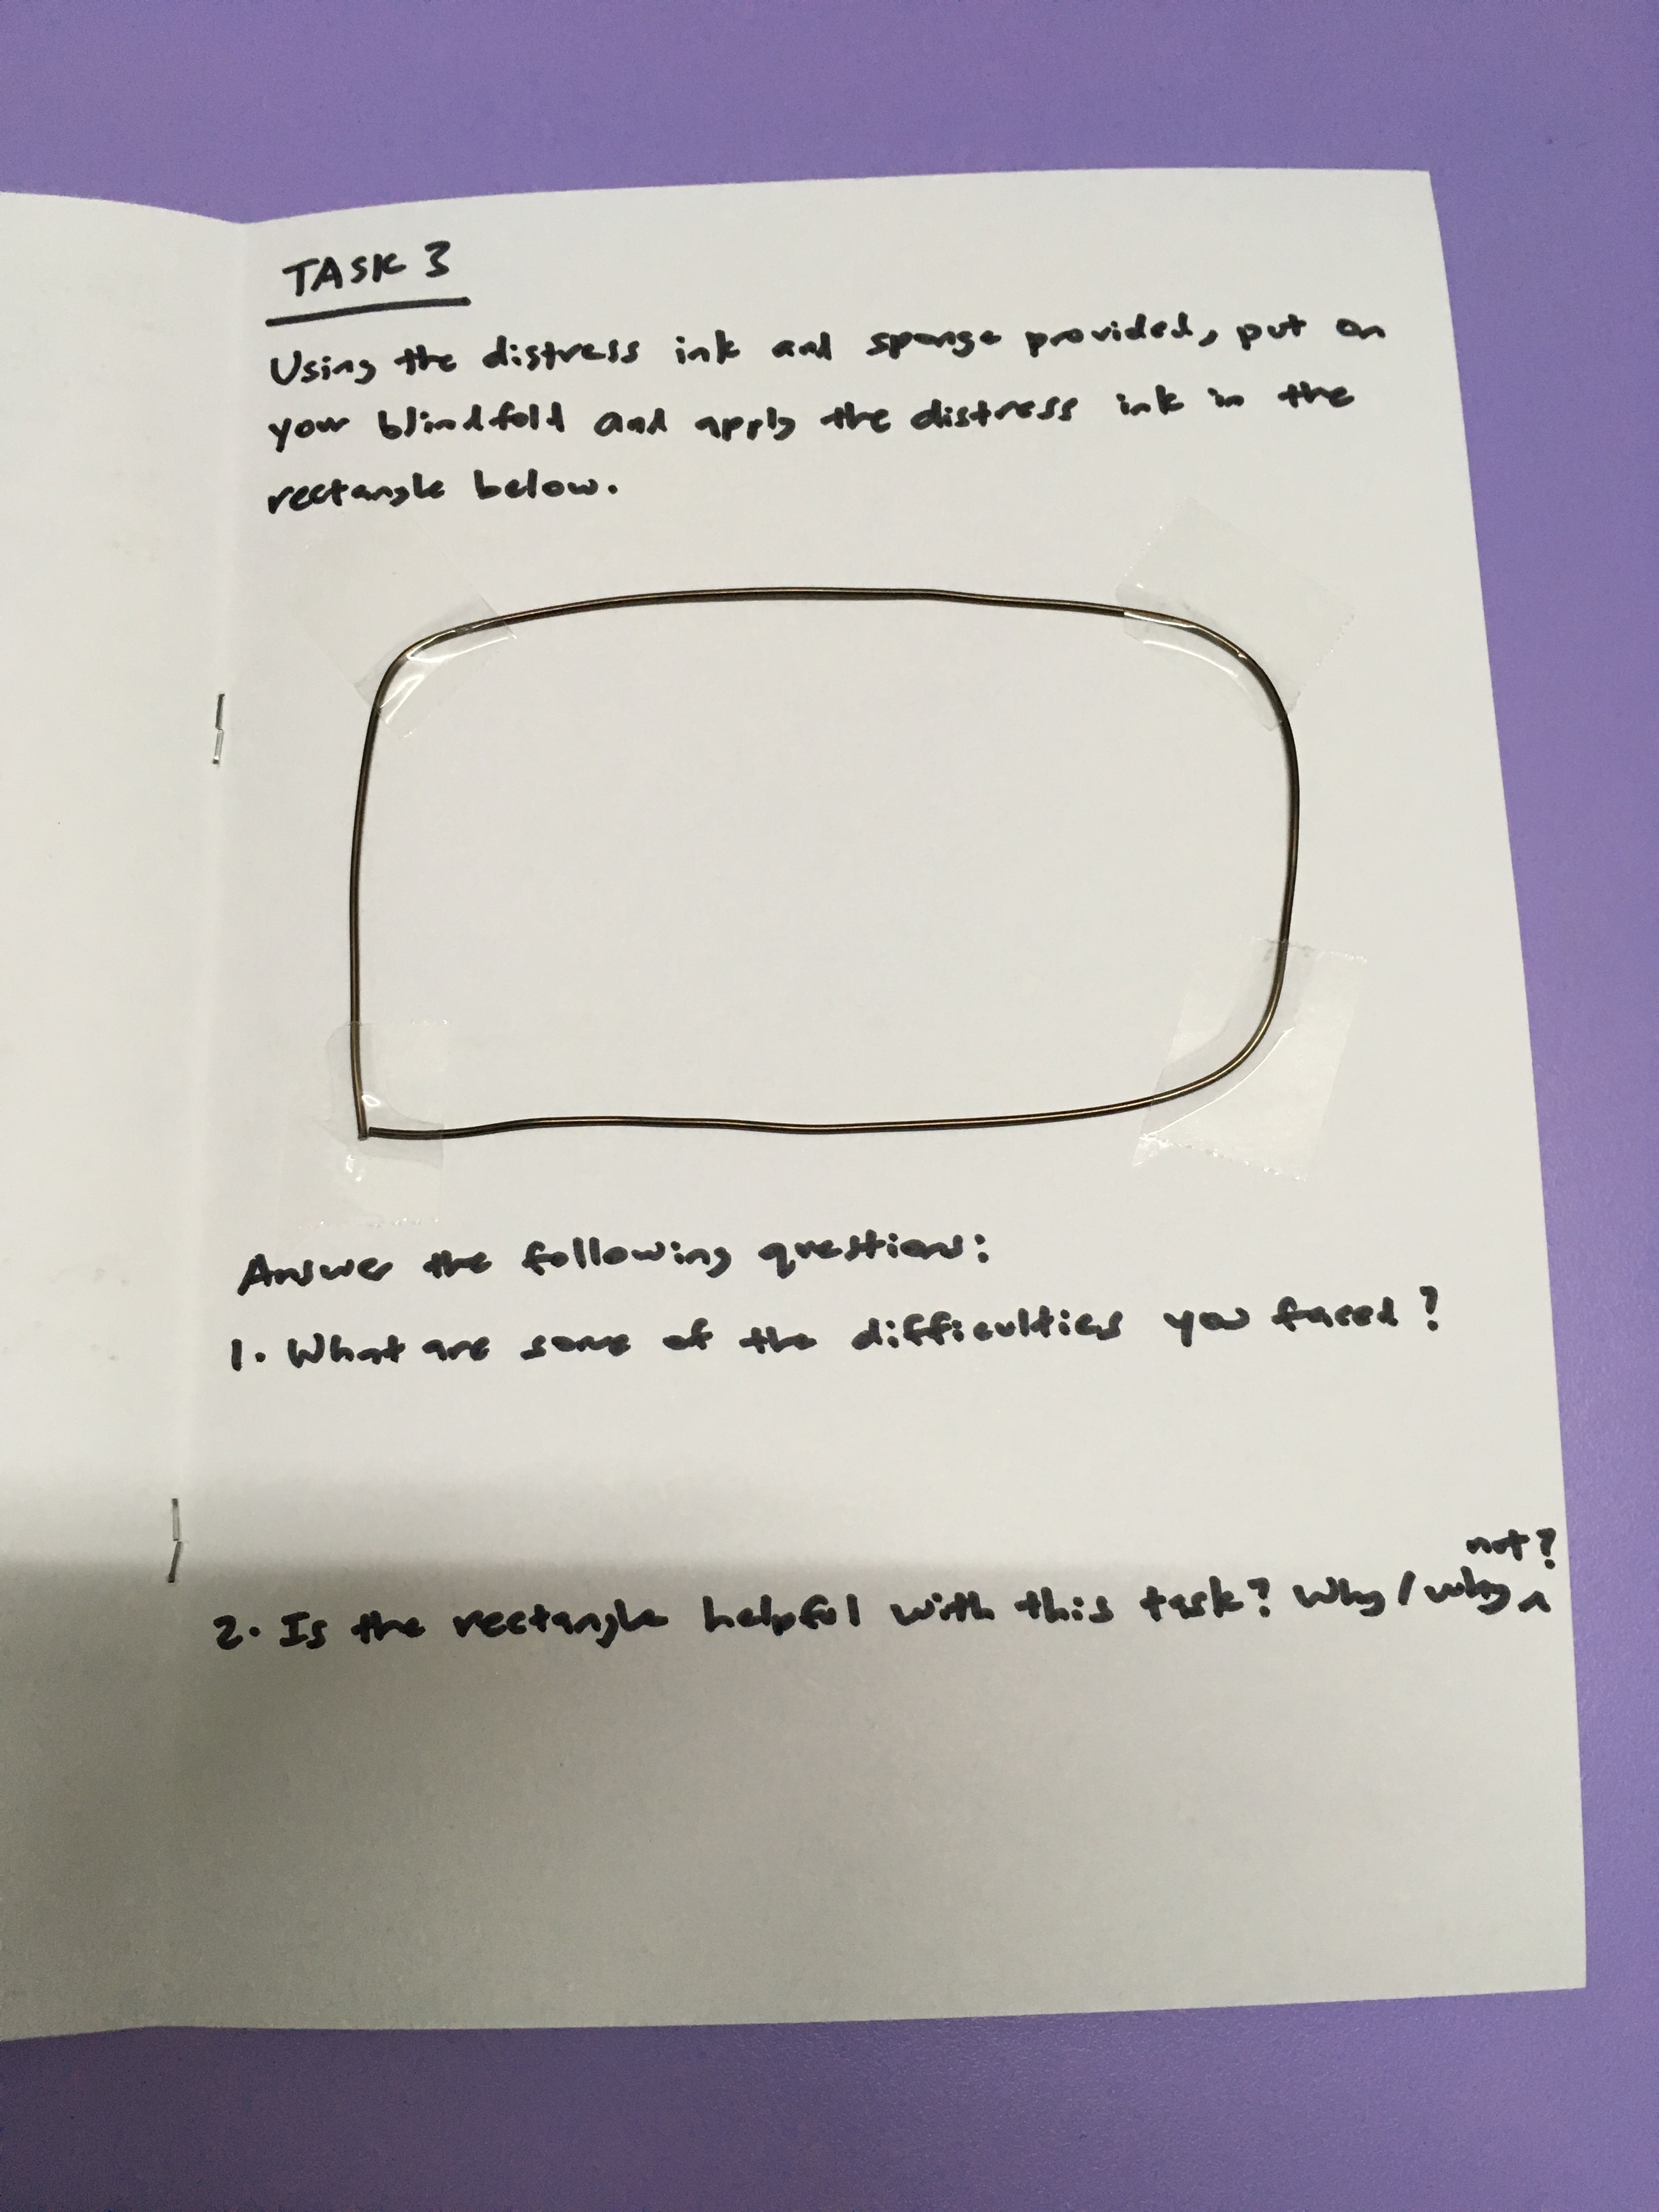
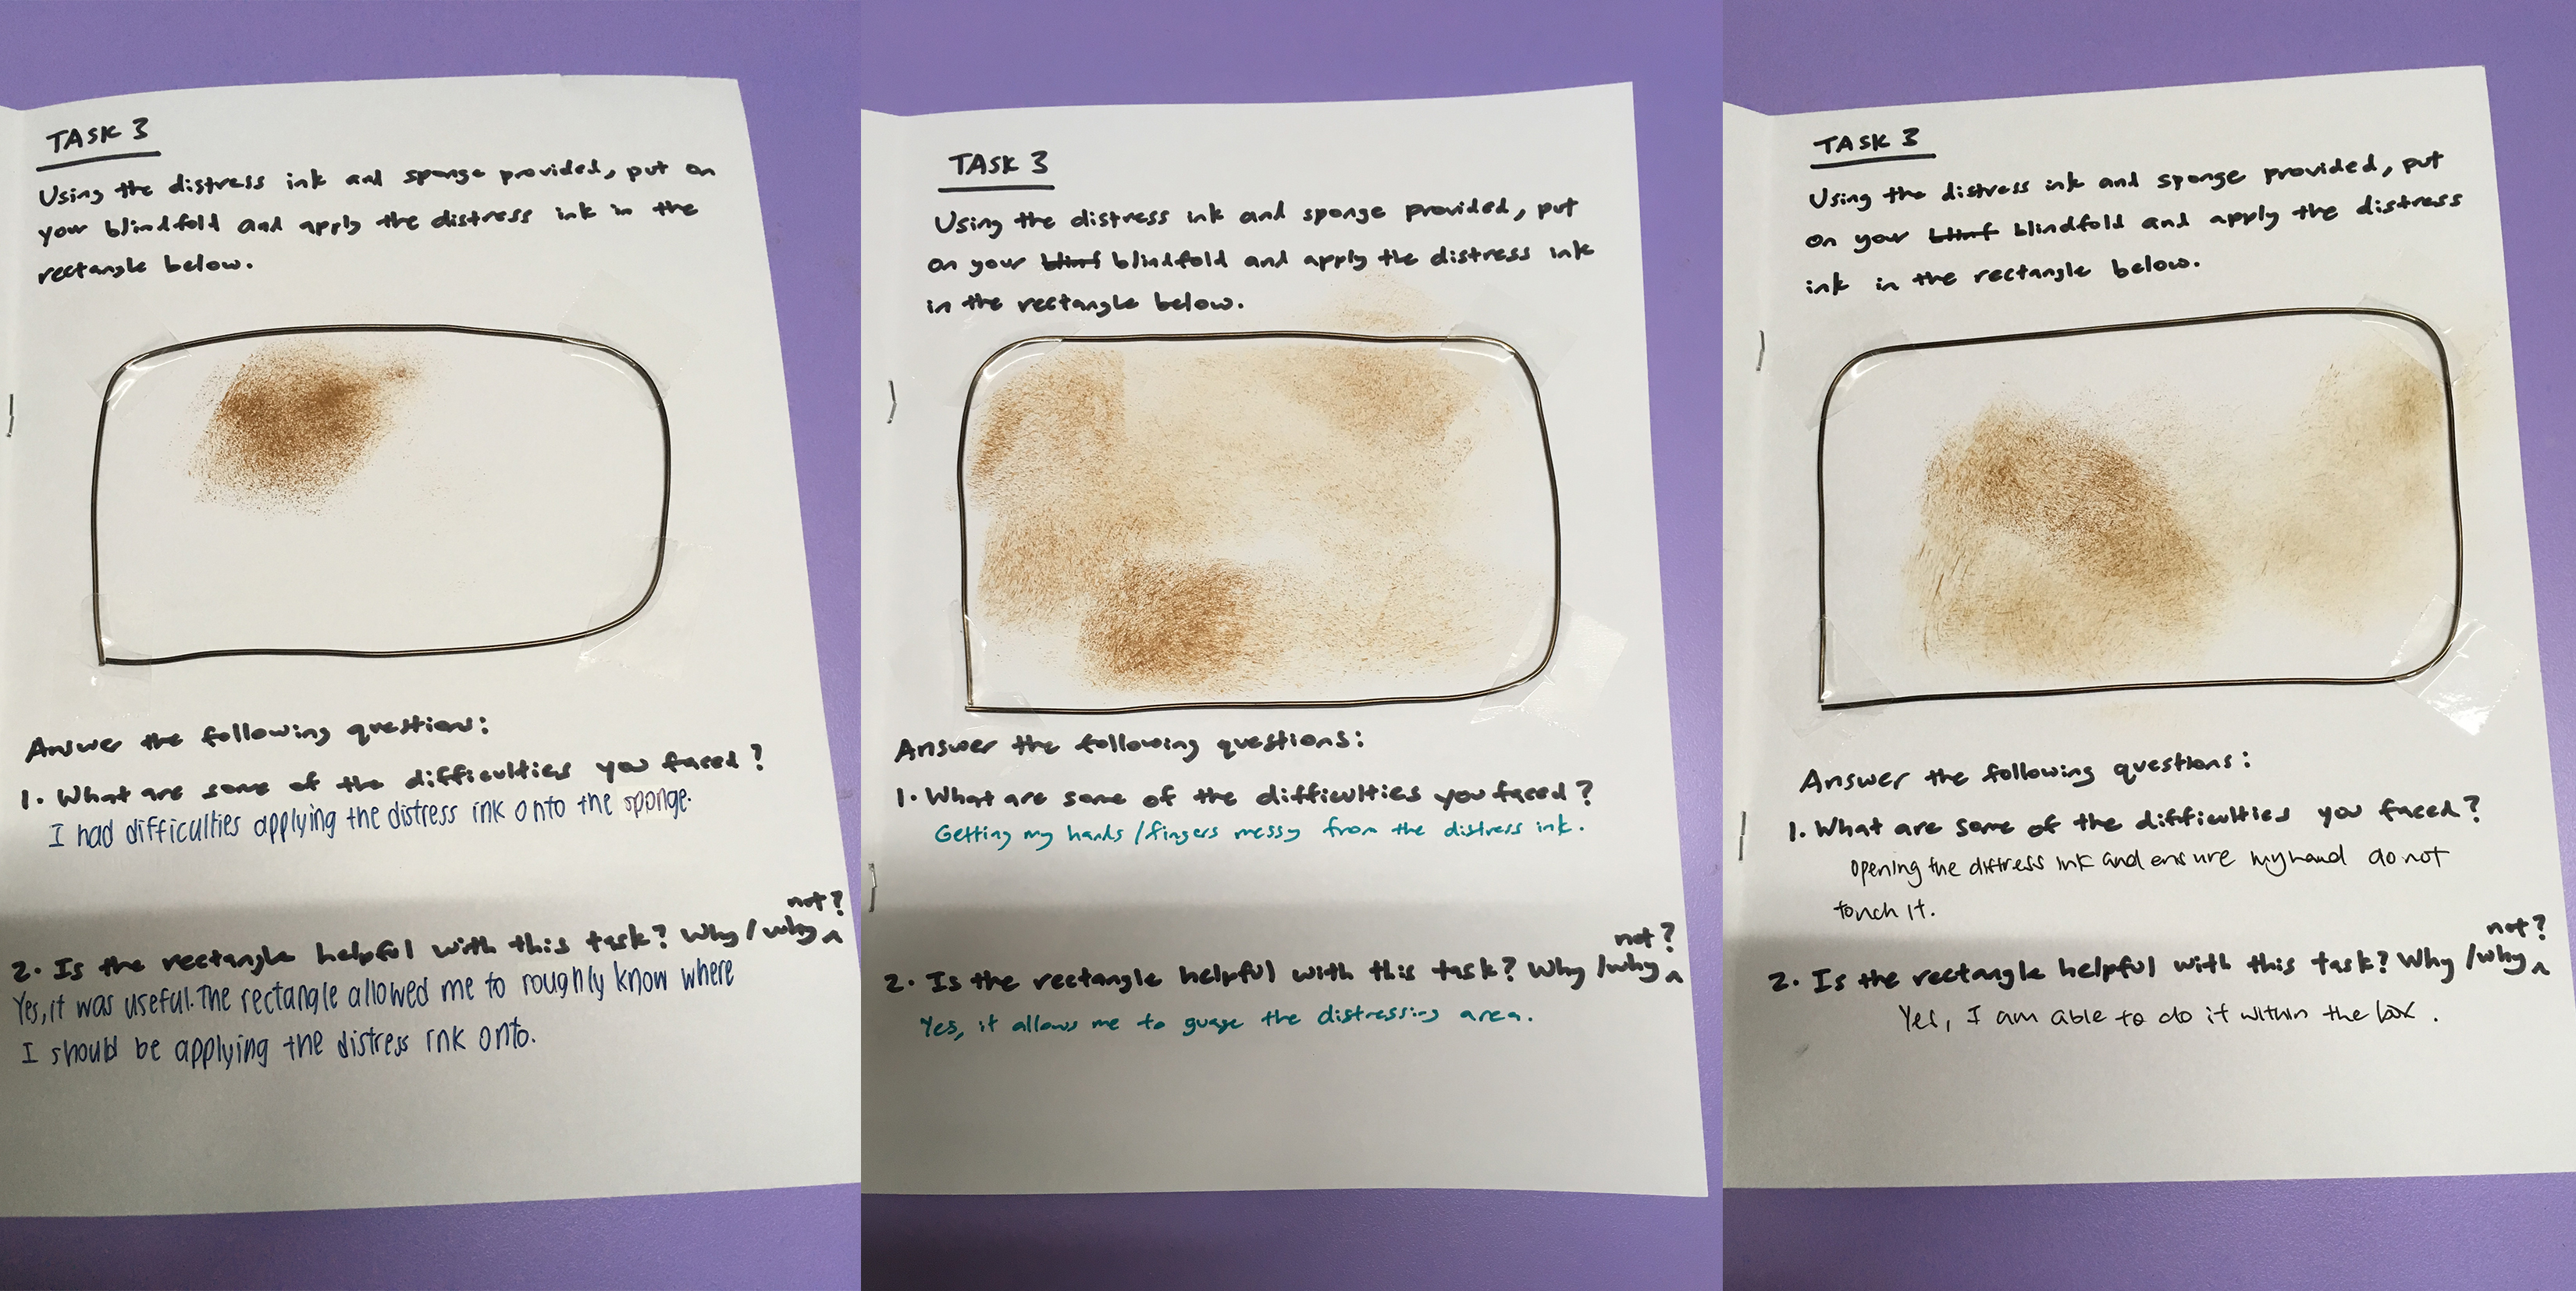
Task 3
Instructions: Using the distress ink and sponge provided, put on your blindfold and apply the distress ink in the rectangle below. Answer the following questions: 1. What are some of the difficulties you had? 2. Is the rectangle helpful with this task? Why/why not?
Rationale for this task: To find out whether a rectangle constructed with aluminimum wire helps the blind distress paper more easily, as they can use their sense of touch to guage the distressing area.
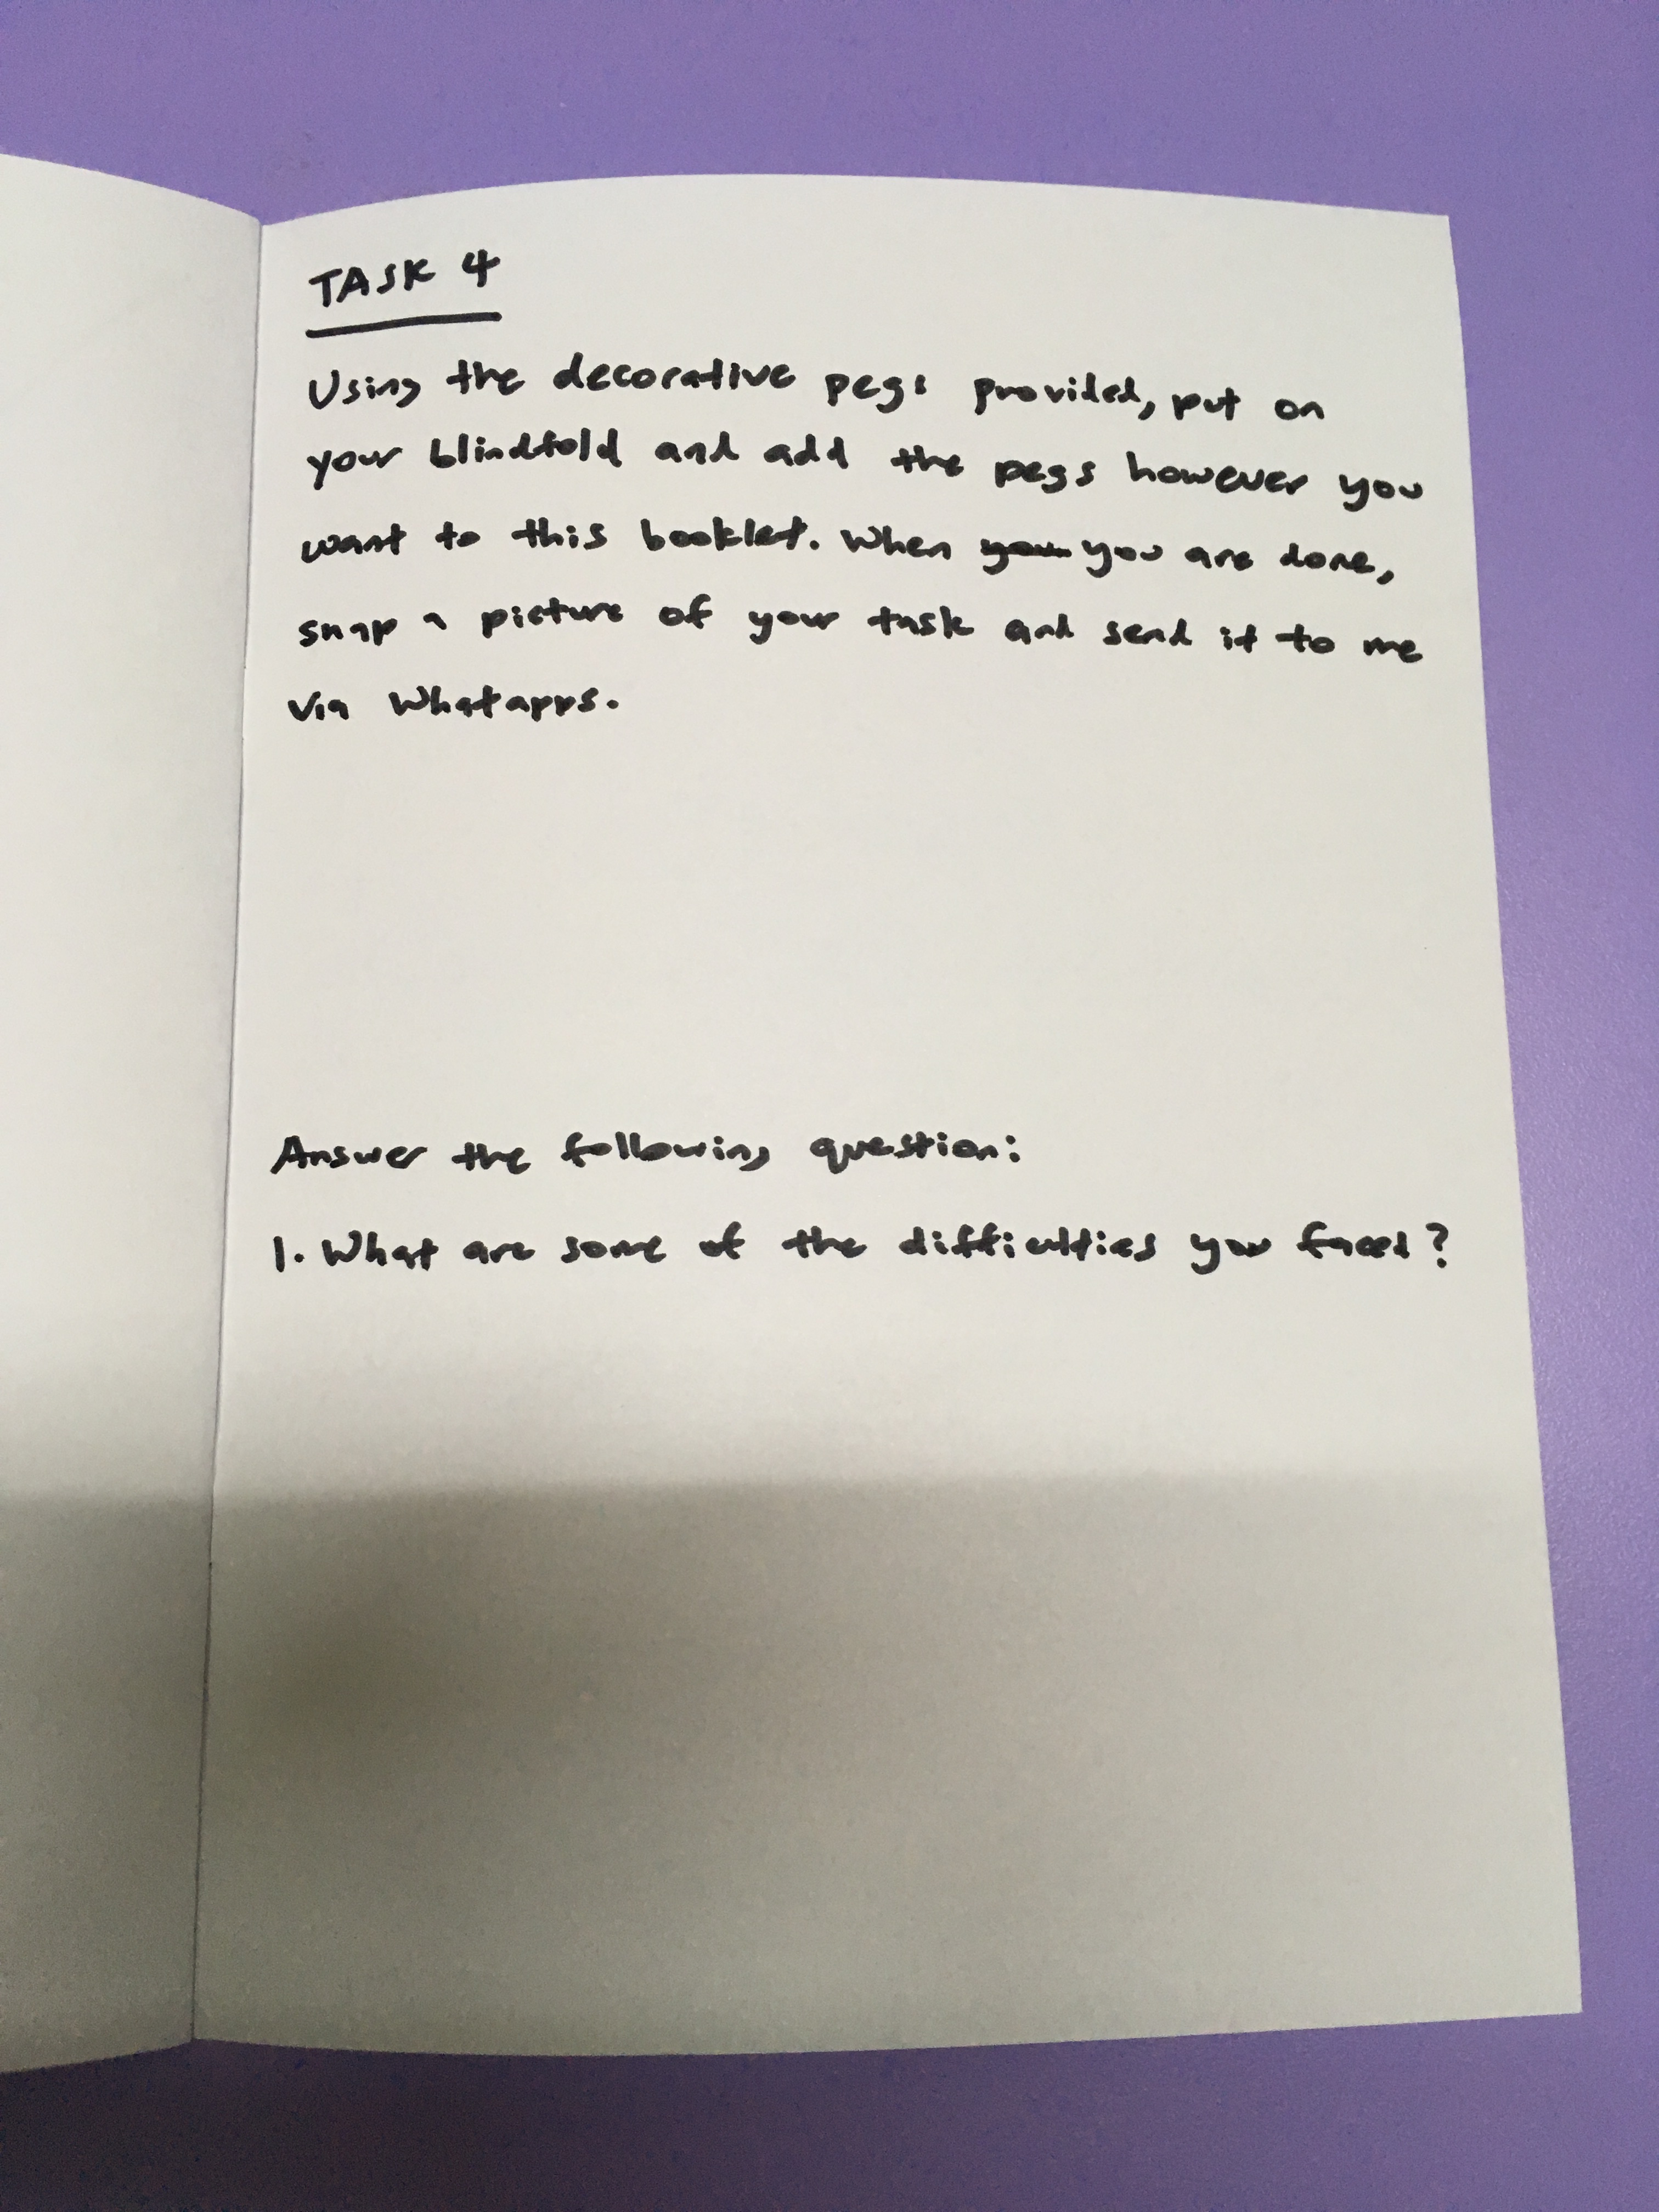
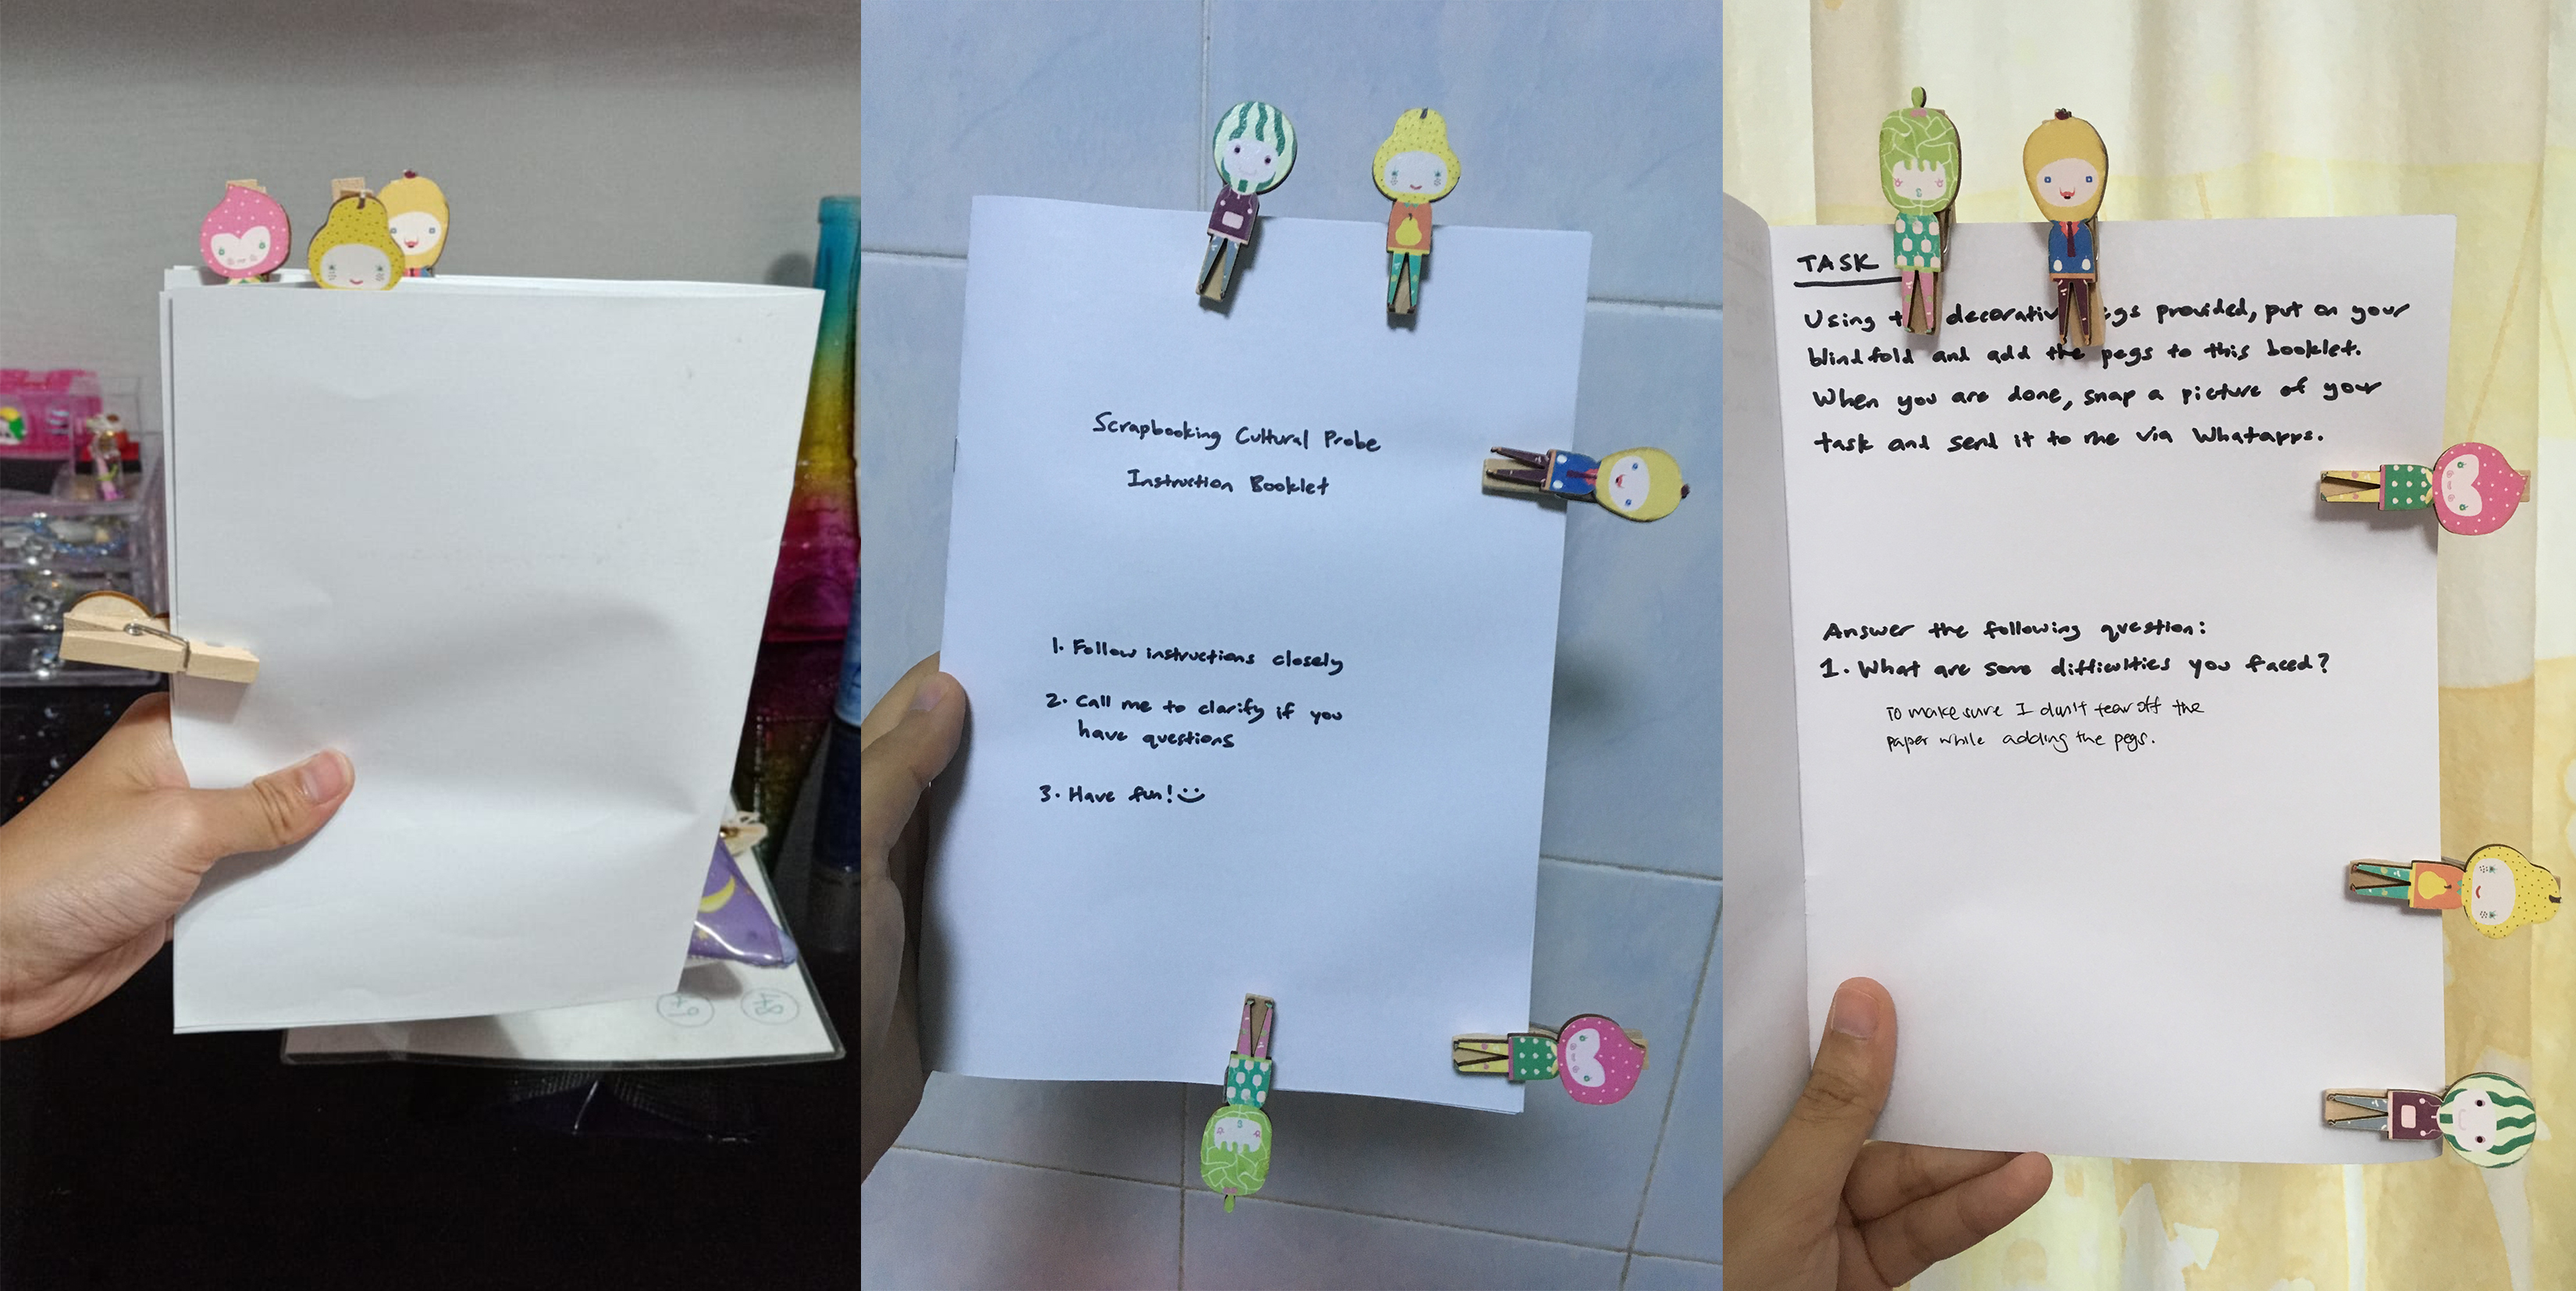
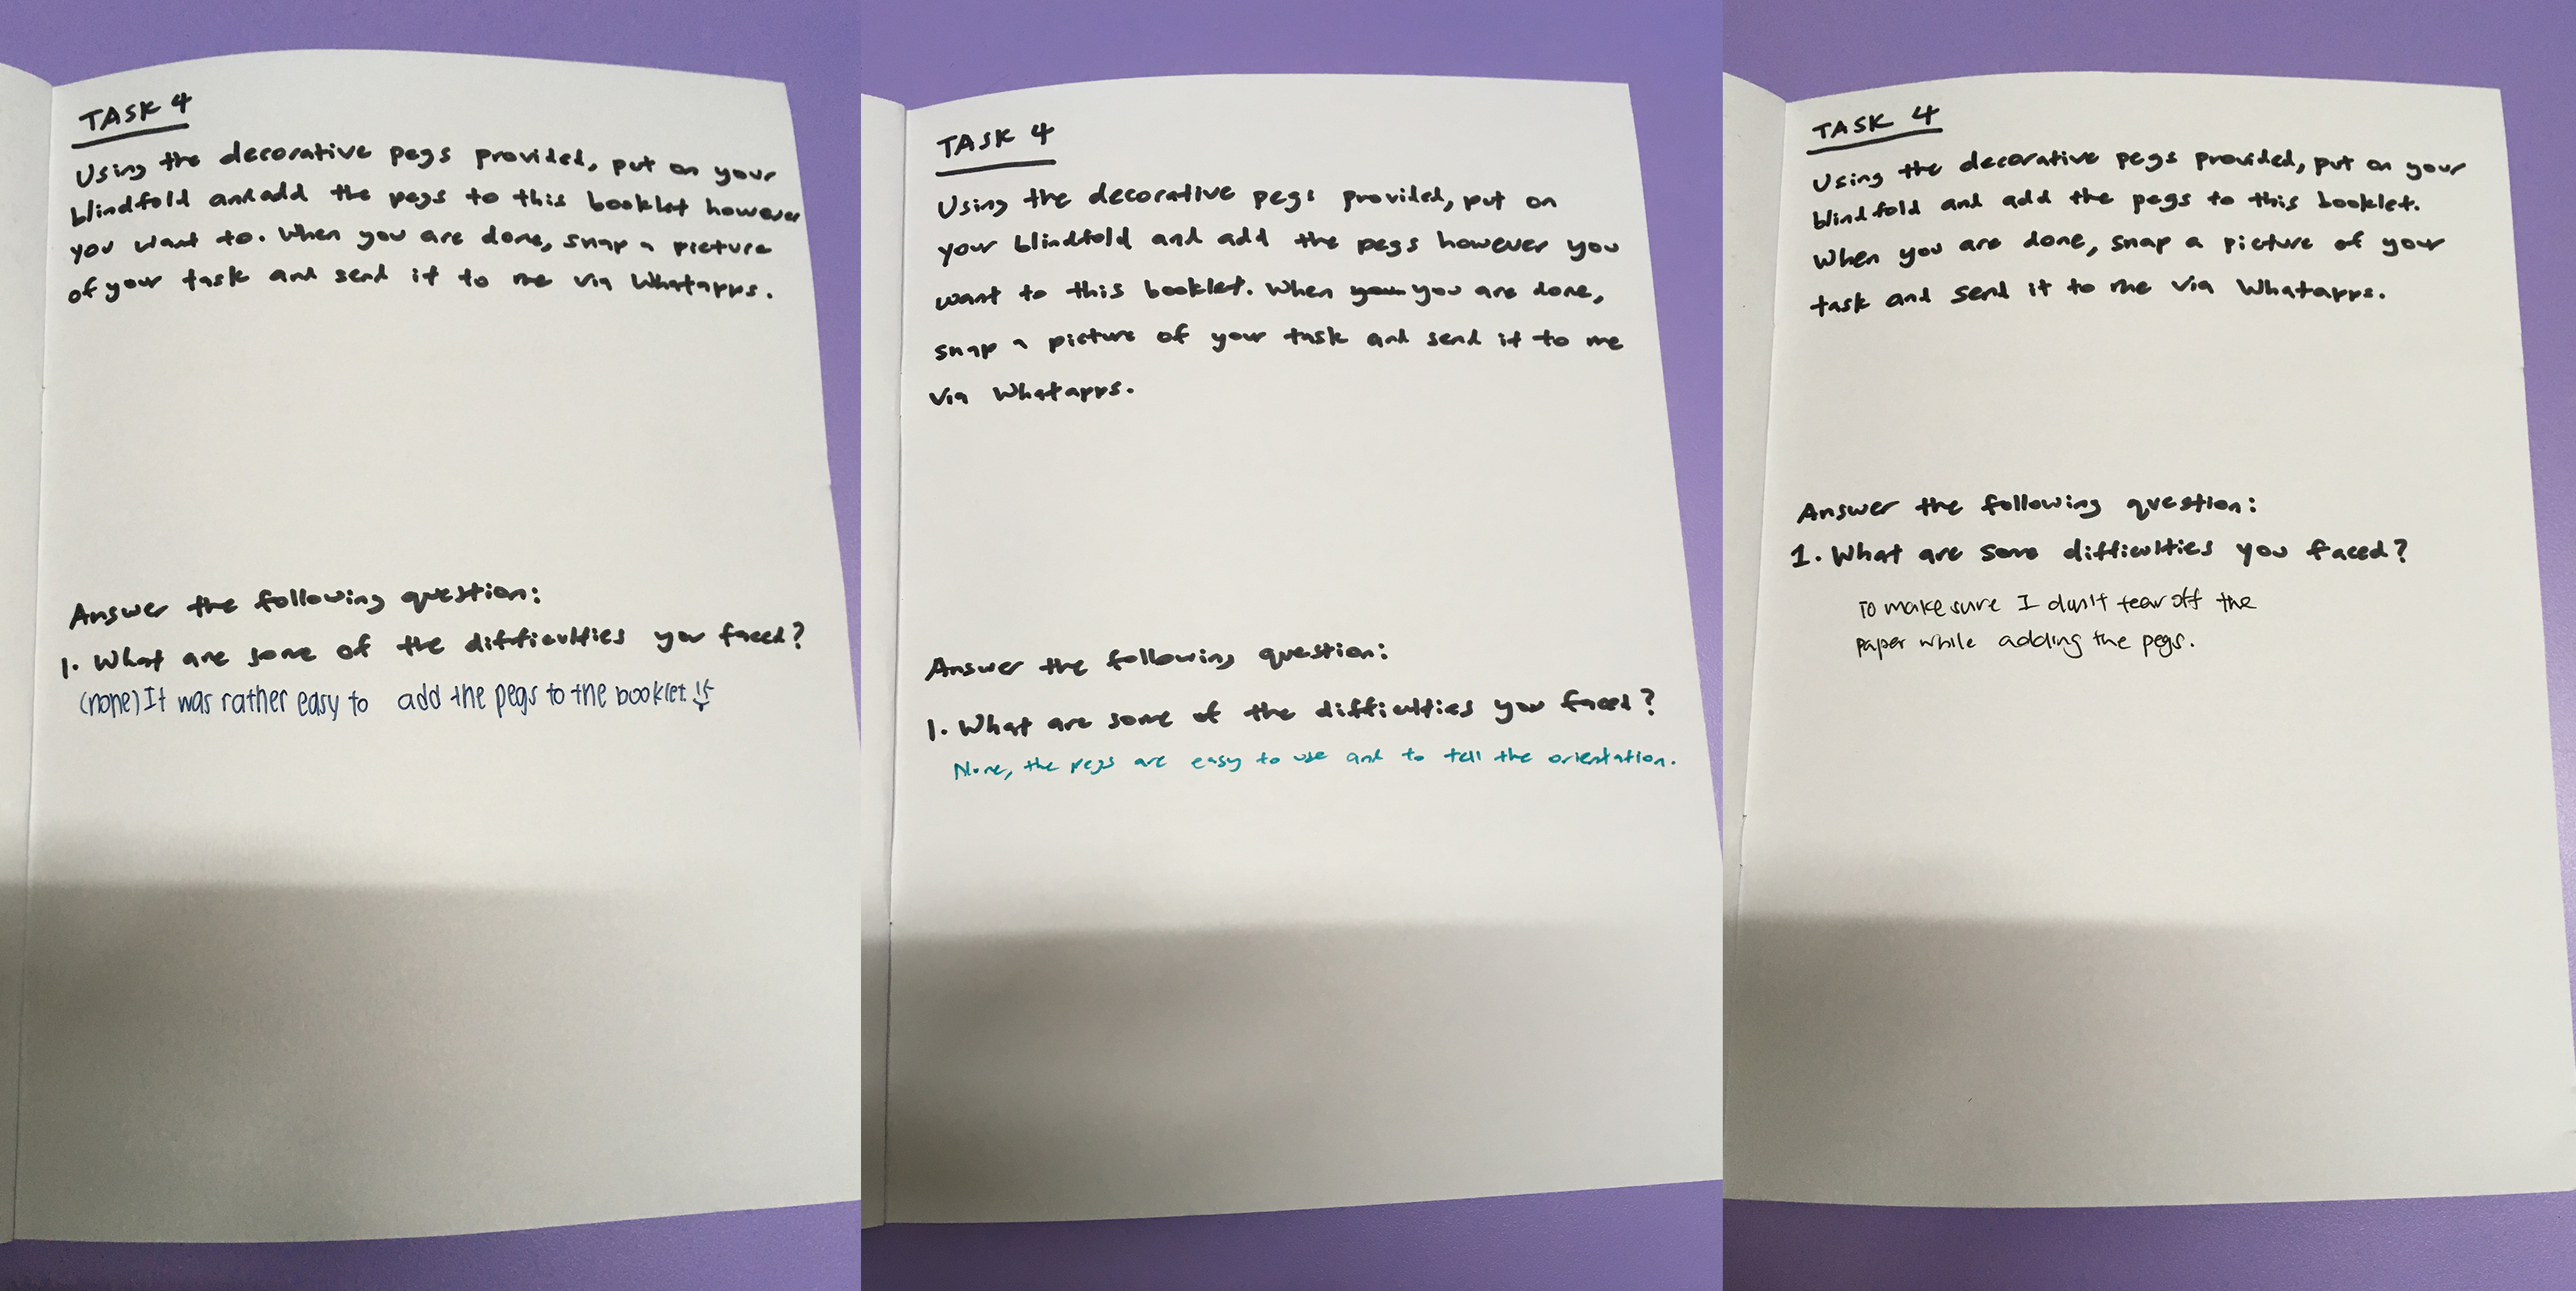
Task 4
Instructions: Using the decorative pegs provided, put on your blindfold and add the pegs however you want to this booklet. When you are done, snap a picture of your task and send it to me via Whatapps. Answering the following question: 1. What are some of the difficulties you faced?
Rationale for this task: To find out how a blind person utilises decorative pegs when scrapbooking, and to see if it is feasible to include decorative items in the final scrapbooking template.
Findings
I coducted my probes with 3 person, including my friend Elena who is the original practitioner of scrapbooking. The other 2 persons are my younger sister who is 12 years old, and another friend who is 25 years old. I conducted the probe with my younger sister as I wanted to see whether the tasks are too difficult for a younger person. This is because I hope that the final scrapbooking template can be used by the blind of all ages so that they too can make cards for their loved ones.
Task 1 (findings)
2 out of 3 persons said that it is difficult to move to and write on the next line, although the lines were somewhat useful as a guide. Based on the comments, I think I underestimated the difficulty of this task. I have to come up with a better guide in order to improve the performance of this task.
Task 2 (findings)
All 3 said that the box was useful in allowing them to guage the pasting area, but the box was not helpful in allowing them to figure out the orientation of the pop-up stickers (i.e. they do not know whether the cat is sitting upright or upside down). One notable comment is to make the guide (wire) the shape of the sticker, so the user just have to paste the right sticker into the right shape without having to worry about orientation.
Task 3 (findings)
All 3 said that the rectangle was helpful in allowing them to guage the distressing area, but it does not solve the issue of their hands getting messy from the distress ink. This issue is hard to solve, unless the distress ink is sprayed onto the paper instead of using a sponge manually.
Task 4 (findings)
Based on the comments, it is safe to conclude that decorative items such as pegs are very easy to use even when blind. Hence, I should include them in my template.
Conclusion
From the cultural probes conducted, I managed to understand how people do tasks related to scrapbooking while blind, and found out the flaws of my concept designs. Moving on, I know what to improve on and what to keep.
Things to improve: 1. Wire guide for task 1 have to better guide users to write on the next sentence. 2. Wire guide for task 2 should match the shape of the stickers in the right orientation so that it is easier for users to stick them accurately. 3. Figure a way for users to use the distress ink without getting their fingers dirty (maybe spraying instead of sponging).
Things to keep: 1. Include decorative items such as pegs/stickers. 2. Wire guides are useful in guiding users to a certain extent, although they need improvement in design for some tasks.
My friend is an amazing scrapbooker. She never fails to add smiles to people’s faces by gifting them beautiful handmade cards full of sincerity. To sum up, scrapbooking is a conventionally method of preserving, presenting, arranging personal history in the form of a book, box, or card, or as a gift to others. Scrapbook albums are often decorated and frequently contain extensive journaling.
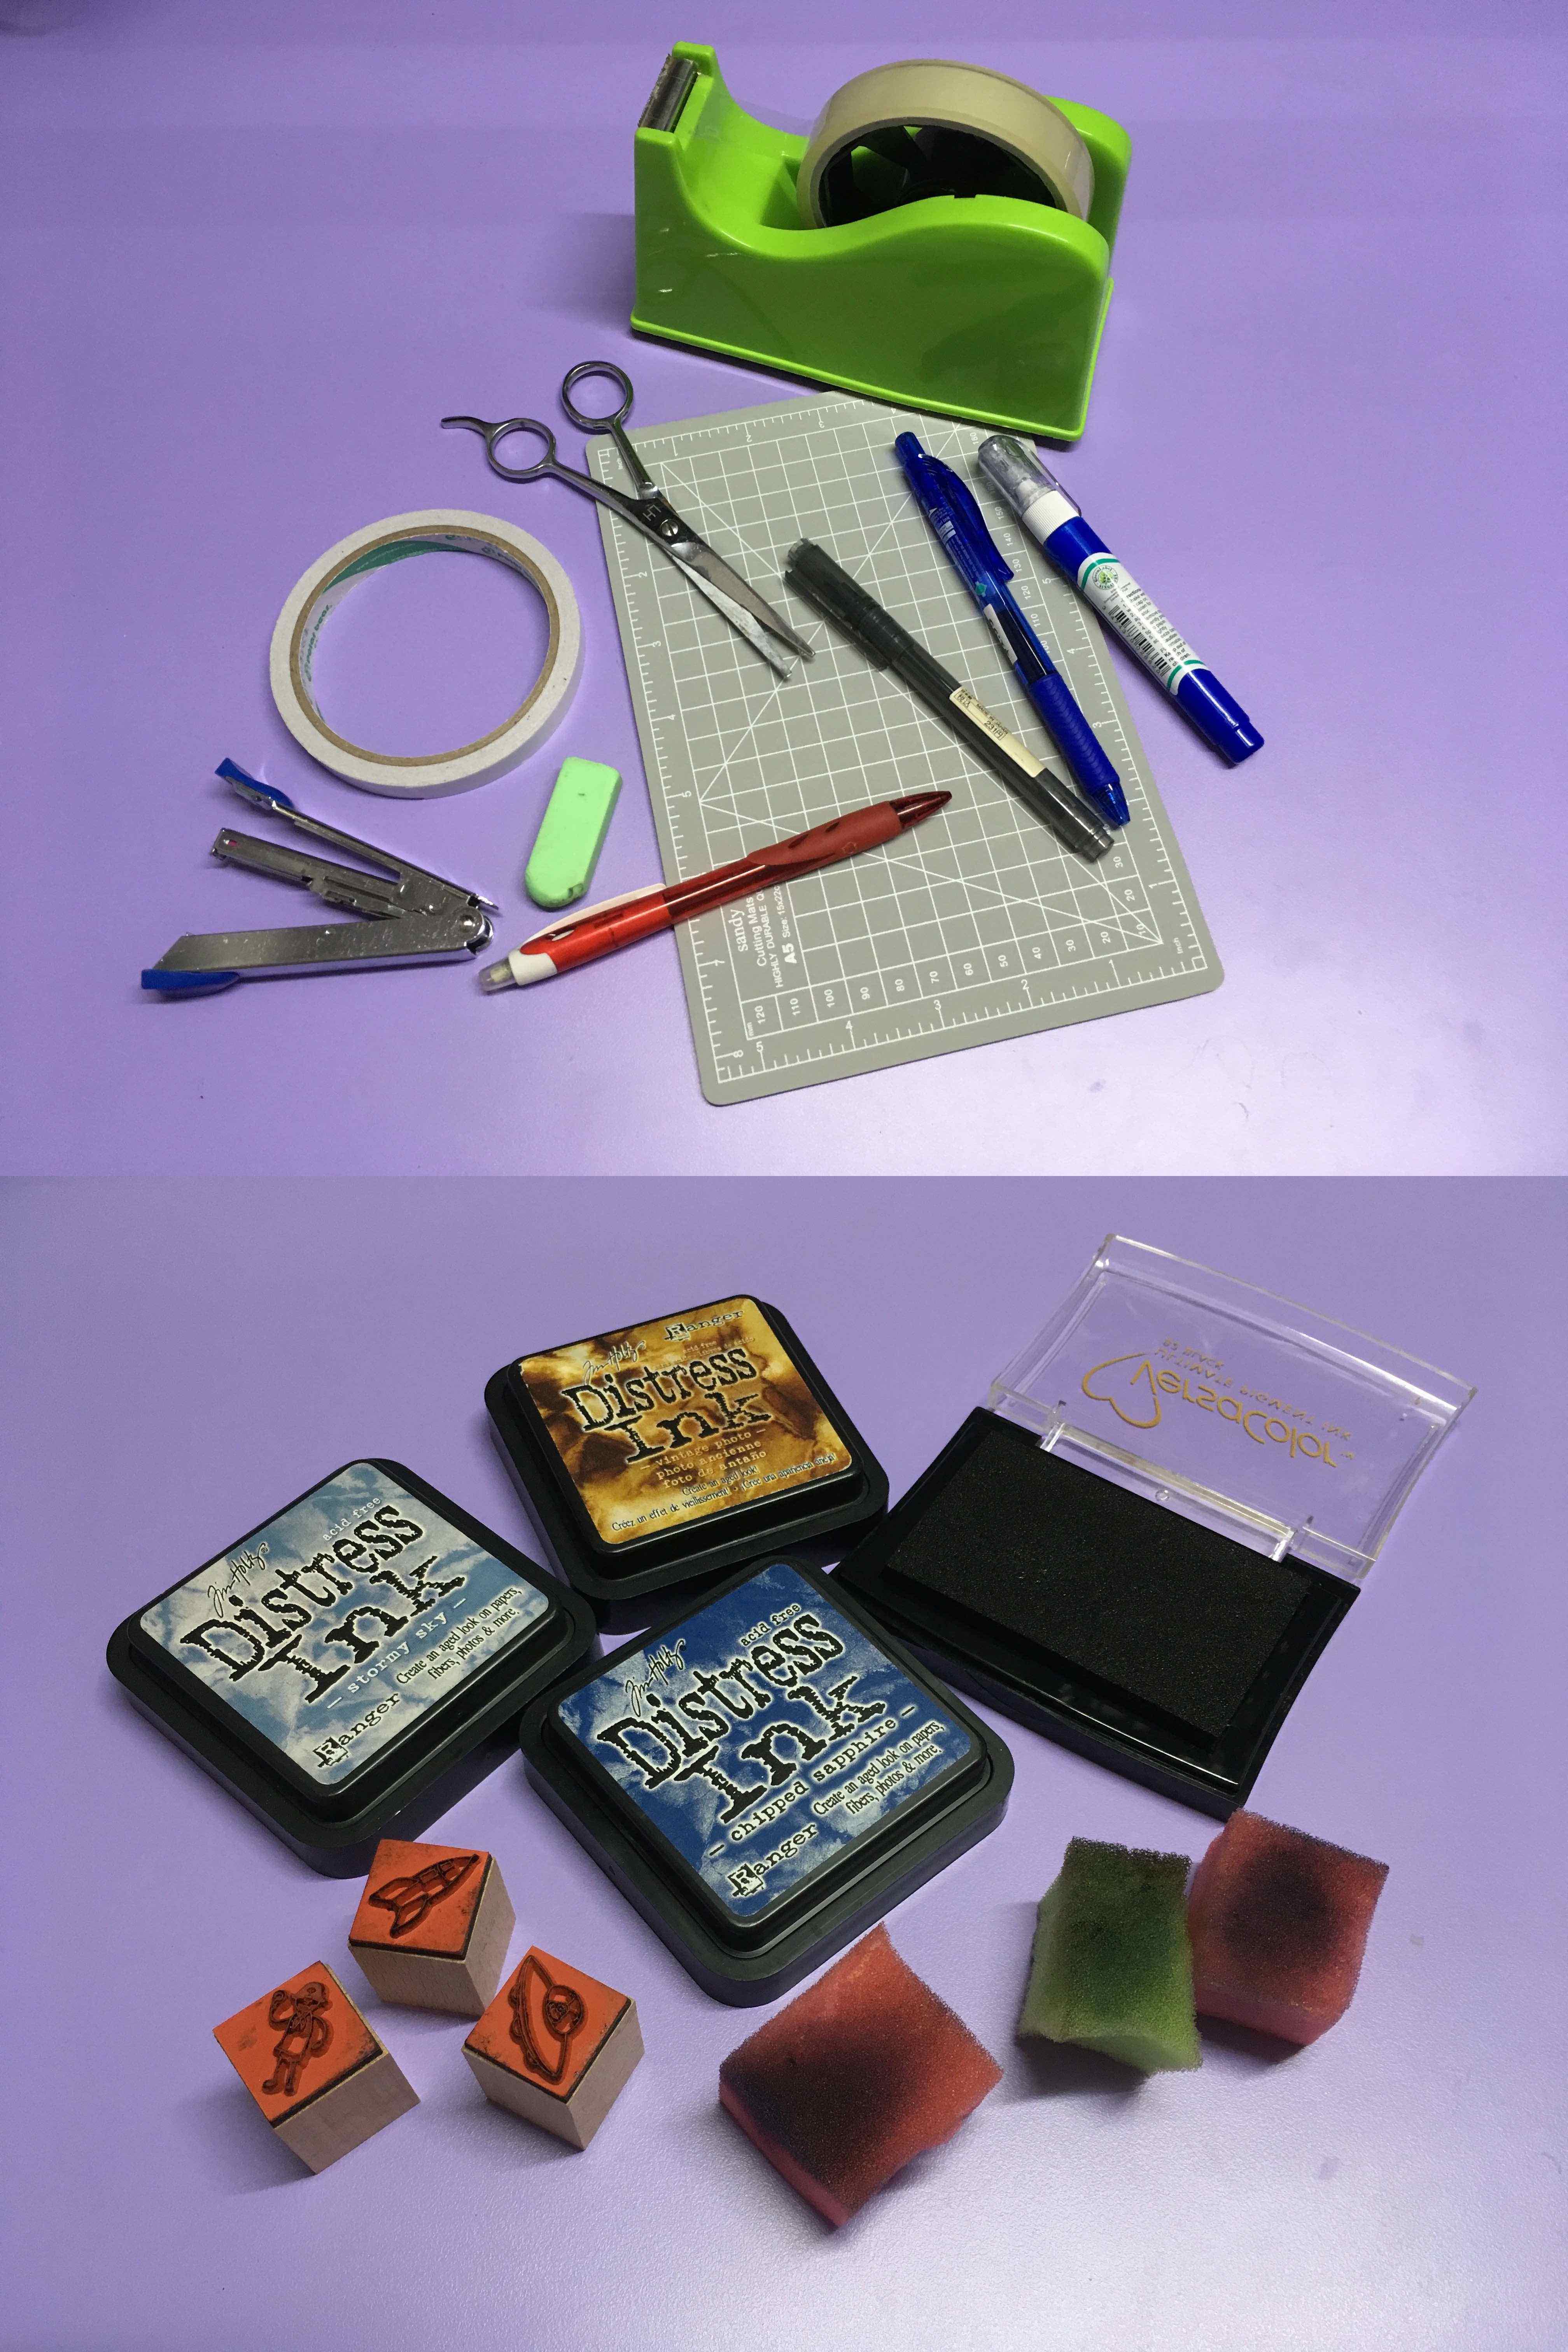
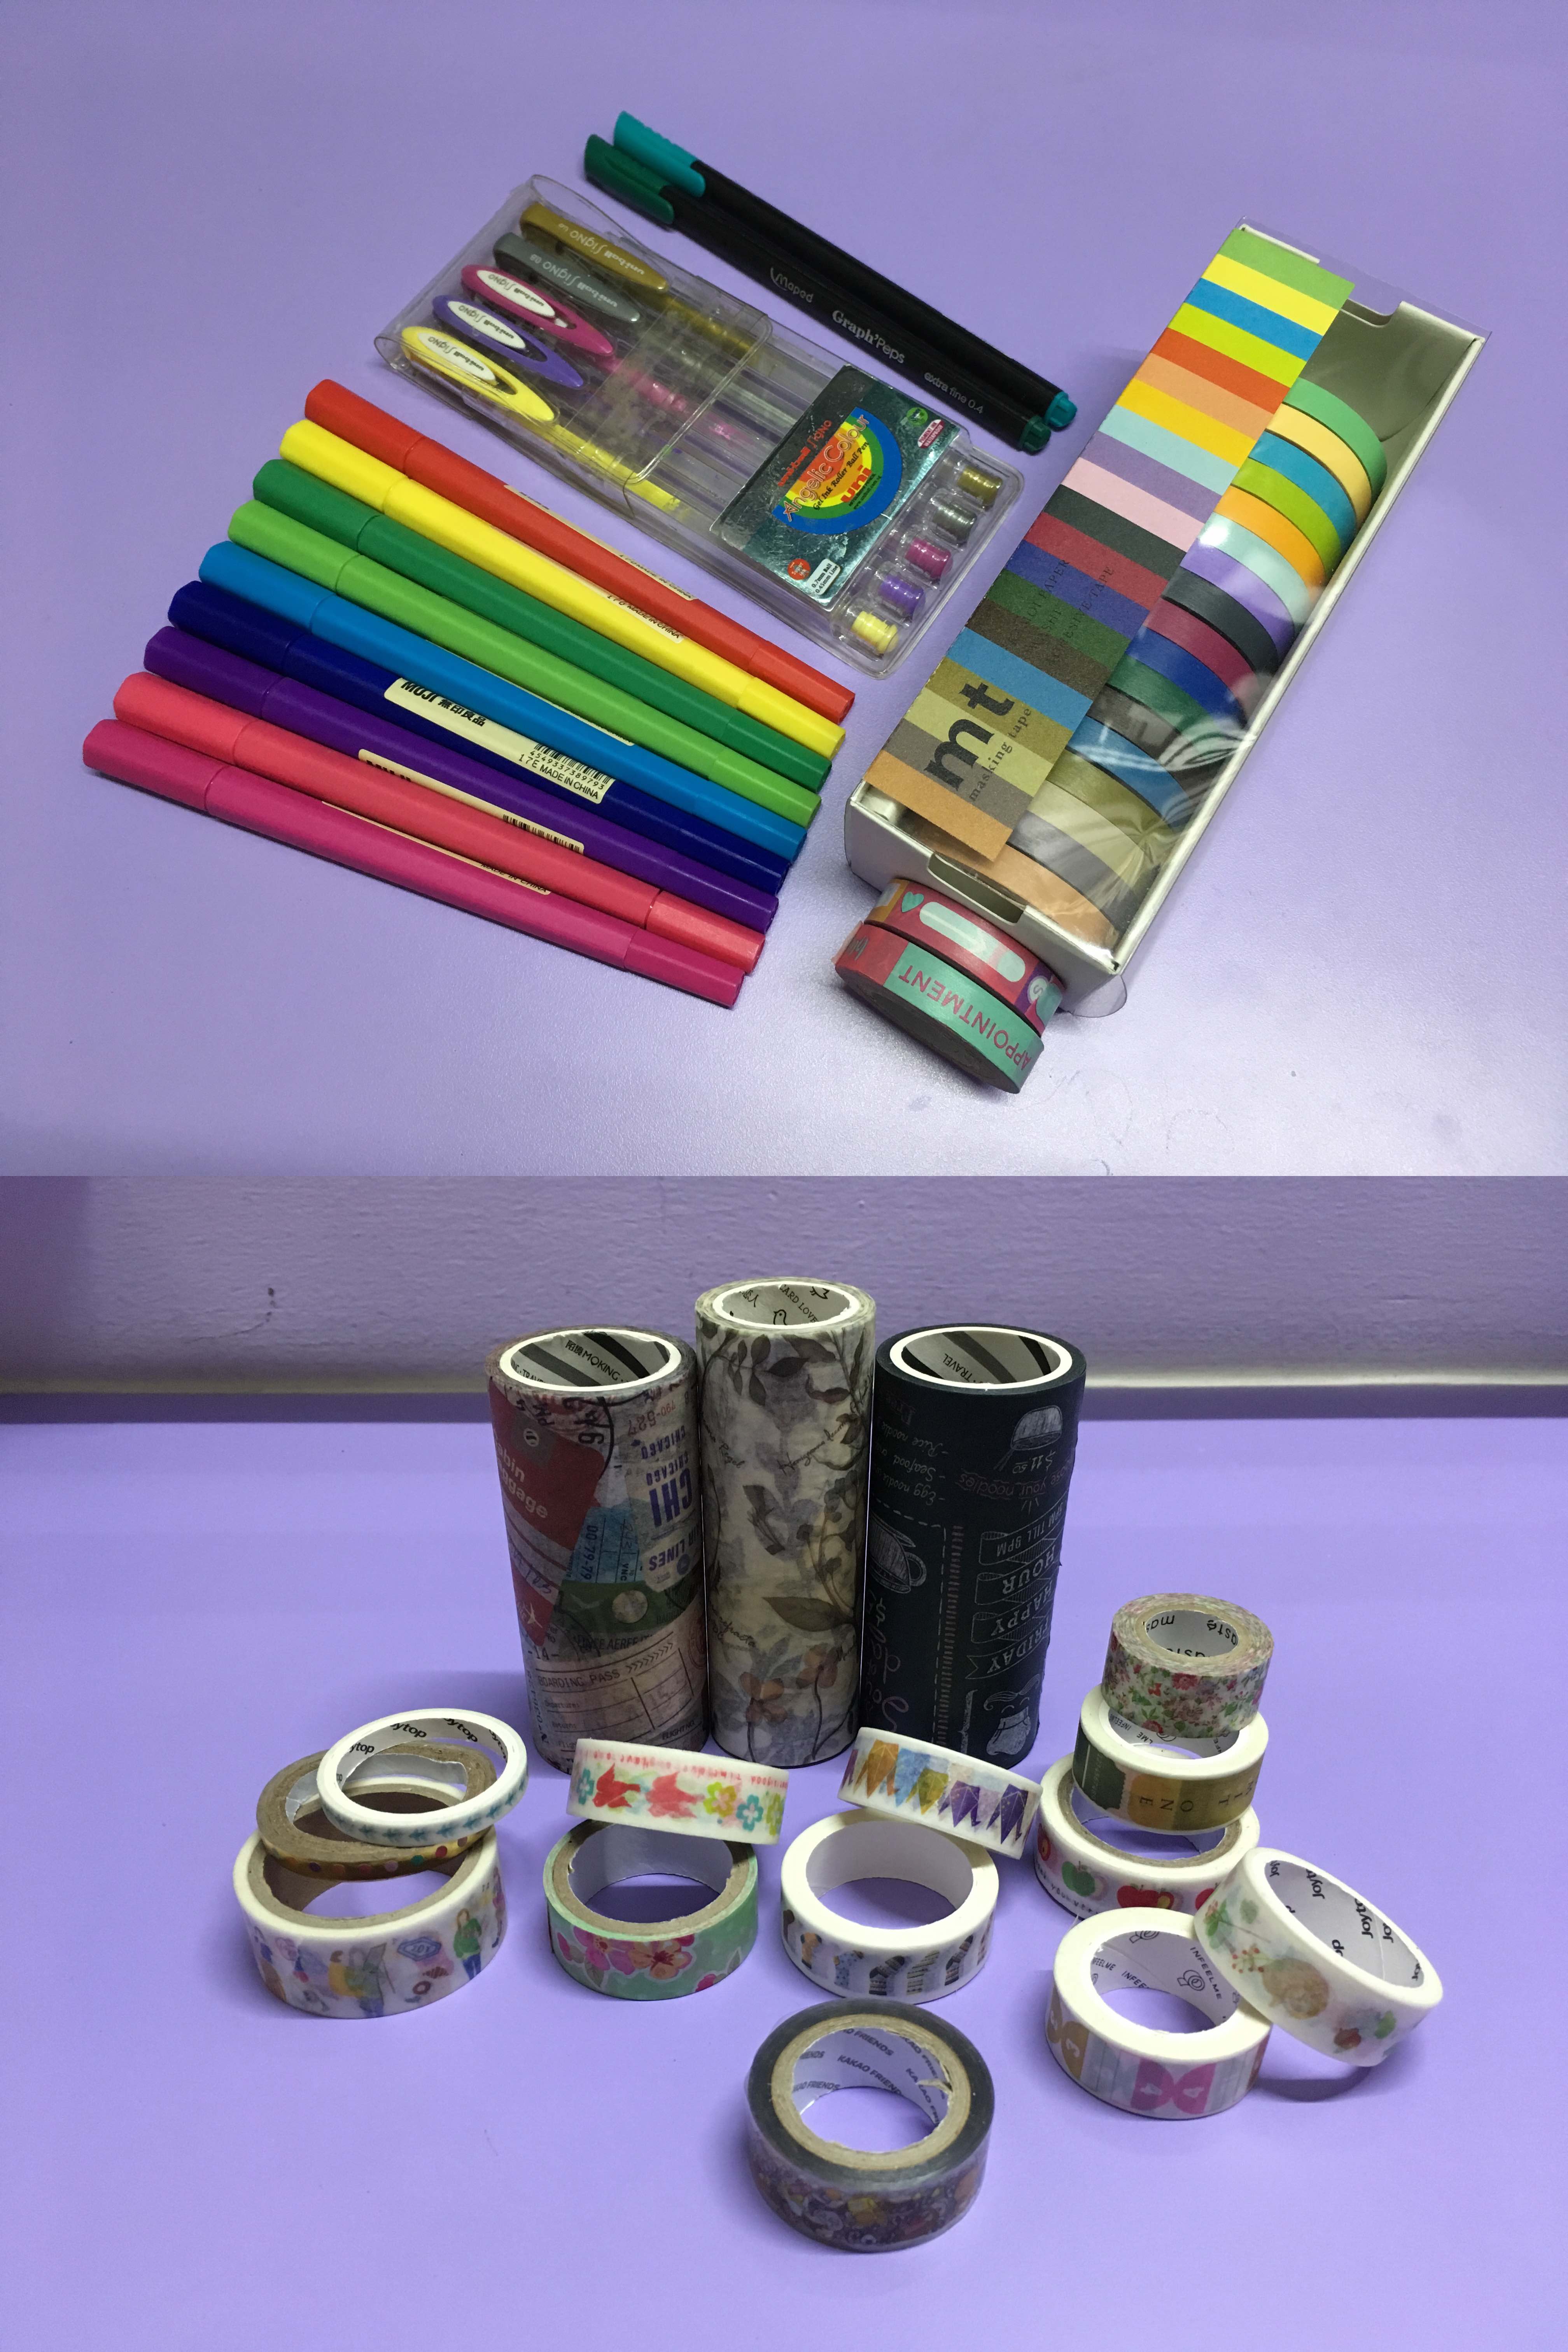
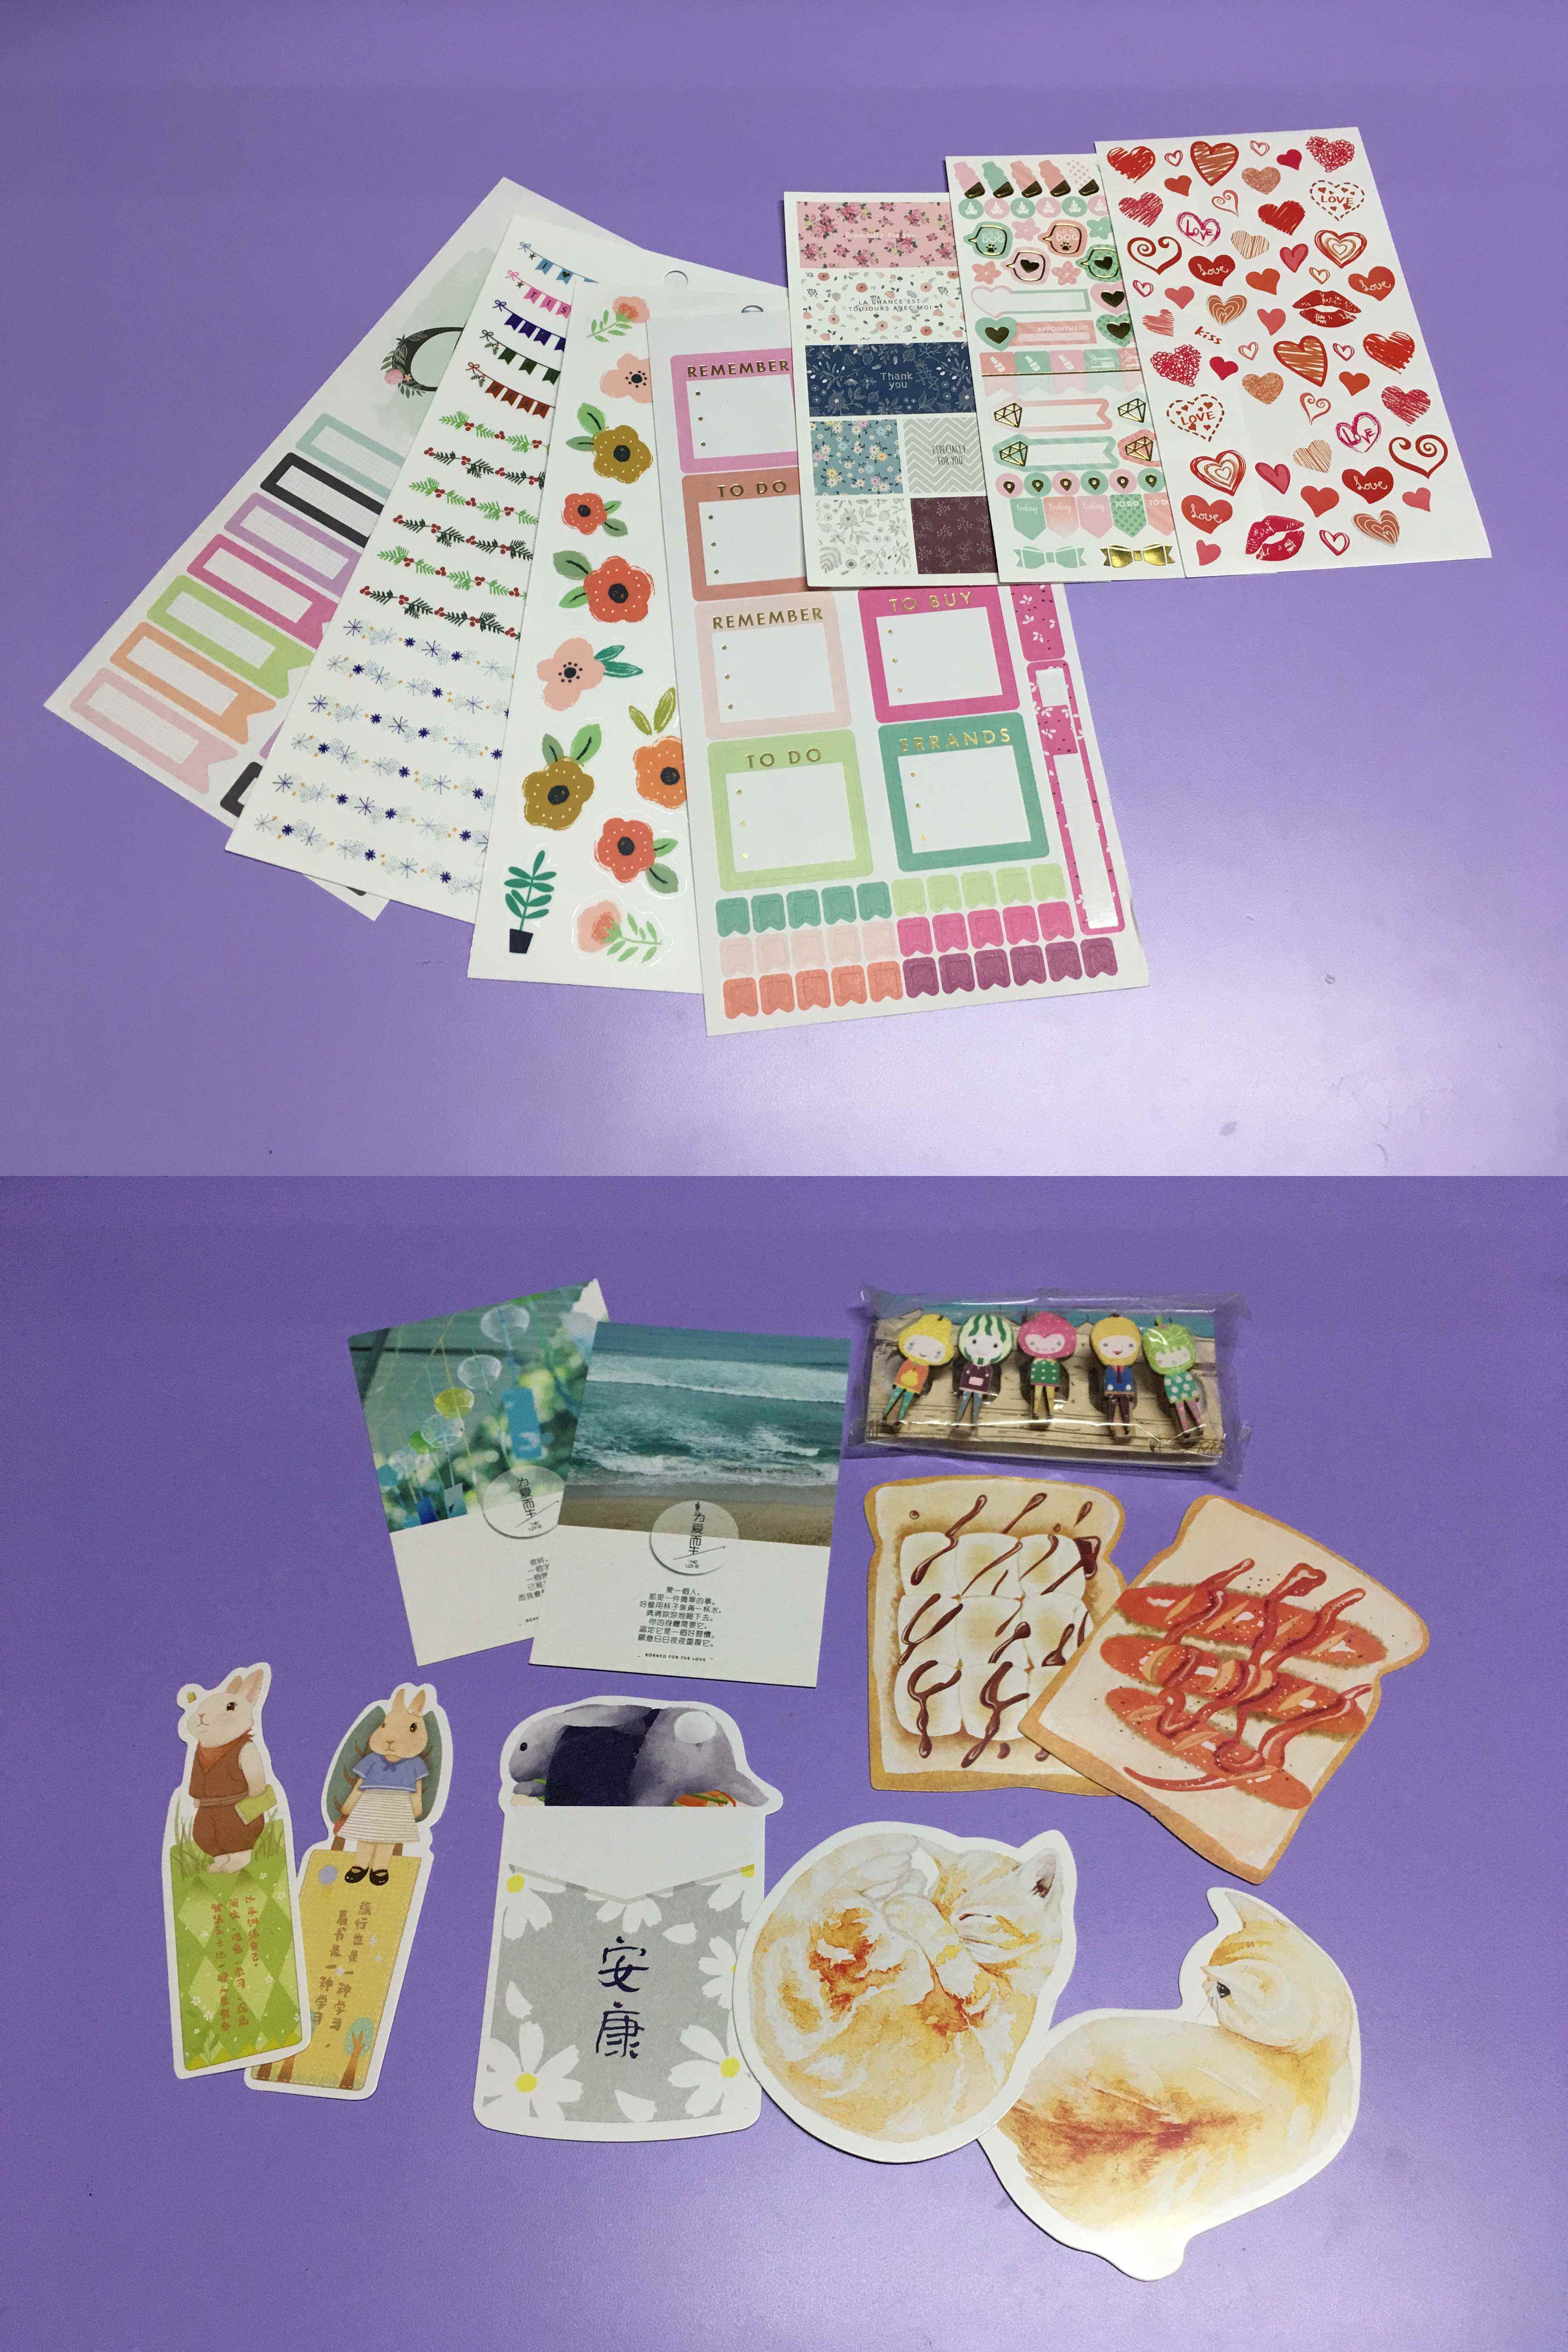
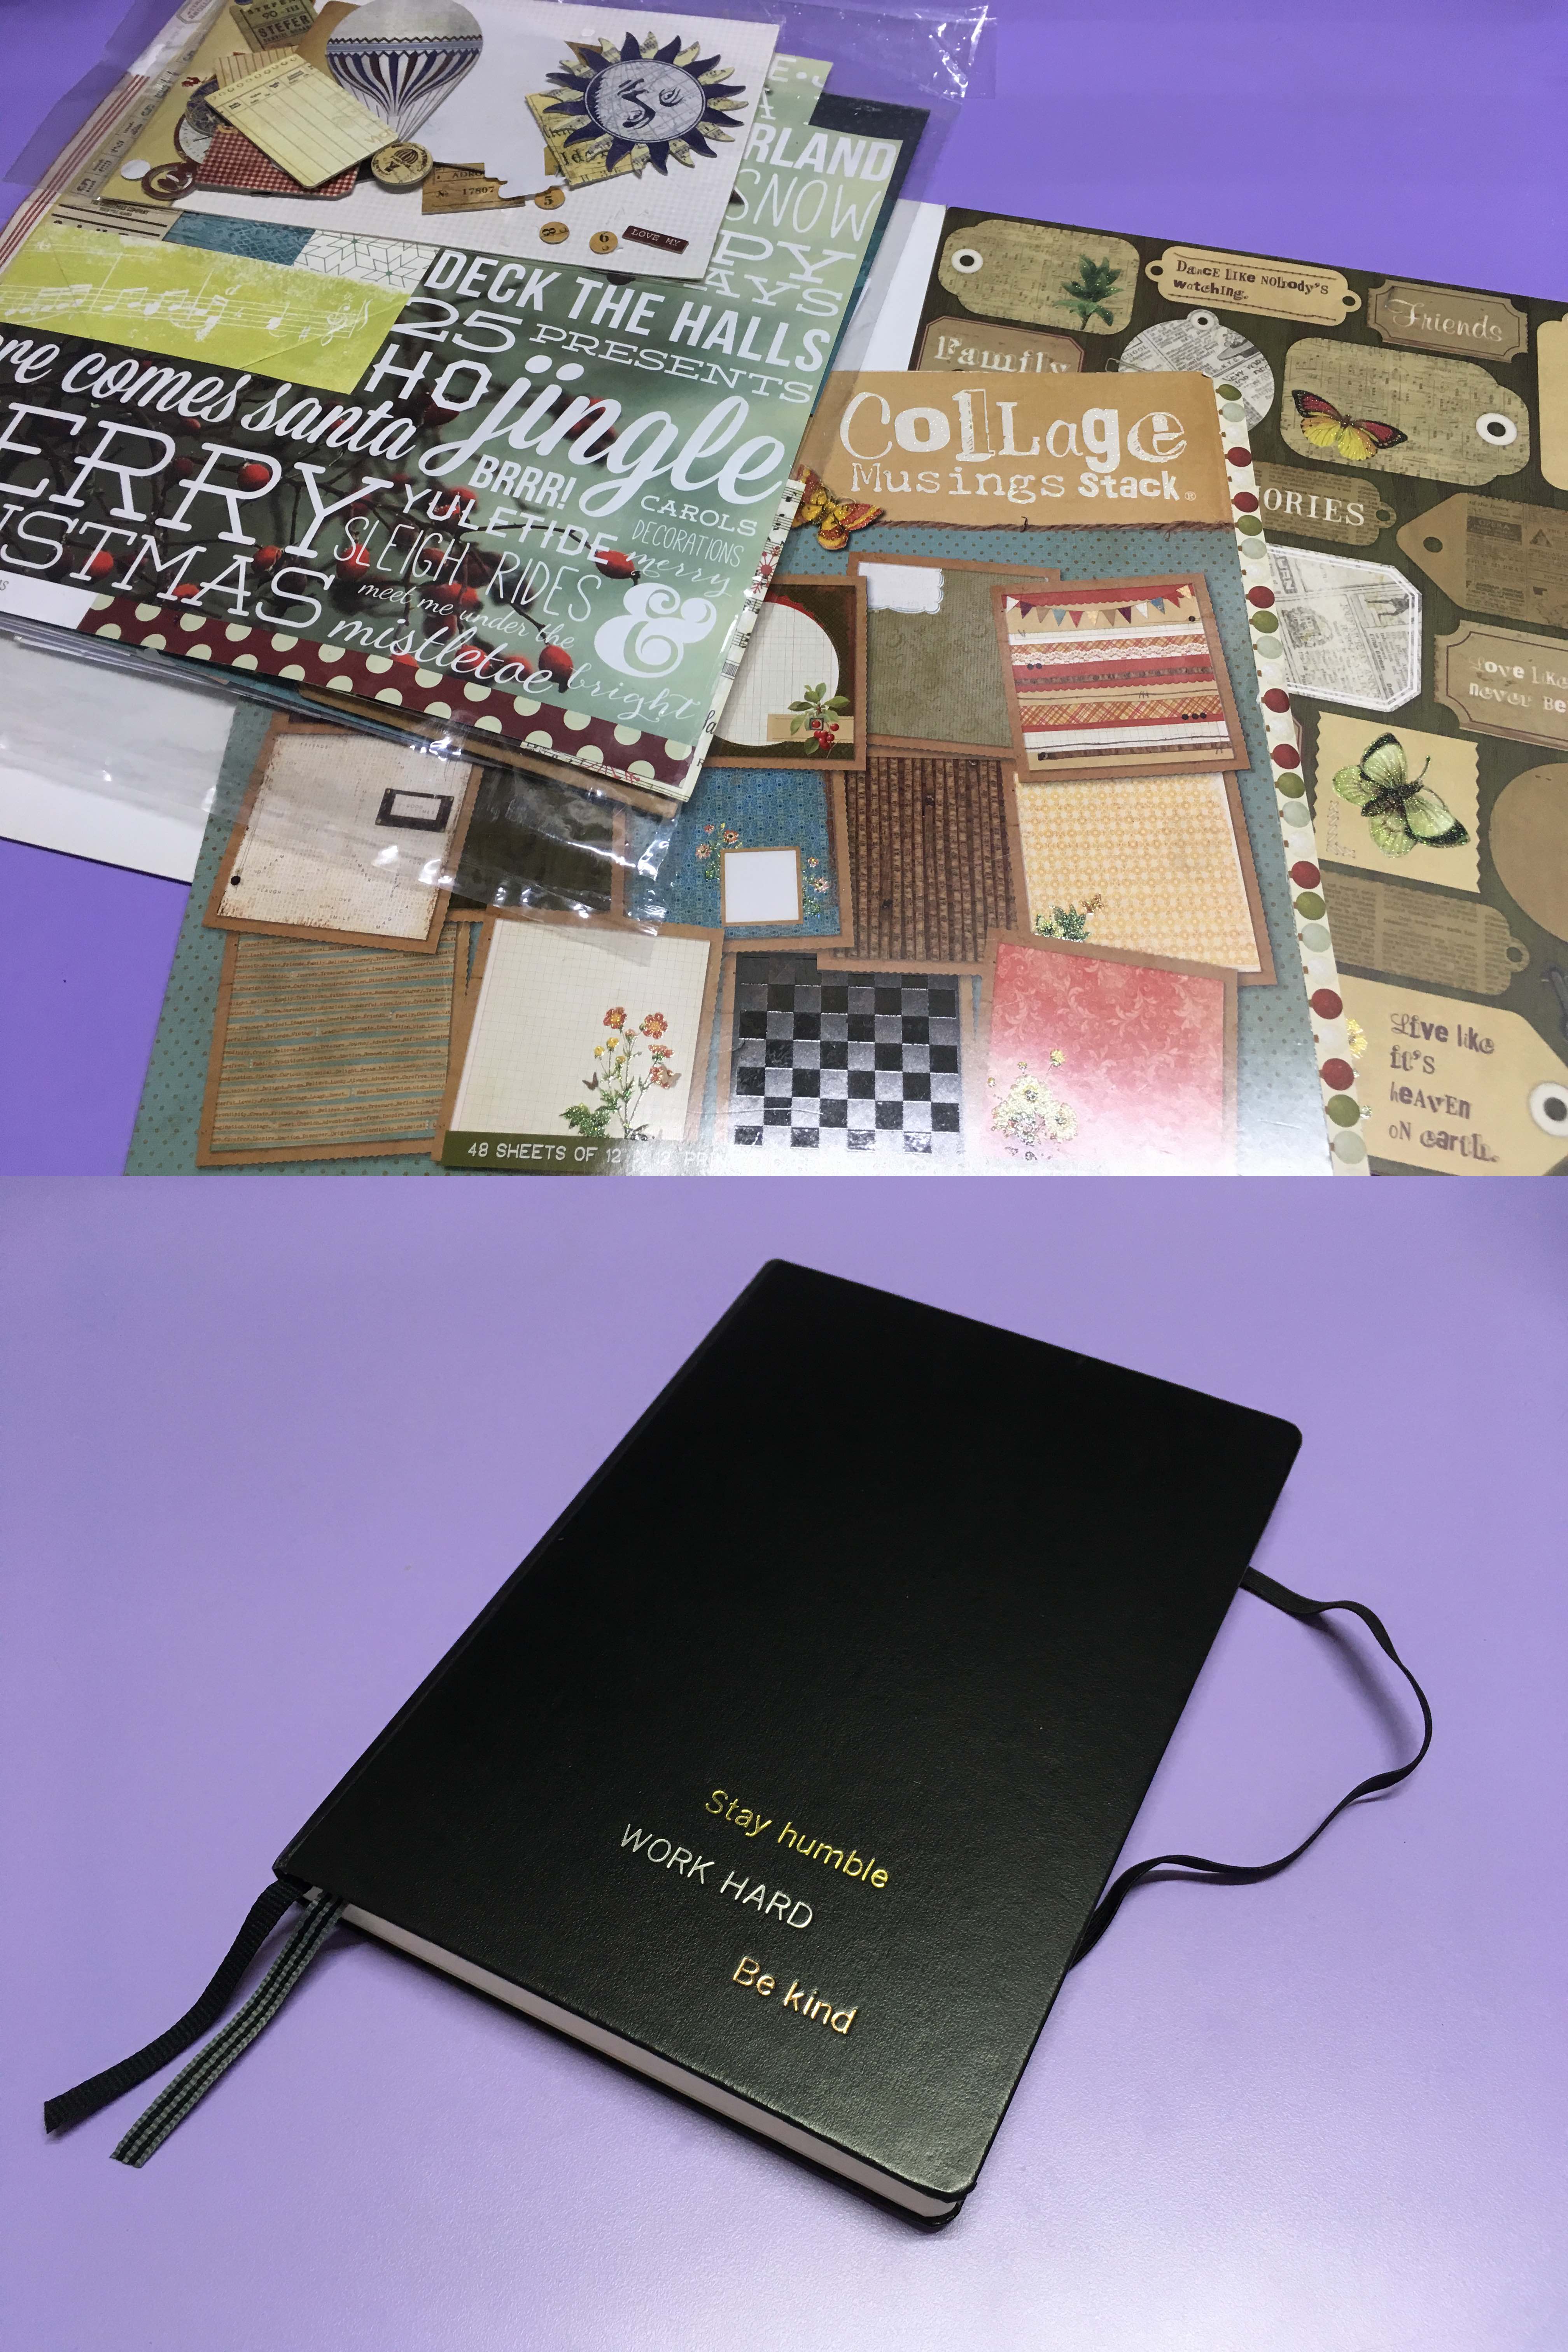
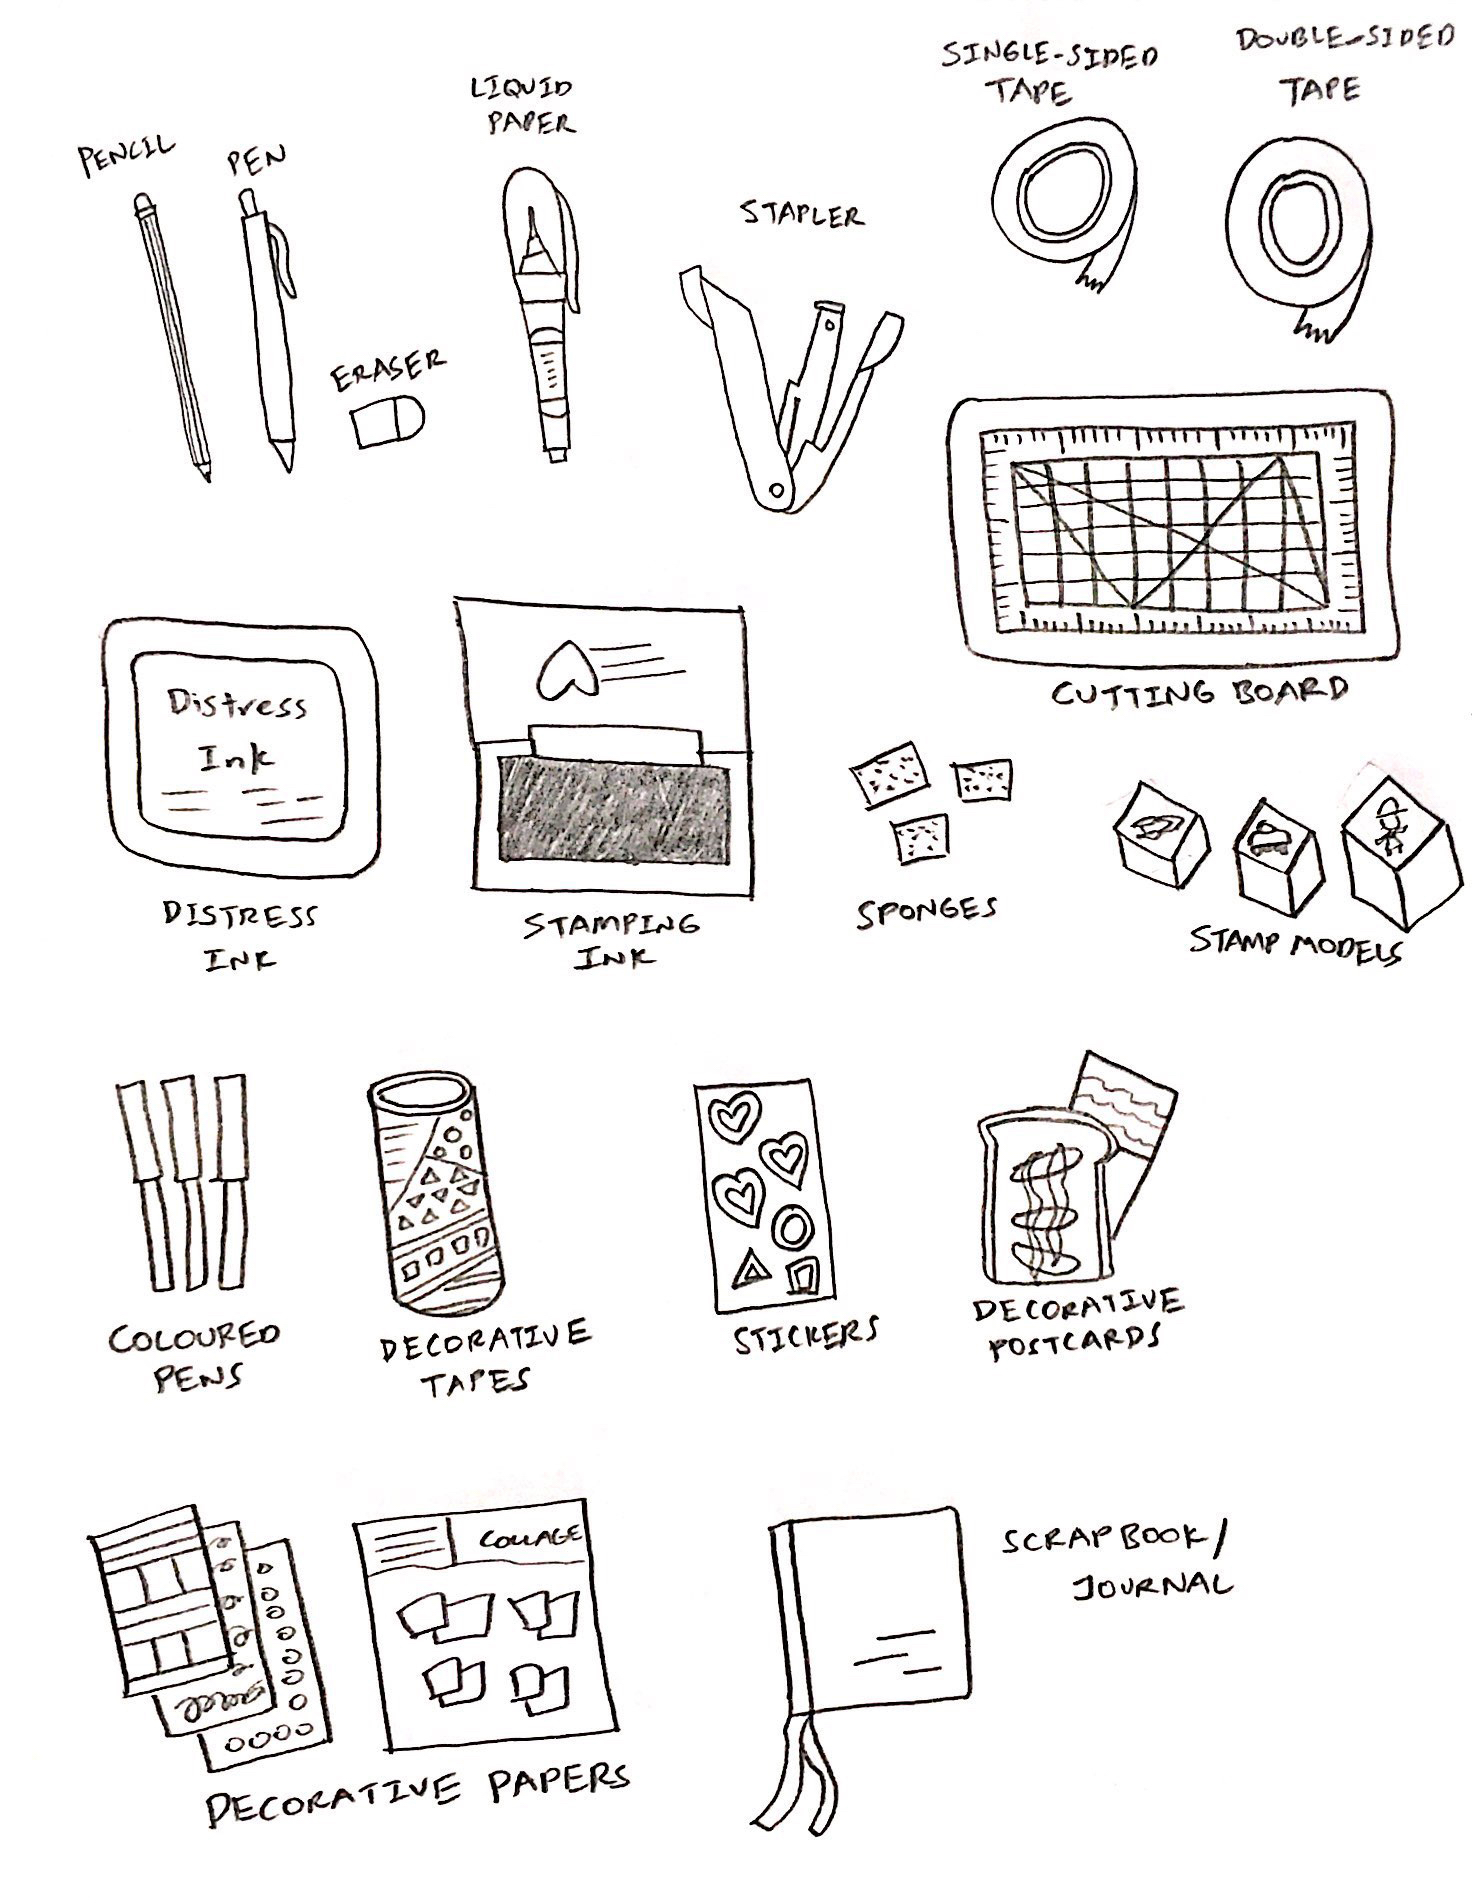
Tools used
Basic tools and inks/stamp models/sponges.Coloured pens and coloured/decorative tapes.Decorative stickers and decorative postcards/bookmarks/pegs.Decorative papers and scrapbook/journal/planner.Sketch of tools used in scrapbooking.
Worksite documentation
Scrapbooking is usually done in the practitioner’s room, where he/she keeps all her scrapbooking materials and tools. Thus, scrapbooking is a really convenient practice that you can do in the comfort of your own home.
Example of desk in practitioner’s own room (image courtesy of IKEA). My friend did not wish for her room to be photographed, so I took a sample room desk picture from IKEA.
Process documentation
I got to play around with the distress ink and stamp models. The idea behind the distress ink is to “stress” the paper, such that it looks aged with a vintage look. Below is a video of how paper distressing is like.
Process of paper distressing.
My process of making a card was heavily focused on trying to find inspirations online and from my friend. It sucks how I lack creativity juices. I looked through her past works to gain inspiration.
My friend’s past scrapbooking/craft works.
While I was trying to finish my card, my friend finished decorating and conceptualising 2 months of her planner (talk about need for speed).
I love how she comes up with a theme for each month. She did these pages using coloured pens and markers mainly.
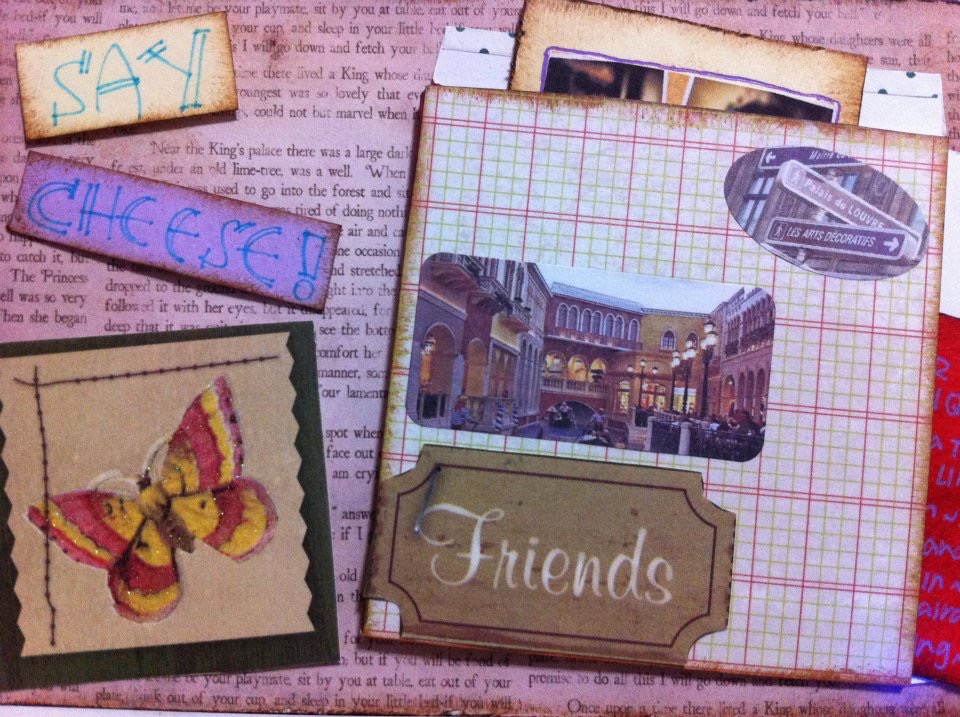
After a couple of hours, I managed to do up the card below. I used the distress ink to make the paper cutouts look aged, along with vintage stickers I took from my friend. Why “Say cheese!”? I have no idea… It just came to mind haha.
Pain points
I think the main problem I had was really with the creativity part. Also, because my friend had so many scrapbooking tools and materials, it was hard to decide and find what I want to use. Thus, a sorting or organising system would be great. Distressing the paper was also a challenge because it is difficult to make the aging look natural. Maybe a distressing time machine to speed up the natural aging process of the paper would be apt to compensate for my lack of skills.
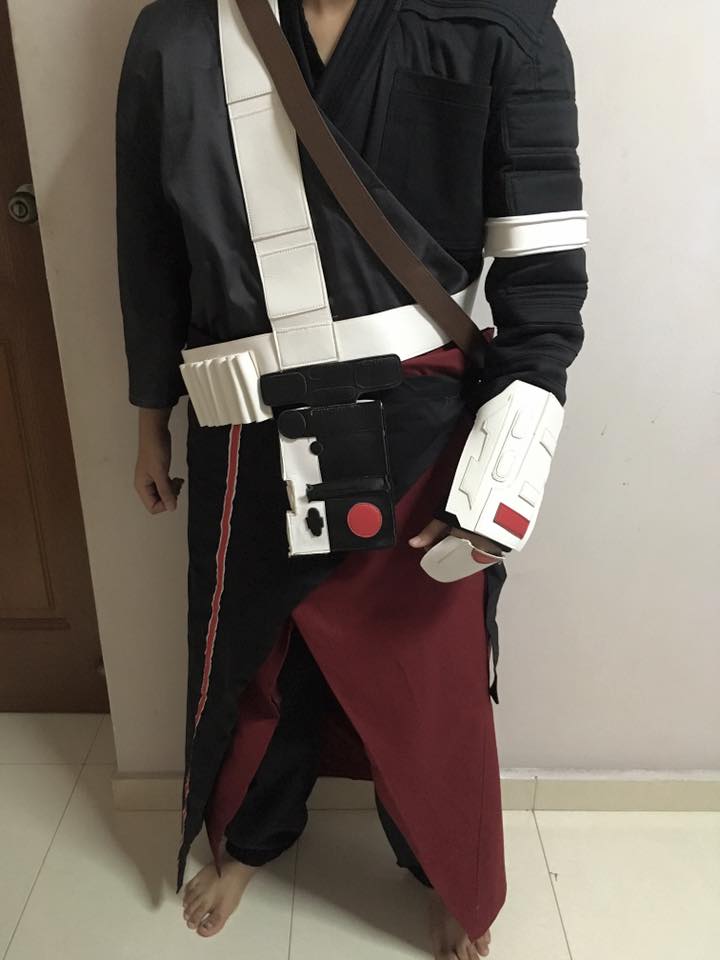
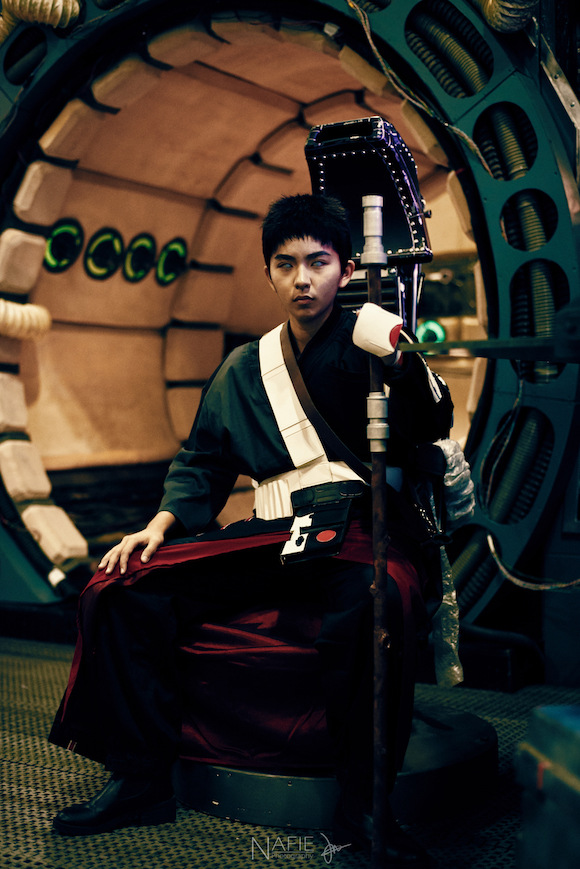
I am an otaku (anime lover) and cosplayer. I have been cosplaying for about 2 years, but I have never crafted my own weapons for cosplay (thanks Taobao). For this year’s Singapore Toy, Game & Comic Convention, I decided to cosplay Chirrut Îmwe from Rogue One: A Star Wars Story. I asked my cosplay friend, who is also a crafter, for help on making Chirrut’s weapon/walking stick because the weapon costs $200+ if I buy it online. Below is the documentation on the tools used and the crafting process.
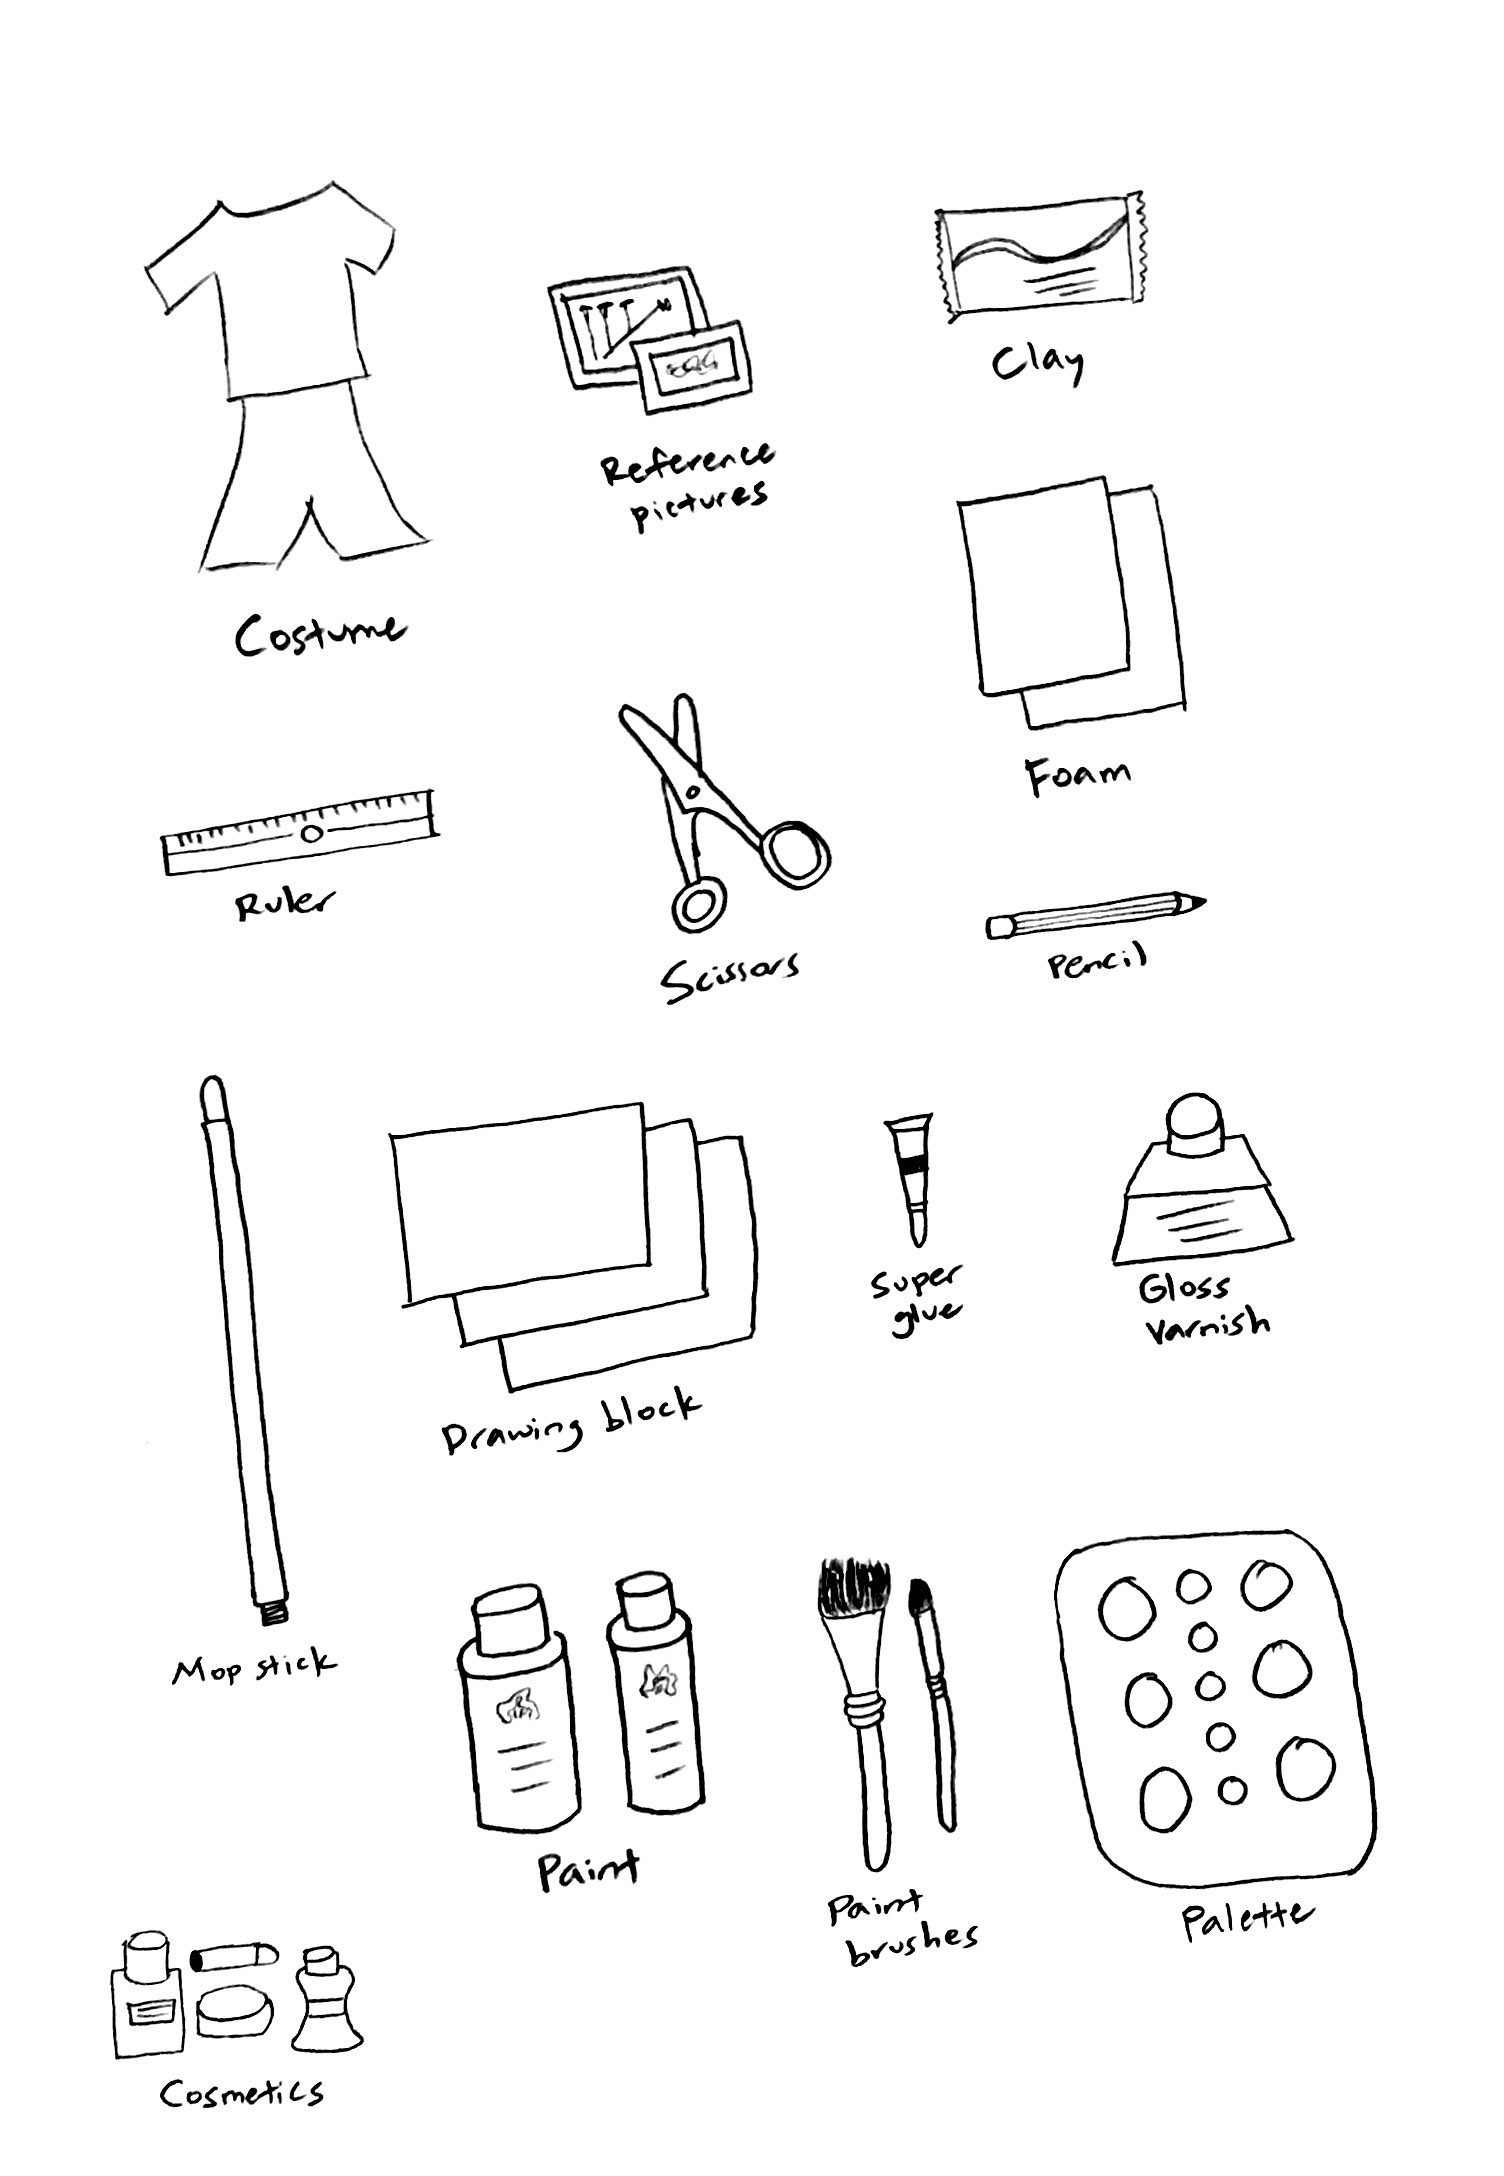
Tools used
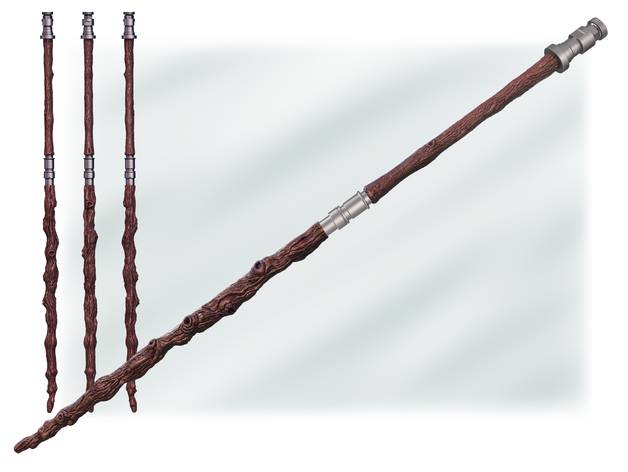
Sketch of tools used in the entire process of crafting and cosplaying. I did not take a collage of these tools, but they’ll appear in the process documentation.Reference picture for Chirrut (character) used in the entire process.Reference picture for Chirrut’s weapon used in the crafting process.Chirrut’s costume that I bought from Taobao (rip wallet).
Worksite documentation
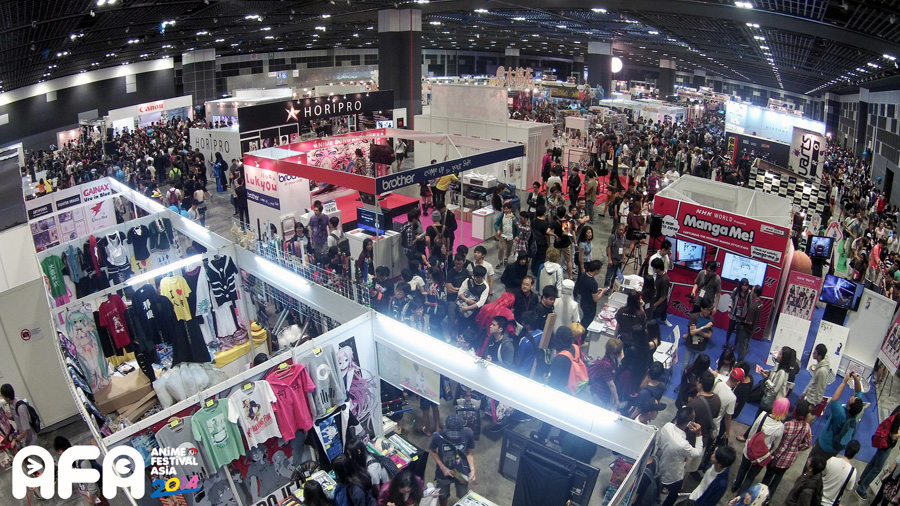
The best part about crafting is that it can be done anywhere. Yes, that includes the comfort of your own home/room. I crafted Chirrut’s weapon in my room as my room has all the tools necessary. For cosplay, it’s usually done at conventions, such as Anime Festival Asia Singapore or Singapore Toy, Game & Comic Convention. The worksite for cosplay is usually really crowded with a mix of normies (casual visitors), cosplayers, exhibitors, and photographers.
The worksite for cosplay (convention). Picture belongs to AFASG.
Process documentation
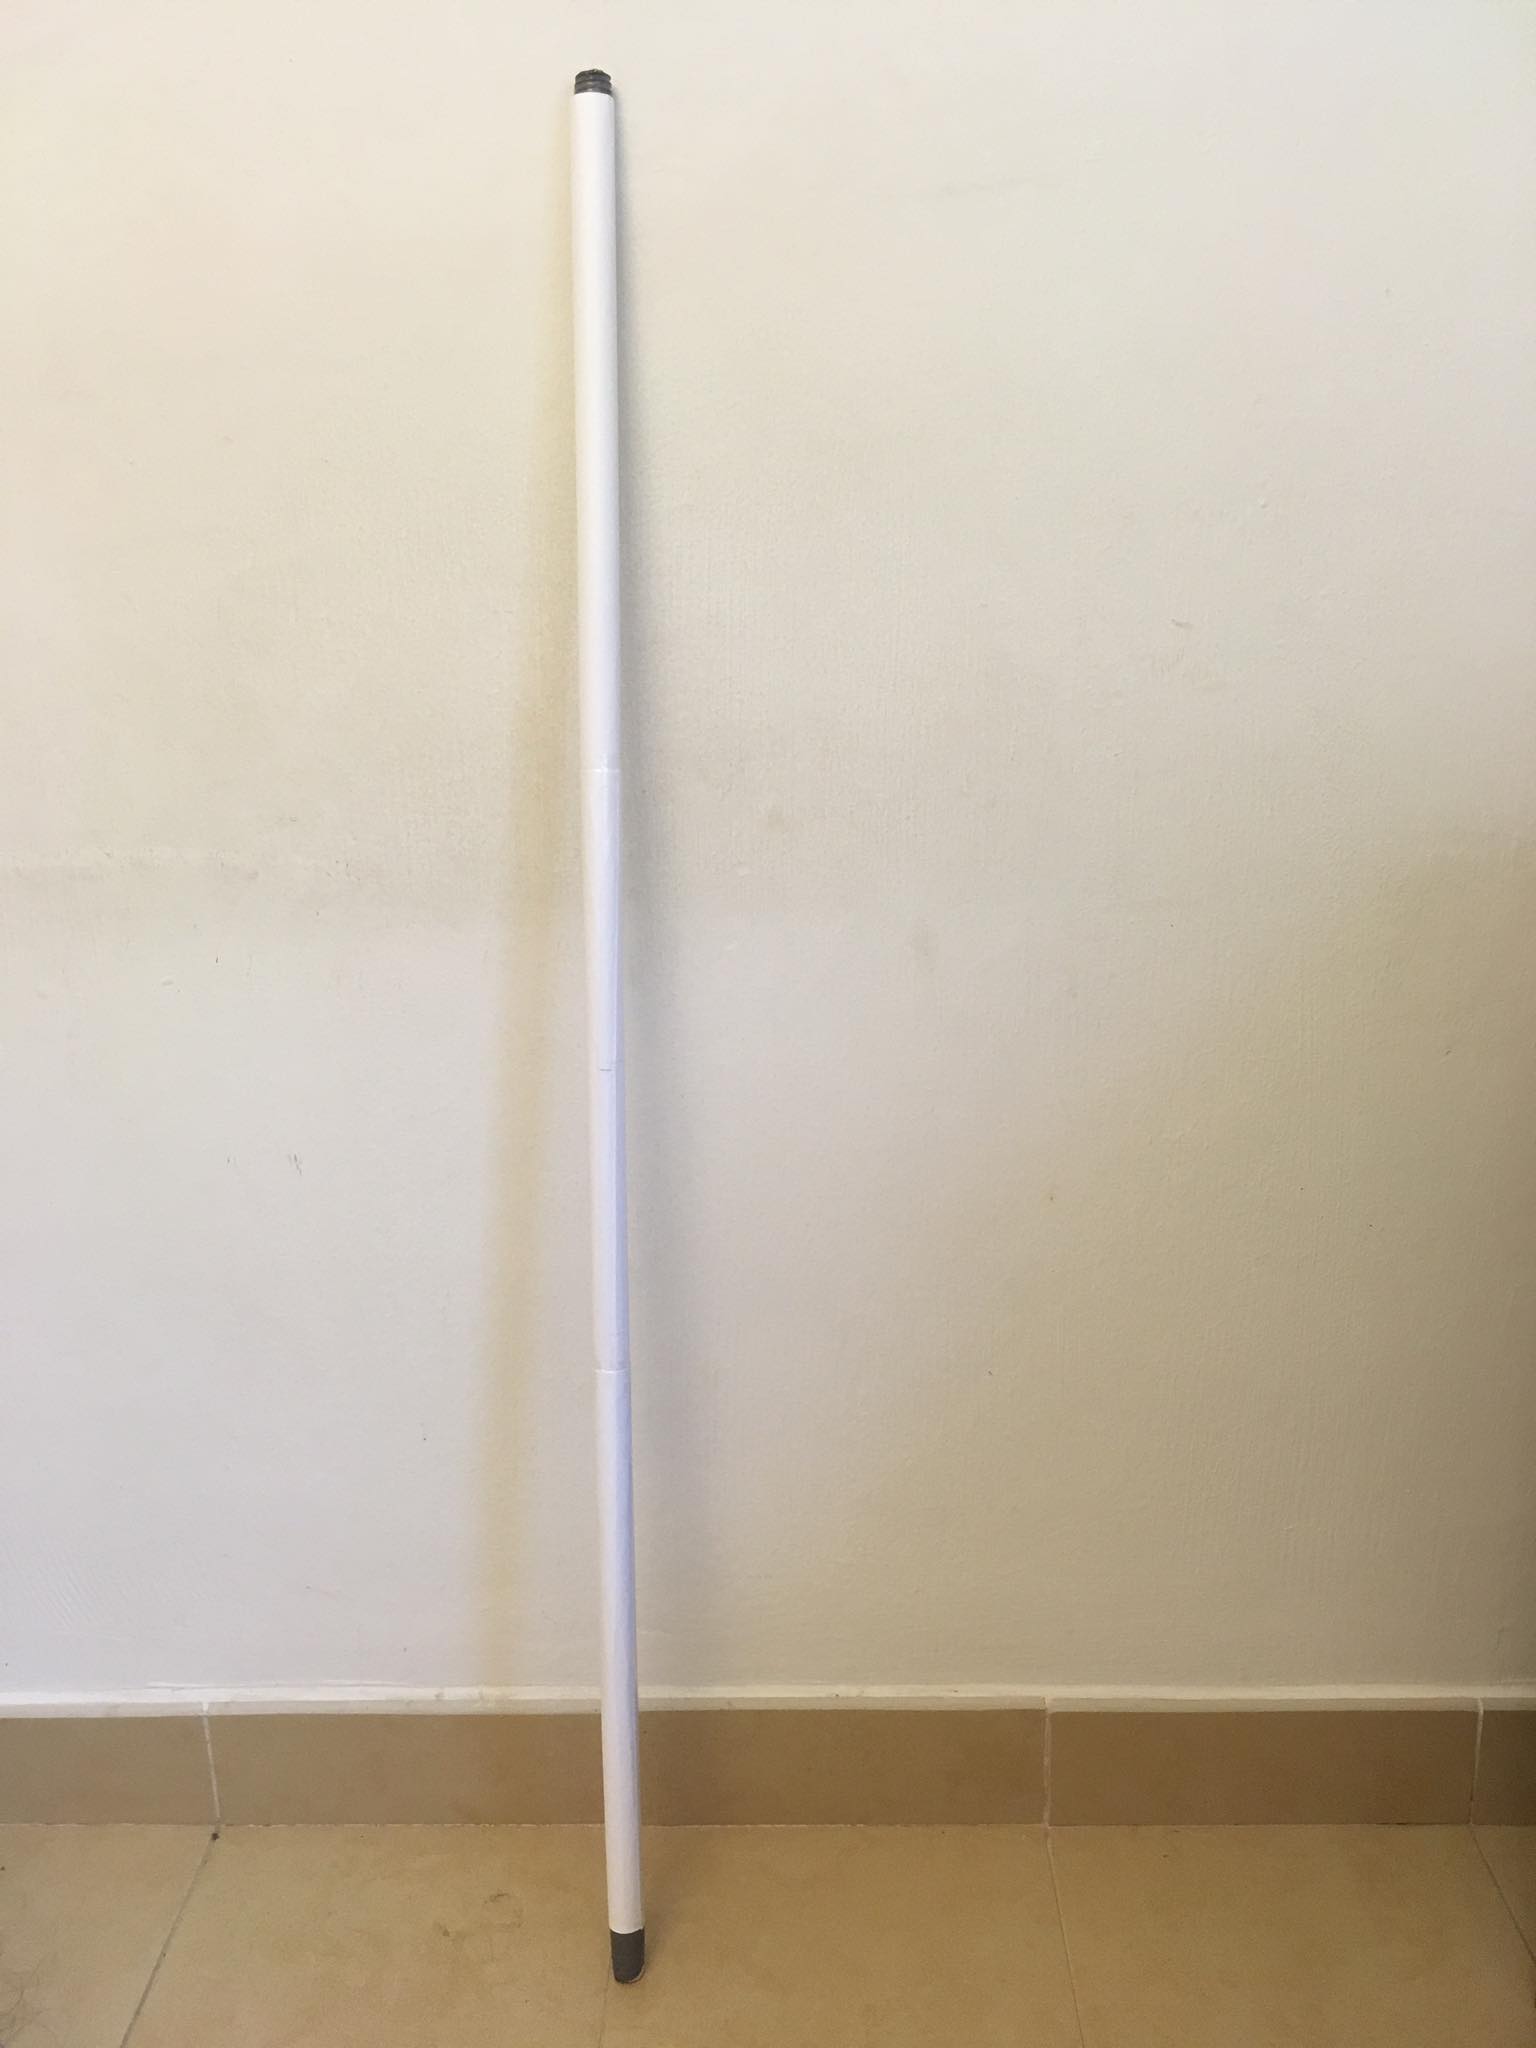
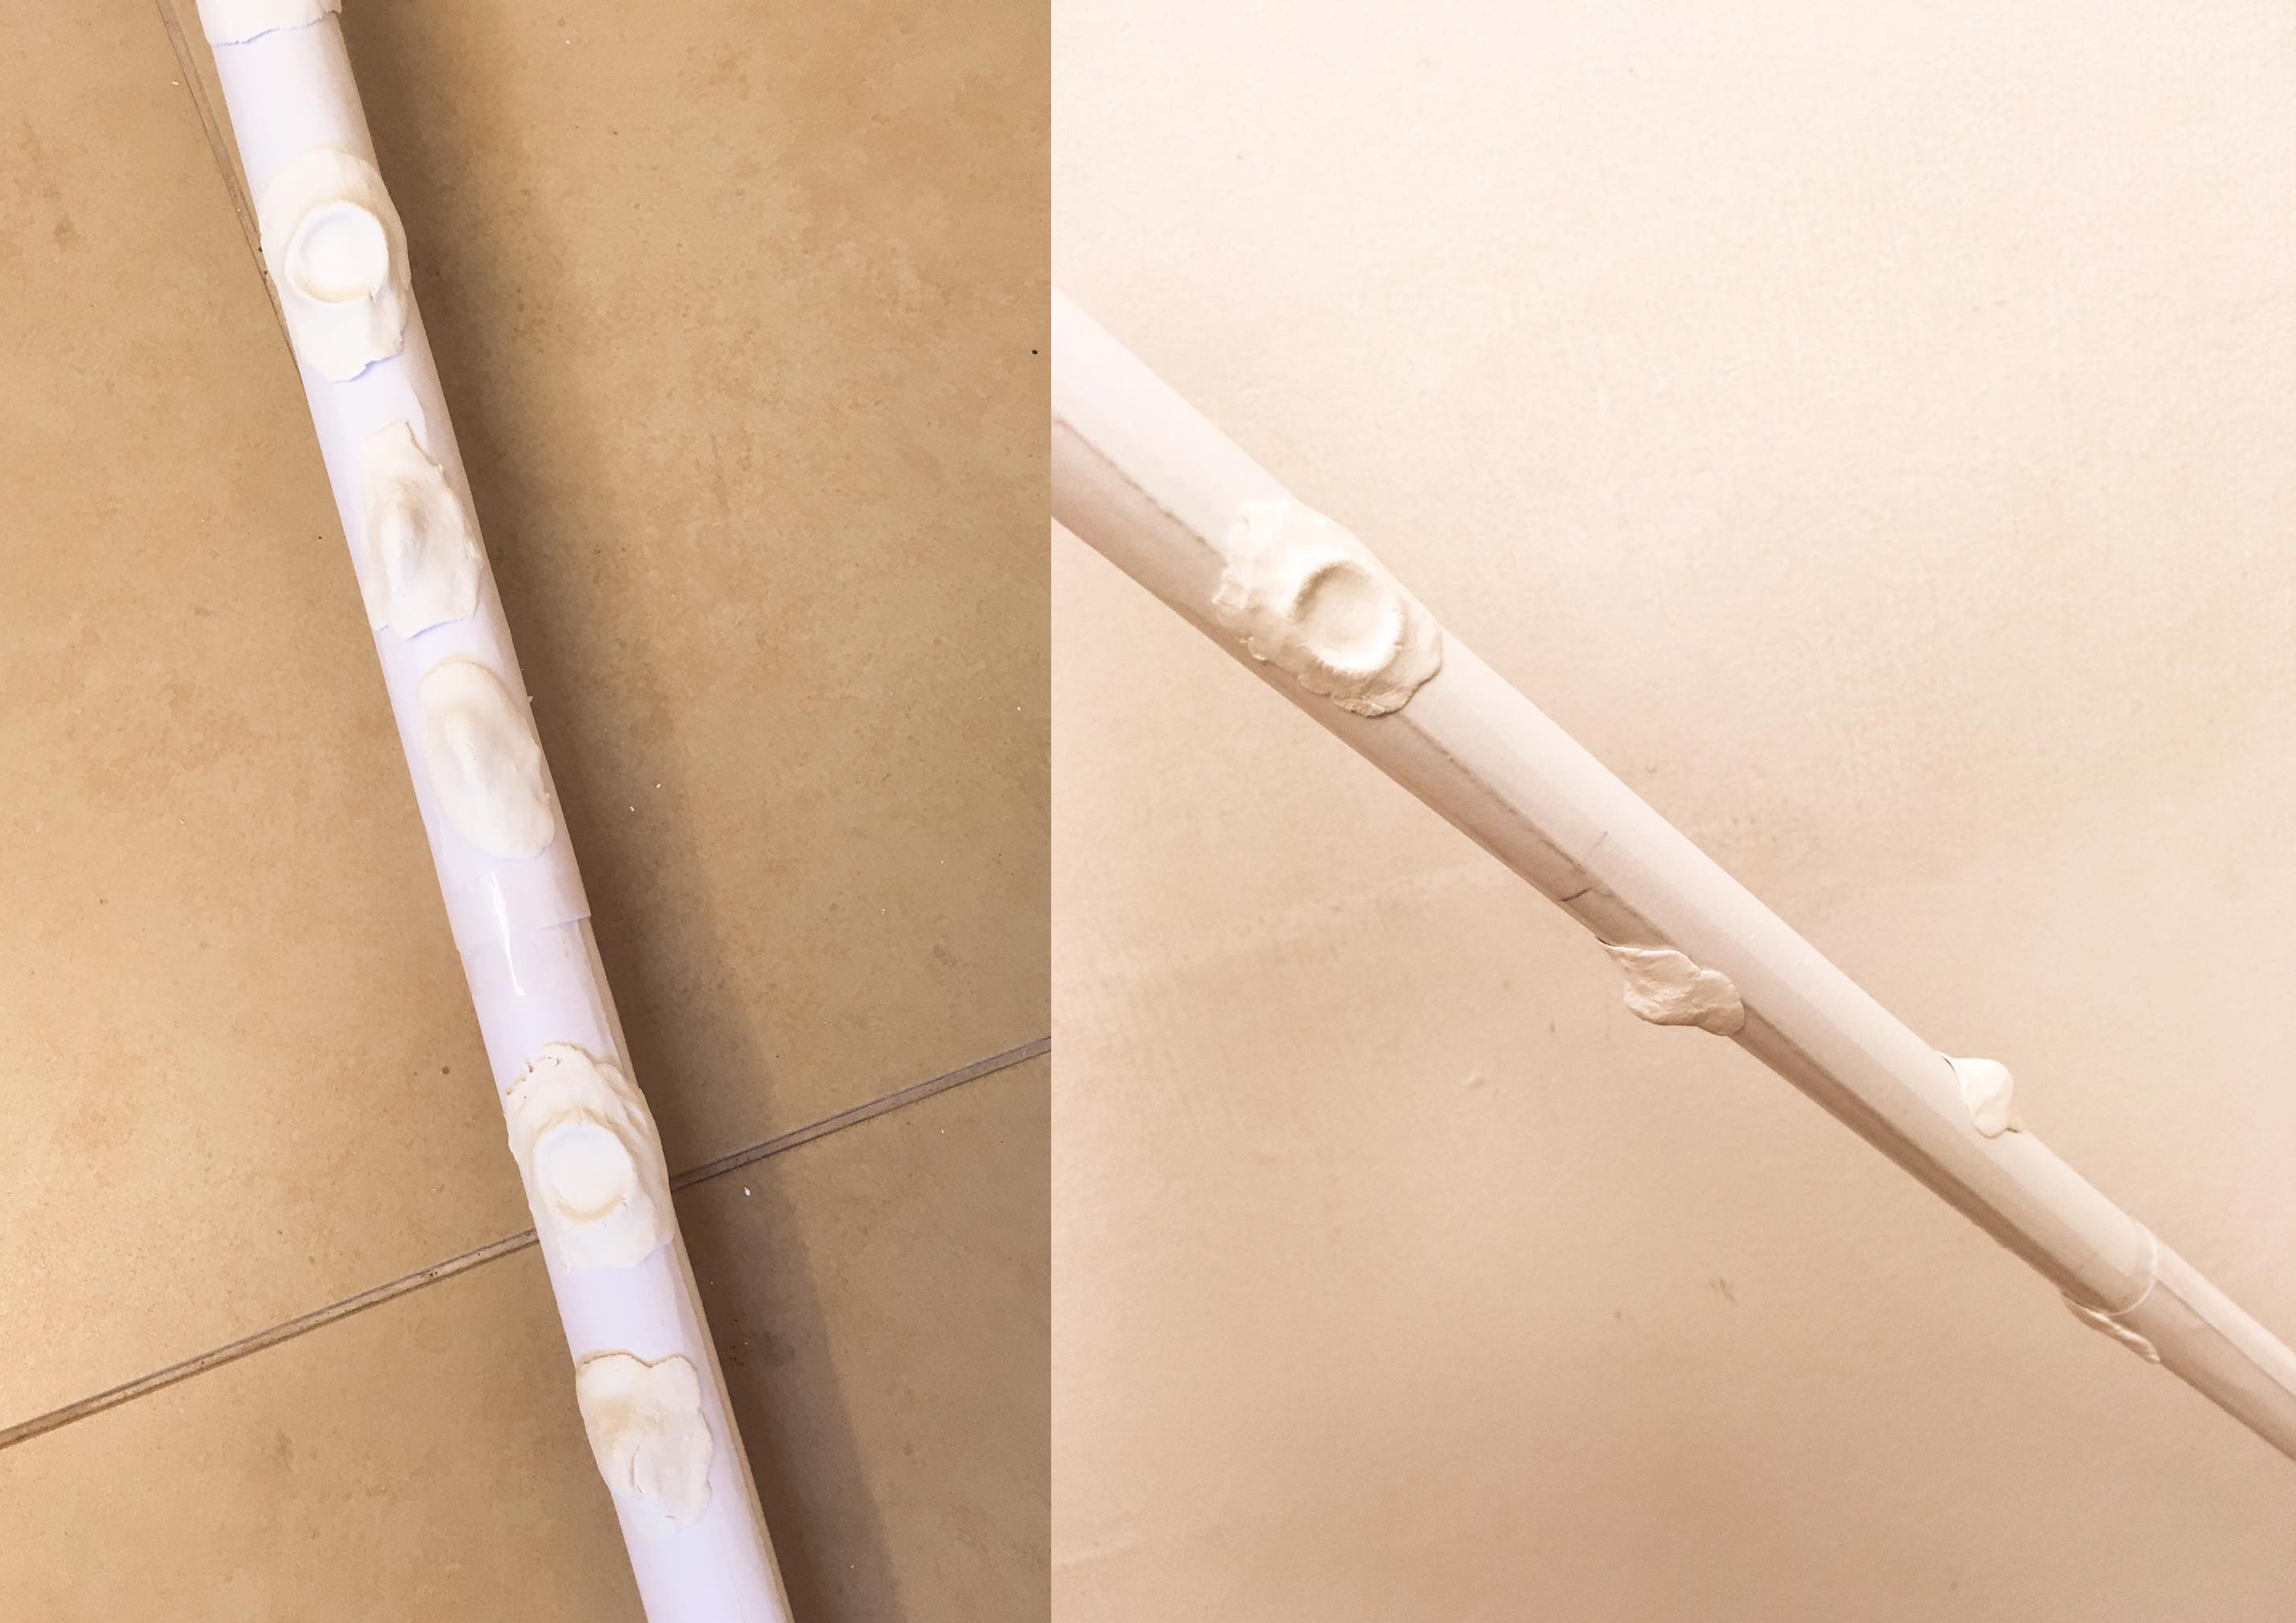
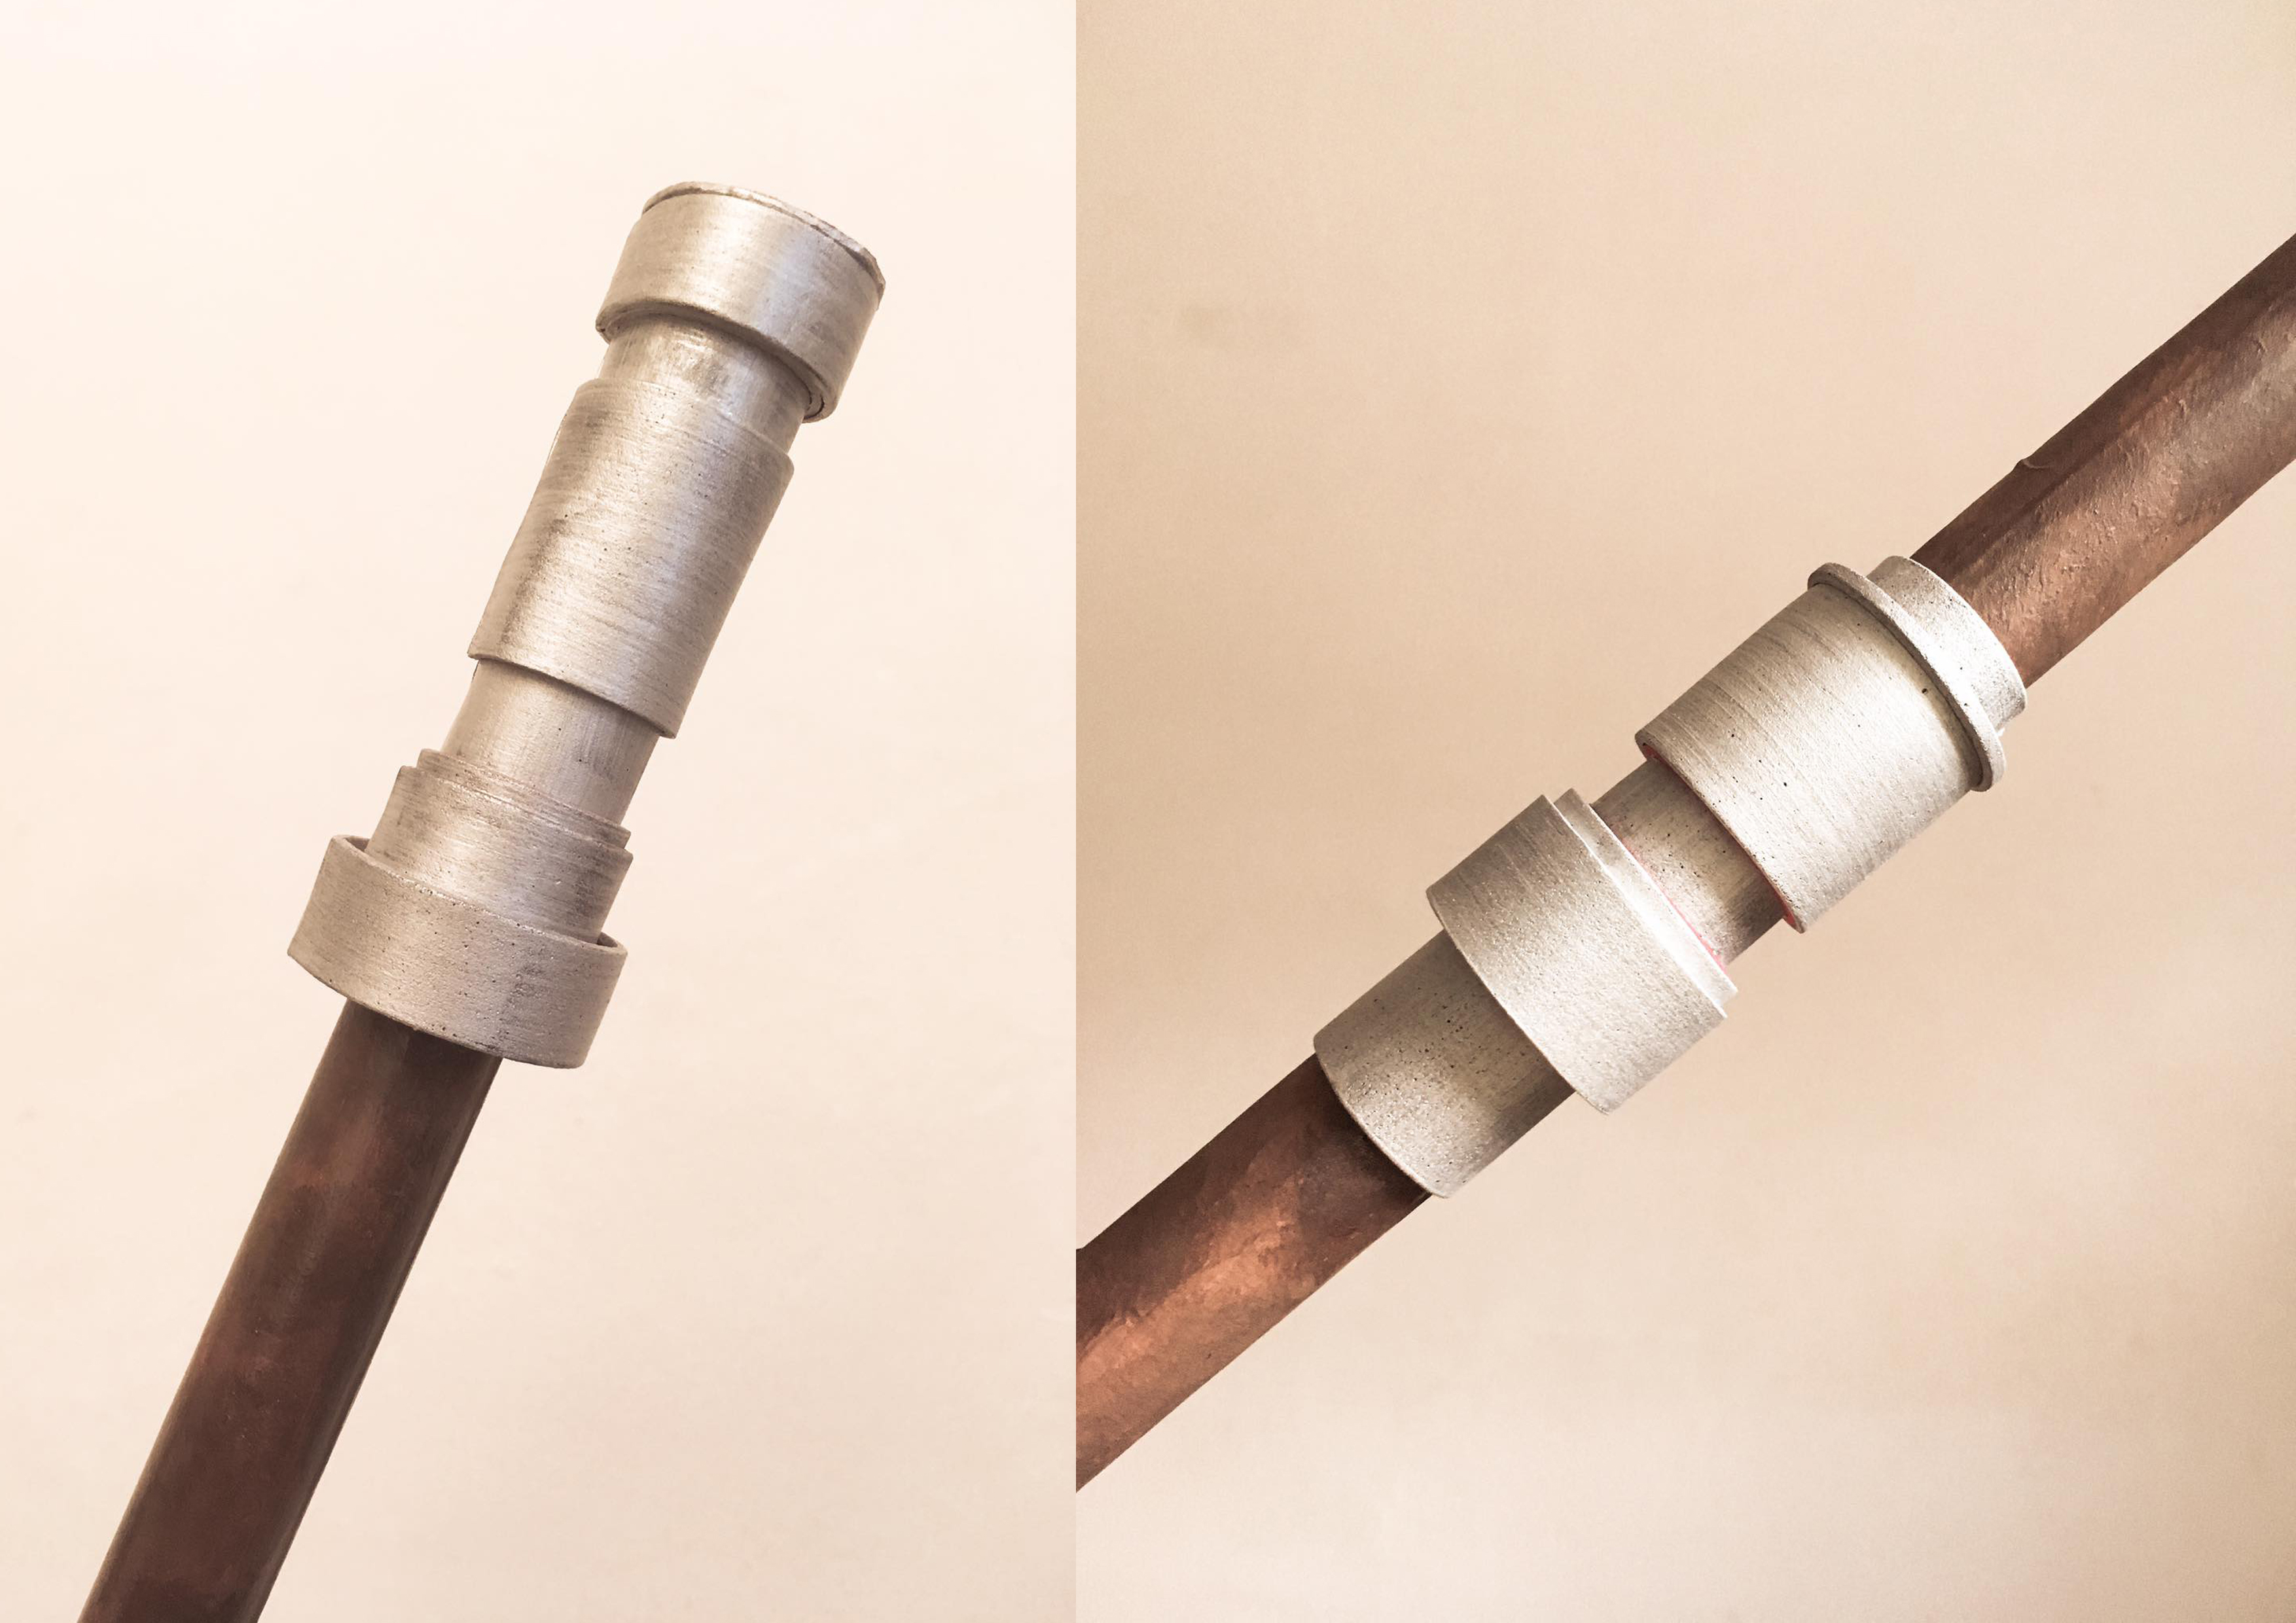
My friend shared with me that as a crafter, I need to have the mantra of “lowest cost possible” deeply rooted in my mind. Crafters often think out of the box and figure out how to make a weapon using the cheapest items, including household items. They dissect the weapon into layers and build the layers one by one. To begin, we decided to use a stick meant for attaching a mop as the base for the weapon. The stick only costed $1 from a household items store. We wrapped the stick with pieces of drawing blocks so that the paint can stay on it easily.
Base for Chirrut’s weapon.
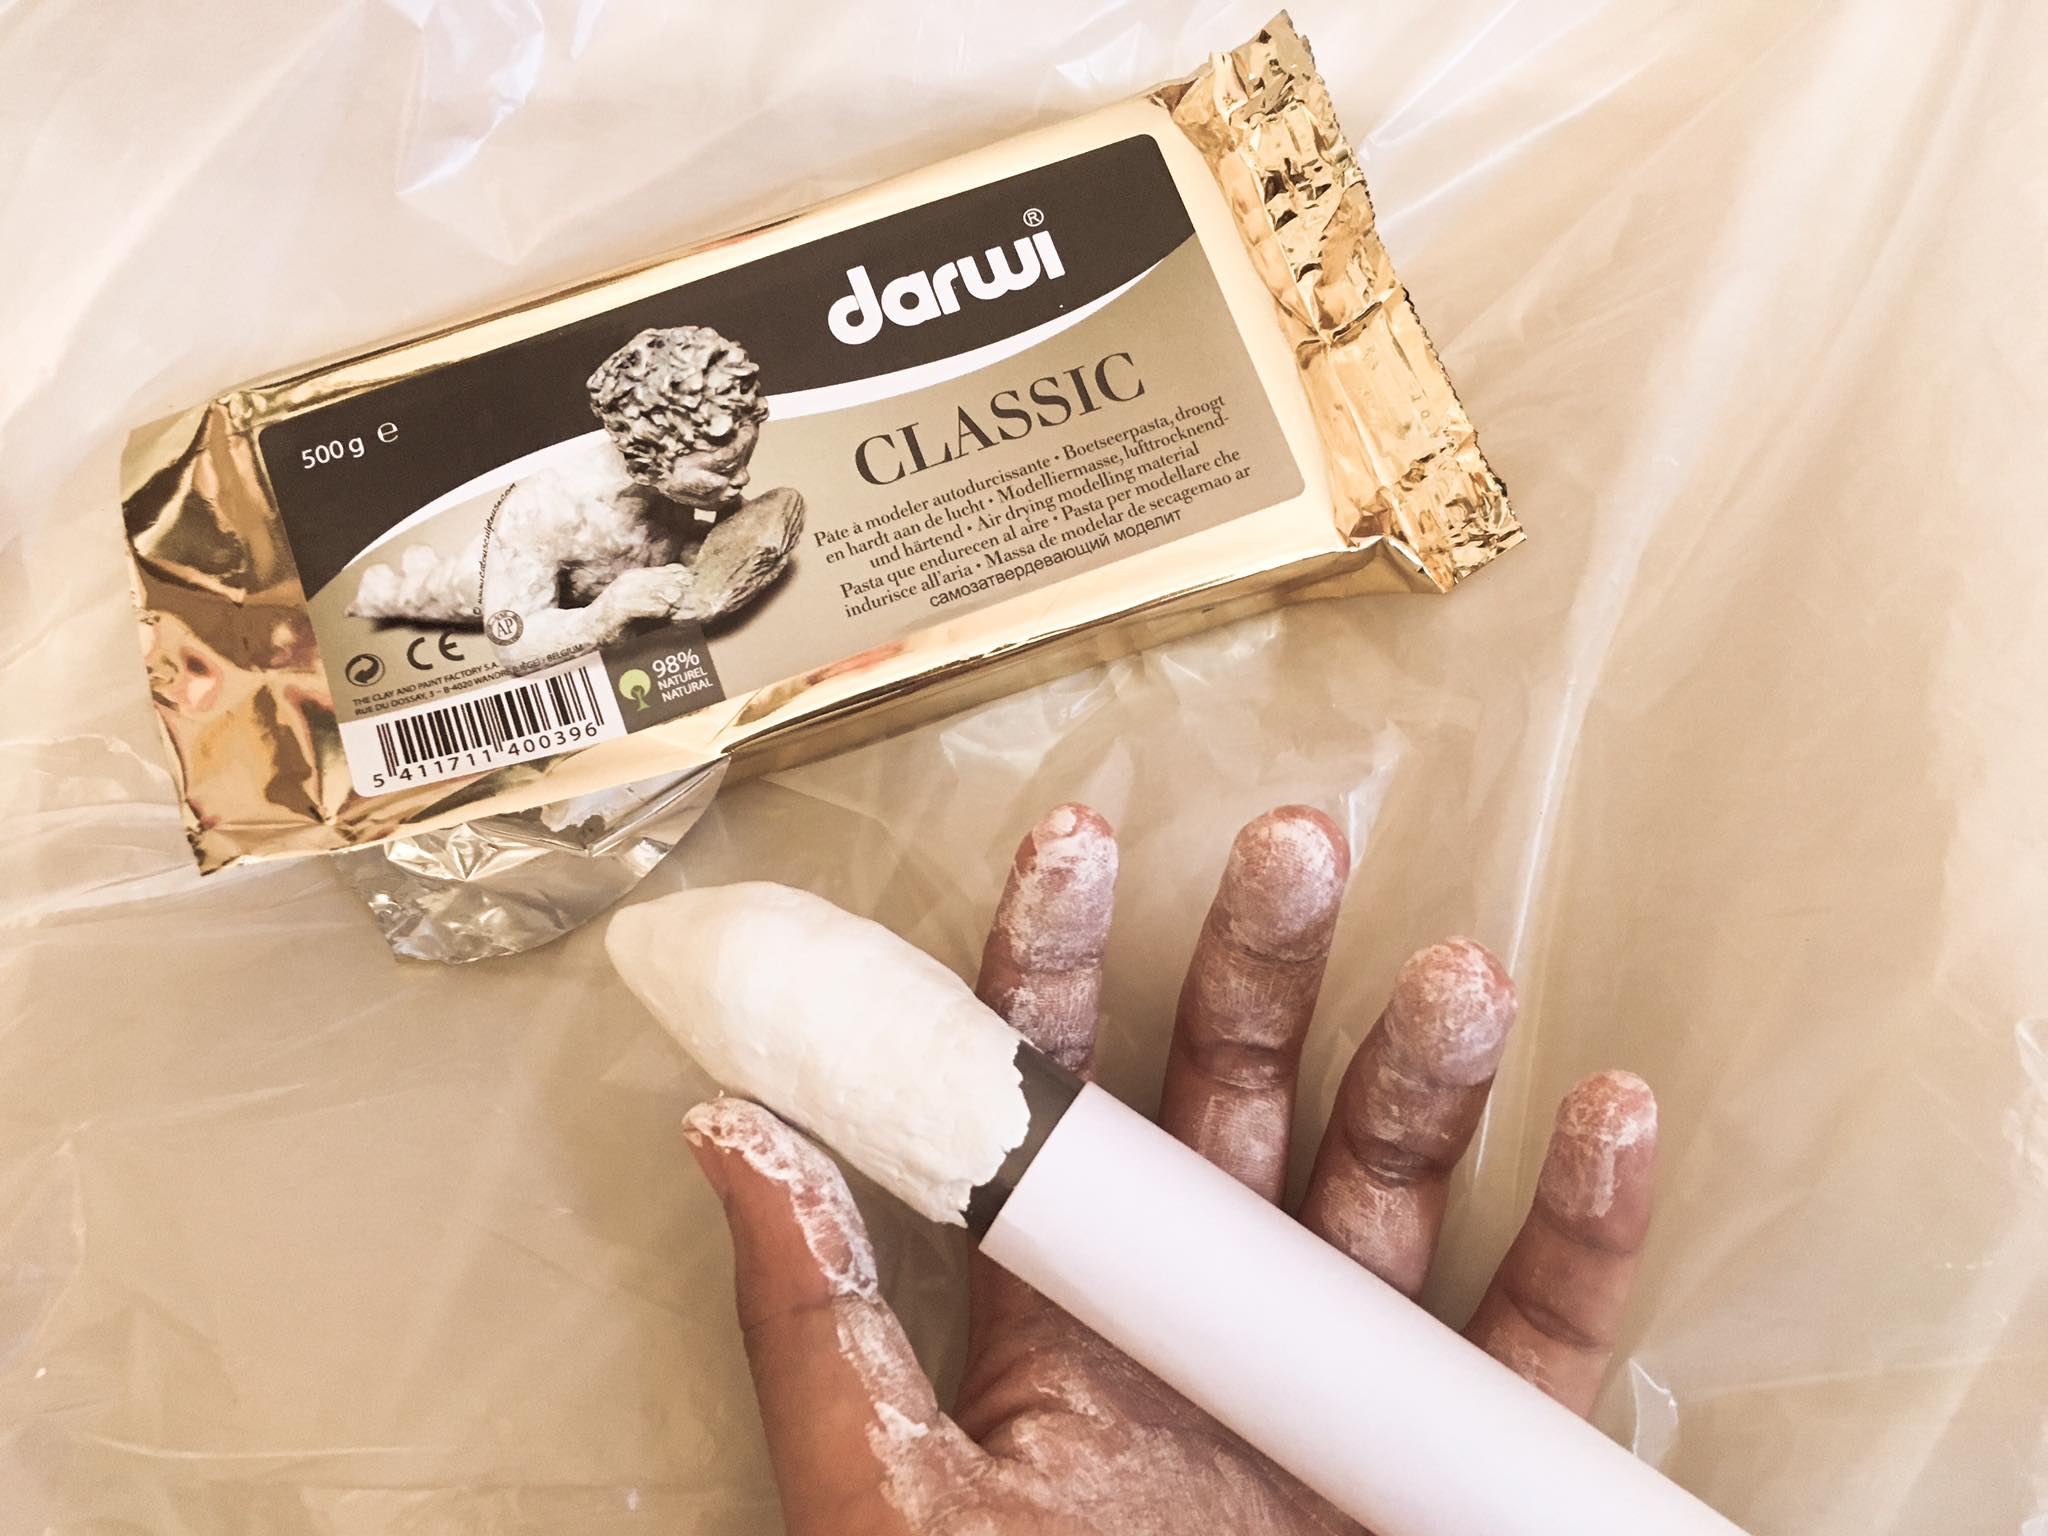
Then, we used moulding clay to make the tip and the uneven bark-like structure of the weapon. After allowing the clay to harden over 24 hours, we used 3-seconds super glue to attach the clay to the stick.
Moulding the shape of the weapon’s tip with clay.Creating the uneven bark-like structure of the weapon.
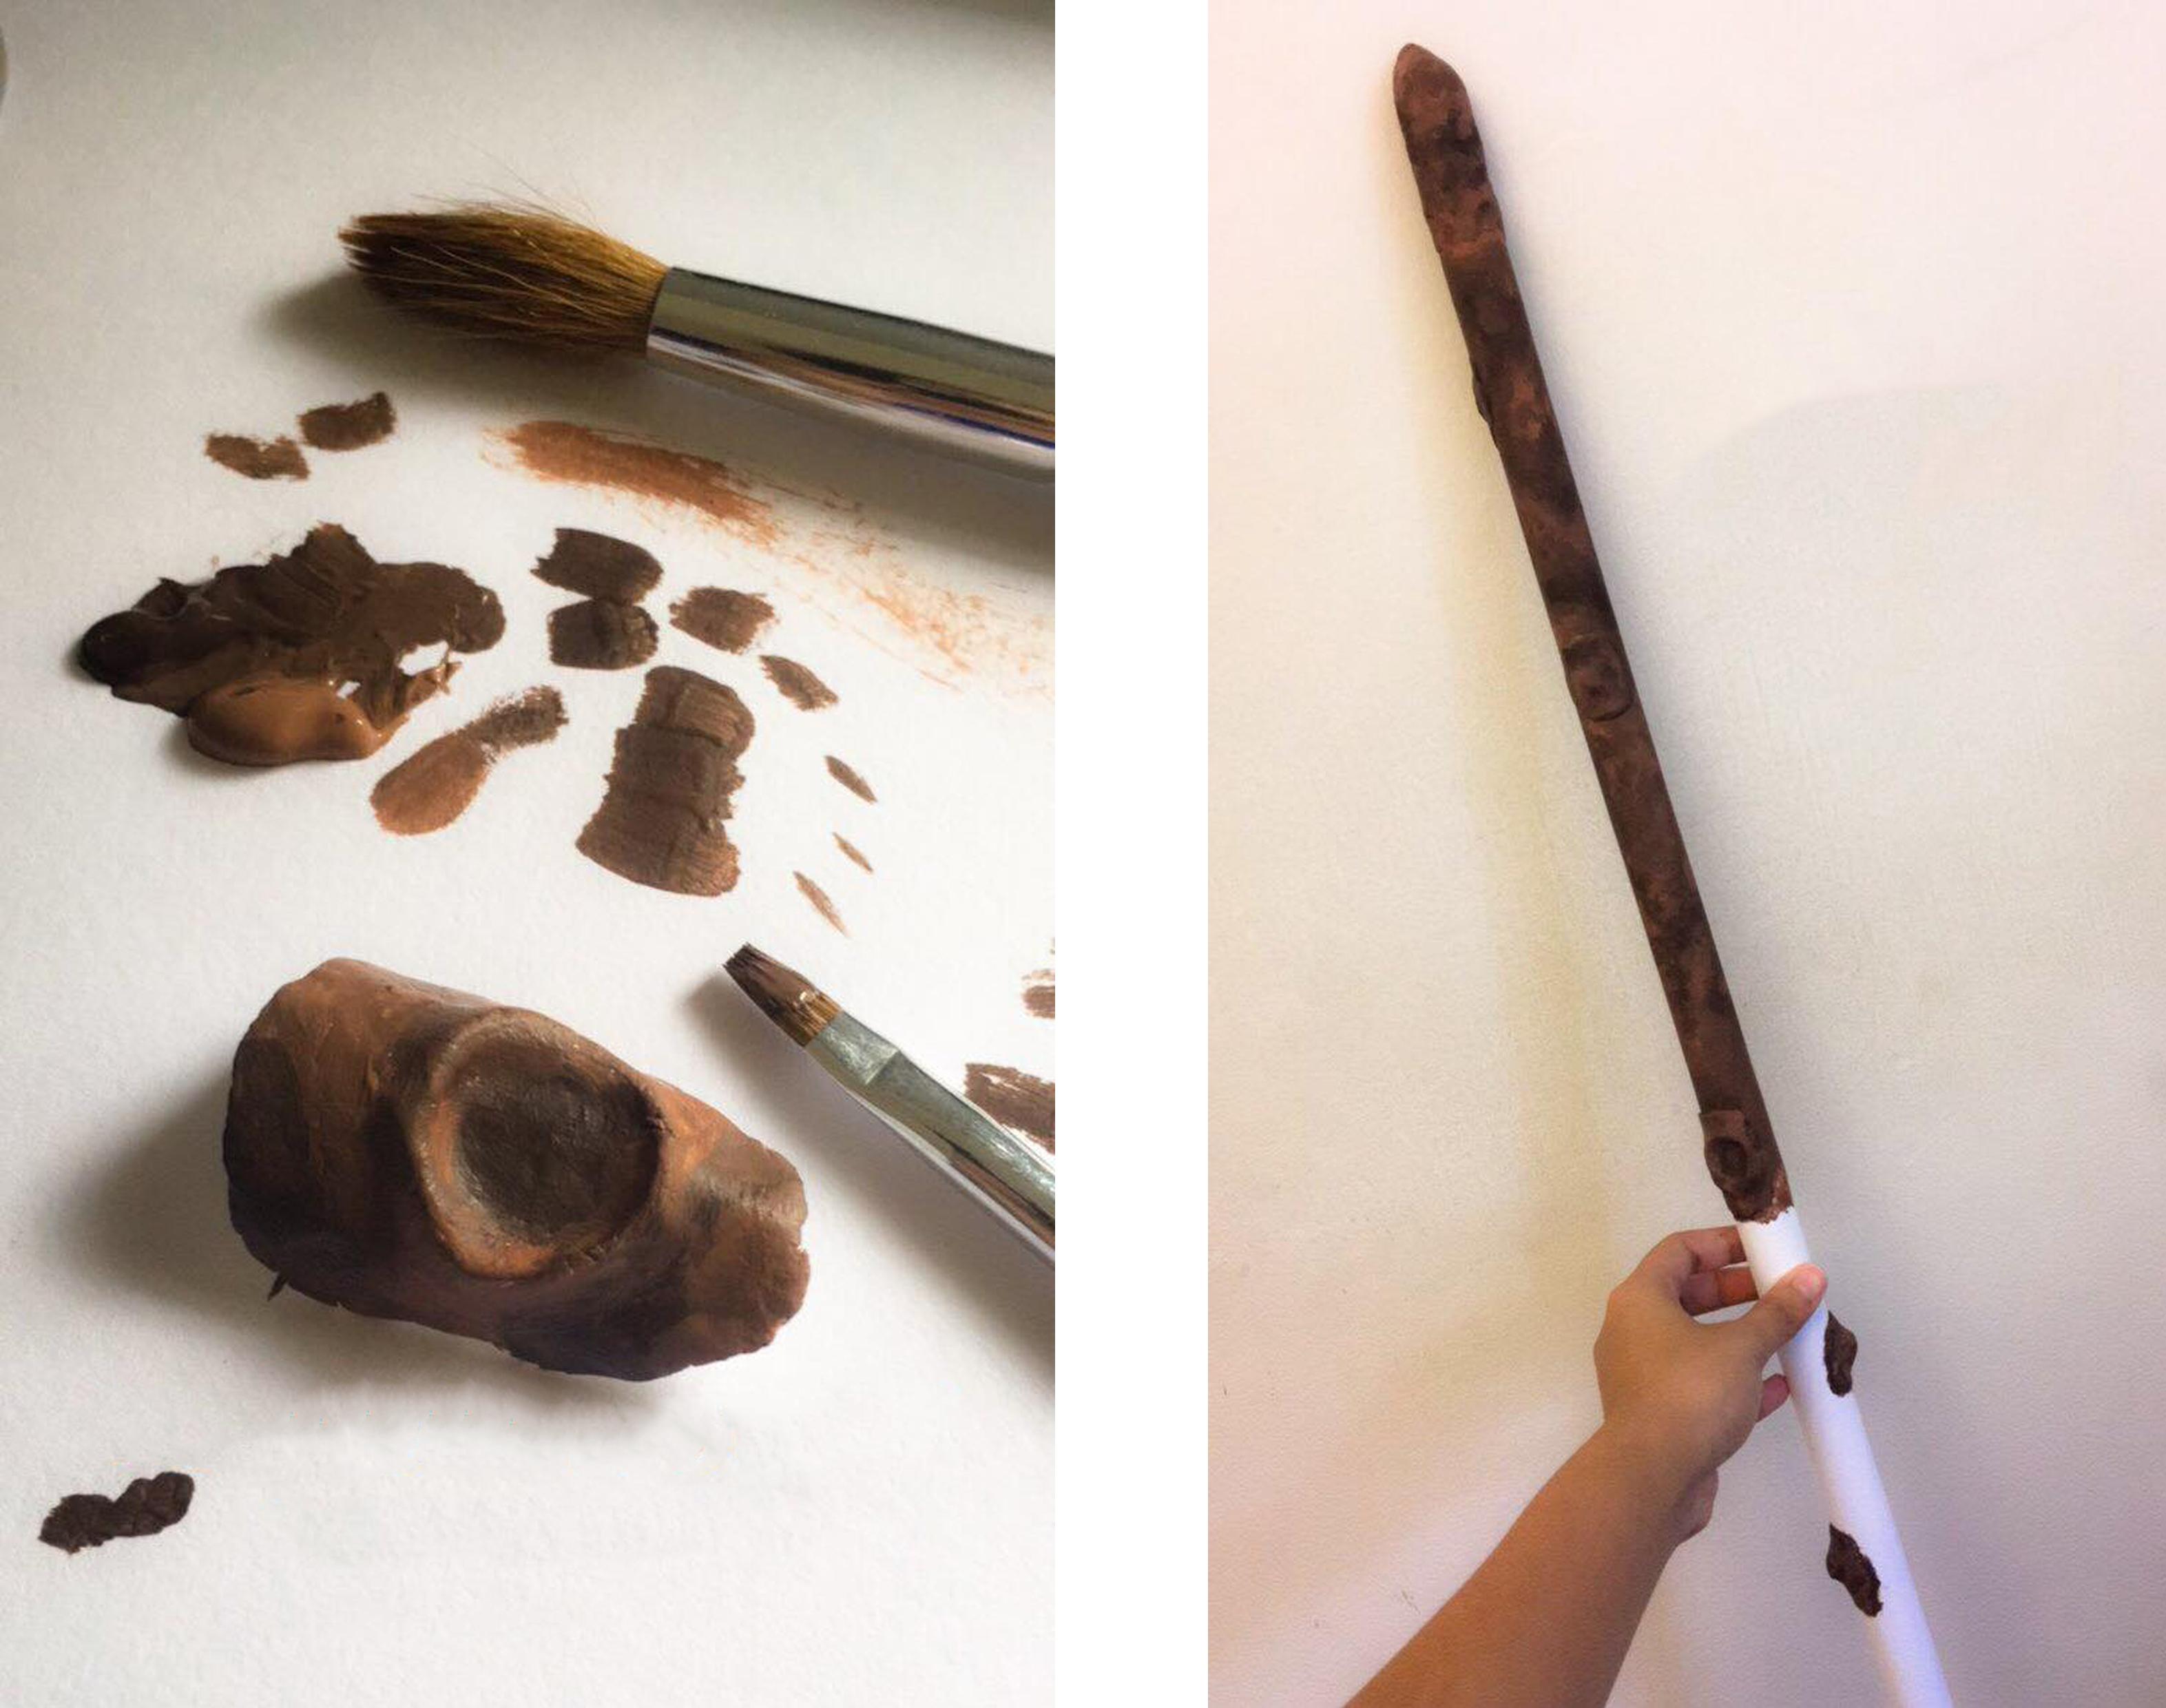
The next step is to paint the weapon. We used 2 different shades of brown paint to coat the weapon. By mixing the 2 different shades, we are able to get a couple of other shades of brown (saving costs). The varying shades of brown give my weapon the illusion of a more realistic texture similar to tree bark or wood.
Painting the weapon.
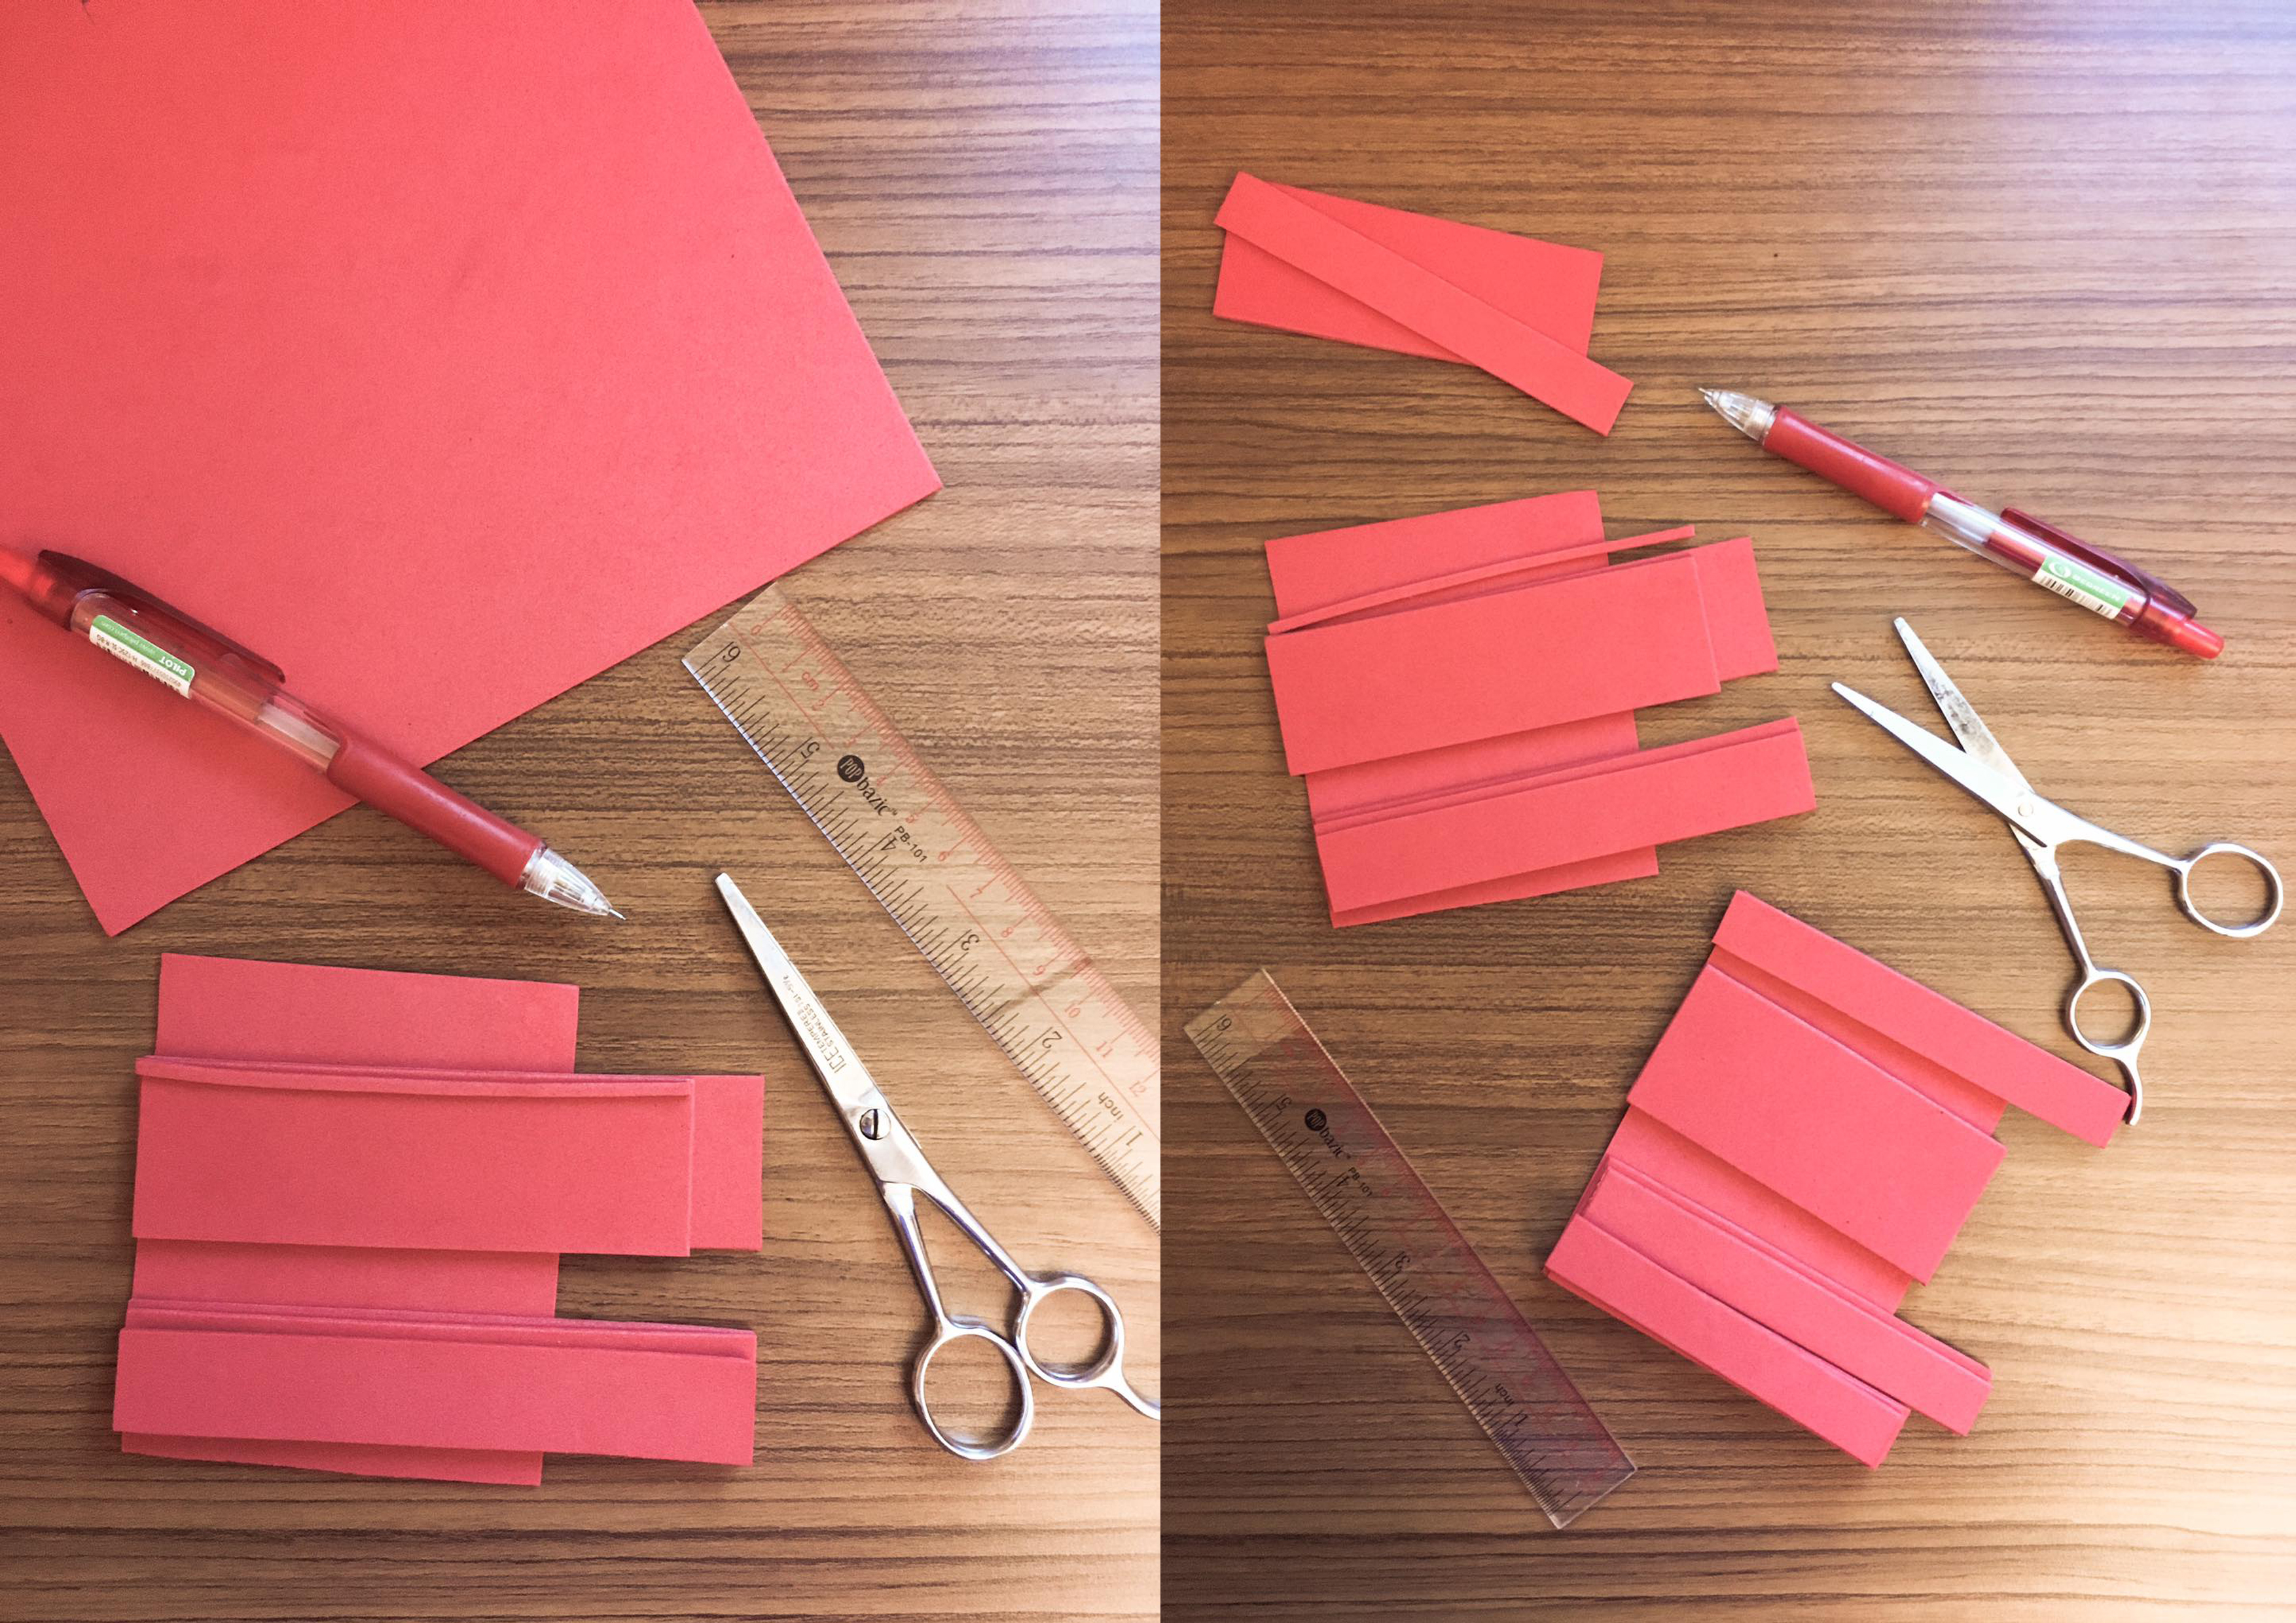
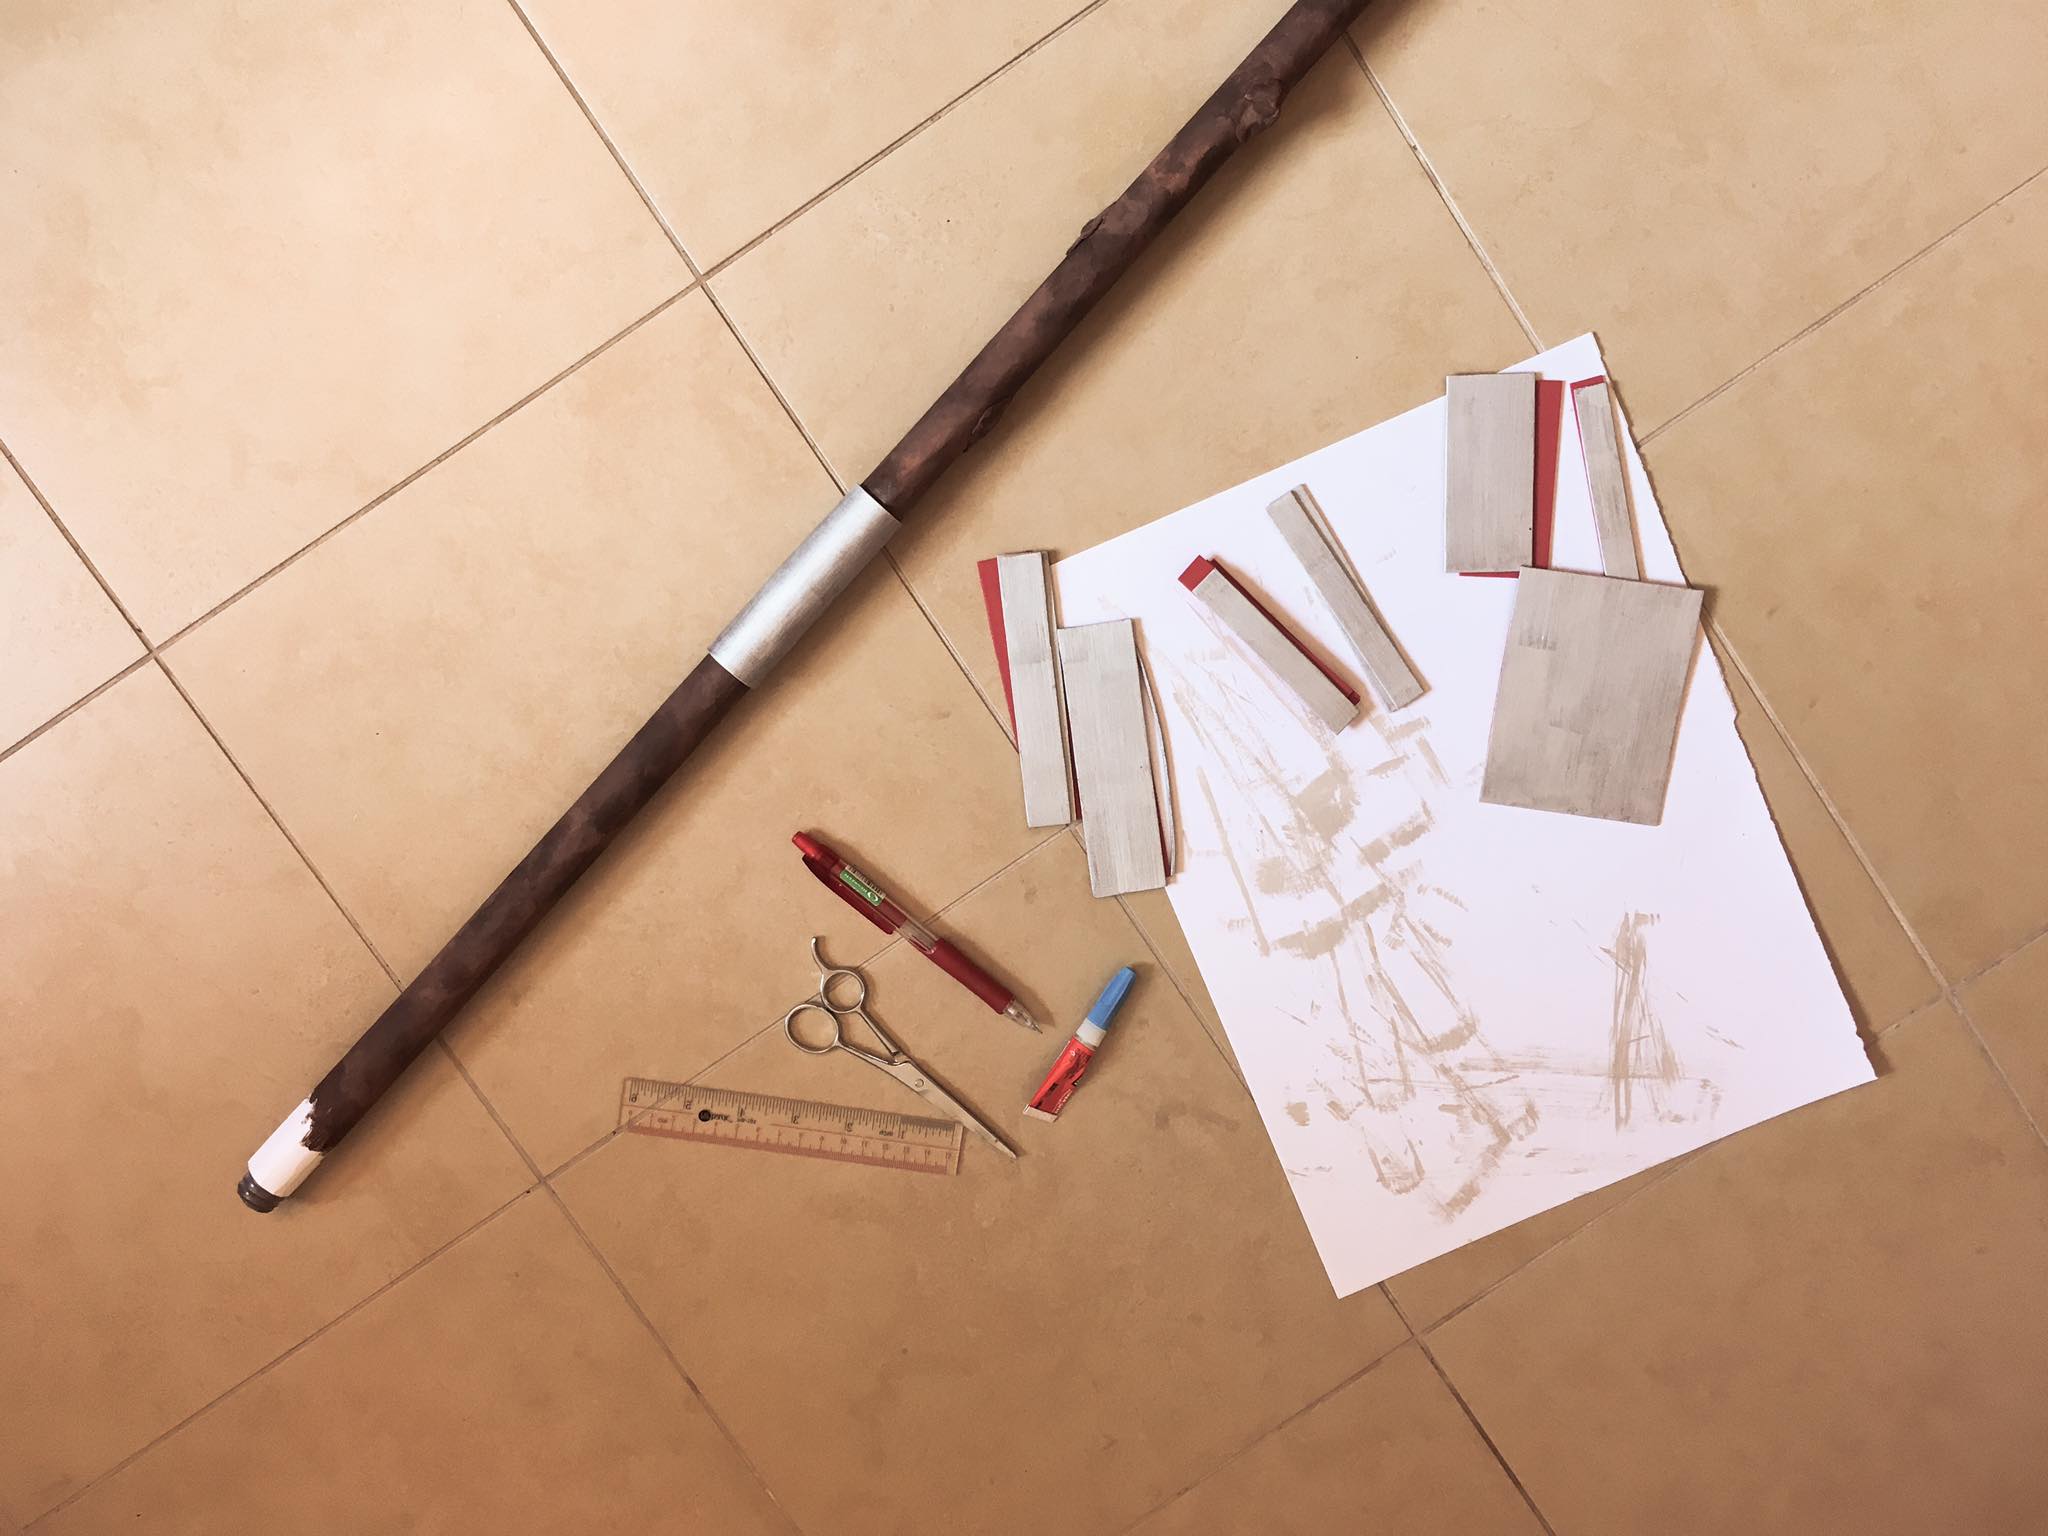
We then proceeded to make the metallic parts of the weapon. To do so, we used pieces of red foam that I had at home (save $$). We used the weapon reference picture as a guide to layer the foam pieces in order to create similar mockups. We added more layers of foam for the parts that are “higher” and less layers for the parts that are sunken. After the mockups were done, we painted the foam silver in order to create the metallic effect, and used super glue to attach them together and to the weapon.
Layering the metallic parts of the weapon using foam.Attaching the painted foam pieces to the weapon. Finished metallic parts of the weapon (yay).
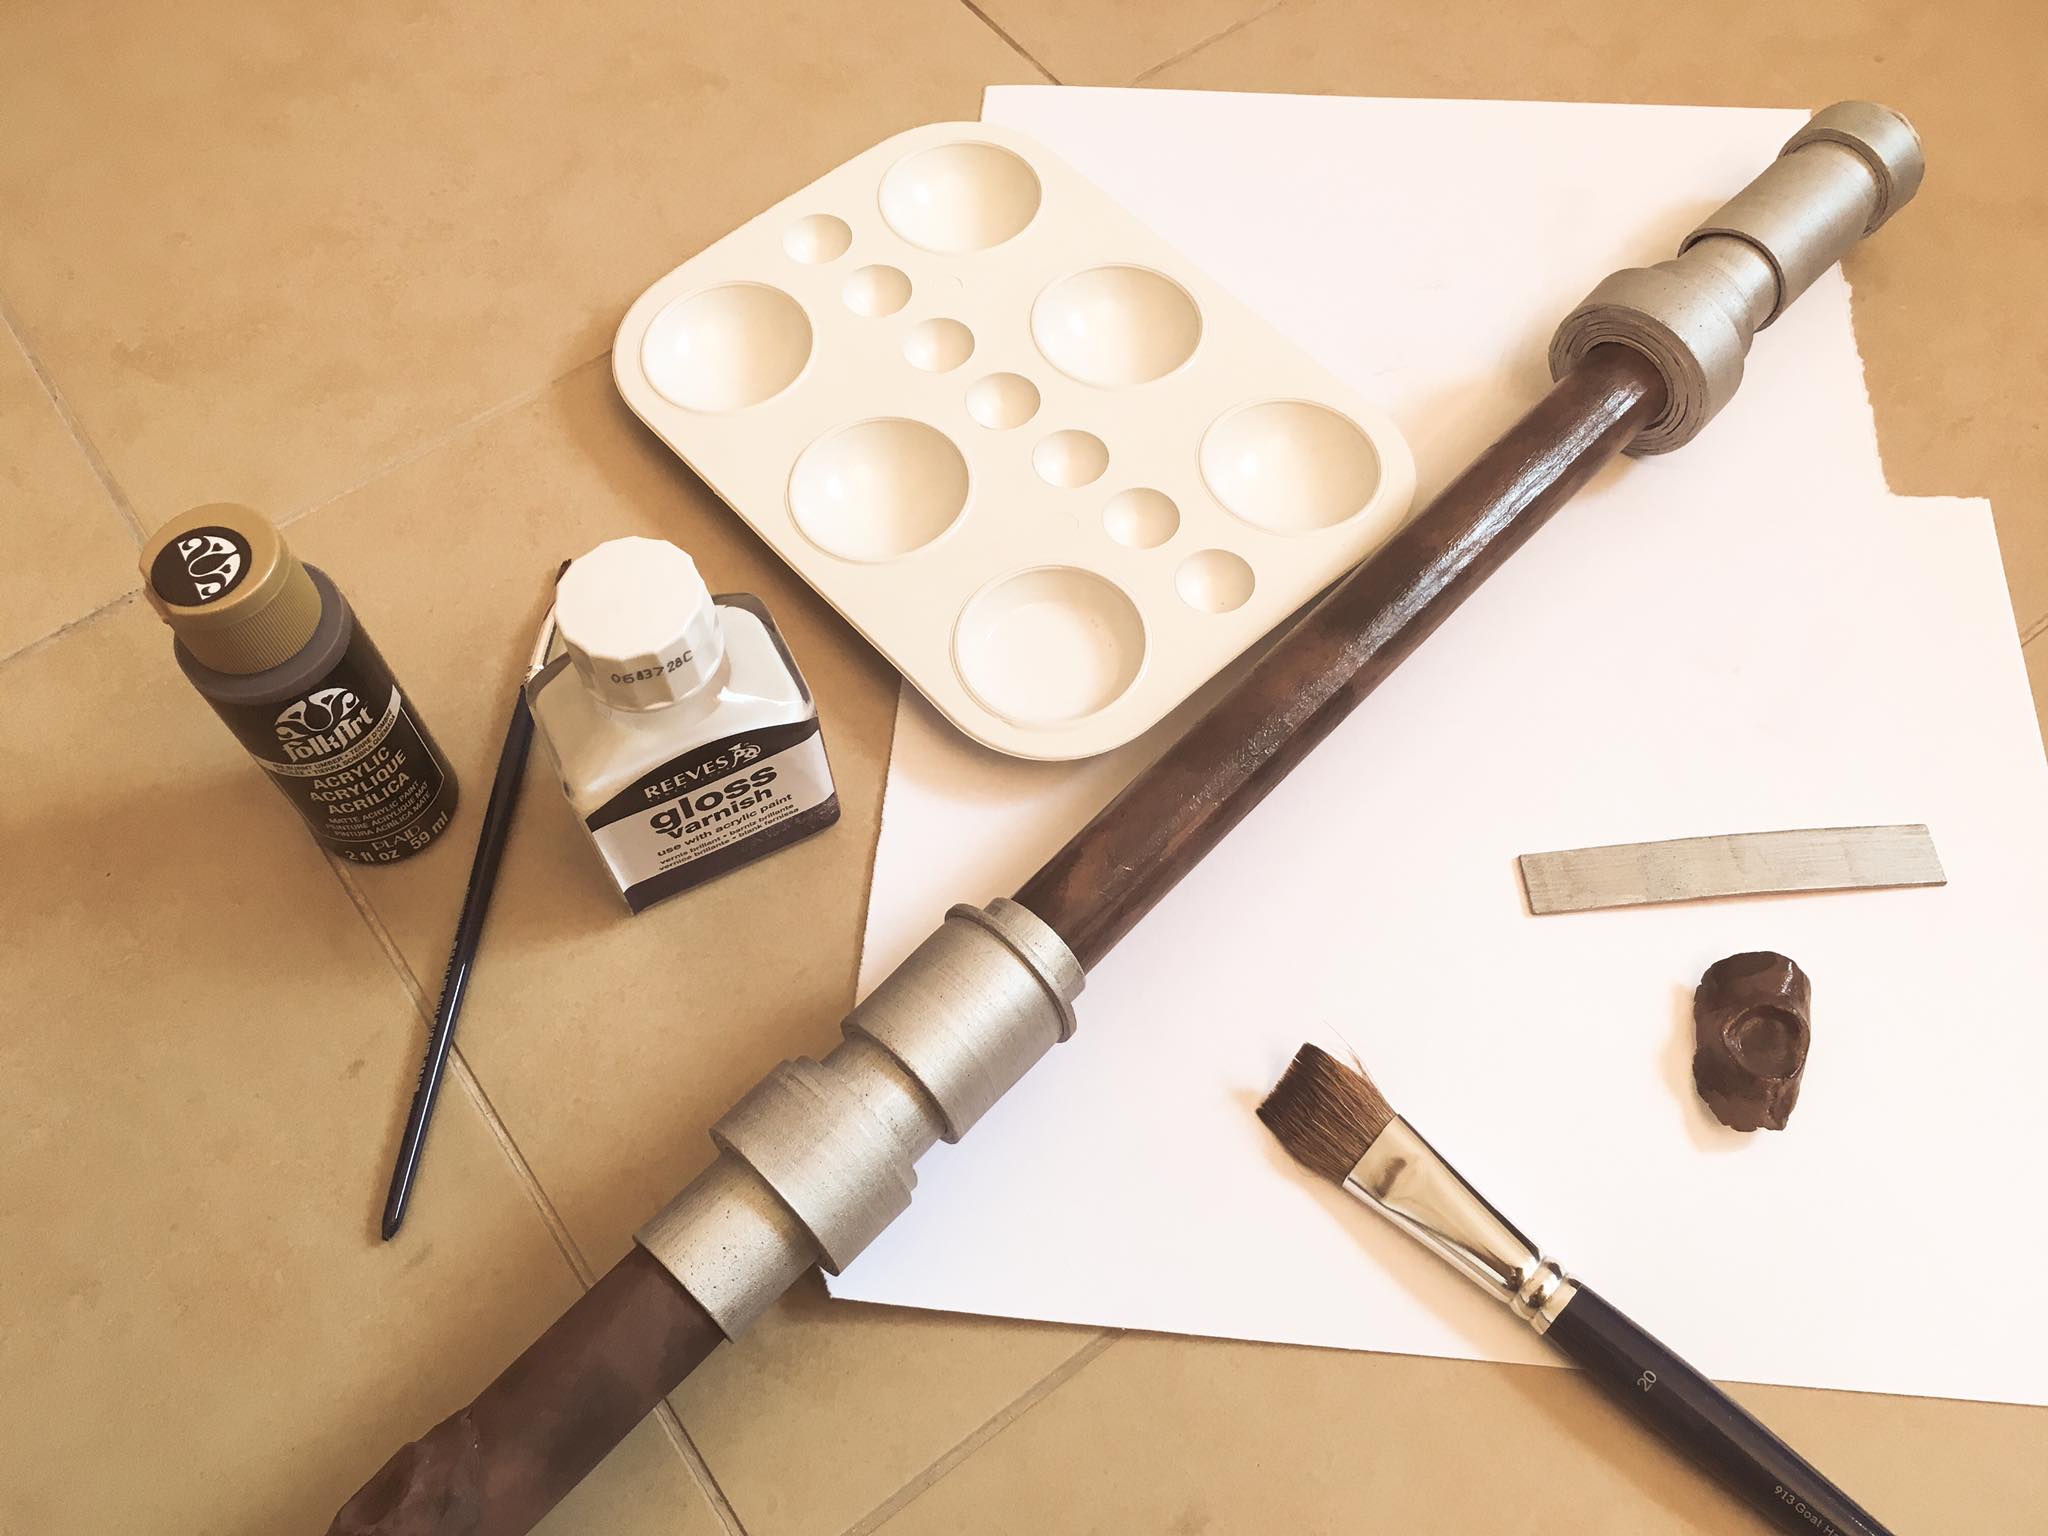
In order for the paint to stay on longer, it was paramount to add a layer of protective coating to the weapon. This is even more important if you are going to a crowded convention where people may brush against your weapon. We applied a layer of gloss varnish to add gloss and shine to my weapon (which appears better in pictures, according to my friend). After which, lo and behold, the weapon is finally completed! The weapon costed me about $20 to make (including leftover paint, garnish and glue), as compared to $200+ if I were to buy it online. I can proudly say we have fulfilled the mantra “lowest cost possible” for this weapon.
Applying varnish to the completed weapon. Completed Chirrut weapon.
Below is a picture of me cosplaying as Chirrut and proudly posing with the weapon I crafted together with my friend.
Pain points
Some of the pain points I experienced during the convention was trying to move around in my costume as it was really crowded. Also, it was difficult for me to see in those contact lens. I had issues trying to touch up on my makeup during the con, and had to leave my baggage unattended at some corner of the venue. For the crafting process, painting took a really long time. It would be nice if there were some sort of paint gun that allows me to spray the paint on according to how I wanted quickly.
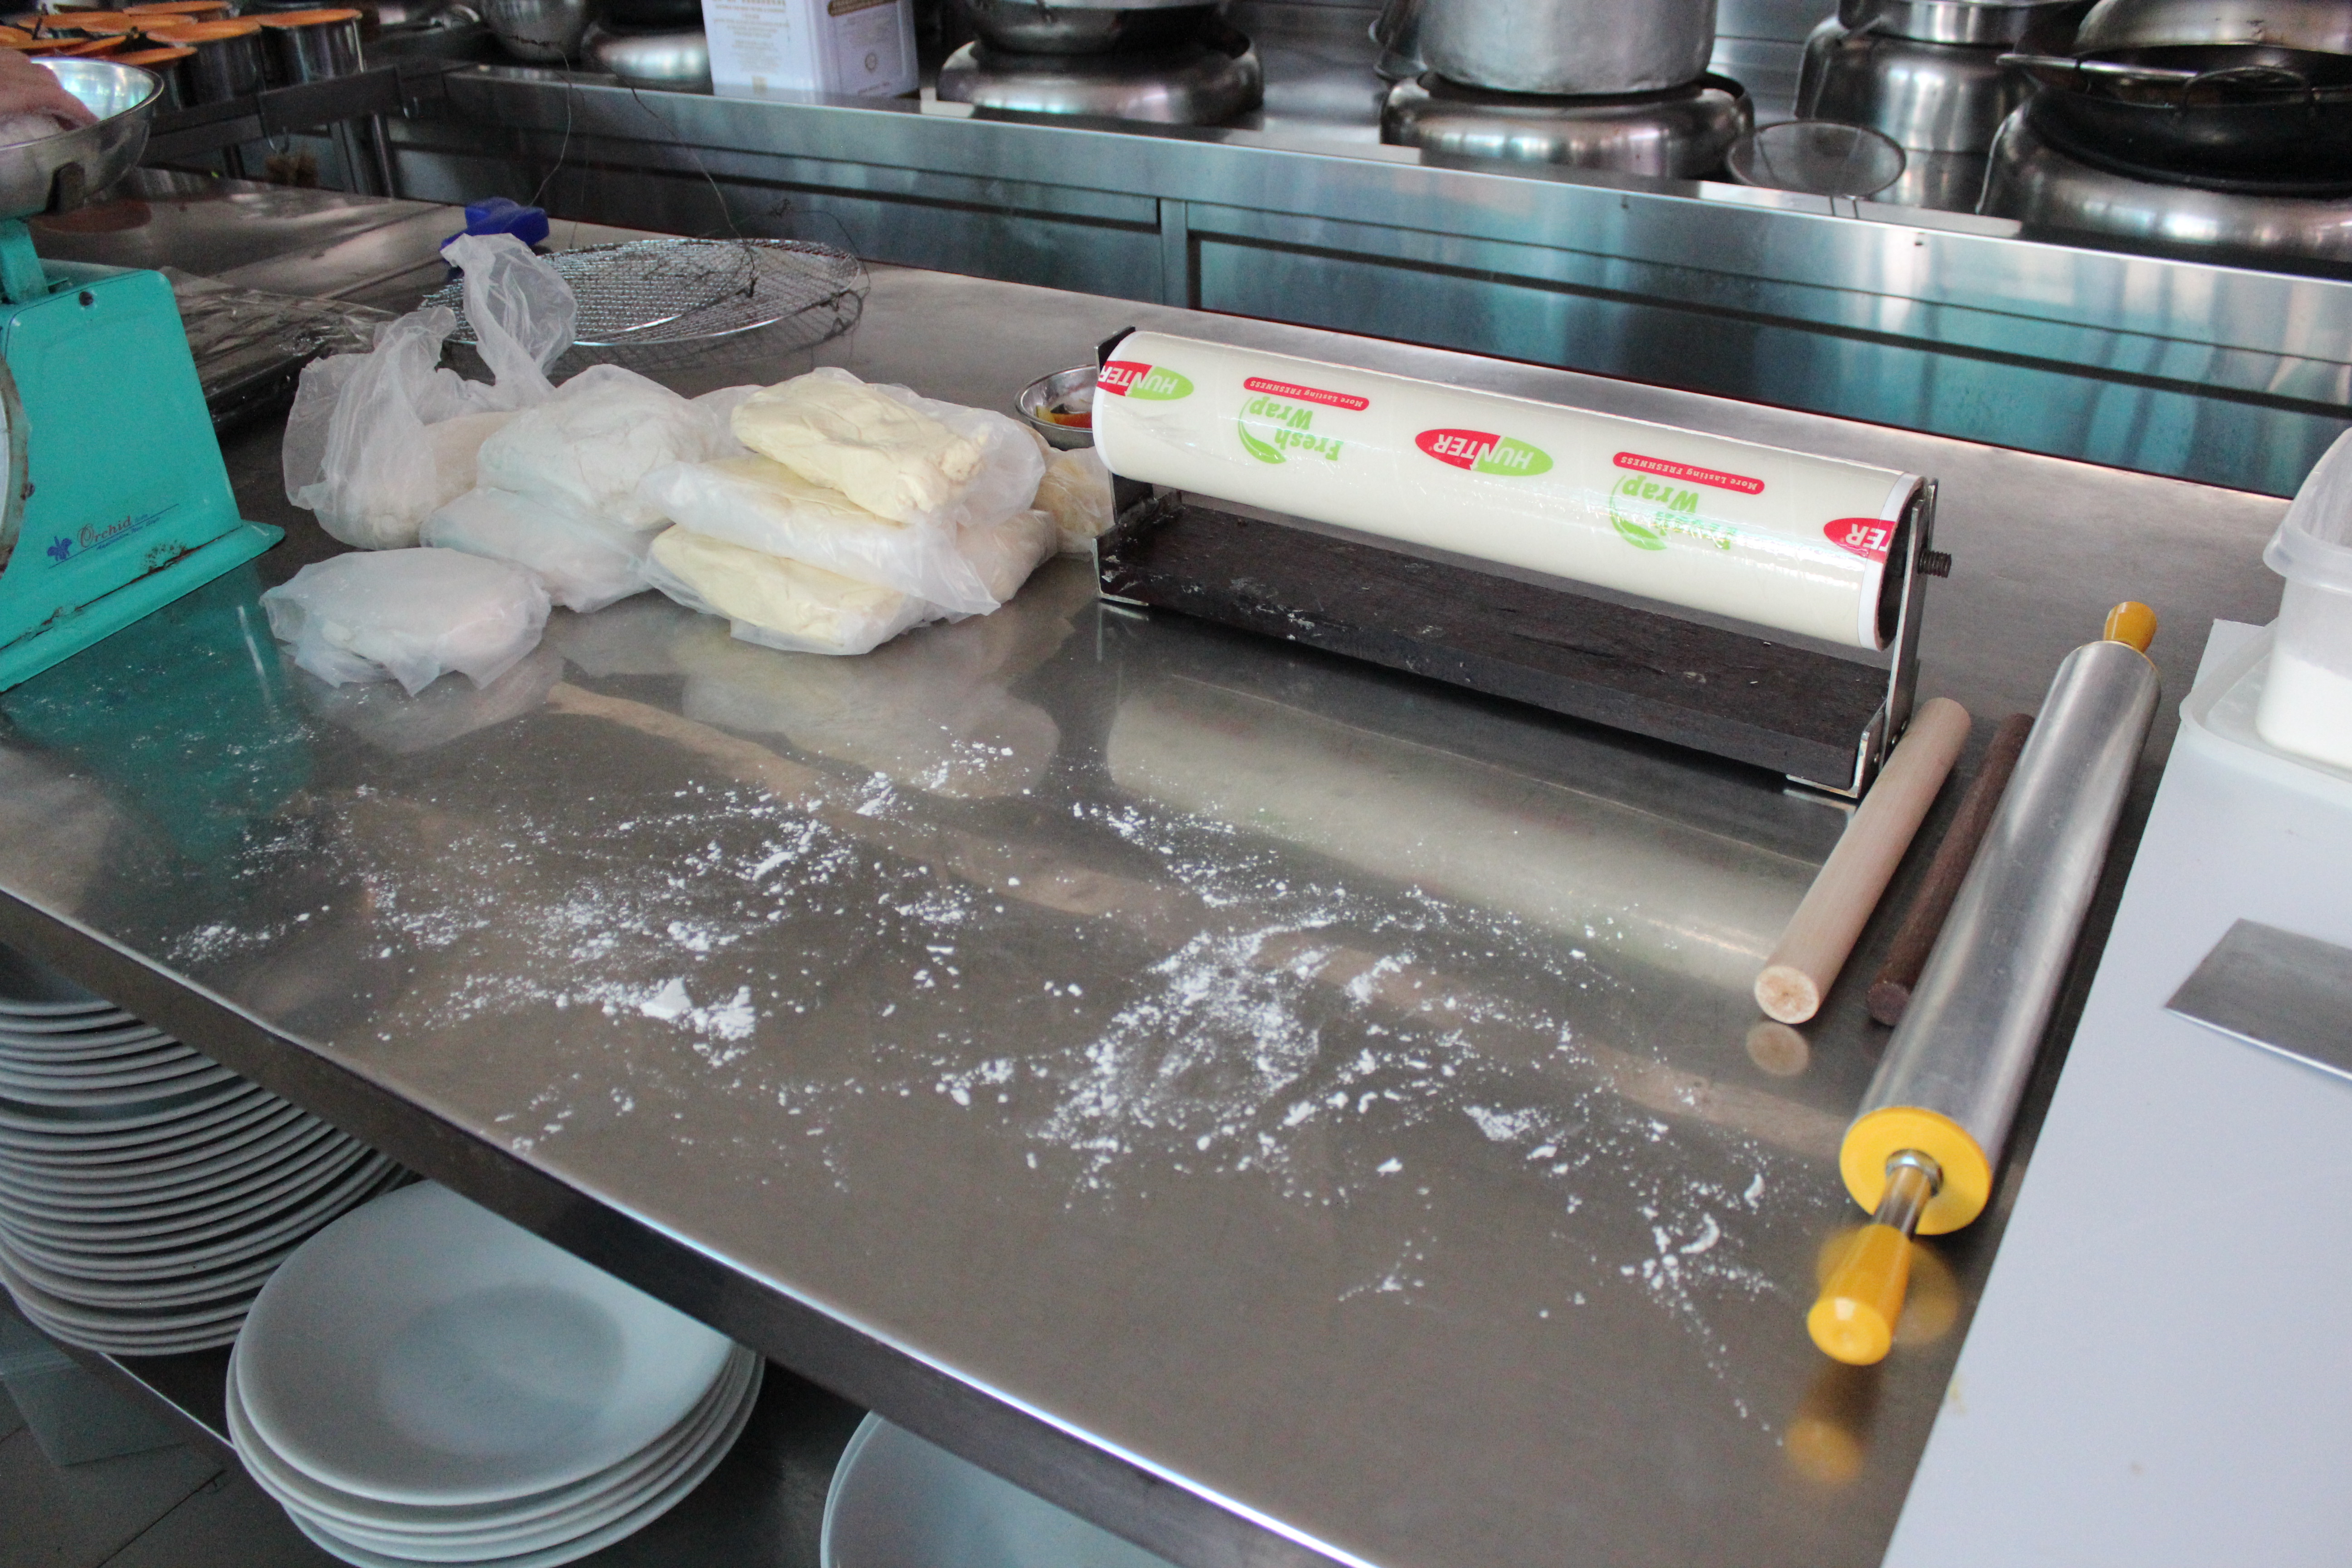
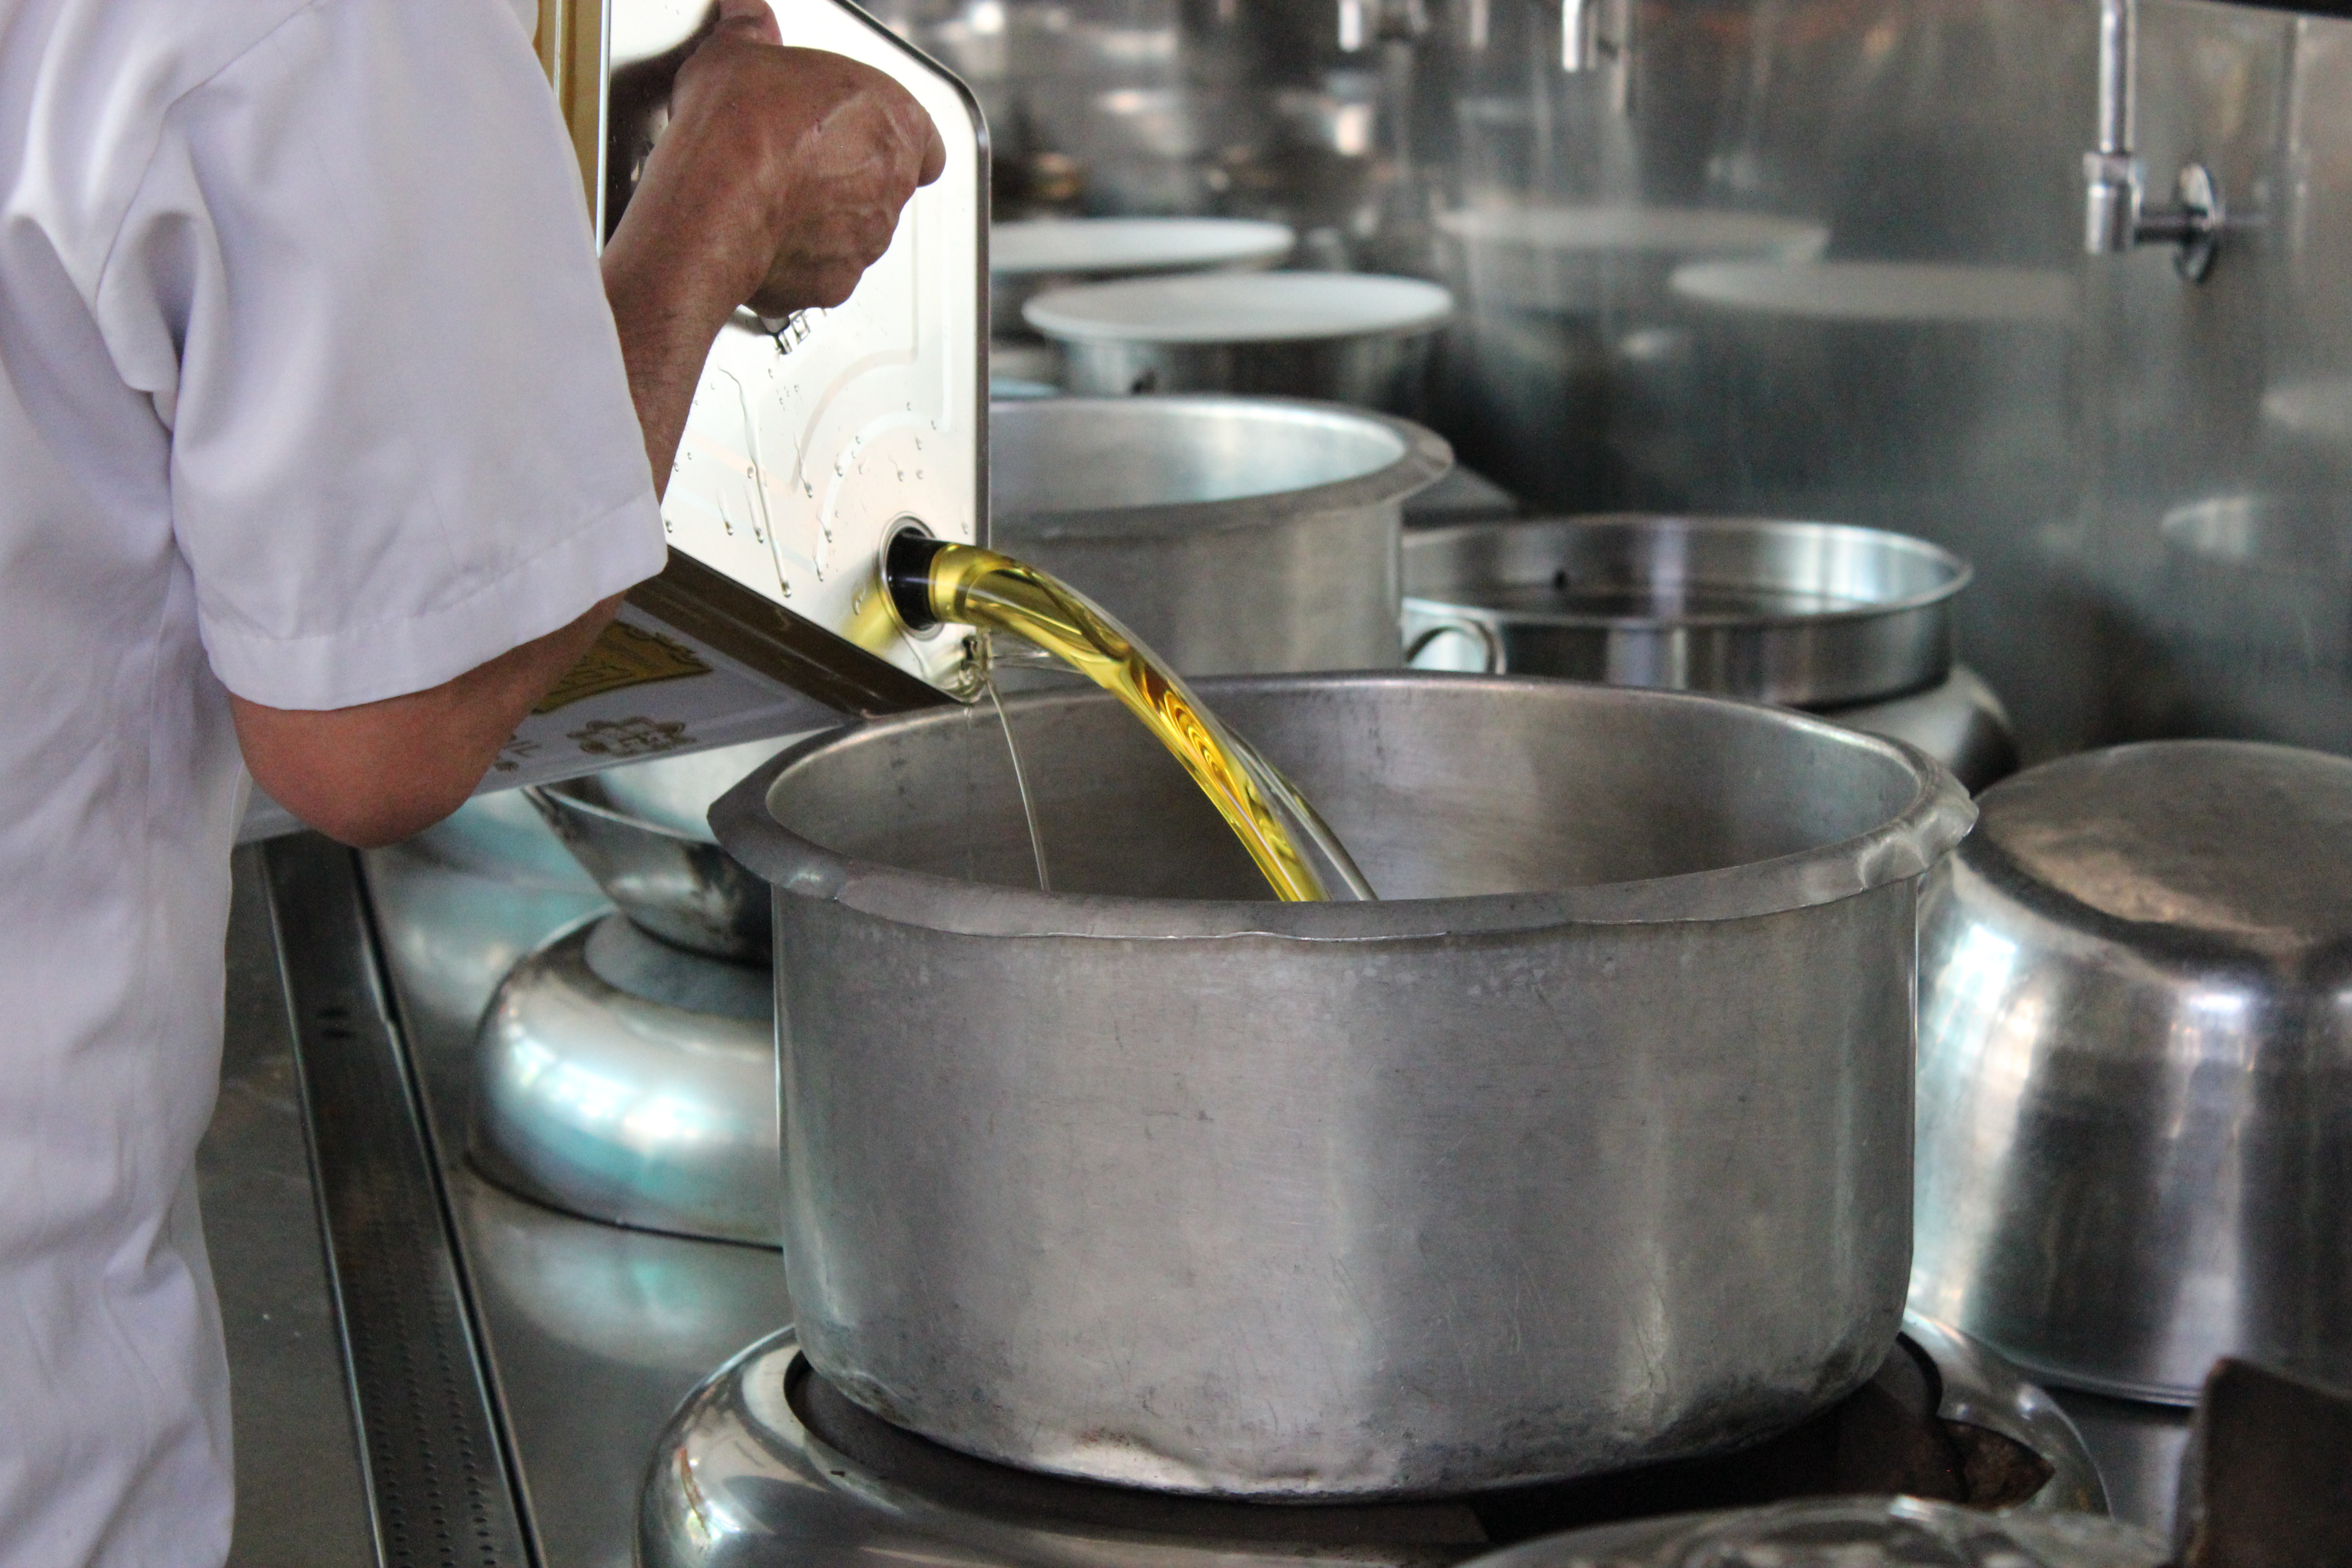
Since mid-autumn festival is round the corner, I got to join my Dad at his workplace kitchen (Hua Yu Wee seafood restaurant) to make some traditional Teochew yam mooncake. Below is the documentation on the tools used and the baking process.
Tools used
(Left) Industrial-grade mixer for mixing the mooncake base. (Right) Tools used in the deep frying process.The weighing scale is a very important tool in baking as baking is all about precision.Tools used for preparing and shaping the mooncake base.Sketch of tools used in the entire process.
Worksite documentation
The worksite is a kitchen containing the necessary tools for mooncake making. In any F&B industry, hygiene is of utmost importance, so the worksite has to be kept clean at all times. Chefs also need to wear apron and hat for hygiene purposes.
The worksite
Process documentation
Flour (white) and batter (yellow) mix that my Dad has already prepared beforehand.Shaping the base (part 1)Shaping the base (part 2)Shaping the mooncake (part 1)Shaping the mooncake (part 2)Preparing the food colouring to mark the mooncakes. Those with an orange dot marking means that it contains yam and egg yolk. Those without simply contains yam.Transporting and getting the mooncakes ready for dry frying.Preparing the oil for deep frying the mooncake. The temperature of the oil is paramount.Deep frying mooncakes process
It was interesting to make some traditional Teochew mooncakes with my Dad. Being involved in the process made me realise that because eating is so easy, we tend not to think about the efforts that go into preparing and making them. Making traditional pastries is incredibly challenging and there must be intricate precision in all steps. I got to shape 2 mooncakes and boy, they did not turn out well during the deep frying process.
The 2 mooncakes I shaped “exploded” during the deep frying process because I did not smash the dough hard enough with the chopper to force the air out of the dough. Meanwhile, most of the ones my Dad shaped turned out gorgeous with nice layered flakes.
Pain points
Some of the pain points we experienced during the baking process include the dough turning hard despite it being covered with a wet cloth. This was a huge headache as my Dad made the mooncakes in batches of 10 (a total of 60 mooncakes). When shaping the first few mooncakes of each batch, the dough for the last few mooncakes tend to harden. When the dough hardened, it was difficult to shape the mooncake as cracks formed easily. This will result in the mooncake “exploding” during the deep frying process and compromising on aesthetics. In addition, when kneading the dough with hand or flattening the dough with a rolling pin, parts of the dough will be smeared and stuck onto the table despite a layer of flour coating. It would be nice if there can be solutions to these pain points.
In year 2155, our world has became one where technologies take over every inch of the city, from Augmented Reality to Virutal Reality to immersive technology. However, this comes at a hefty price. The city is so polluted with toxic fumes that it is impossible to breathe properly without the help of GASGear3.0. Thus, in this city, the people do not know how one another look like, even among family members, because it is a golden rule that they must never remove their mask. The only time they can do so is in virtual reality, where they can manipulate their appearance according to their preferences.
This is how a typical inhabitant of New Oracle looks like. Due to the toxic fumes, they have to cover themselves up fully with long sleeved top and pants, gloves, a head cover, and GASGear3.0. The inhabitants are always online in the virutal world because that is their only escape from the cruel and gloomy reality. In the online world, they get to experience how the world is like in the 2000s – green, clean, and free.
Important technology
GASGear3.0 is an important technology in New Oracle, because inhabitants cannot survive without it. GASGear3.0 is based on developments of the current respirator system technology, such as Scott Safety’s Powered Air Purifying Respirators (PAPR).
The present day AR and VR technologies are what led to New Oracle. Advancement of these technologies led to a cyberpunk city at the expense of the environment.
Genre
This story falls under the dystopian genre. Since inhabitants are always online, it is easy for cyber attackers to hack the system and disrupt their reality escape. To add on, inhabitants are vulnerable to murder in the real world when they are online, as anyone can remove their GASGear3.0 easily. New Oracle is thus a city for temptation of crimes, just for the fun of it.
Story
The story begins with mysterious figures removing the GASGear3.0 of someone who is online in the virtual world. They then left him to be poisoned to death as he breathed in the toxic fumes without GASGear3.0. After 1 week of repeated incidents, a tense atmosphere engulfed the city as everyone’s safety is compromised. As a result, less and less people go online, and this saddens the protagonist, Ned, who is an avid gamer and ethical hacker. Unfortunately, while gaming with his best bud Lom, he witnessed Lom’s avatar gasping for air and eventually, becoming lifeless. Ned was devastated, and vowed to bring the murderers to justice. He started hacking Lom’s and the other victims’ accounts to find leads. While Ned found more and more leads, Wera, the antagonist and the boss of the crime syndicate, took notice of Ned’s actions and inched closer on him to silence him before they get exposed. The story ends with Ned uploading the identities of the murderers onto the city billboard online, as his GASGear3.0 mask gets removed offline.
Method
I will tell my story via a short video of about 3-5 minutes. This is a short video, but it is best to leave most of the imagination about New Oracle to the audience, rather than telling them every single detail.
The role of the device I make, GASGear3.0, will become a tool for murder. This is ironic, because inhabitants of New Oracle depend on it for survival, but at the same time, it is this very reliance that renders them vulnerable to murder. Them being perpetually online in the virtual world makes them even more susceptible to murder as while their physical body is in the real world, their consciousness and mind is in the virtual world.
My story will include a protagonist who tries to track down the murderers, a best friend of the protagonist who gets murdered, the antagonist who is the boss of the crime syndicate, members of the crime syndicate, murder victims and the inhabitants of New Oracle.