I got the chance to see the process of a fish dissection. This is a common practice for marine biologists who study fish in order to find out more about the anatomy and life cycle of aquatic creatures for conservation purposes.
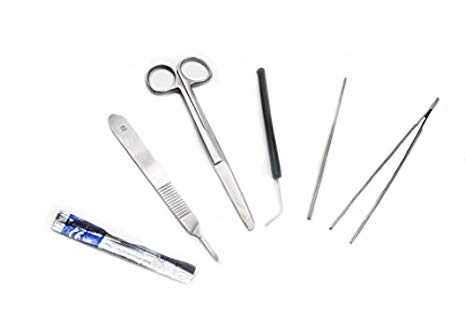
Tools
Scalpel
Point tweezers
Ruler
Measuring tape
Vernier calliper
Needles
Tray
Electronic scale
Microscope
Worksite
The experiments are usually done in a research lab, with access to appropriate equipment, chemicals, etc. There are usual procedures to be followed to ensure that the experiments are done in a systematic and proper manner.
Process
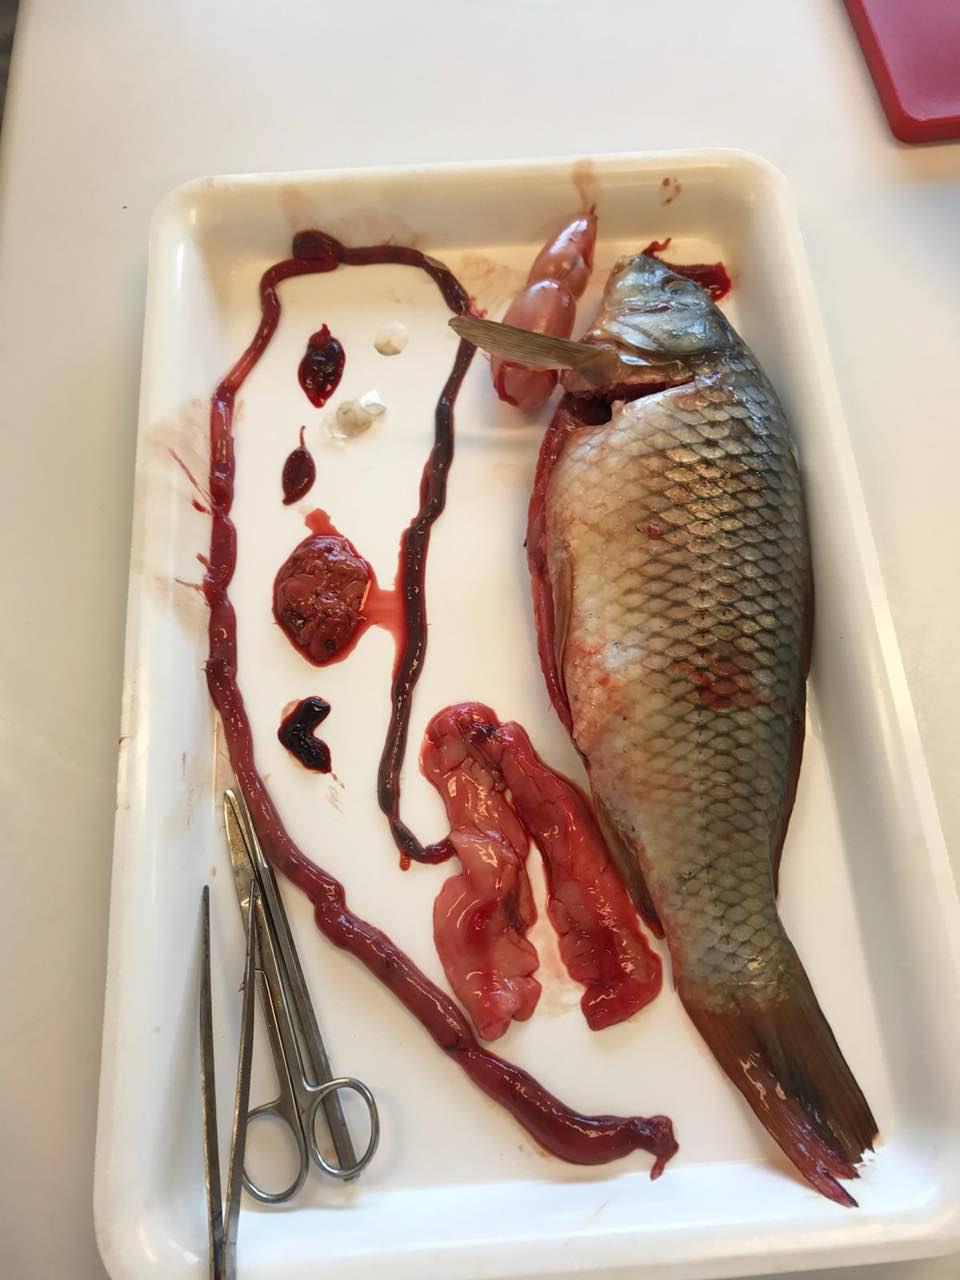
The fish dissected was called a common carp. First, the width and the length of the fish was measured using the tape and the vernier calliper. Different parts were measured such as the mouth size, which says a lot about its diet and initial environment.
Then, the needles were placed around to position the fish when cutting it up. The scalpel was used to cut the fish from tail to the fin. Afterwards, the organs were taken out slowly and carefully using the tweezers.
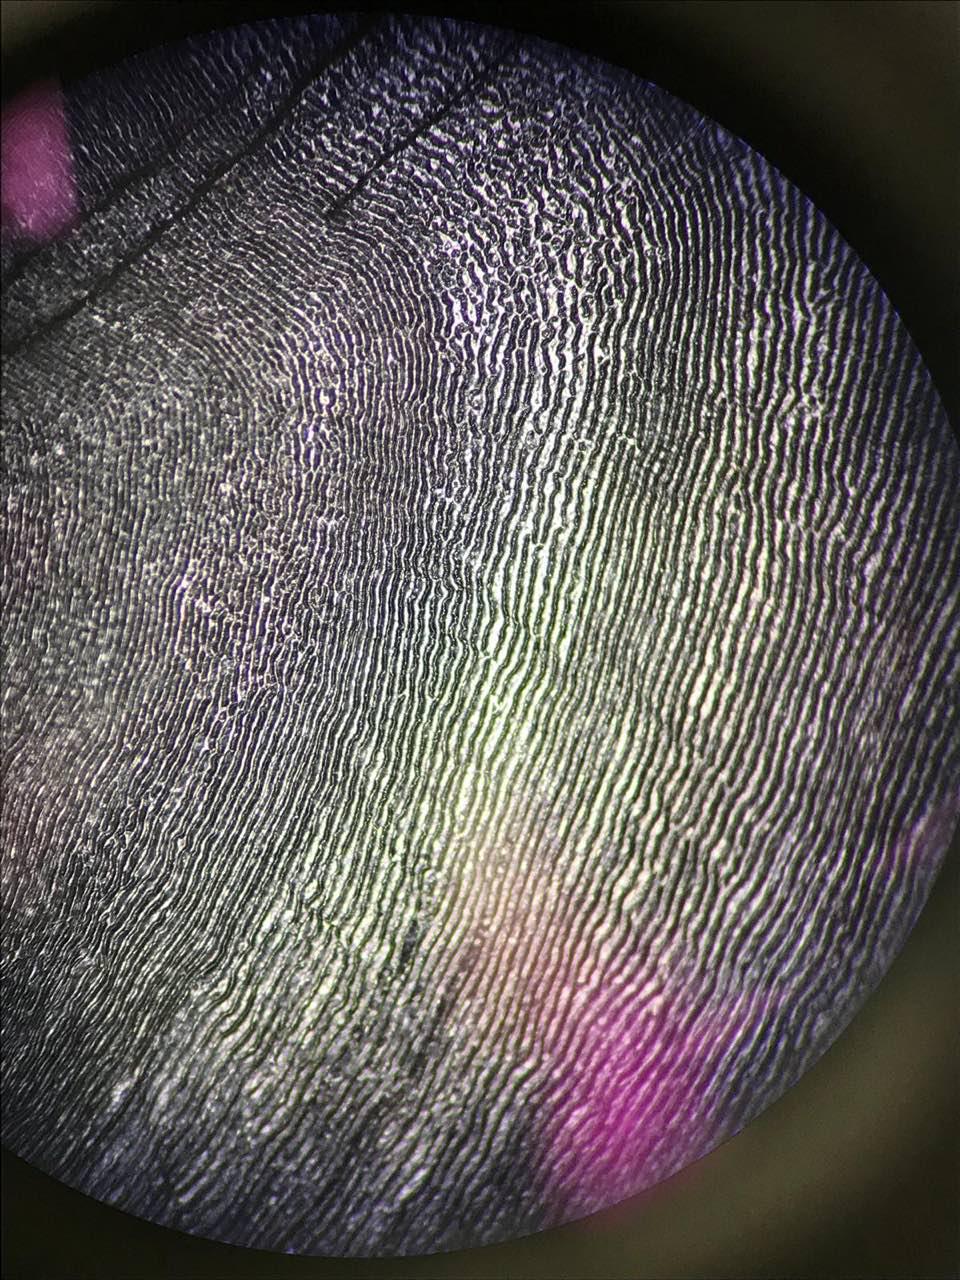
After gathering all the individual organs, each were measured and weighed. The microscope was also used to look at the scales of the fish which shows how old the fish is.
Thoughts
It can get quite messy with all the blood but it’s still an interesting process. One of the challenges would be trying to take out the organs because one has to do it slowly, without affecting the other parts. At one point, the fat can be all lumped up together making it difficult to separate each organ. The scalpel is also really sharp so putting too much pressure might accidentally cut an organ and resulting in more blood and inaccurate measurements after the experiment. Overall, each tool has an important function and ensures that the dissection is done as carefully and properly as possible.
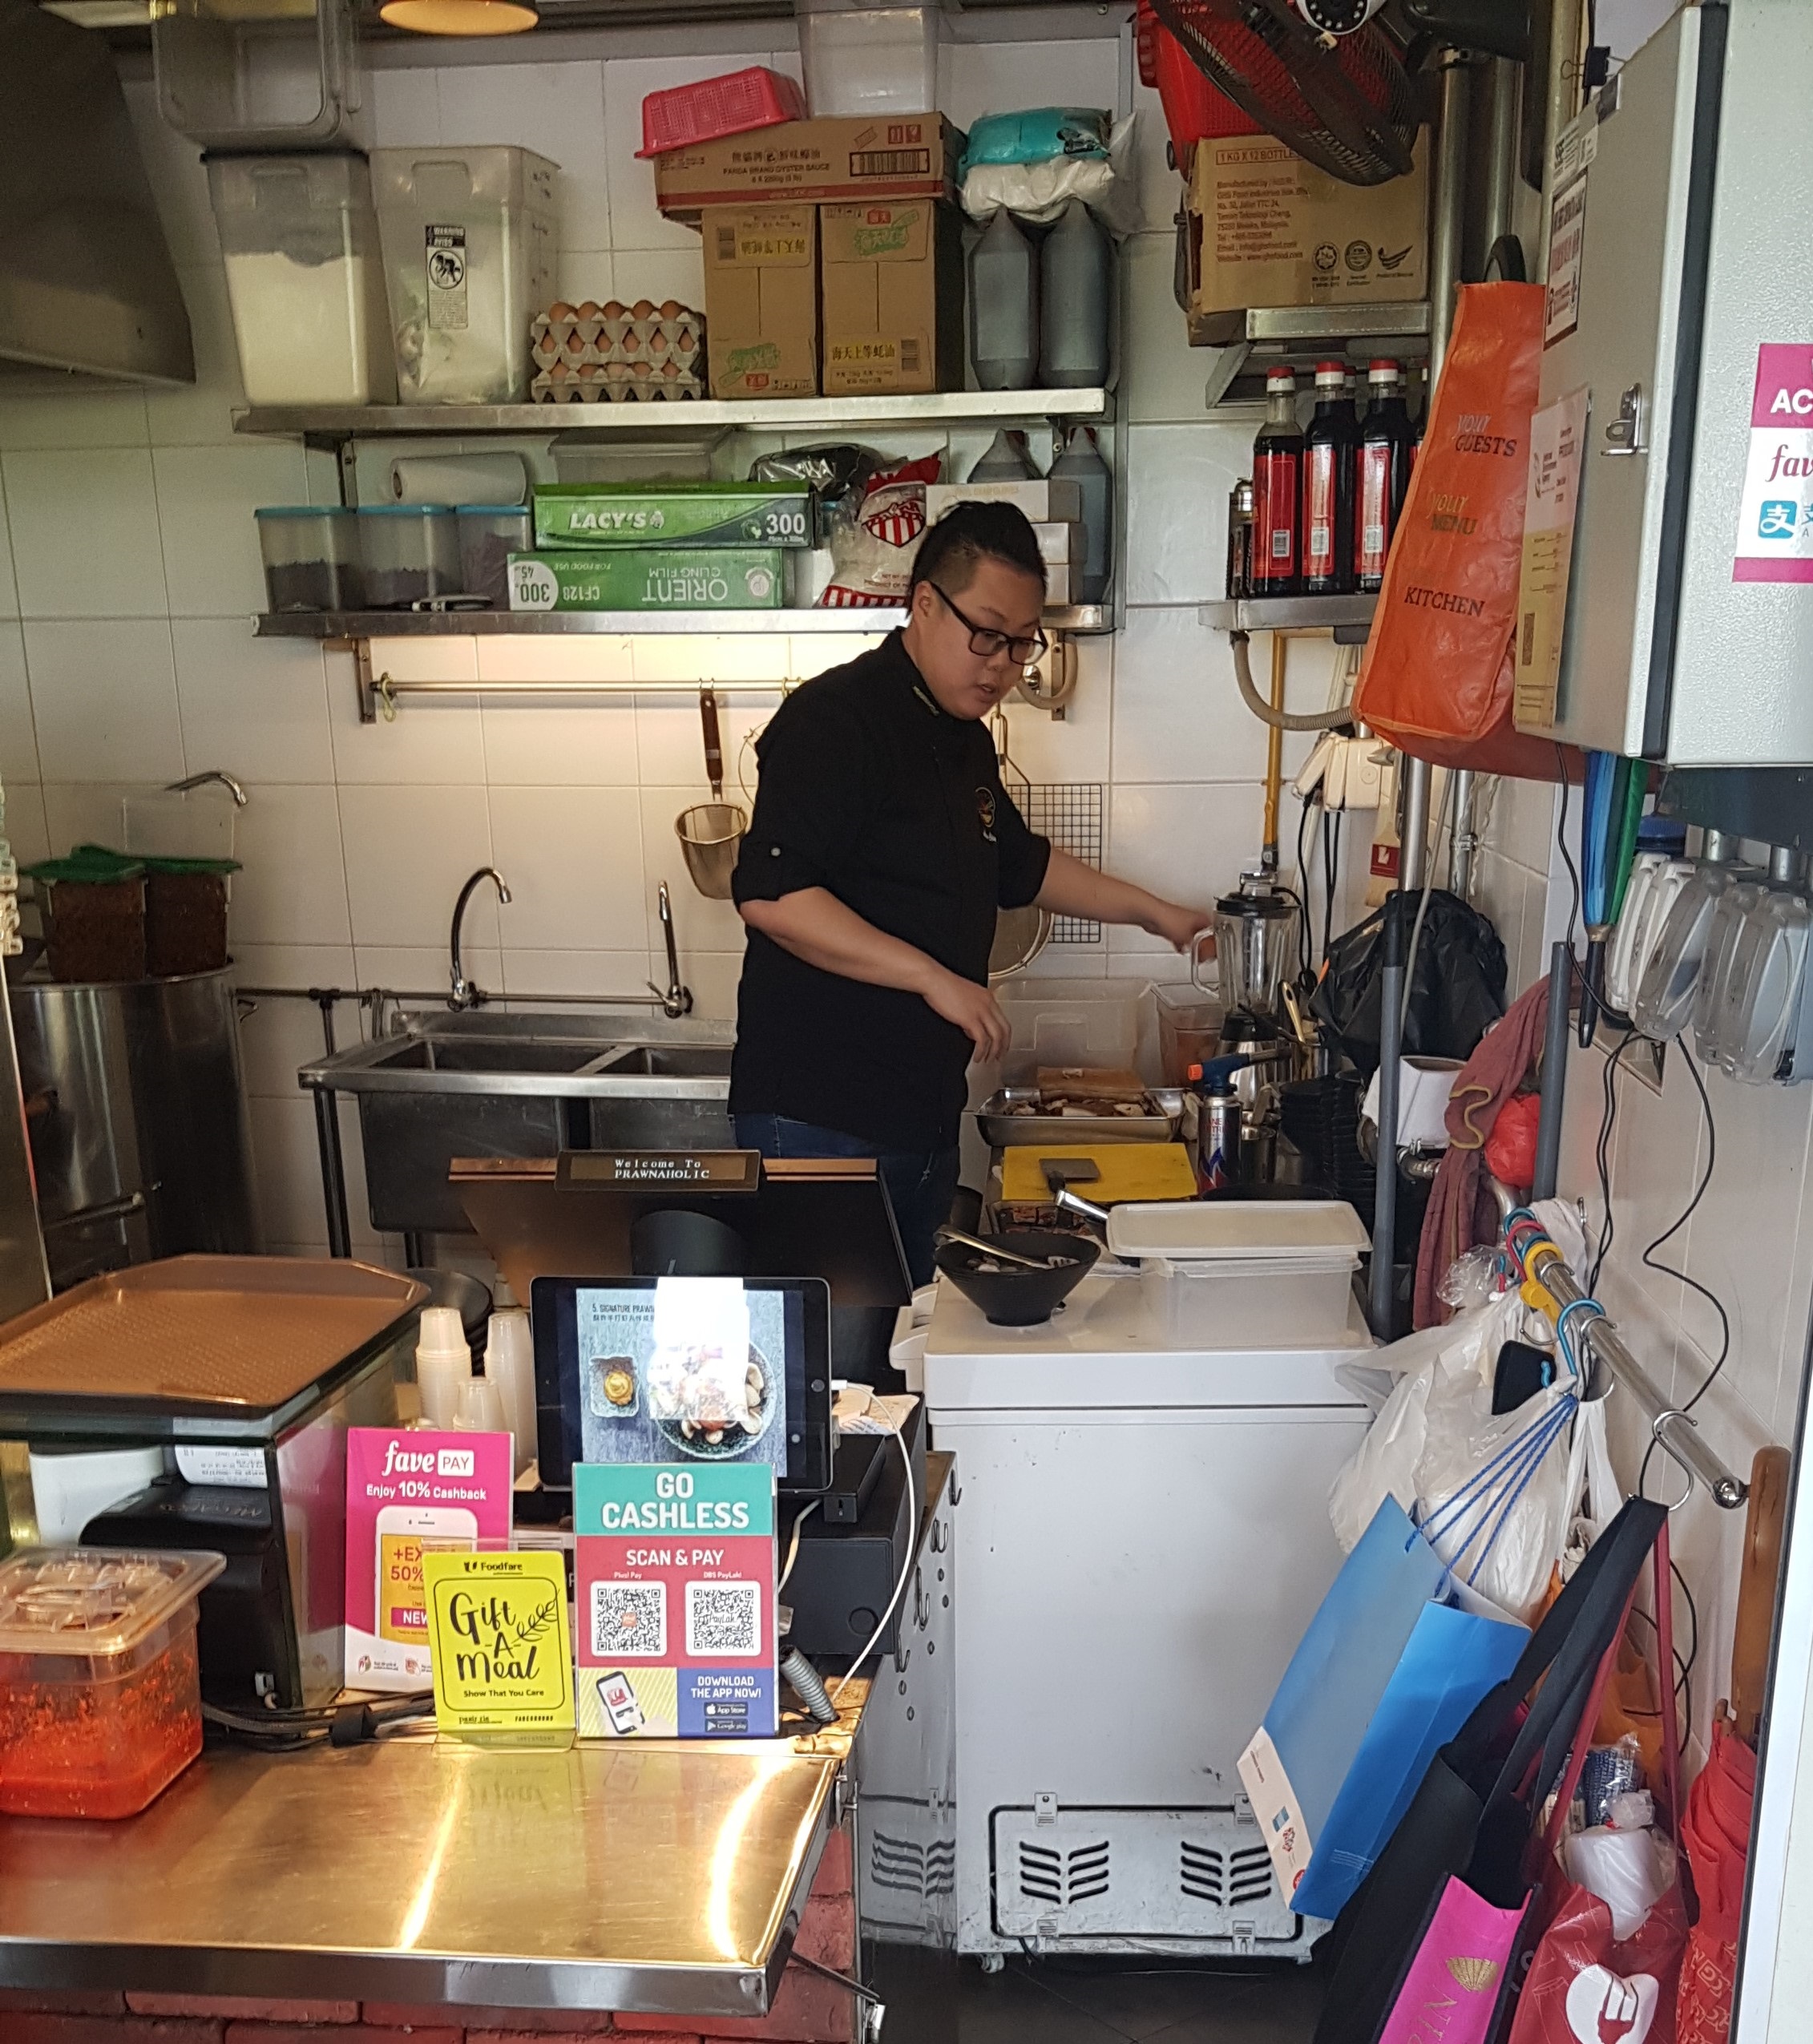
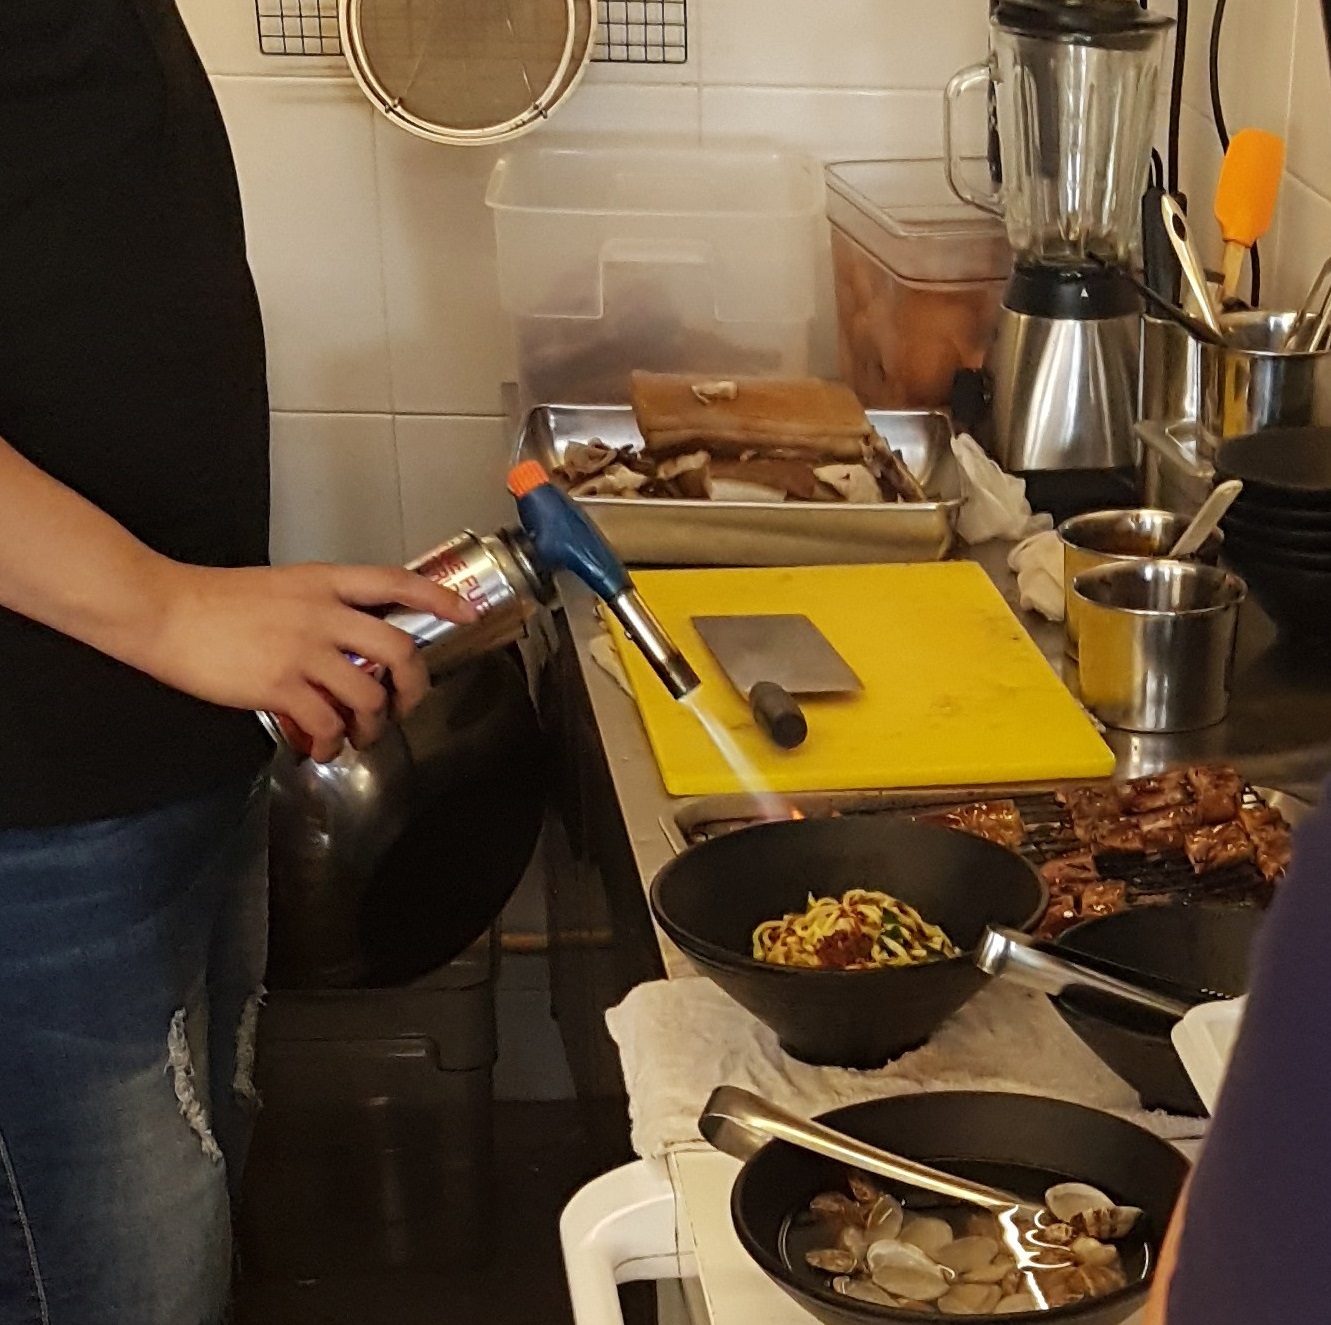
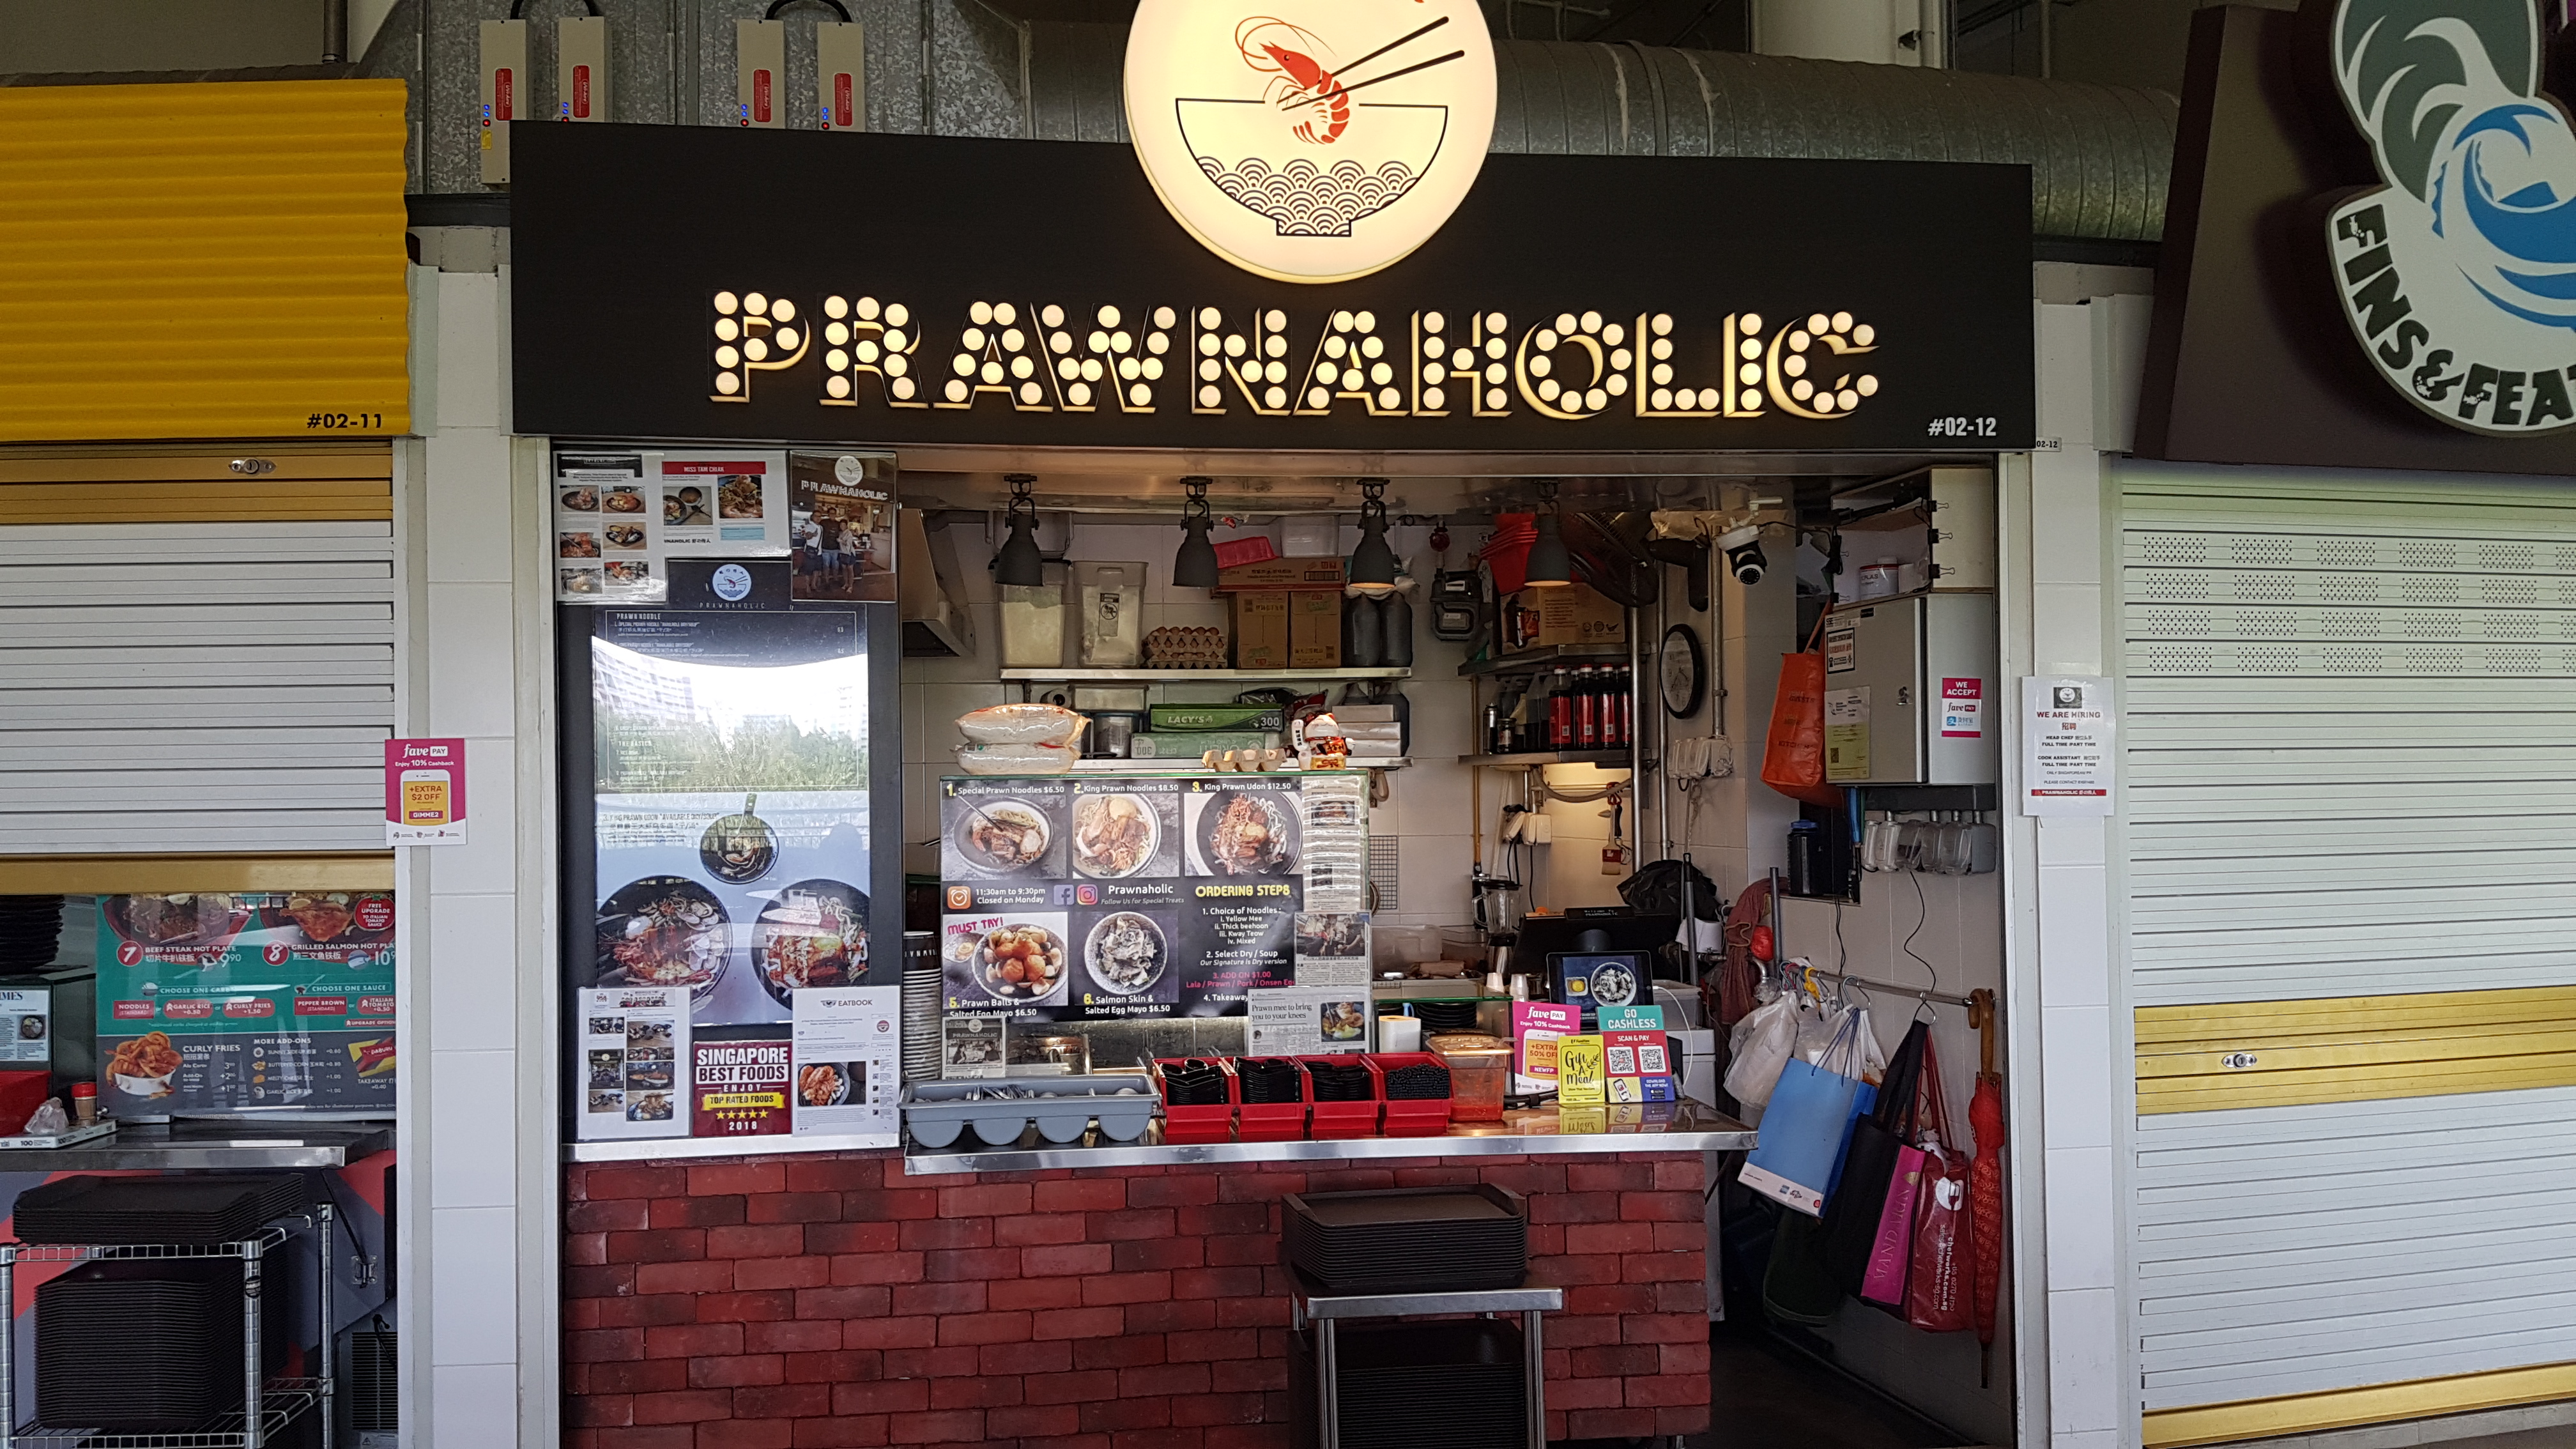
I had the opportunity to interview a hawker vendor as part of a film project and I took this opportunity to observe the chef cooking up his specialty, prawn noodles. It is interesting to see behind the scenes as to how it is being prepared and done. Something interesting about this prawn noodles is that it is no ordinary noodles but an innovation from the original.
Process Documentation
The process starts with the order from the customer and the chef proceeds to prepare the order. The chef goes on to do the necessary steps for the dish that the customer order. In my case, it was prawn noodles. The preparation sequence goes as follow; first cut the pork slices, then the chef will prepare the noodles. After which, he goes on to blow torch the pork slices and adds the rest of the condiments inside the bowl of noodles. This marks the end of the cooking process.
explanation of the processblow torching the pork slices
Steps
Orders from the customer
Cutting of the pork slices.
Preparation of the noodles
Blow torch the pork slices
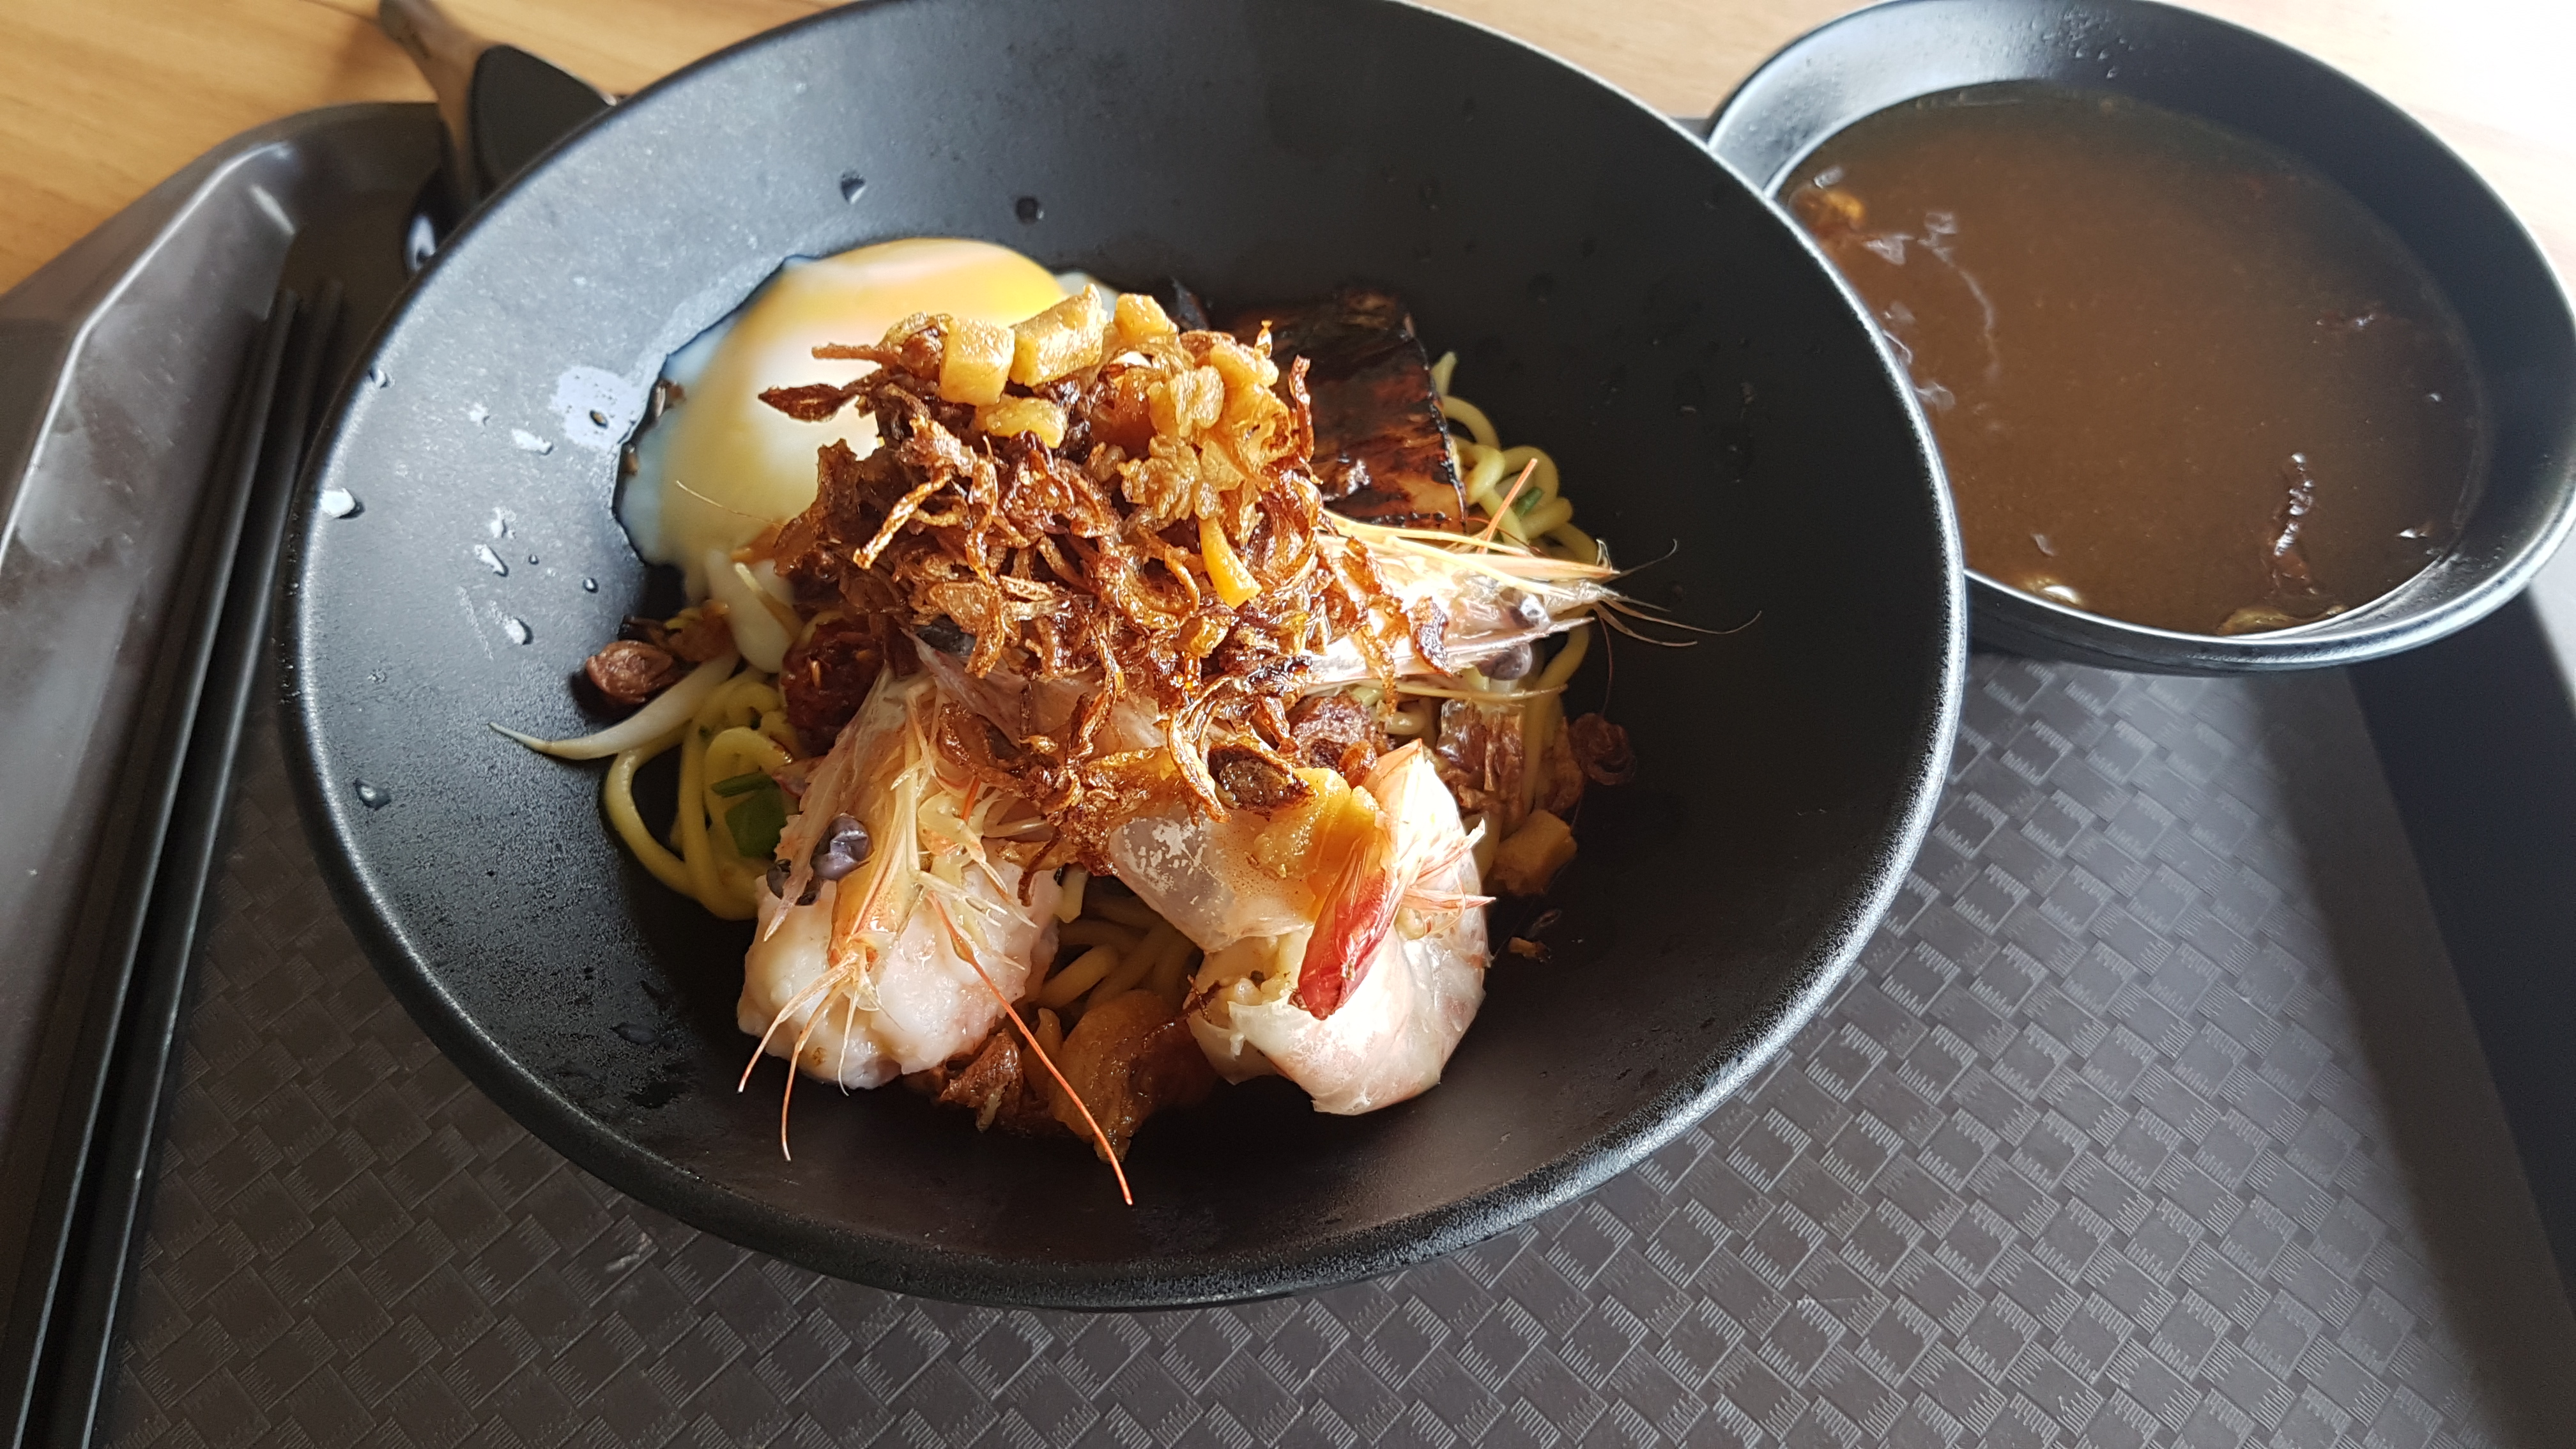
Add pork slices into the bowl of noodles
Add half boiled egg and prawn into the bowl.
Add additional condiments into the bowl.
Final product
Worksite Documentation
The worksite features a typical hawker vendor store space with the unit having just enough space for at most three people inside. During the entire process, there was not much space for other people to move in and out of the unit. The worksite though has many parts to it, from a space to cut things; to the storage fridge; and the place to cook the noodles. There is a lot more than it meets the eye for the place.
Tools Used
tools used in the process
I was actually surprised at the number of tools needed to prepare one bowl of noodles. There are actually more tools that are used in the preparation phase but the ones that I drew here were observed during the cooking phase of the noodles.
Pain Points
Due to the limited space in the kitchen, there is no space for rest. The chef mentioned that it gets tiring especially on days whereby there is a large influx of customers. Having to stand the entire time, it gets quite tiring at times.
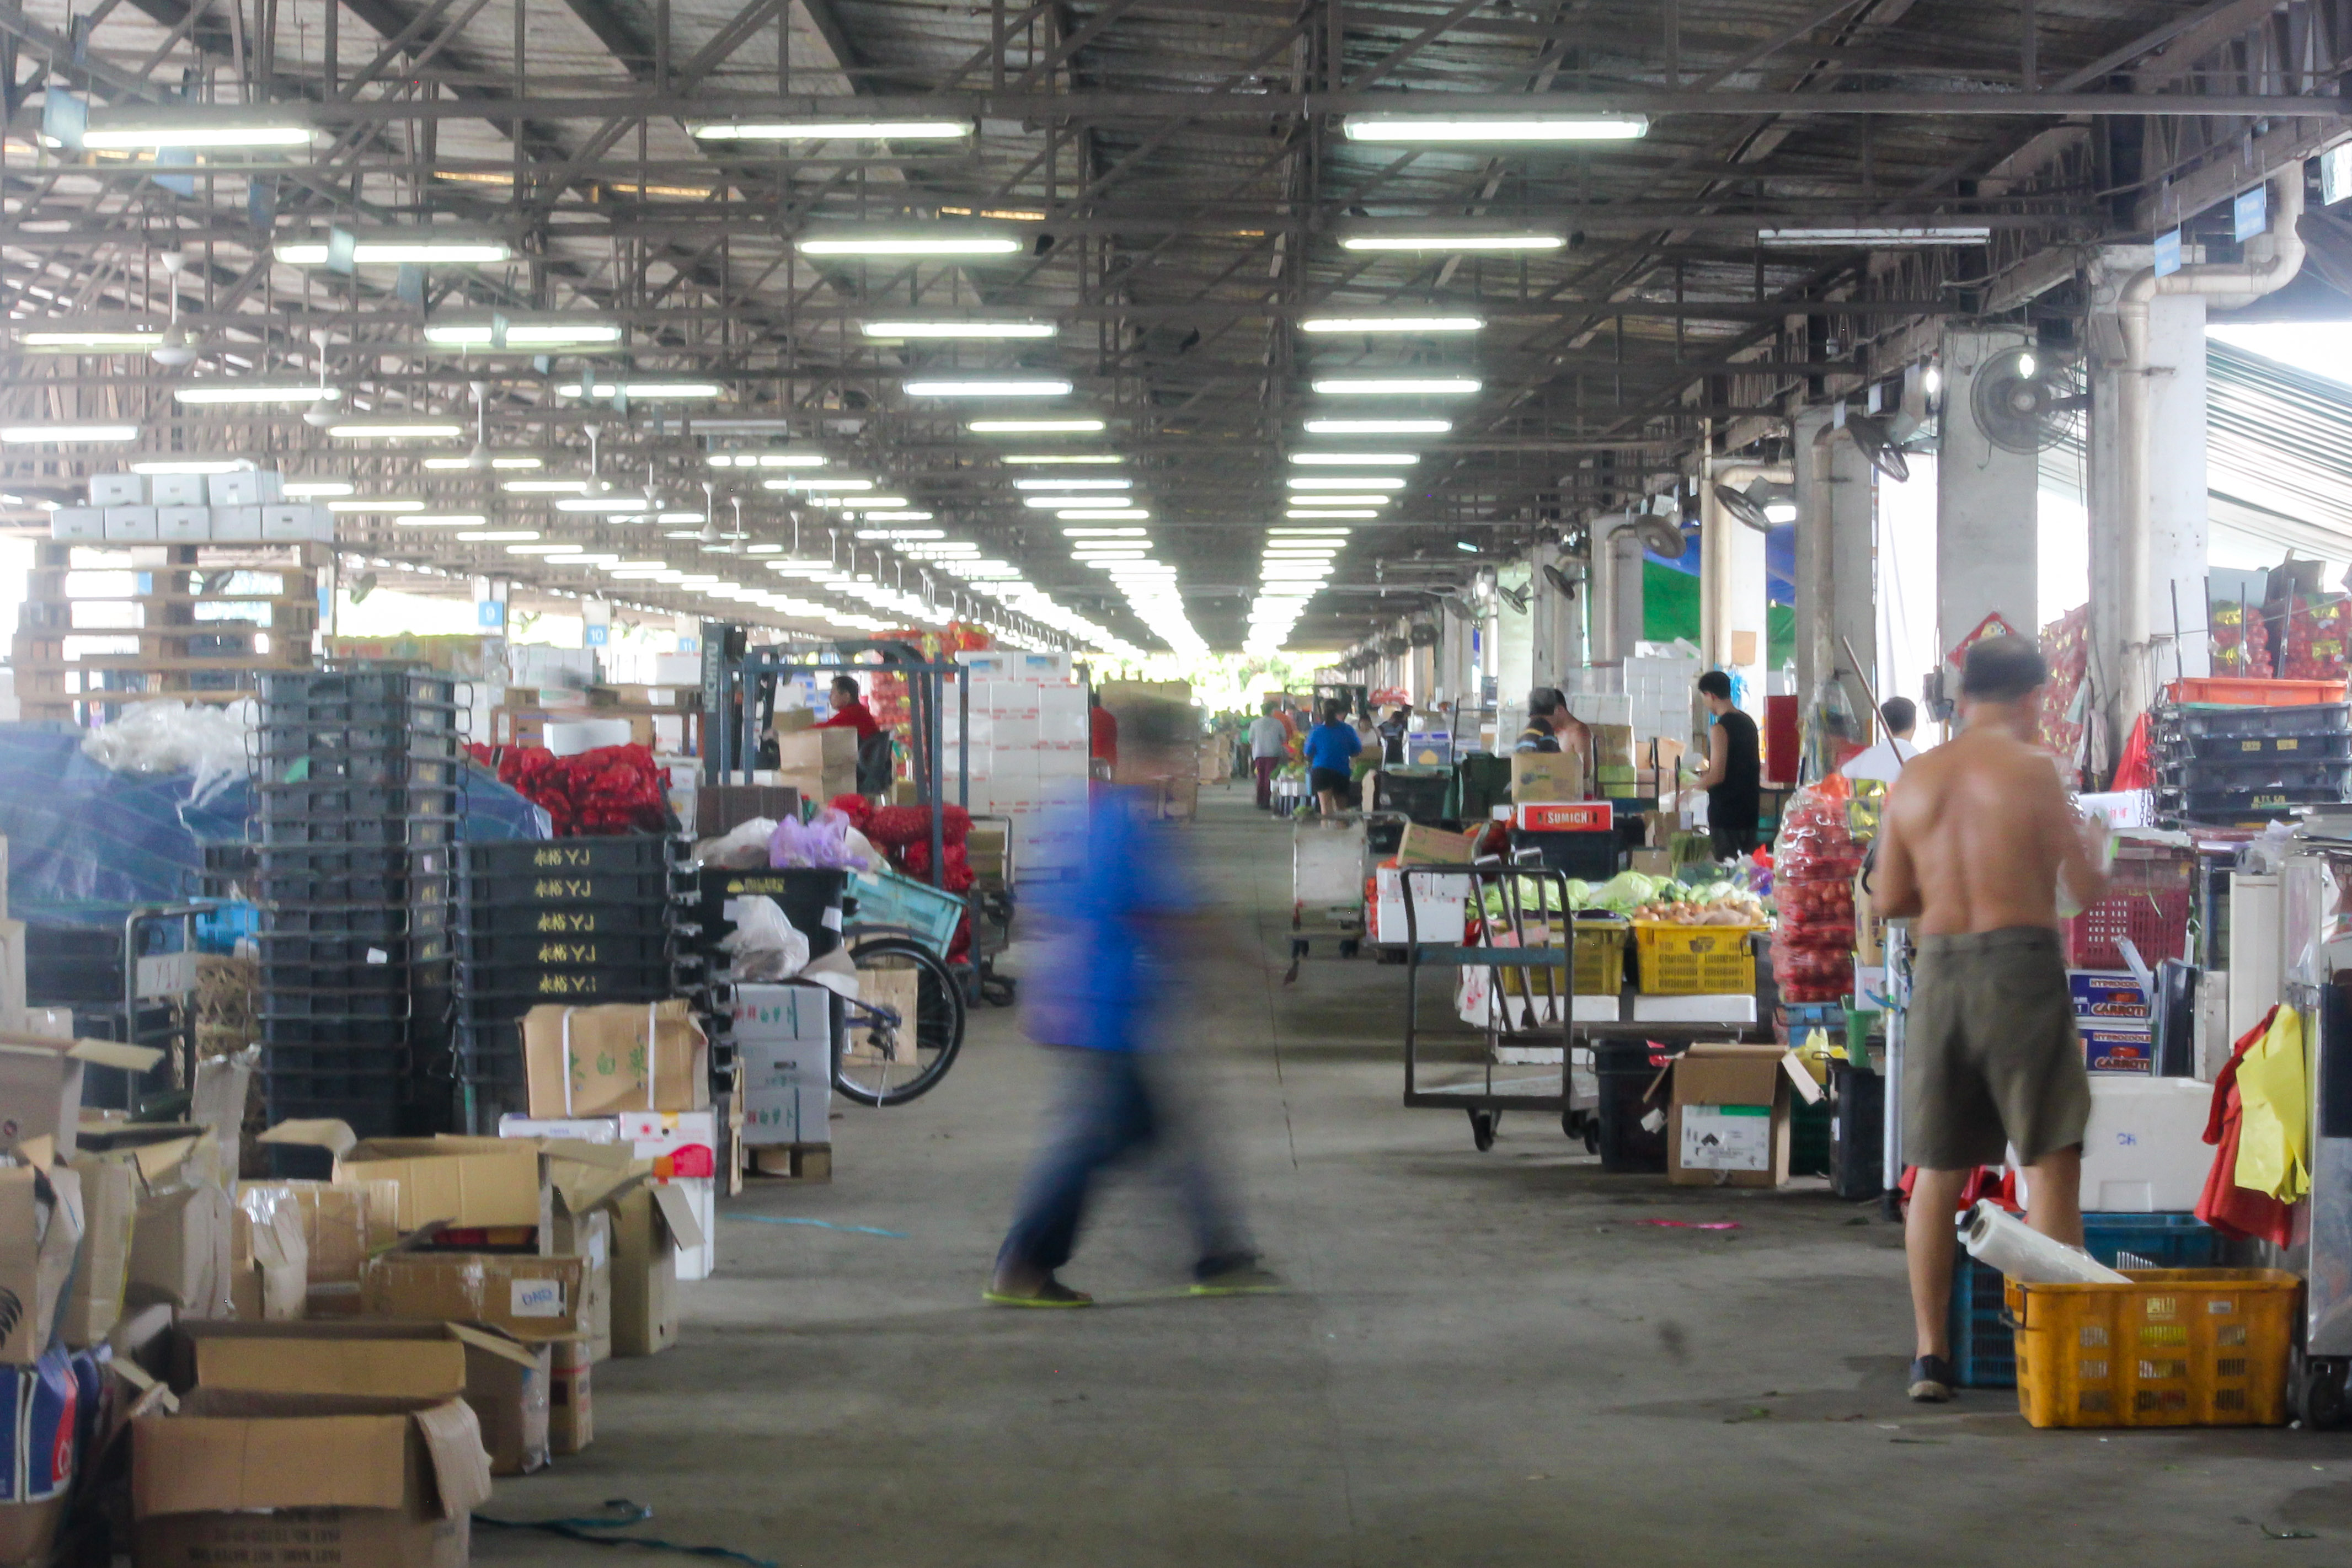
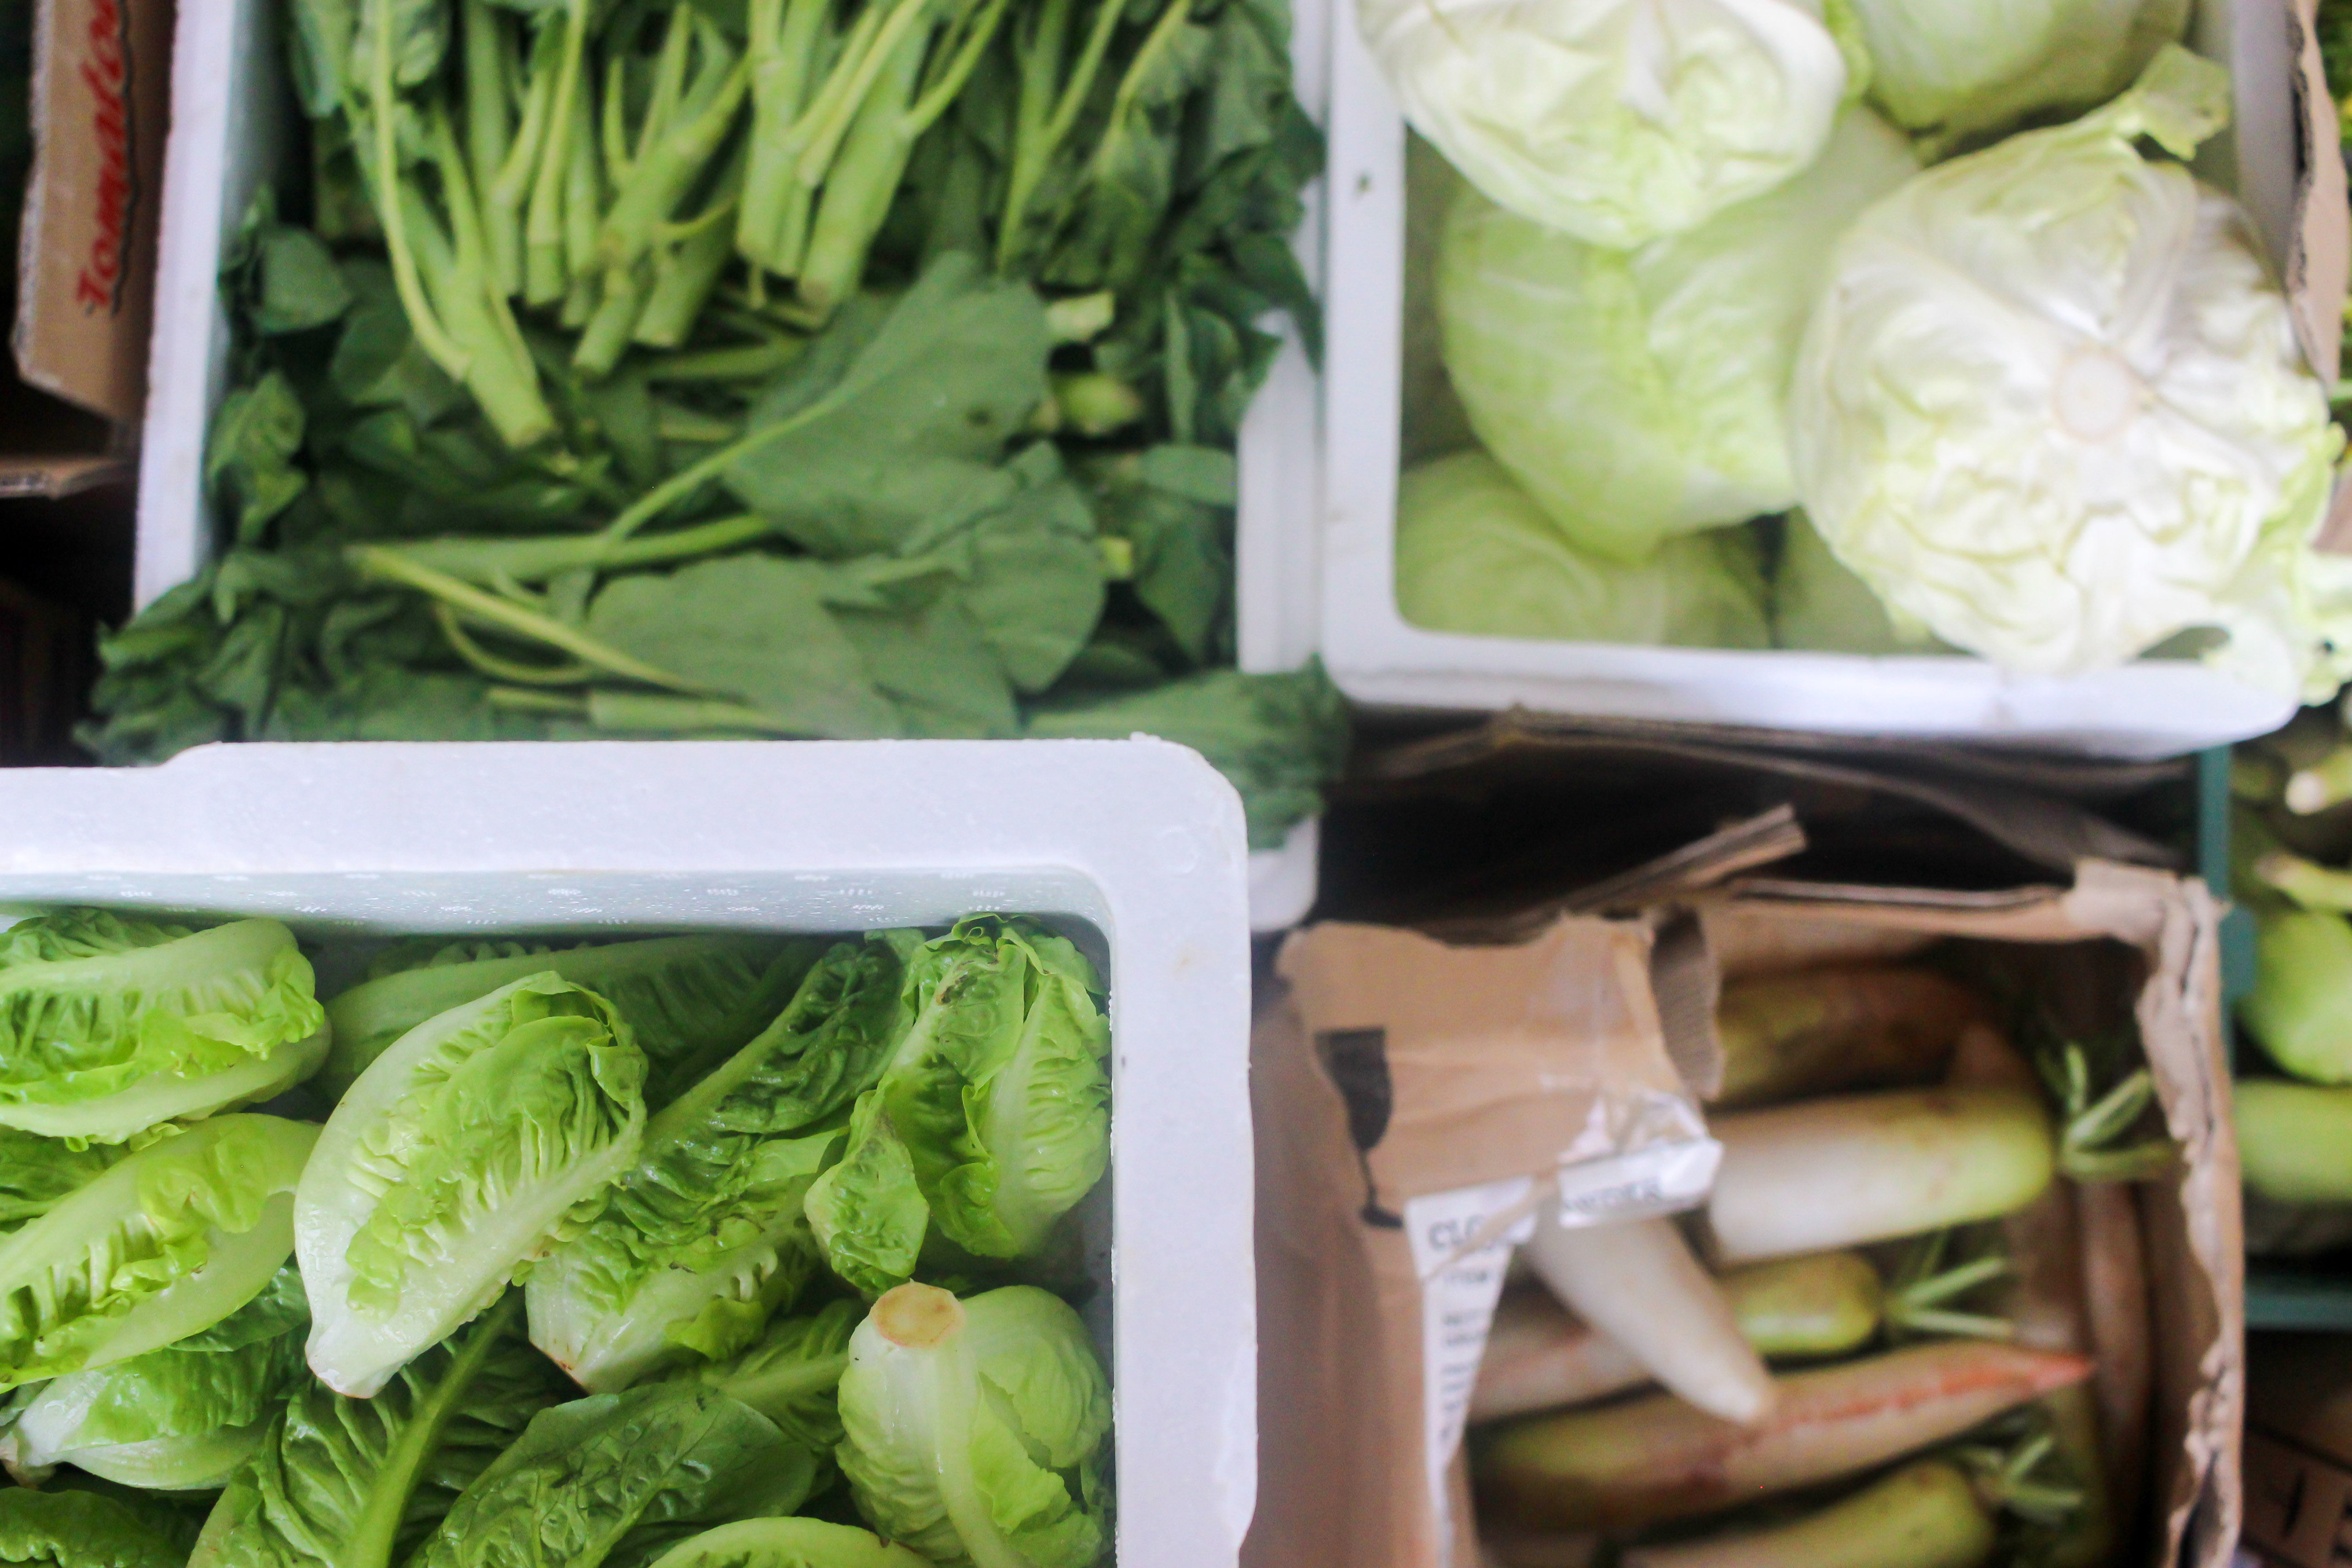
Practitioner #1: Veggie Rescue at Potong Pasir Wholesale Centre (PPWC)
I participated in the SG Veggie Rescue conducted at Pasir Panjang Wholesale Centre. Each Thursday (occasionally Saturday), the entire team of SG Food Rescue volunteers meet at PPWC.
Worksite Documentation
Breakfast before beginning the veggie rescue!
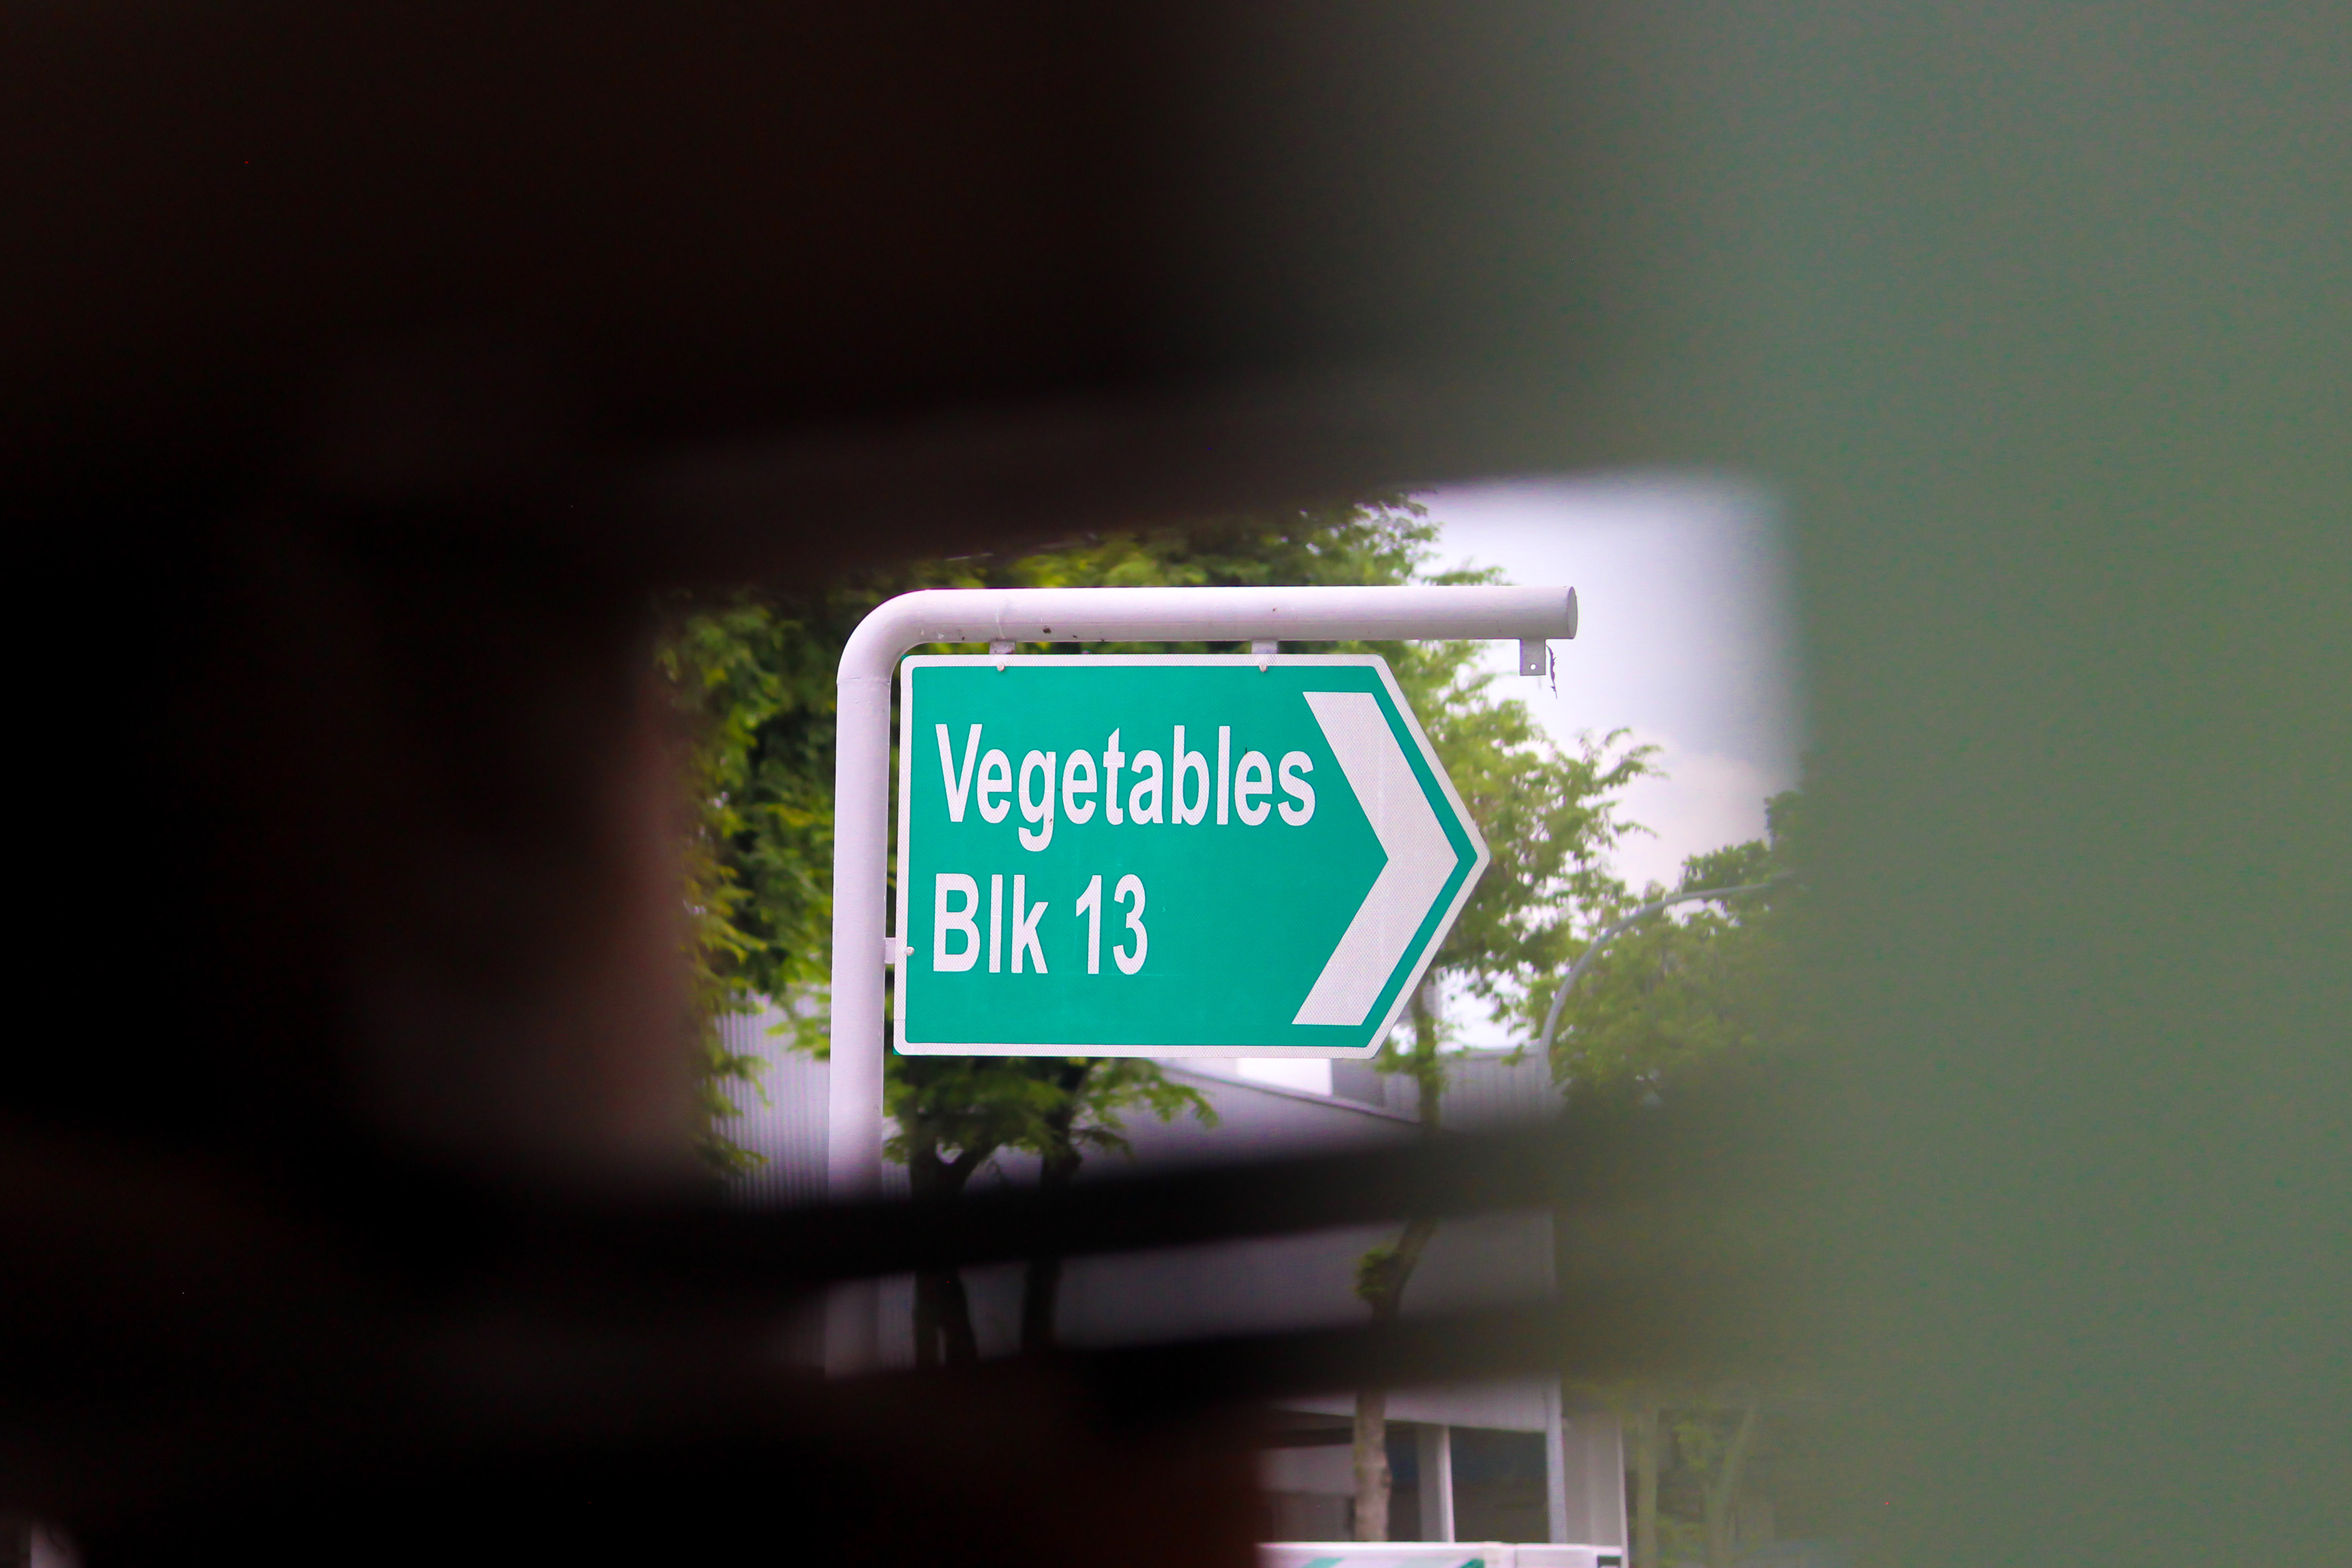
PPWC is a large wholesale centre that is split up into different blocks that focus on specific produce. There are blocks focusing on vegetables, fruits, dried foods and so on. It was an eye-opening sight, bustling with activity in the early morning as vendors sorted and sold their goods. Especially in the large auction hall, forklifts were constantly moving heavy boxes and people were shouting left and right. There were many container trucks, transporting and delivering goods. Within their own stores, each vendor had a team of staff that was working relentlessly to sort and pack produce.
ToolsUsed
SGFR lanyard
Mobile phone
Push trolley
Reusable bags/trolley (for volunteers to bring food home)
Delivery truck
ProcessDocumentation
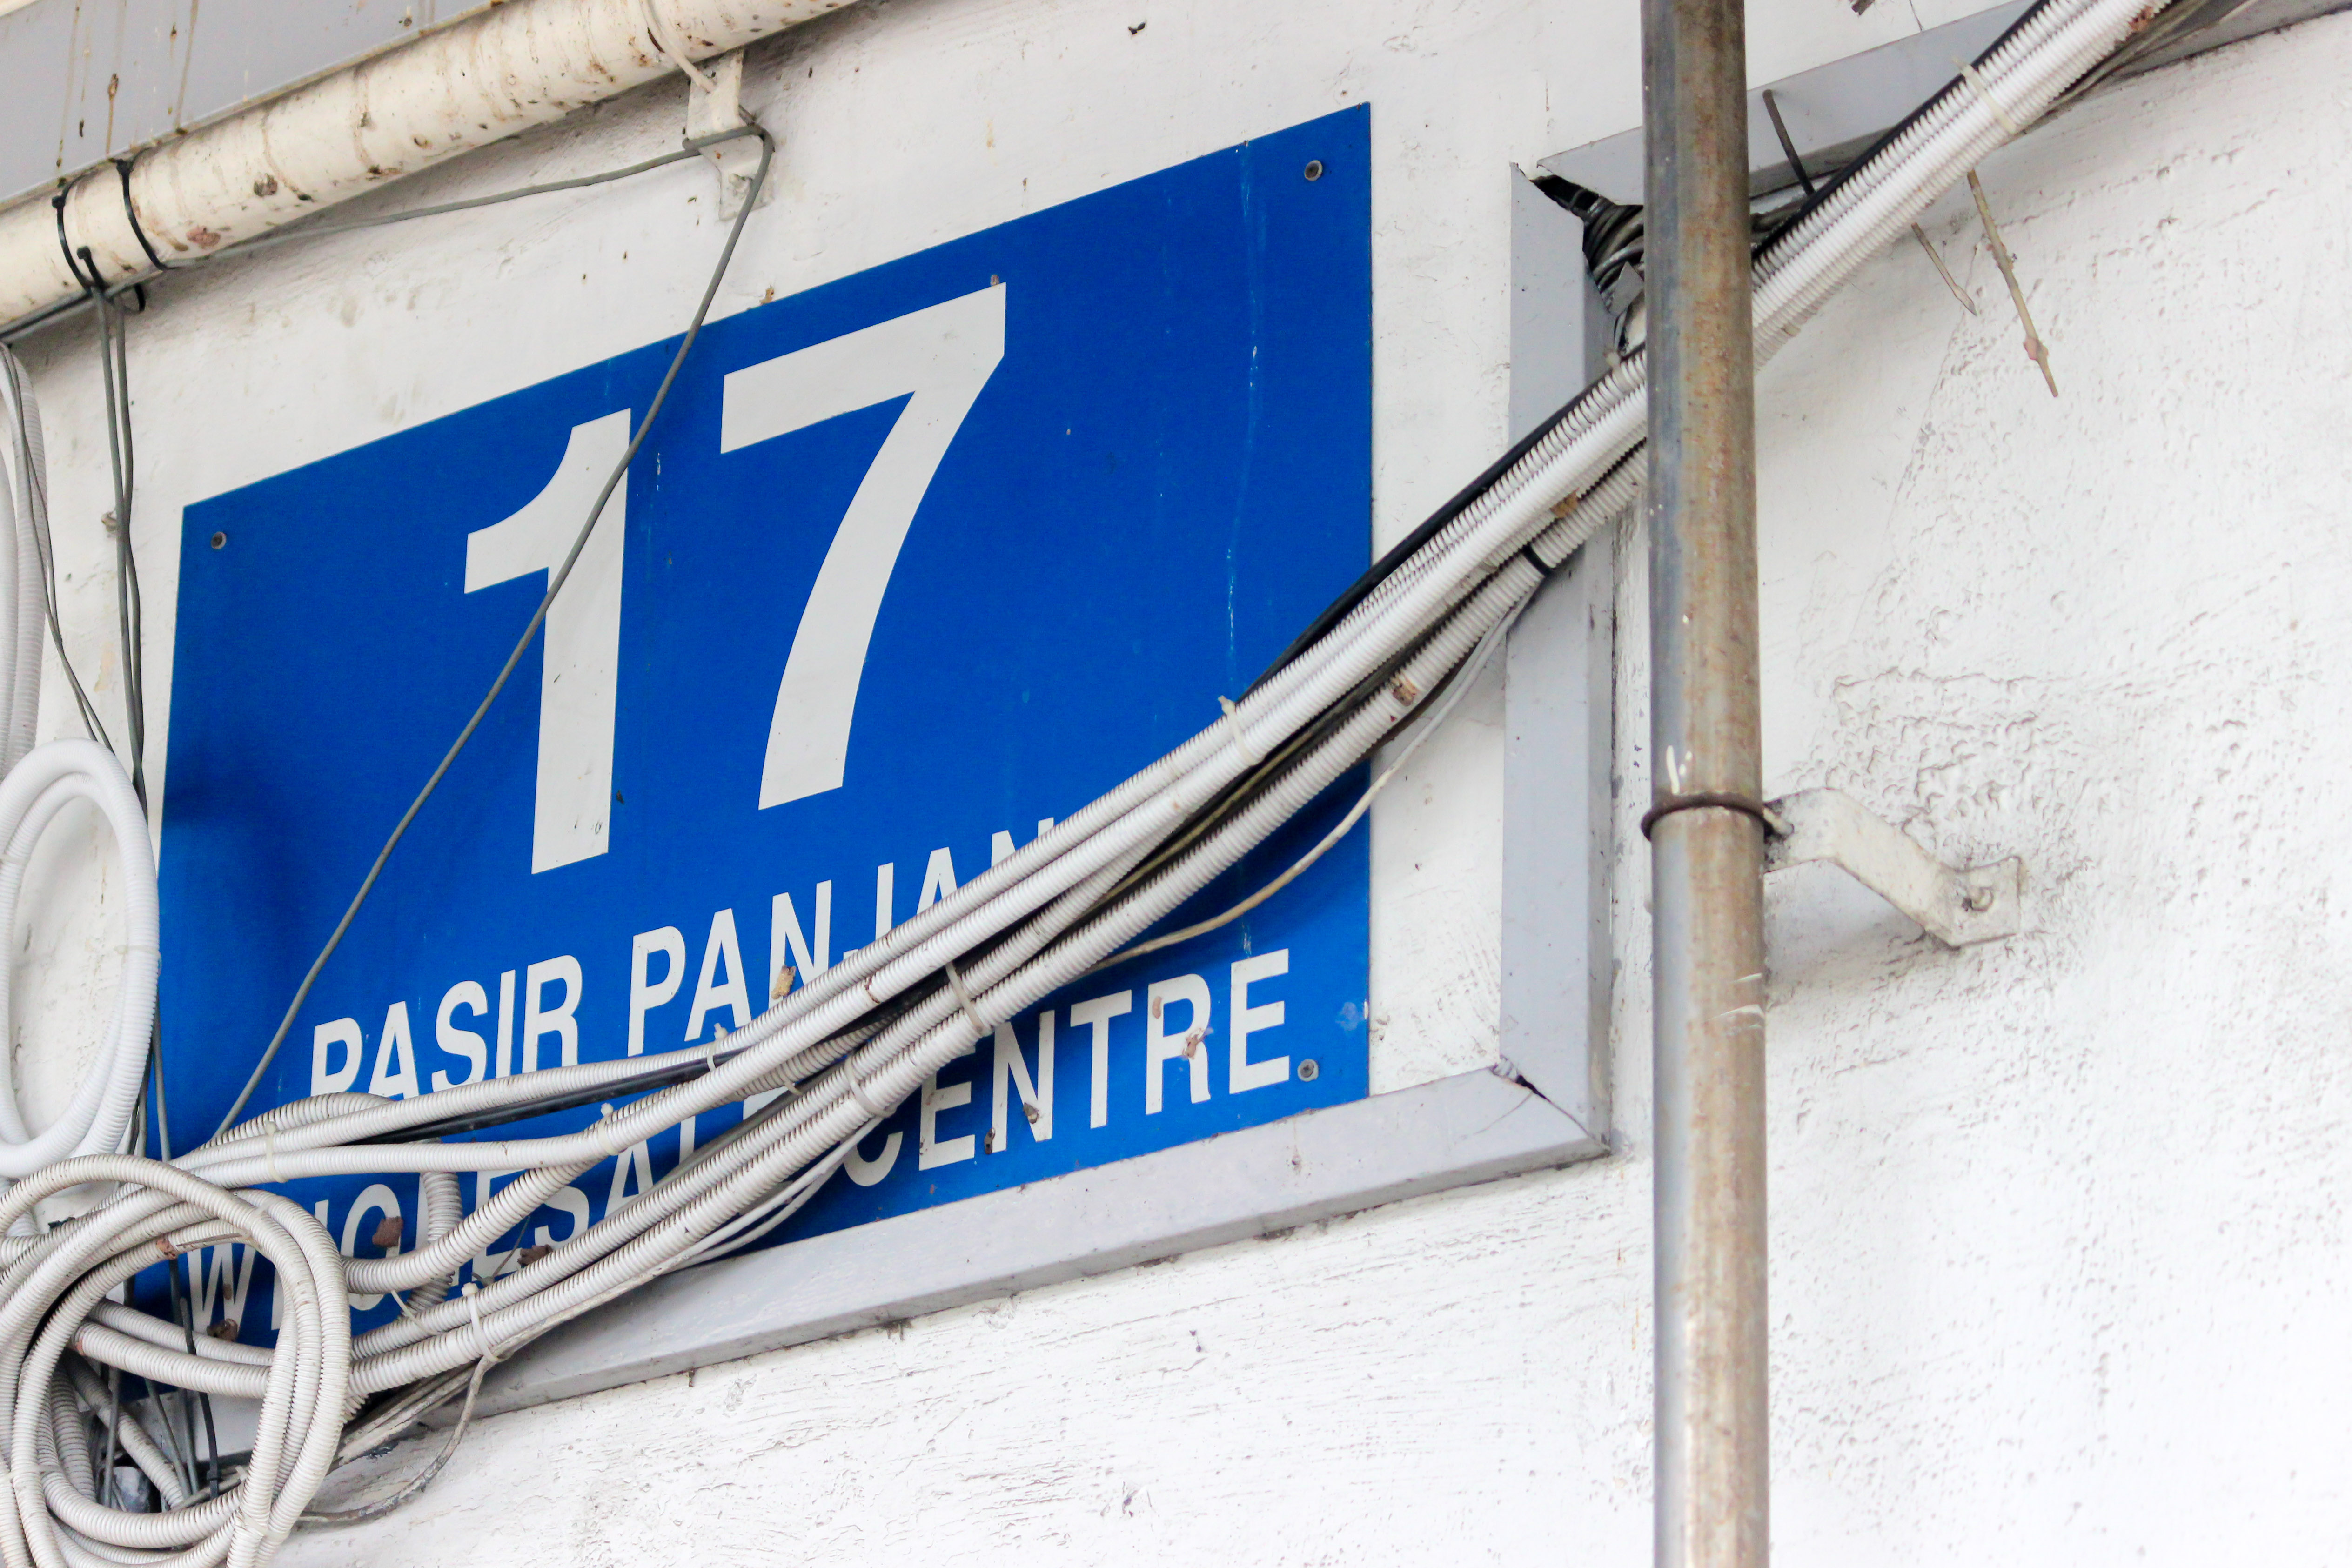
Block 17: The gathering point!Some of the veggies rescued!
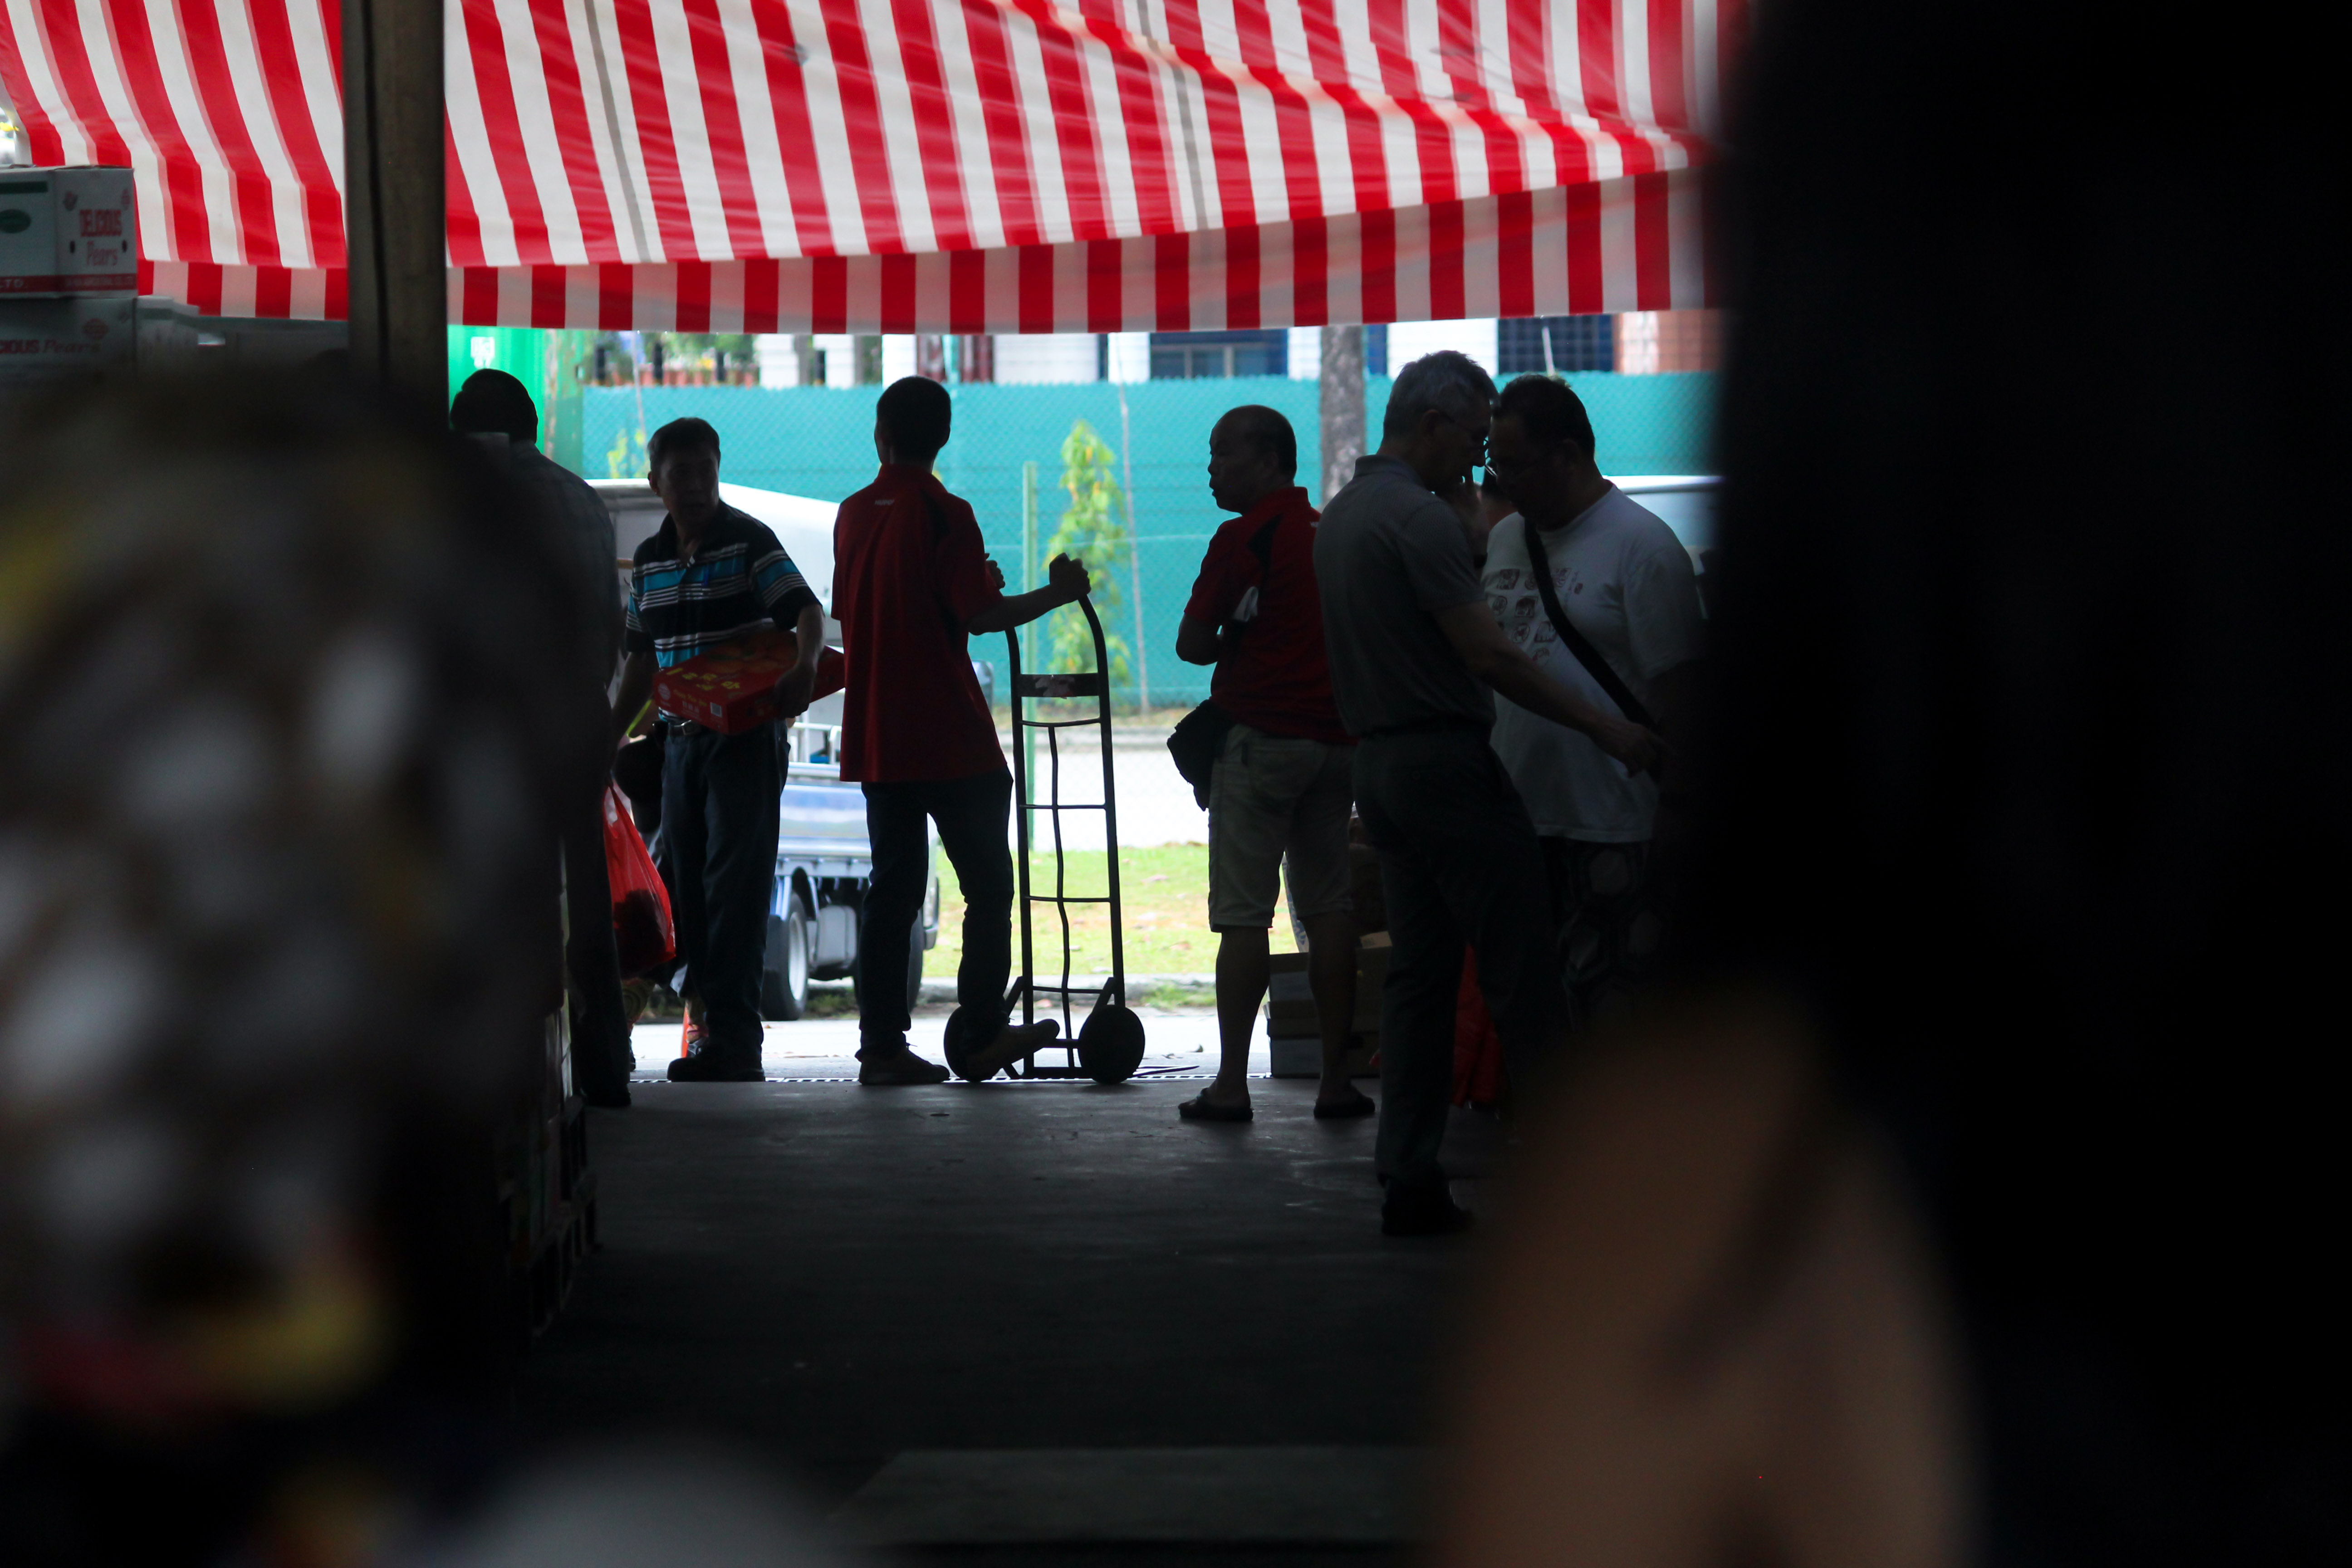
The food rescue commences with a briefing to all volunteers, conducted by the team leader. The briefing informs volunteers about SGFR, what to do, how to approach vendors, how to persuade them and most importantly, the dos and don’ts. For instance, don’t take photographs of the vendors themselves without their permission. Always ask for permission before taking, even if you’re certain it looks like trash. The ground rules were established before we split up into our separate groups: fruit and vegetable. Each group would focus on rescuing produce from the respective blocks. A few people were also stationed at Block 17 (the gathering point) to be ready to receive, sort and look after the goods collected throughout the food rescue. Team leaders and volunteers would keep in contact via mobile phones and WhatsApp chat groups set up ahead of time.
After splitting up to our respective blocks (I was in vegetables!), team leaders (and experienced volunteers) would approach vendors and ask for produce that could not be sold for whatever reason. Some cited the produce as ugly, or not up to standard, even if they were perfectly edible. The rest of the volunteers would then load up the trolley with boxes of whatever the vendors gave, and then push it back to the gathering point. Some vendors recognized the SGFR lanyards and had already set aside items to give, and most of them were super friendly! There was also a time limit to the collection process, and after an hour and a half, we made our way back to Block 17.
We were then debriefed and were allowed to bring home as much produce as we could carry. During the debrief, the SGFR team gathered feedback from participants to find out why vendors threw away the produce. Some volunteers also gave vendor details to SGFR, so the team could contact them to participate in the future PPWC Veggie Rescues. Subsequently, volunteers packed their bags with the rescued food and helped to load up the delivery truck, which would transport the food to communities in need.
Pain Points + Thoughts
Every time the trolley was full, volunteers would have to make the trip back to deposit the collected goods. This often resulted in many trips (and PPWC is quite big!) back and forth vendors and the gathering point. In my opinion, it wasted energy and time – as compared to being able to collect all the goods before making one trip back. Additionally, some times people are slow to check/pick up their phones, so there may be a lapse in communication.
Overall, I thought the veggie rescue was a great initiative started by Daniel (the freegan dude!) and some volunteers. Not only does it teach volunteers how to help with rescuing produce, but also opens their eyes to the food waste prevalent around us. Plus, you get rewarded by helping out with free food! What’s not to like?
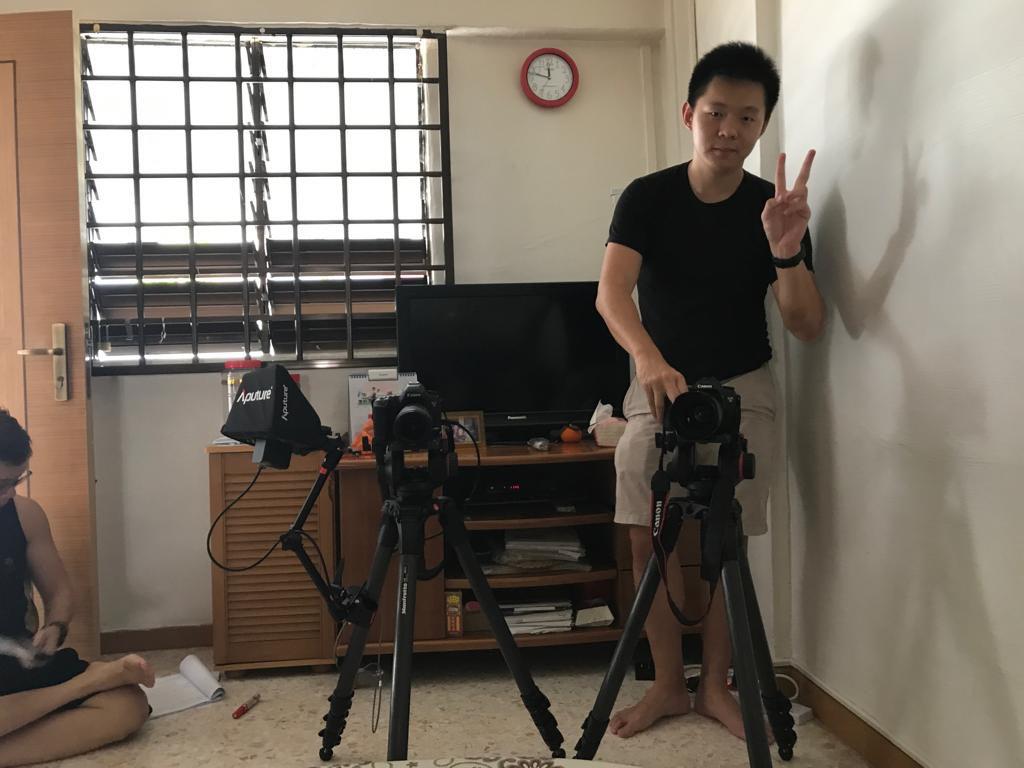
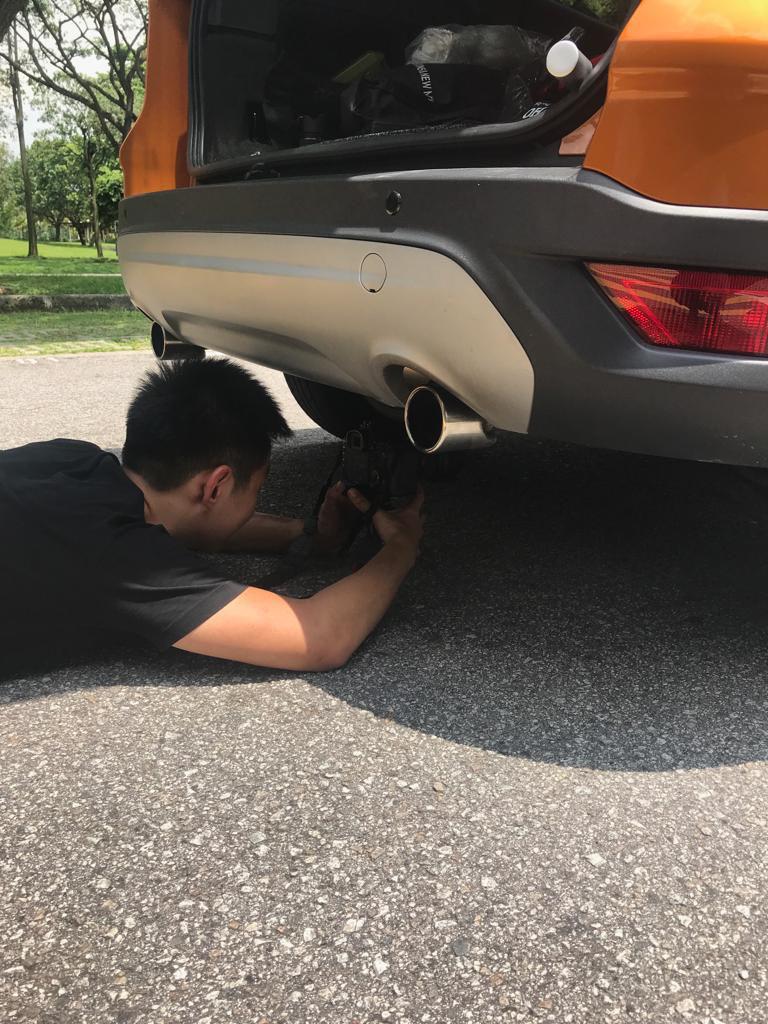
Practitioner #2: Film making
I participated in filming a fictional short film with some experienced film makers.
Worksite Documentation
Filming @ the HDB flatFilming @ the fishmonger in the wet marketFilming @ random carpark
The worksite changes often, depending on the day of the shoot and what scenes we’re shooting. For instance, we can shoot scenes in a flat, at a wet market, and at a car park all in one day.Due to this, there was a lot of shifting about and the team had to pack up all the equipment quickly and move to the next filming location. On top of that, since the ‘worksite’ changes, this means that we either plan things out before hand (location scouting/recee) or be able to adapt on the spot.
Tools Used
Tripods
Handheld stabilizer
Gimble
Cameras
Monitor
Fresnel lights
LED lightbox
Boom microphone
Lapel microphone
Zoom microphone
Process Documentation
We arrived a few hours before the cast to begin setting things up. We had scouted the place before, so we knew what to do upon arriving (e.g. where to place the tripods for which scenes, what areas to block out for certain shots, where to put props). The tripods were set up, then put into position (one main camera, one secondary camera) and other team mates would prep the set. This involved putting props into specific positions (following a photograph snapped on a phone) to ensure there was continuity in the film.
When the cast arrived, the director would talk to them to settle them down, before briefing them on what was to be shot for the day. After which, the cast would run through their lines and the director would advise them on what to change, or what emotions to convey.
After a few practice runs and blocking out shots (to help check the framing on the camera), we began filming. Most scenes took one to three takes to complete, and we had to work fast in order to ensure that the light did not change much from shot to shot. It was a constant race against time. Additionally, every time we were filming a scene with dialogue or specific sounds, we had to ensure there was silence on set. This proved to be difficult especially when in public areas that had influencing factors we couldn’t control (e.g. the flat was located near the MRT tracks, the microphone kept picking up the rumbling of the train).
Throughout the entire filming, team mates had to work together to back up the files on the laptop, change and charge batteries for the camera and microphones, change and empty out SD cards, shift lights, tripods and carry sound equipment. After finishing the scenes at one location, every one had to rush to pack up and shift items back to their original positions, before moving on to the next location and redoing the whole process.
Pain Points + Thoughts
The SD cards fill up fast, especially when filming for the whole day. Since we had limited SD cards, every time a card was full – the camera man had to pause filming, remove the card, pass it to a team mate and replace it with another SD card. Meanwhile, the team mate would insert the SD card into a laptop, back up the files, clear the card and then return it to the camera man. This was a cyclical process. A lot of time was spent waiting to back up the files and pausing to switch SD cards.
Another pain point is the sound equipment. The lapel and boom microphones had to have wires connected to the main zoom microphone. As we had two lapel mics and one boom, this resulted in a mess of long wires that often got tangled up. It was difficult to manage them, however, if they were color-coded, it would make things a lot easier. Additionally, similar to the SD cards, the batteries in the mics and cameras ran out quickly and had to constantly be swapped out to charge.
All in all, it was a fun and hectic experience that taught me a lot about film making. Especially with regard to the logistical process behind it (setting up, putting props in specific spots, resetting scenes, manipulating light to make it look like certain times of the day, etc).
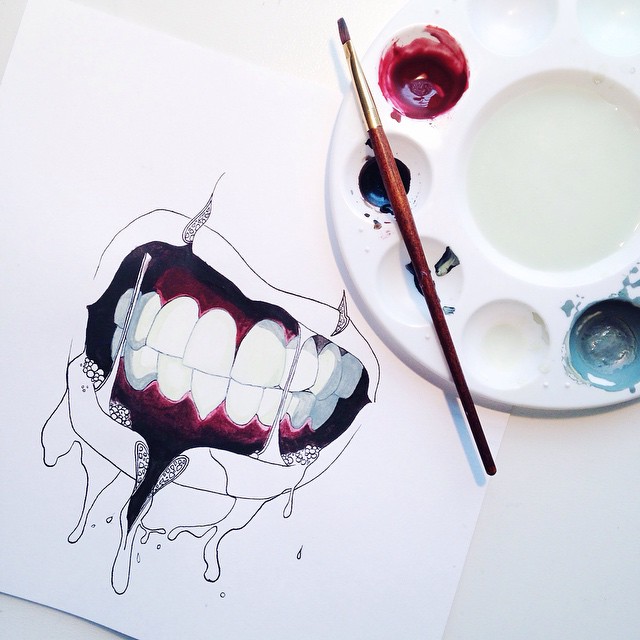
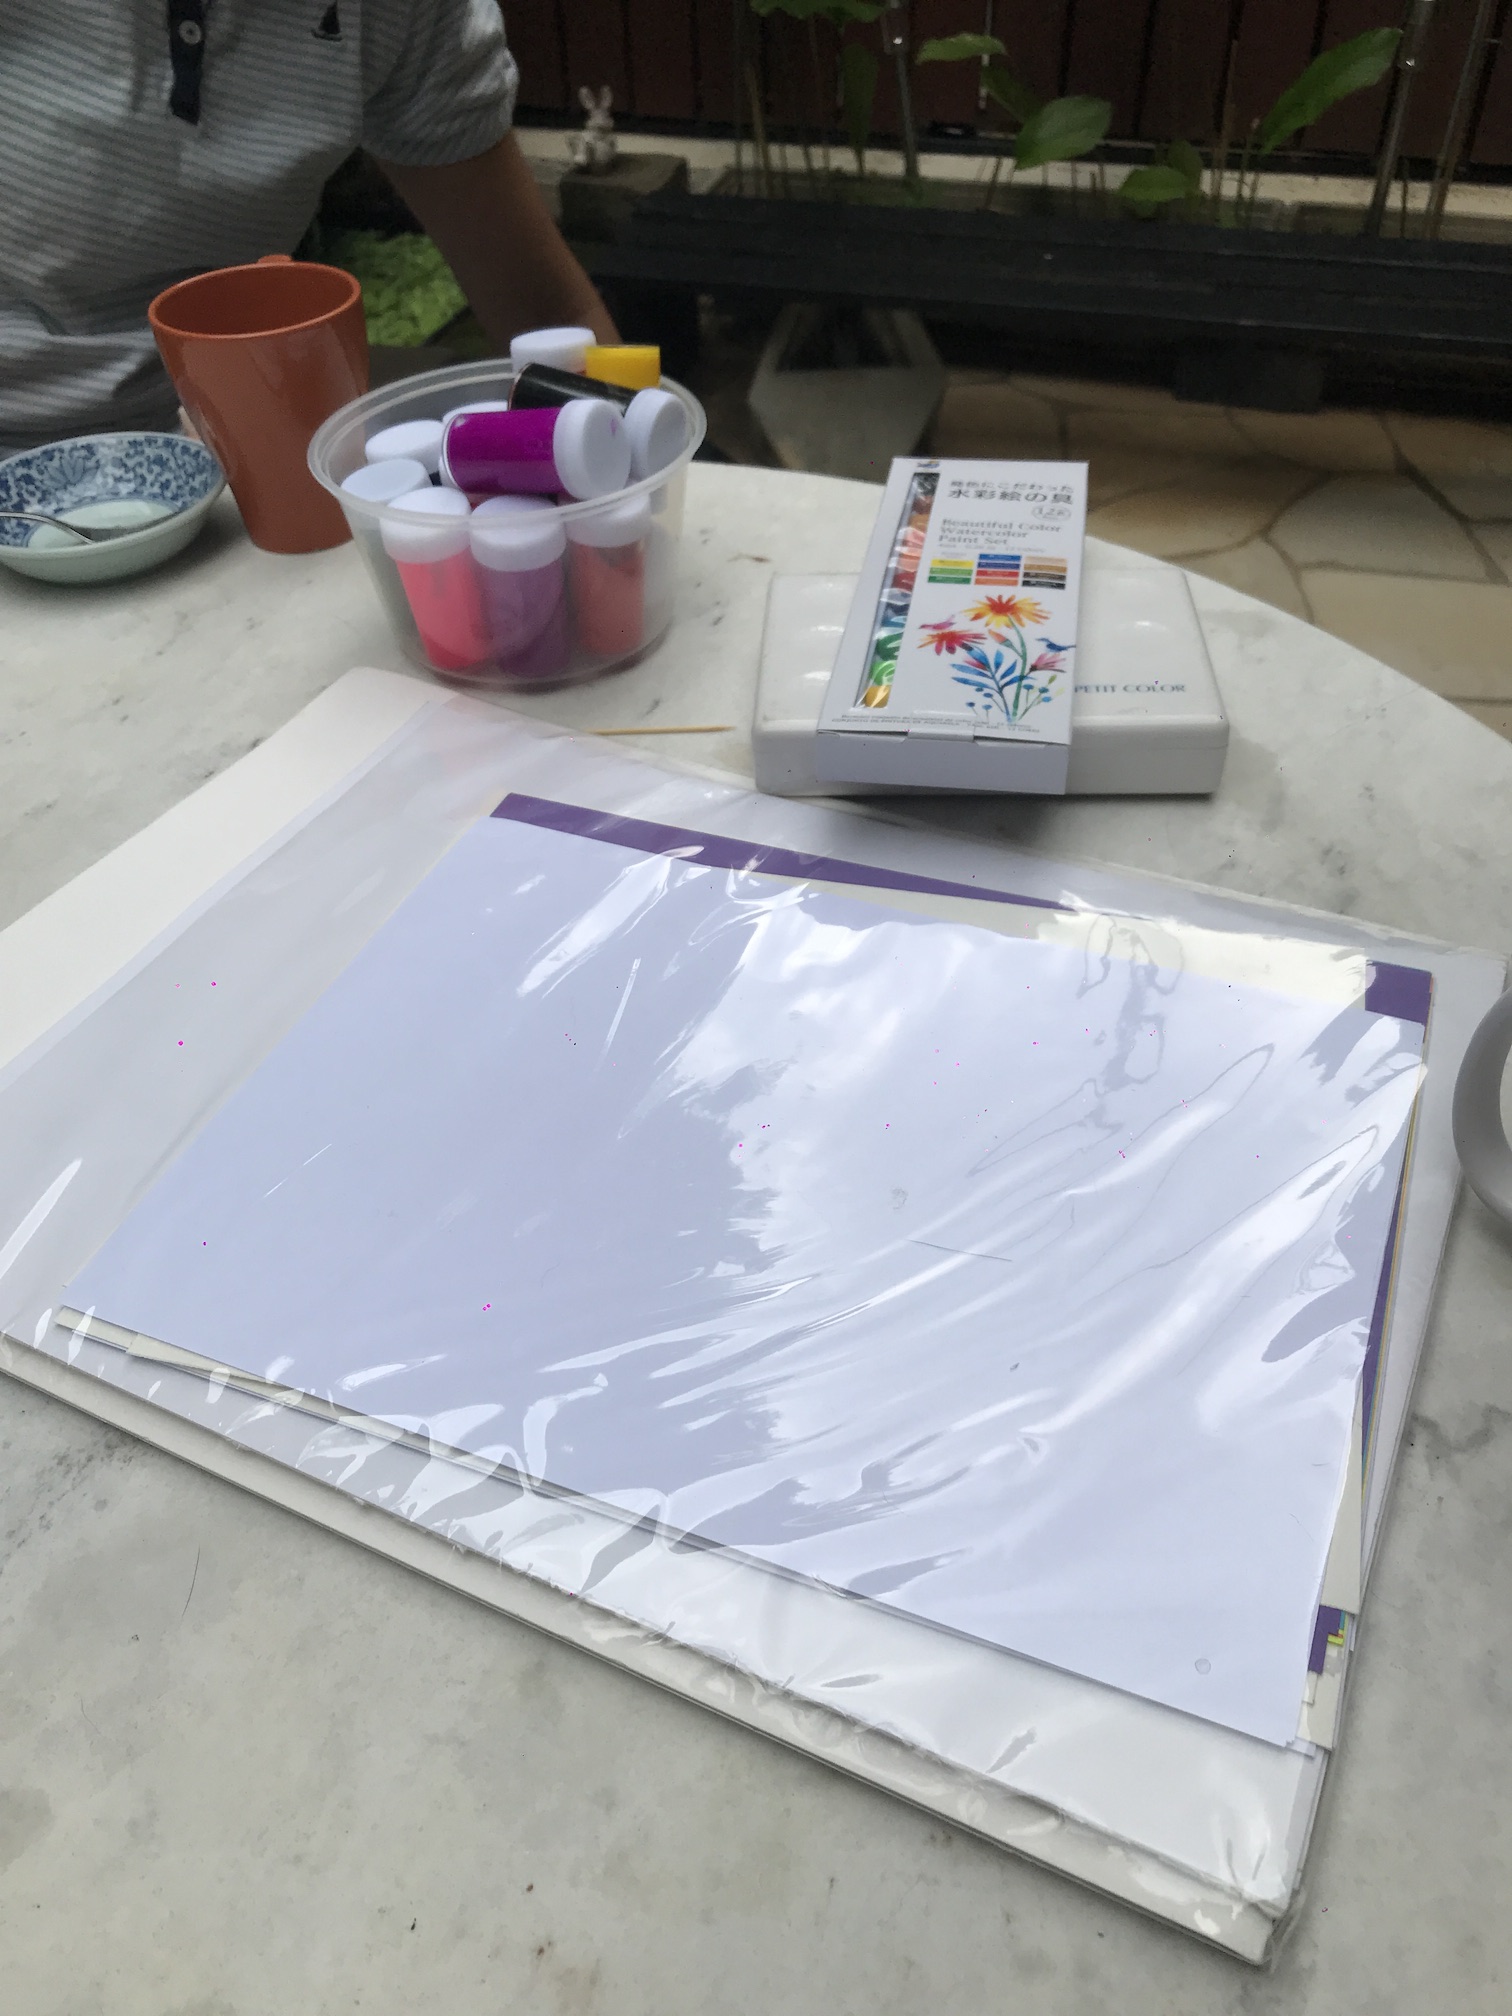
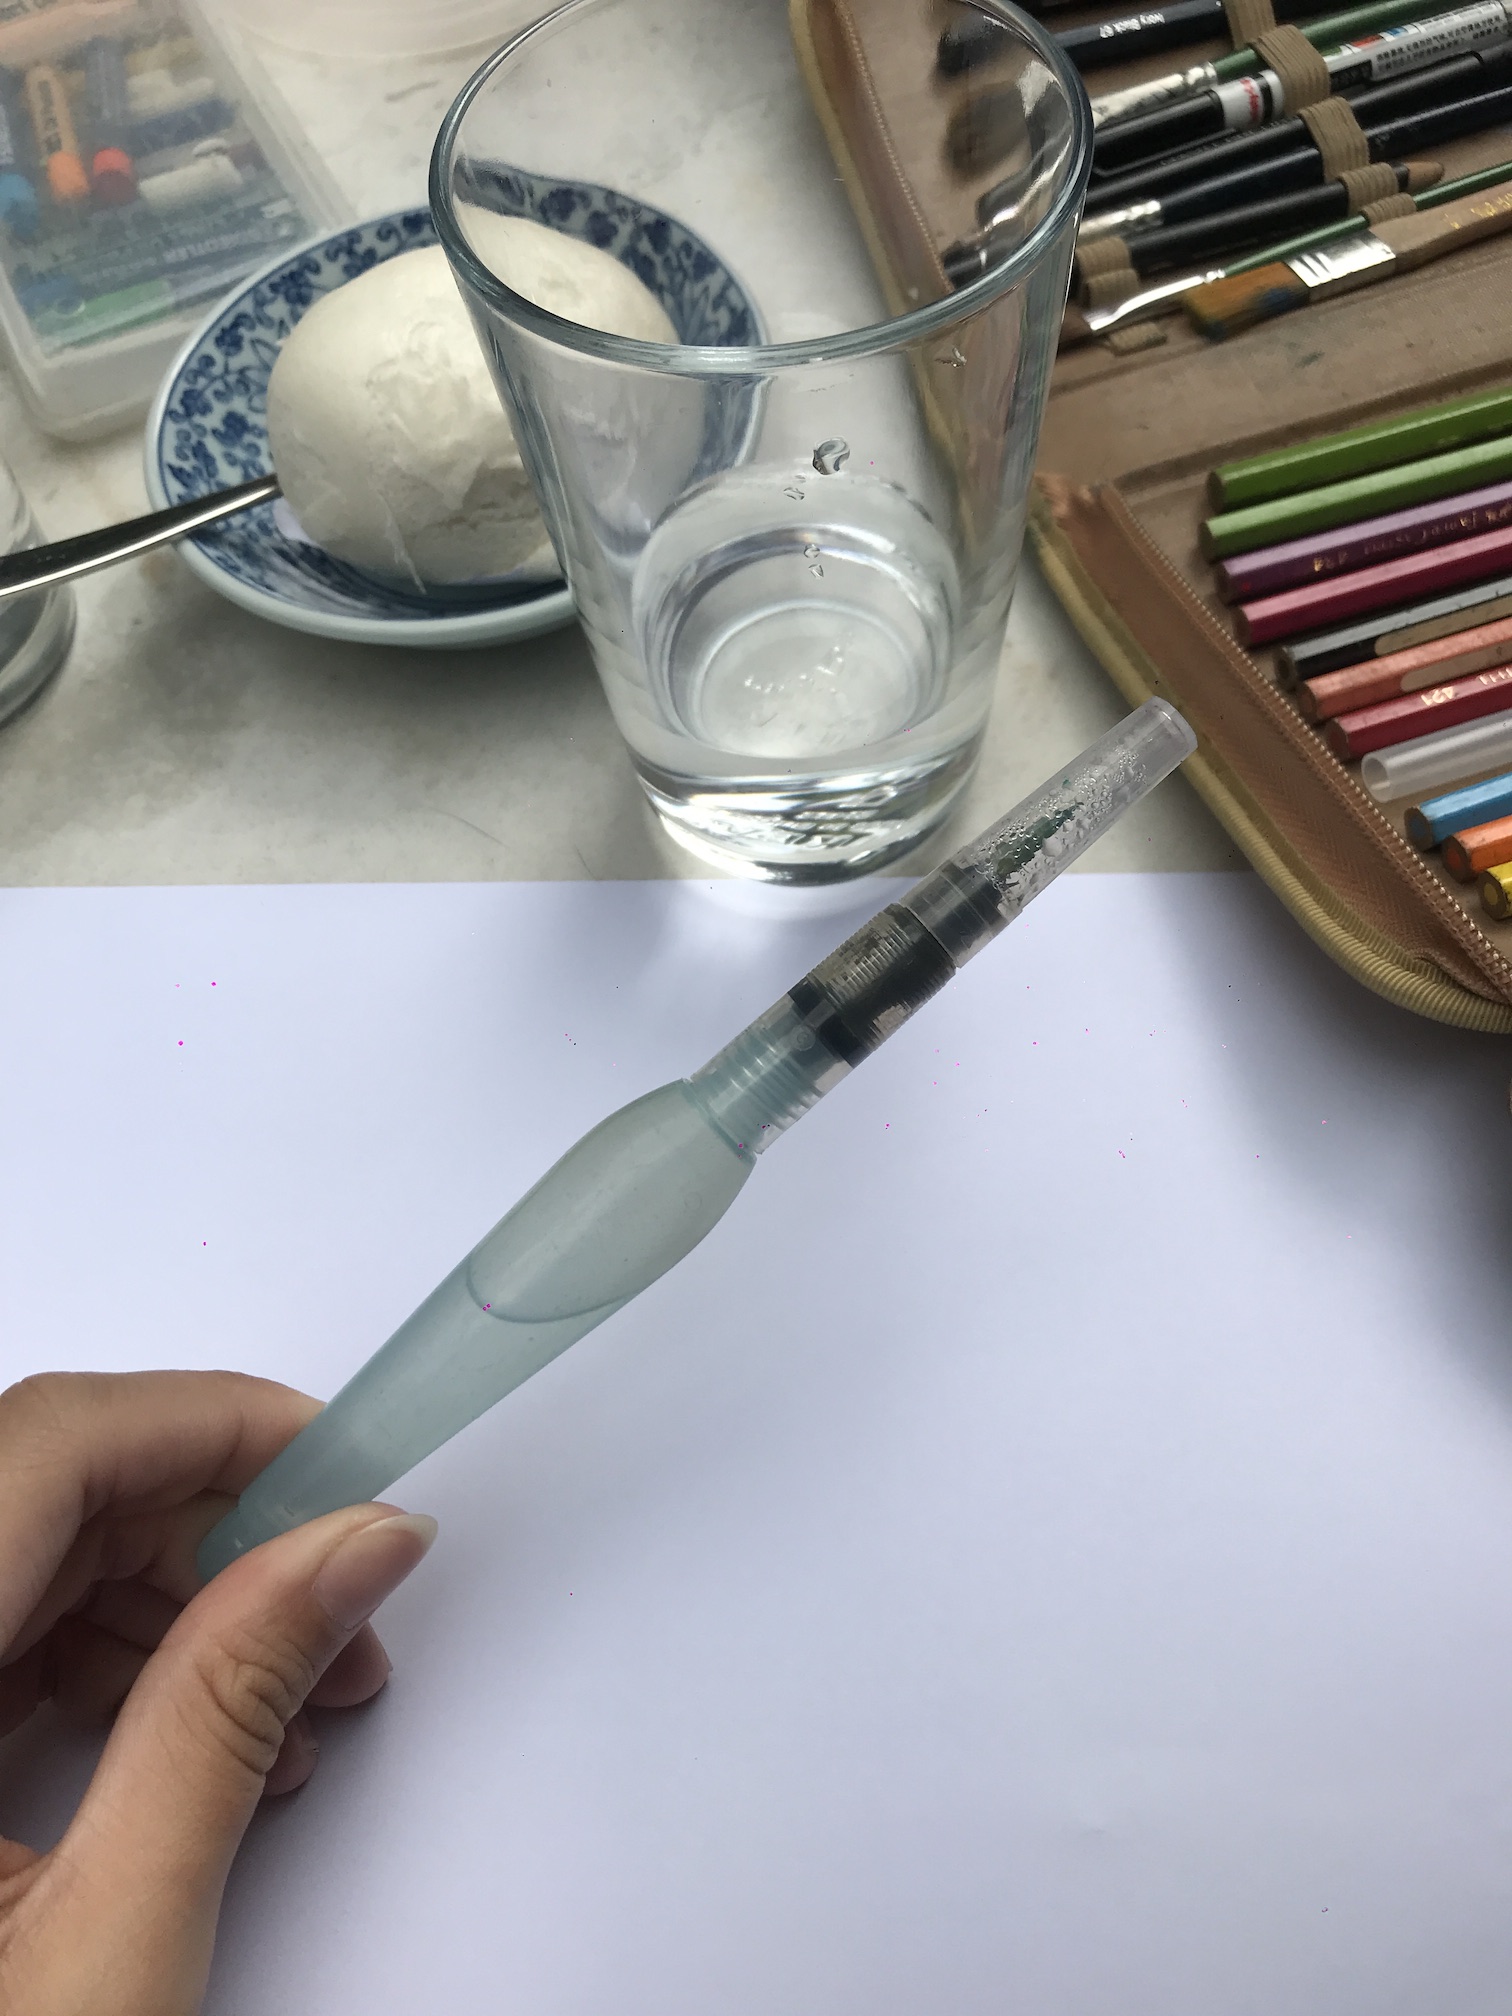
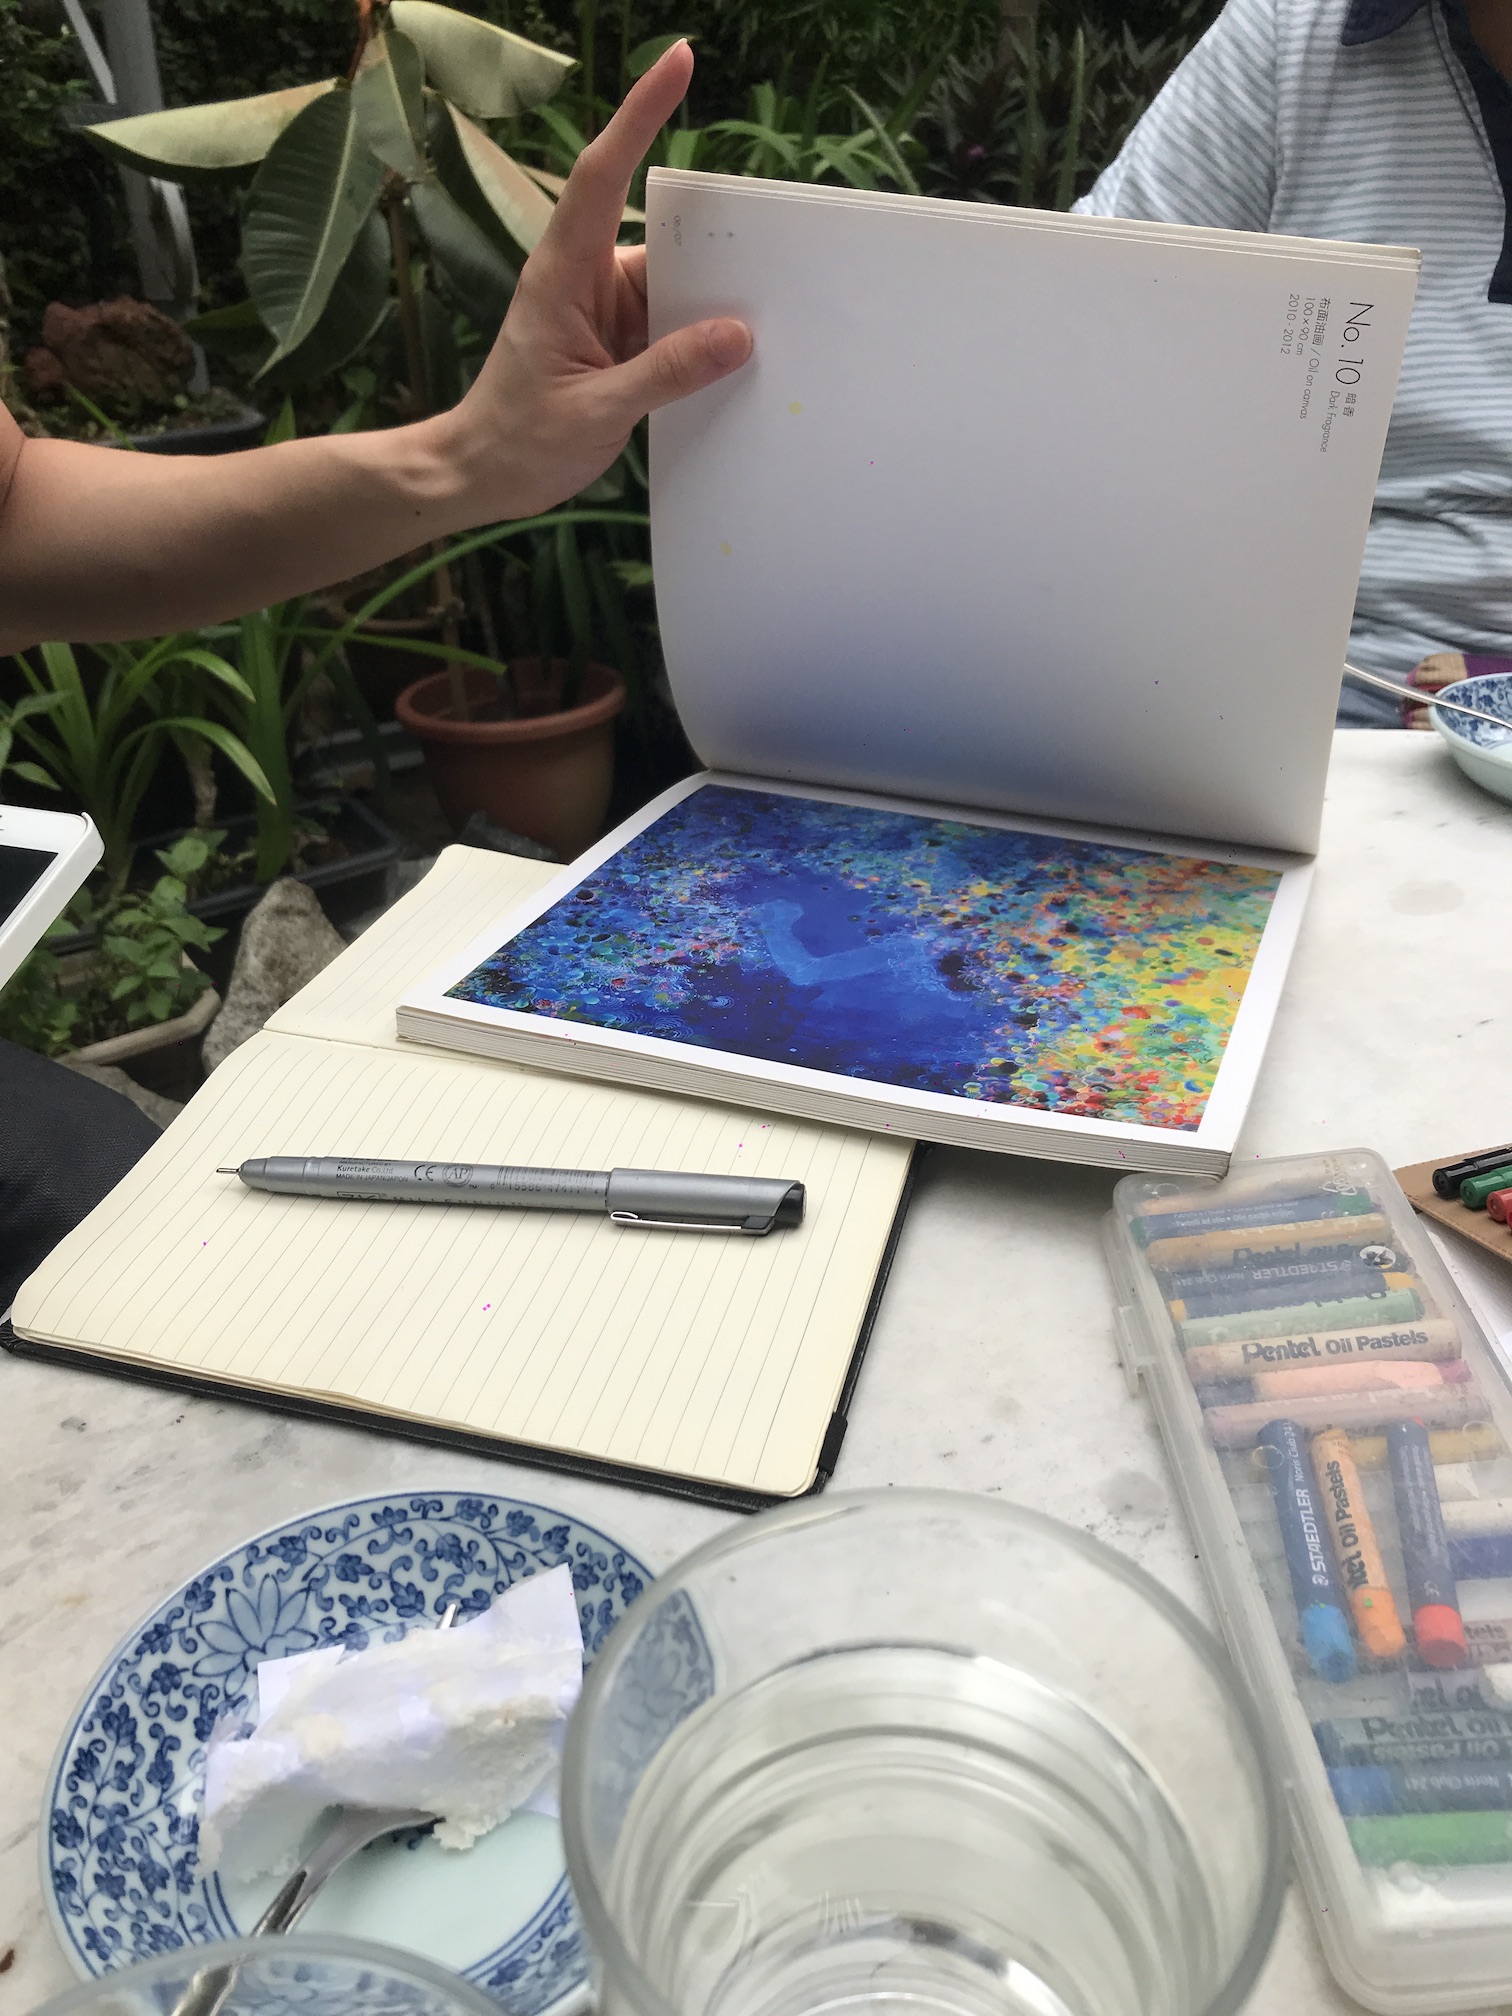
Practitioner #3: Watercolor painting
I went to observe a friend who does commissioned watercolor paintings at her home.
Worksite Documentation
She works from the desk in her room. For privacy reasons, I didn’t take any photos. But her desk is just a plain IKEA study table, white in color (she says it’s good for taking photos of her pieces against a white background). When she wants to do her watercolor painting, she makes space on the table and leaves her laptop there, and brings out her watercolor tool box.
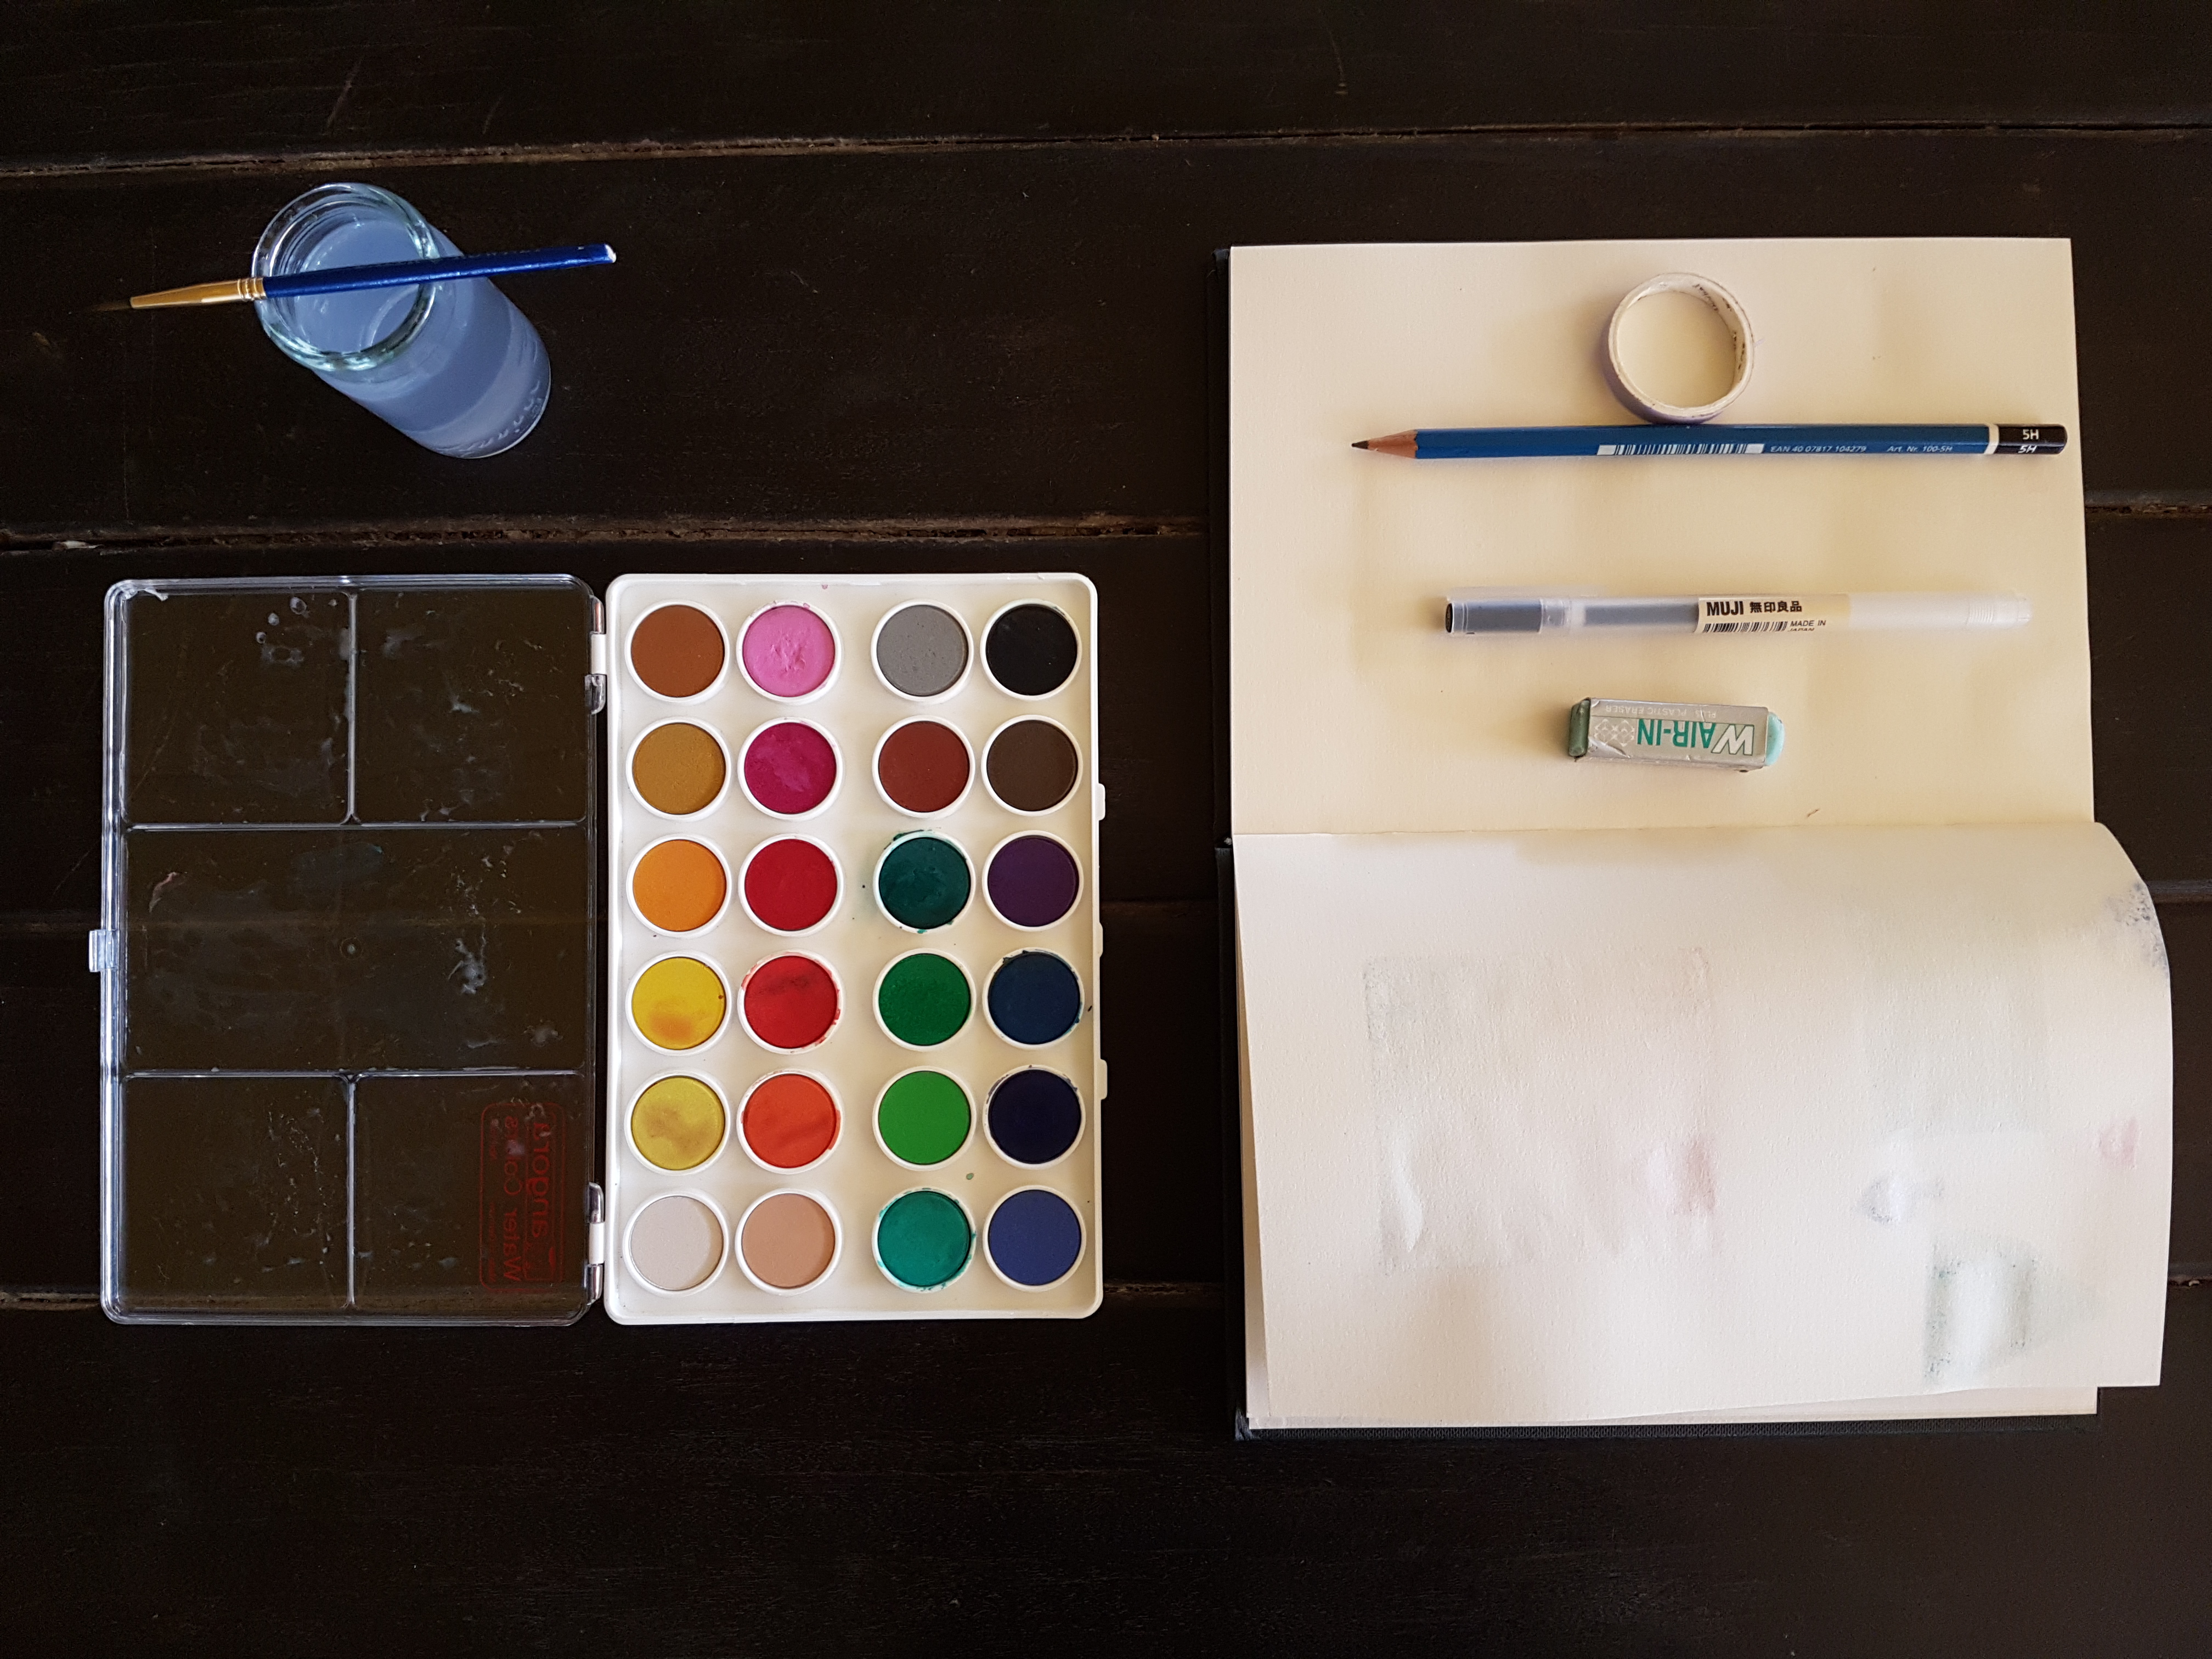
Tools Used
Paint brushes of various sizes
Watercolor paint tubes
Palette
Watercolor paper
India ink (for lining the piece when it’s done)
Rough paper (for testing out colors)
Jar of water
Towel (she has a paint cloth that she wipes her paint brushes on, after every session she washes it so she can reuse it!)
Pencil
Eraser
Ruler
Process Documentation
She starts painting from the ‘bottom’ or ‘inner’ layer. Adding details and depth! Finished product!
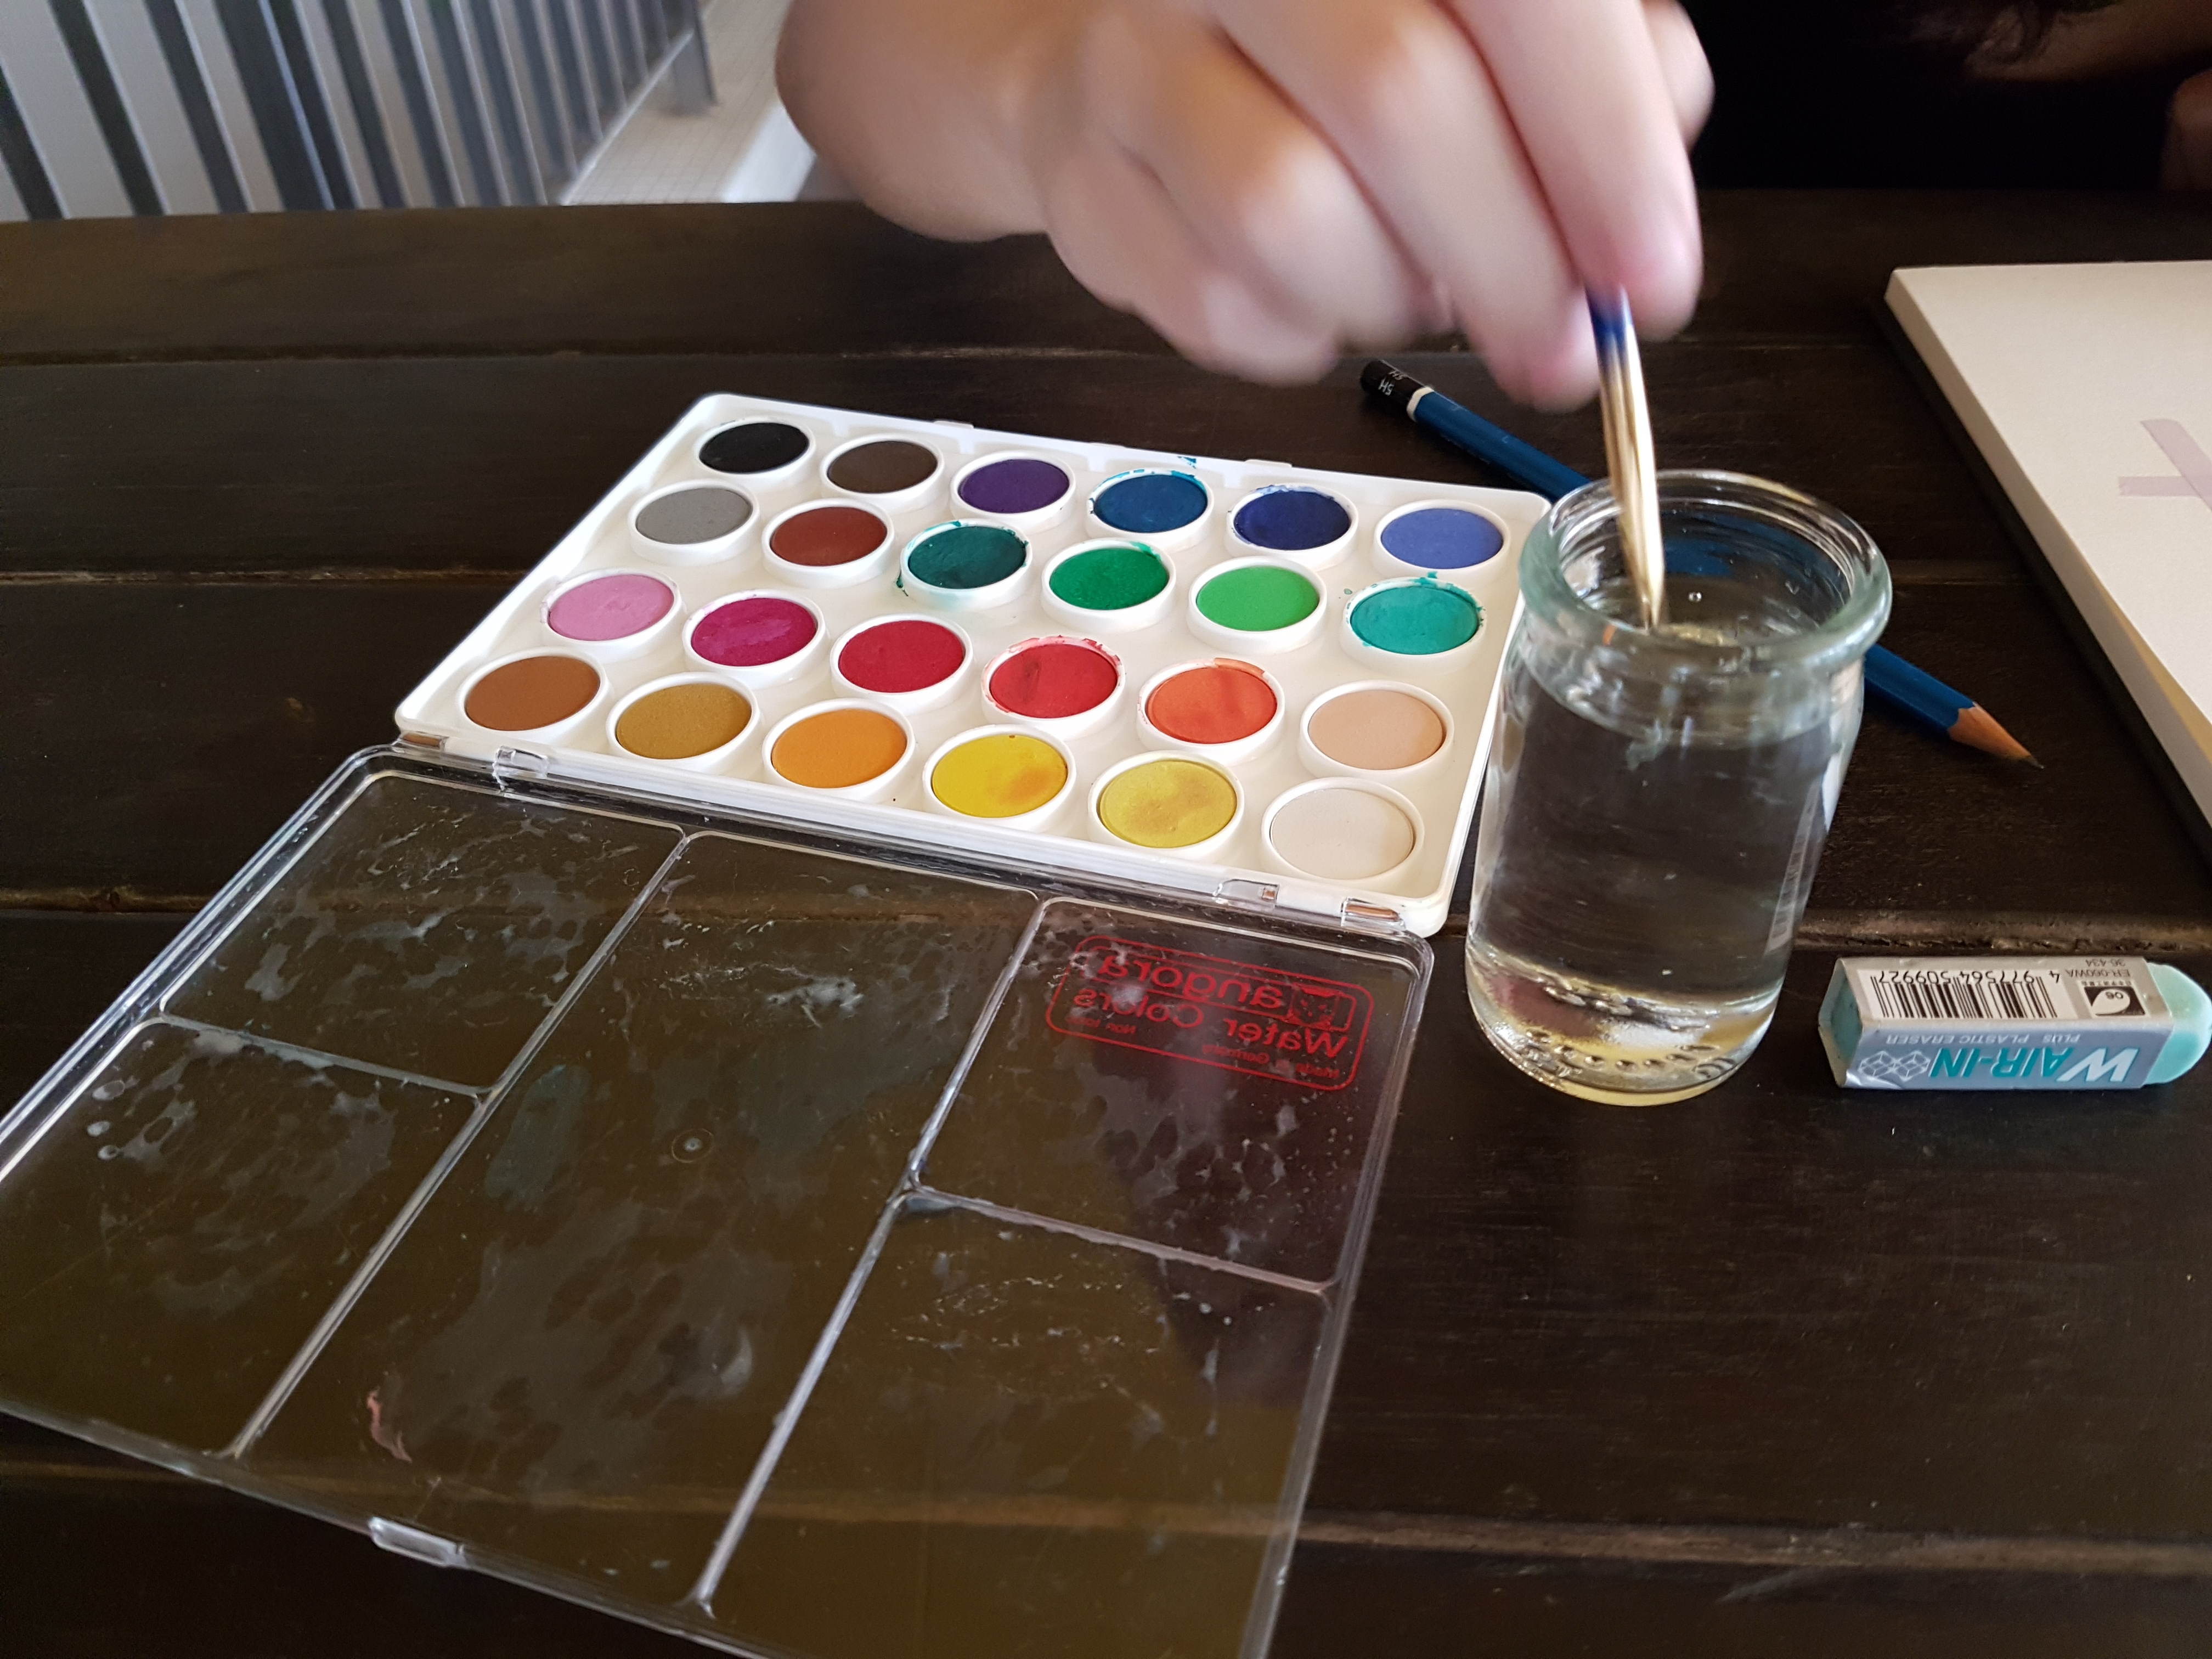
Before she starts, she lays out her paints and fills her jar with water. Everything is set up so she doesn’t have to get up from her seat during the painting process. After that, she begins by drawing the image onto a piece of watercolor paper. When she’s done, she uses india ink and goes over it to bring out the details. It’s not conventional to do so, as most people will go over the entire drawing with india ink after painting – but she does two coats of india ink in order to be precise and make the details pop. India ink is used as it doesn’t get diluted by the watercolor that goes over.
Once the line art is done, she begins mixing all her colors out. She measures and squeezes out the pain onto her palette, then mixes the paint and tests it out on a piece of scrap paper to see if it’s to her liking. Only after she’s mixed all the paint, does she finally start painting. She says she prefers to mix all her paints at the start so that there’s consistency in the color and the hues and shades don’t differ – as compared to if she had mixed several different batches throughout the entire process.
She works from the ‘inner’ most layer, as she described. I likened the process to photoshop, where you have different layers. She starts with the base, which in this case is inside the mouth. Then she works upwards, to paint the gums, the teeth, the plague on the teeth, then the lips. It was very therapeutic watching her work and blend the colors! My favourite part was when she added details to really make the painting pop off the paper.
After all that, she used india ink and went over all the lines once more to finish off the piece.
Pain Points + Thoughts
Throughout the process, she had to get up to make a few trips to refresh and refill her water jar. As she was using dark paints, the water got dirty quickly – and didn’t clean her brushes as effectively.
Additionally, when she going over the lines for a final time during india ink with a calligraphy pen, there was zero room for error. If the nib got caught and extra ink flowed onto the paper, especially on the lighter parts (e.g. teeth, lips), there was almost no way to salvage the piece.
The watercolor paint also took time to dry, and she had to be careful not to smudge some parts while detailing others. However, it was difficult to tell which parts were dry and which were not. It would be pretty cool if there was a sensor that could tell you so.
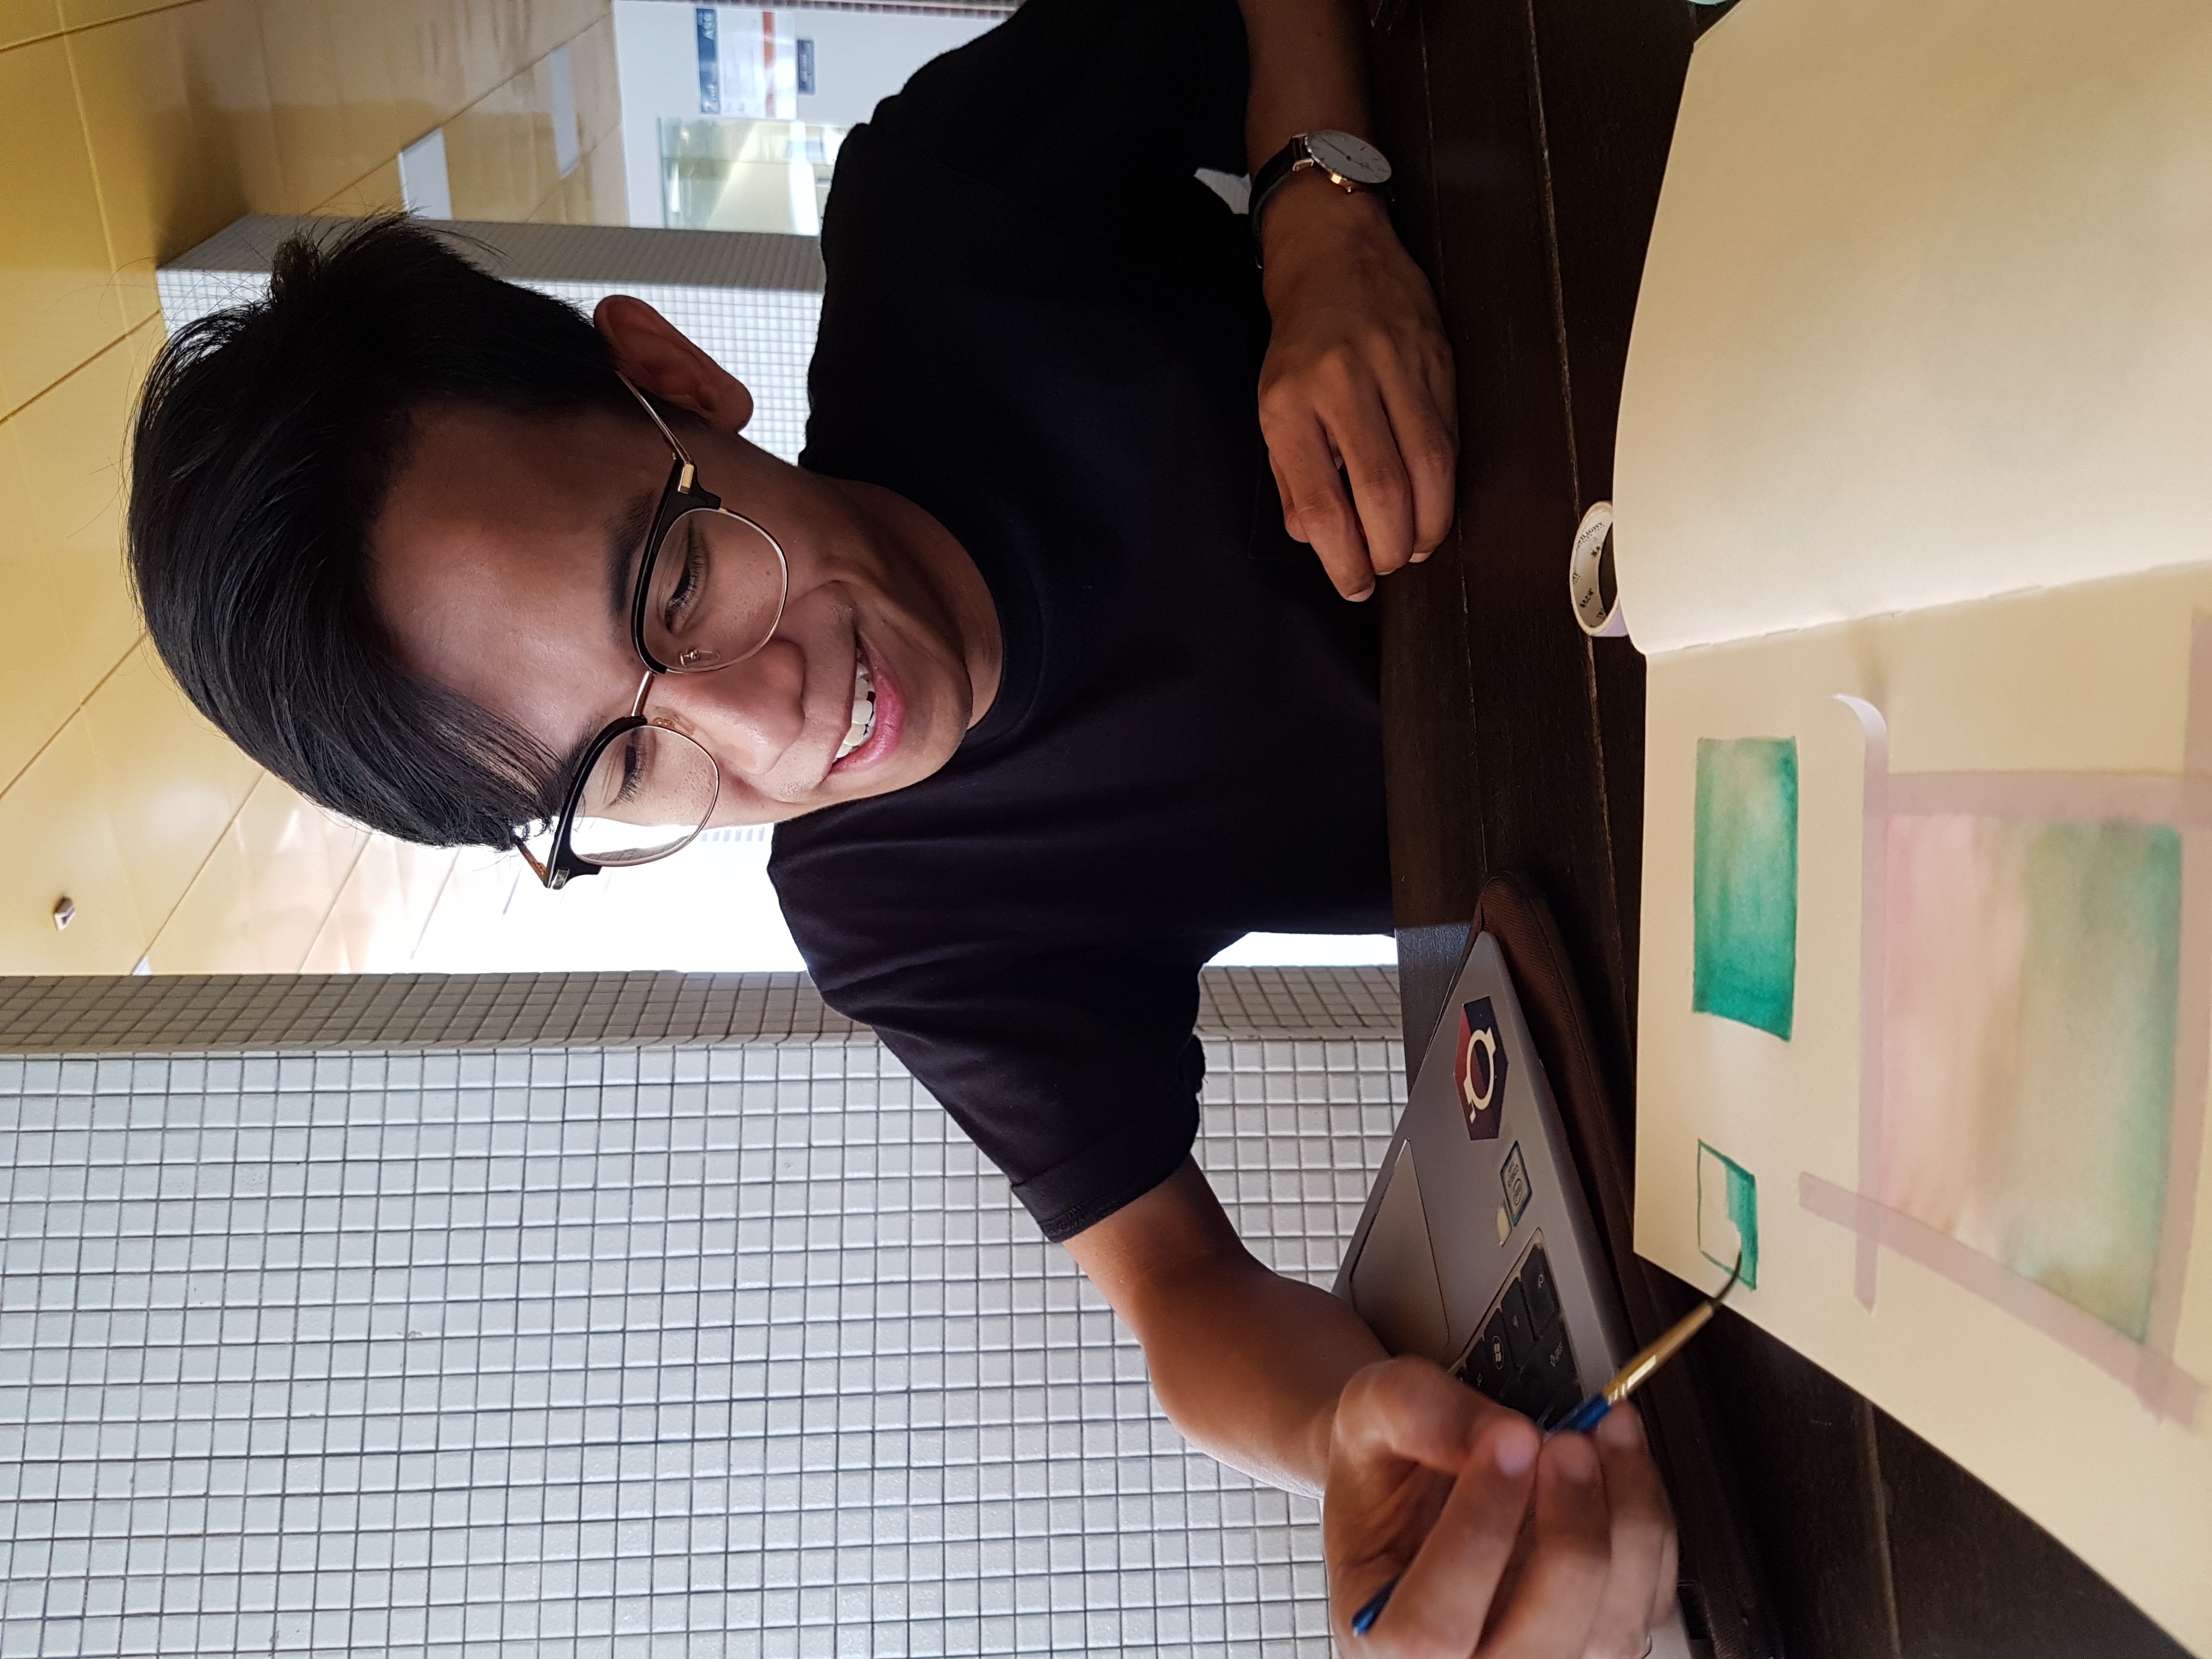
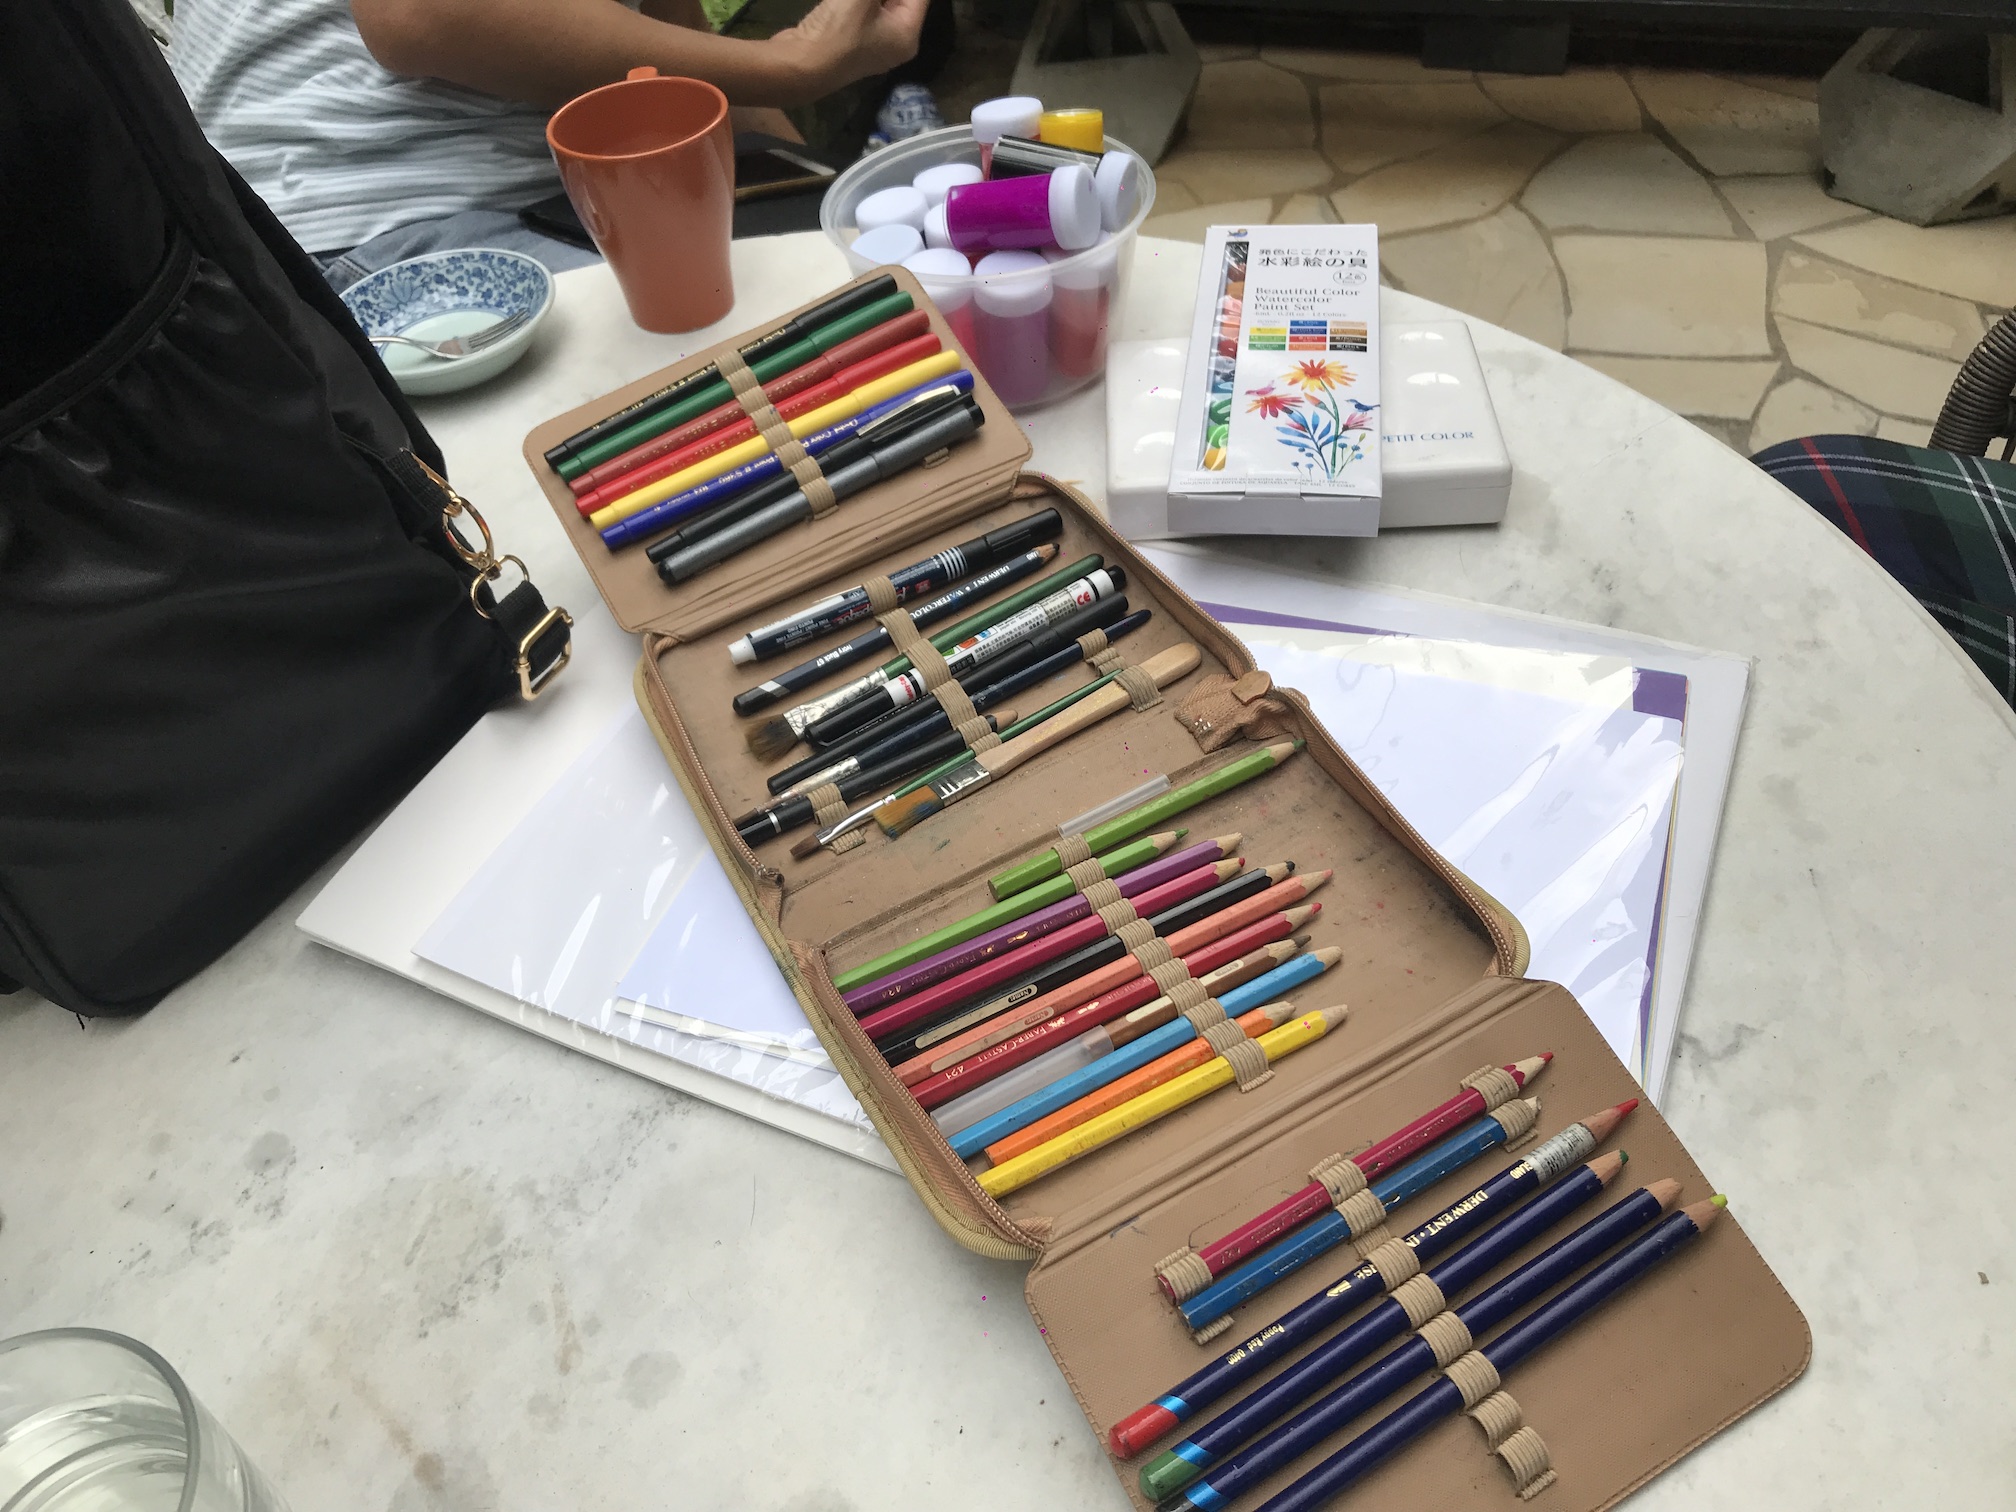
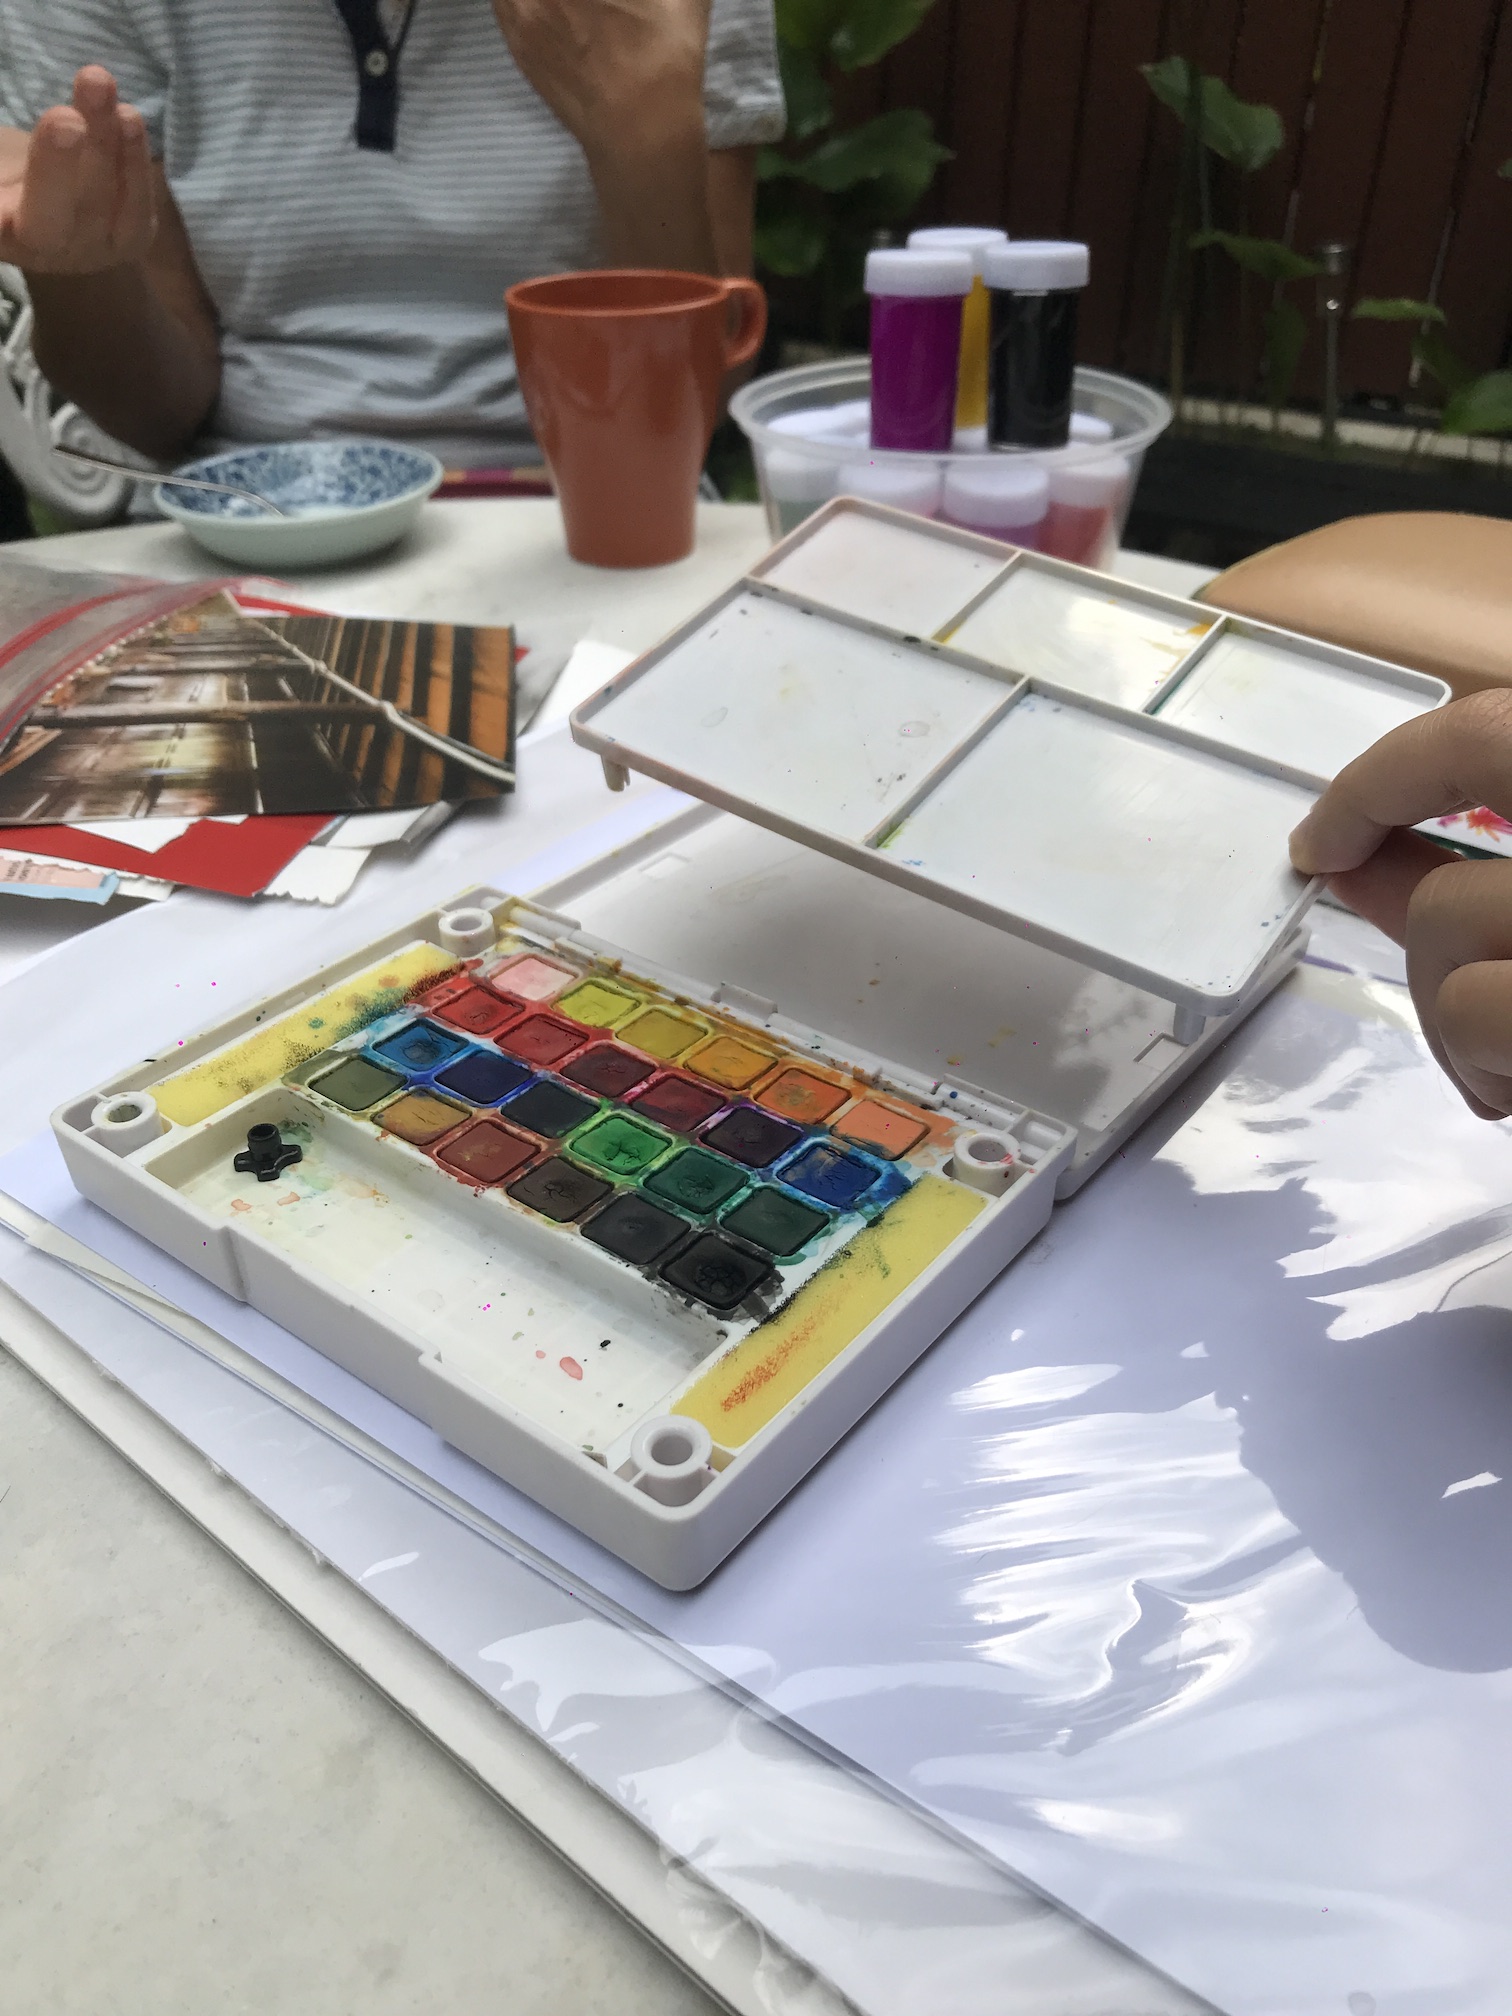
I also went to observe a friend who does watercolour painting in her leisure time! She was nice enough to meet up with me, walked me through the process and let me try some watercolour painting of my own.
Tools Used:
Paintbrush
Sketchbook
Watercolour palette
Washi tape
Glass full of water
Pencils, eraser, markers.
The Process:
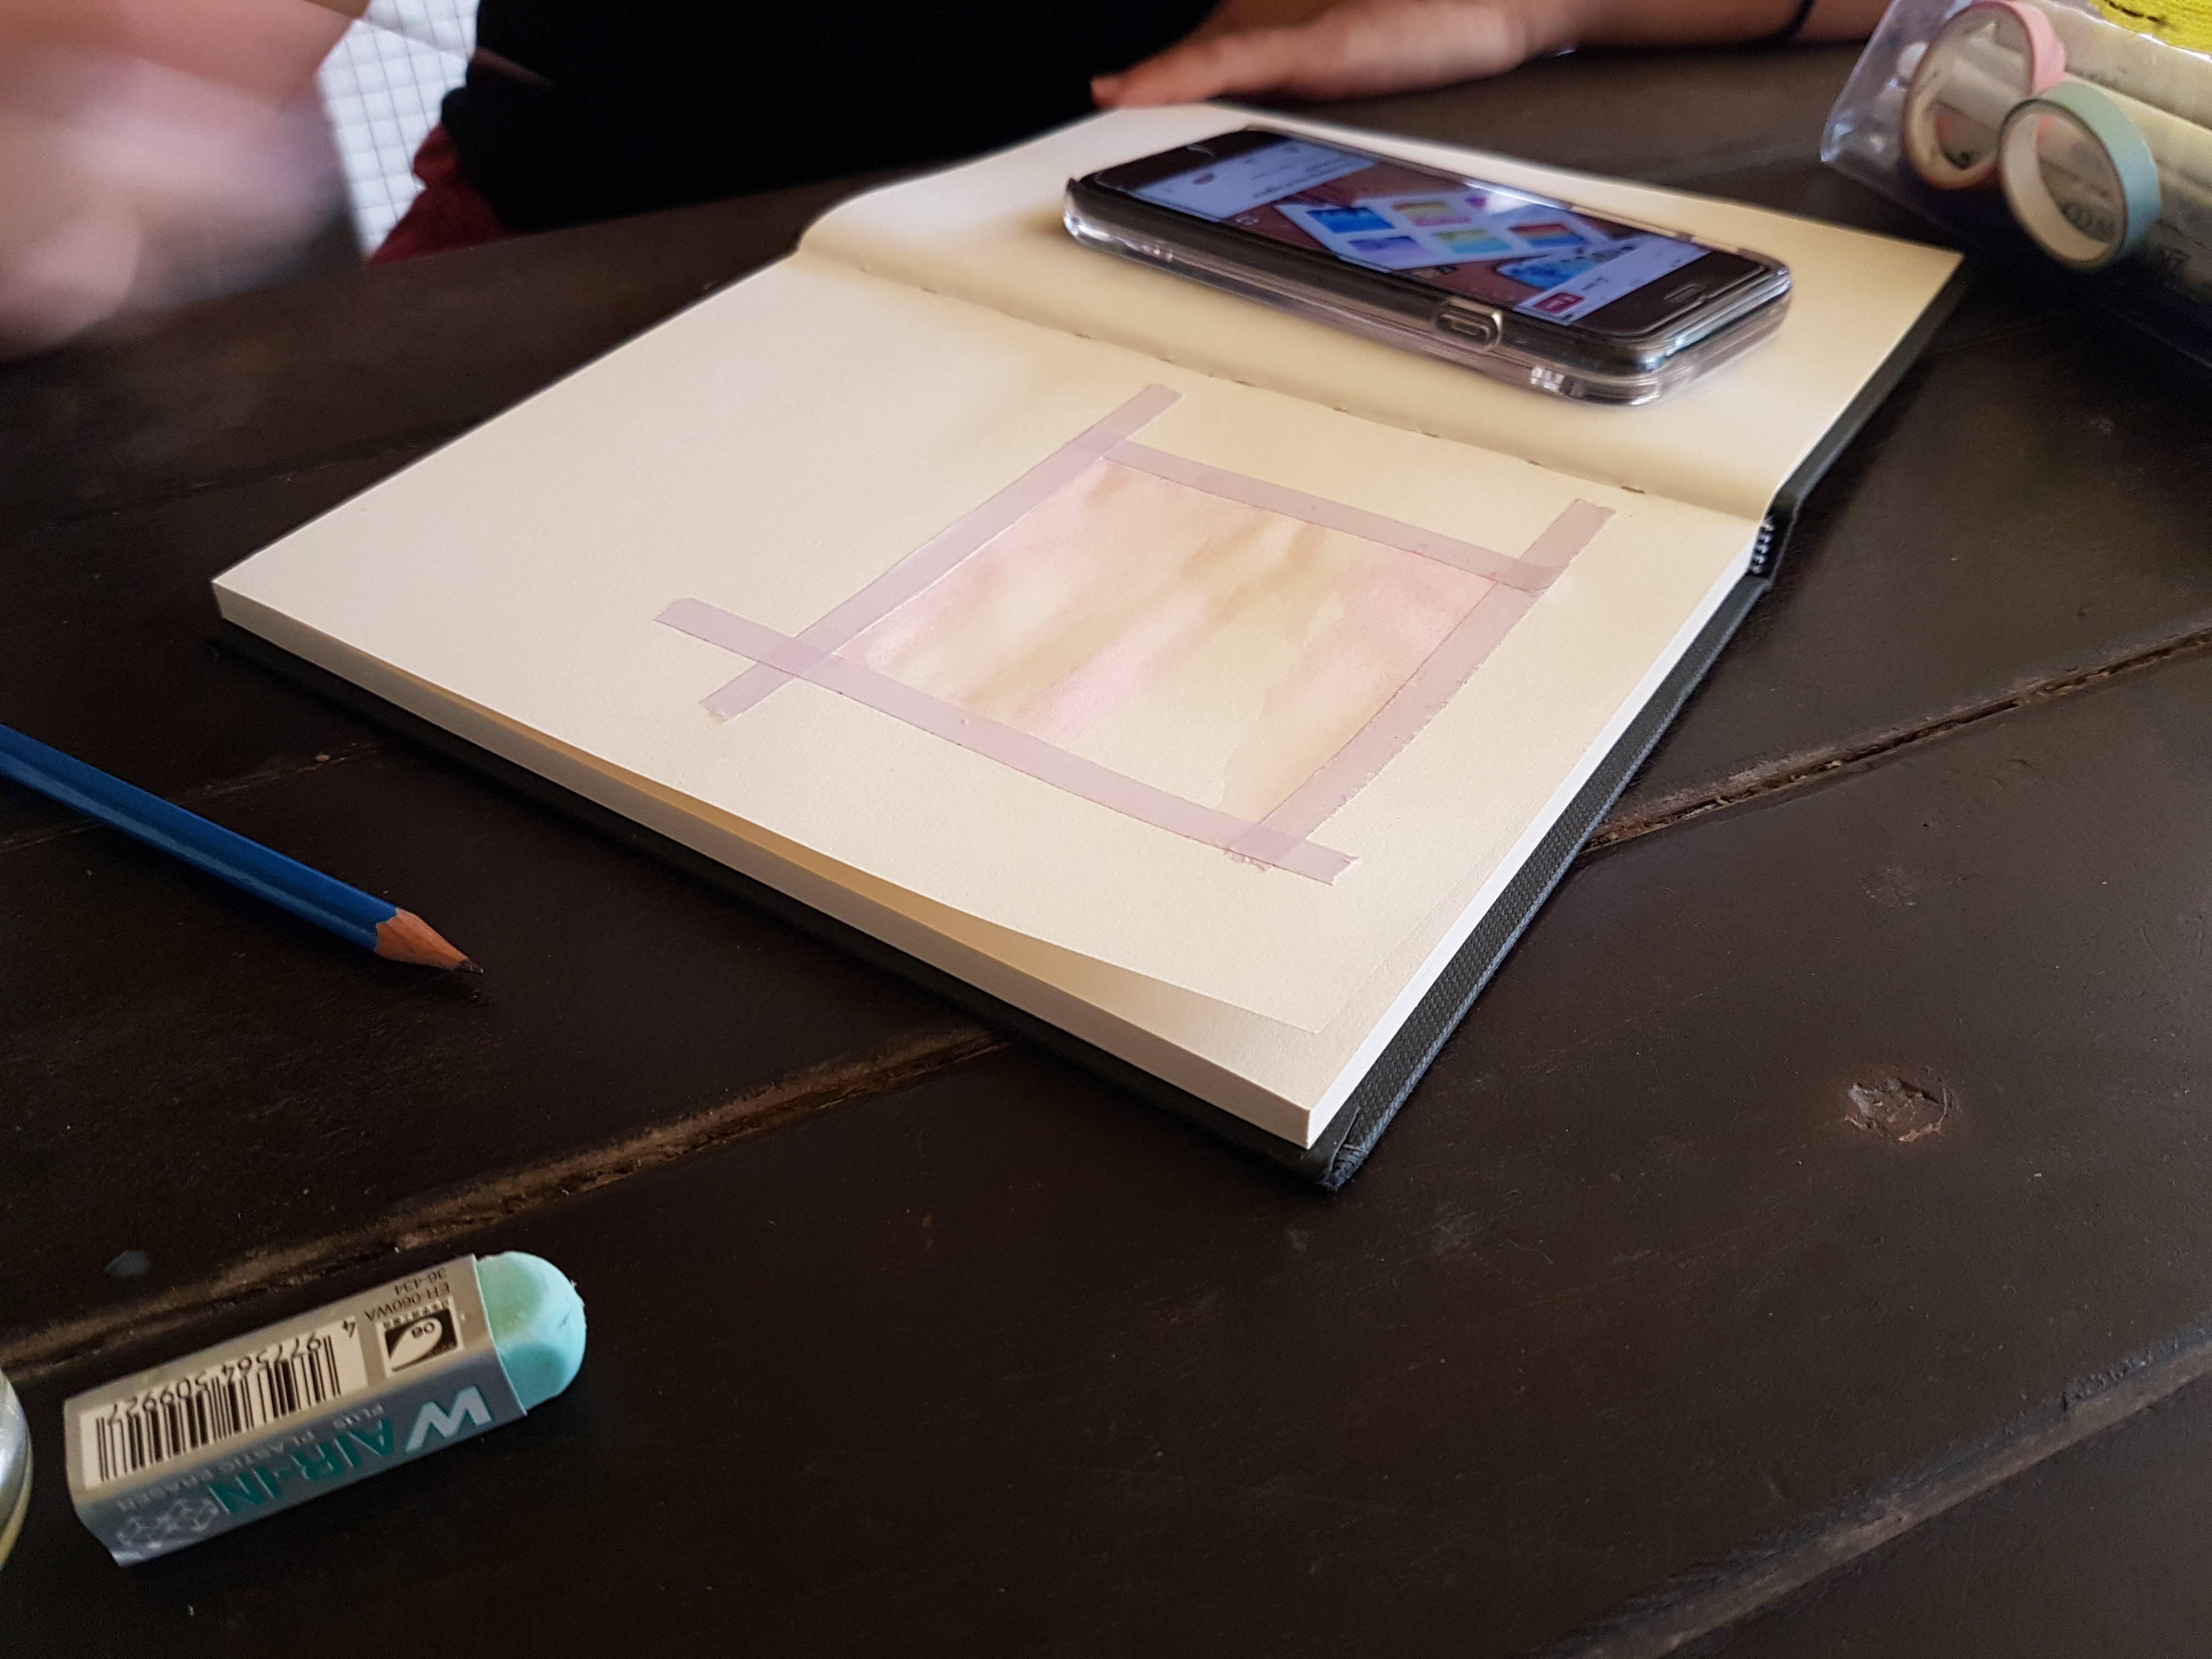
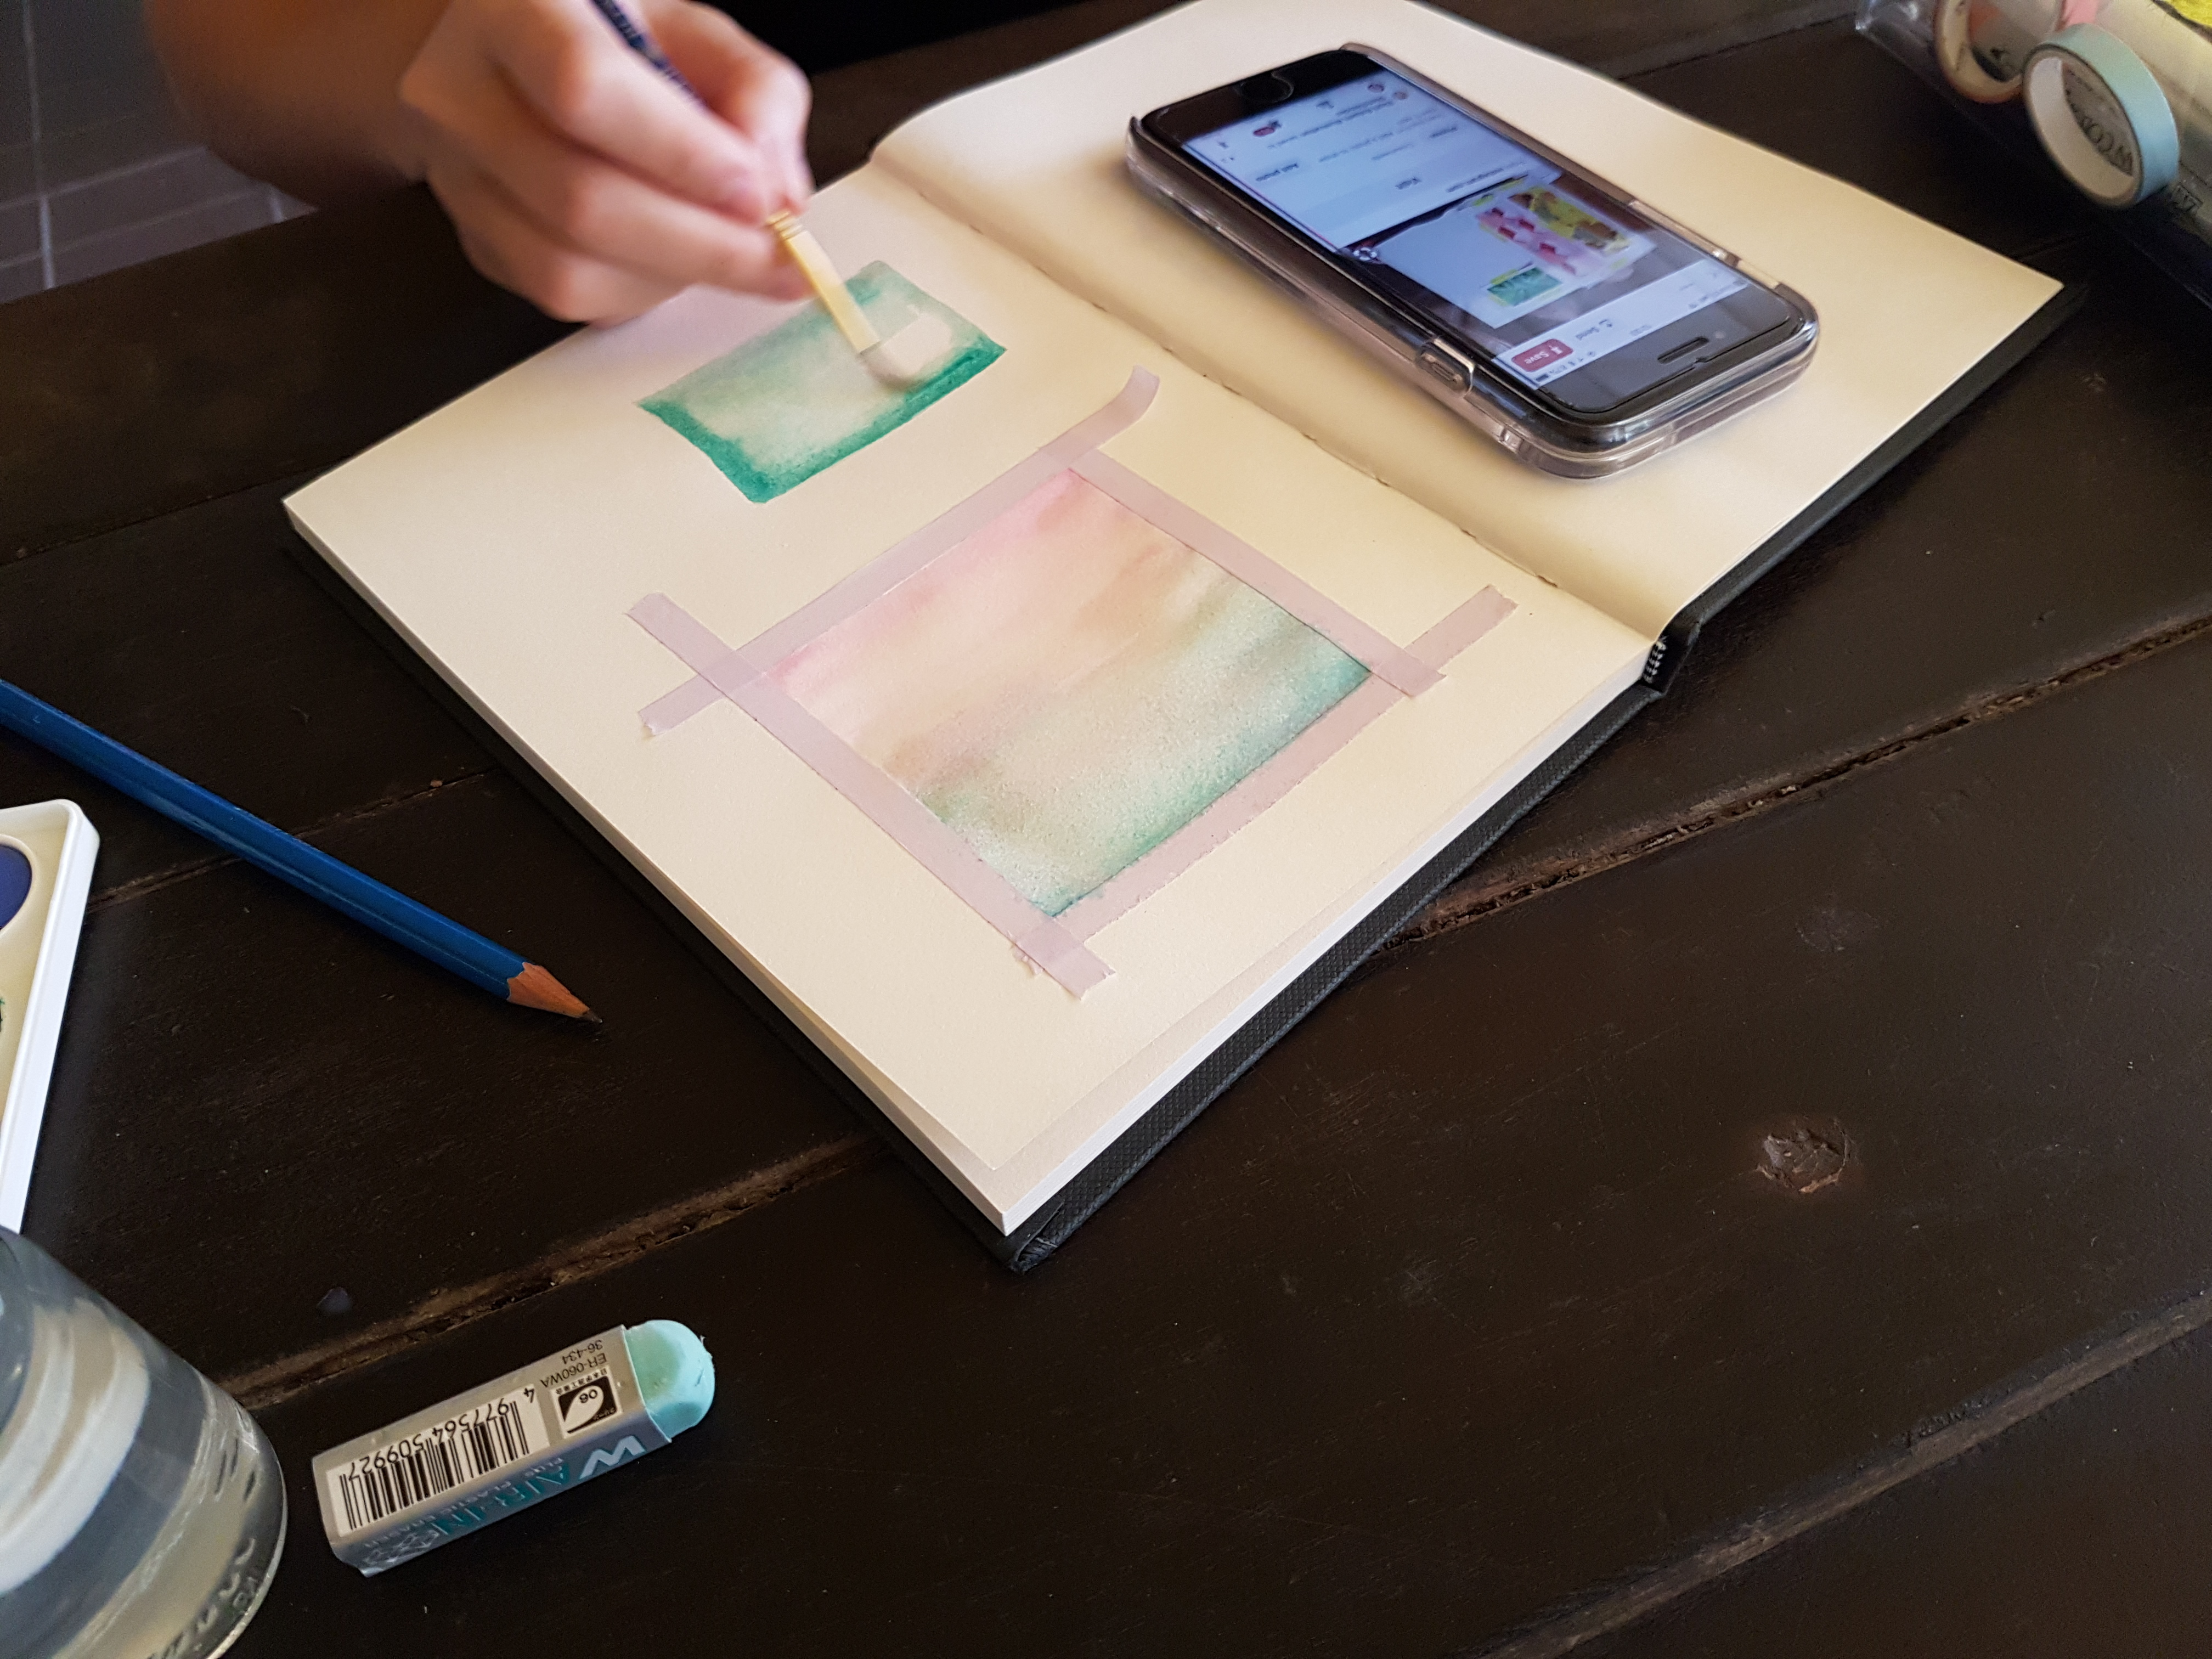
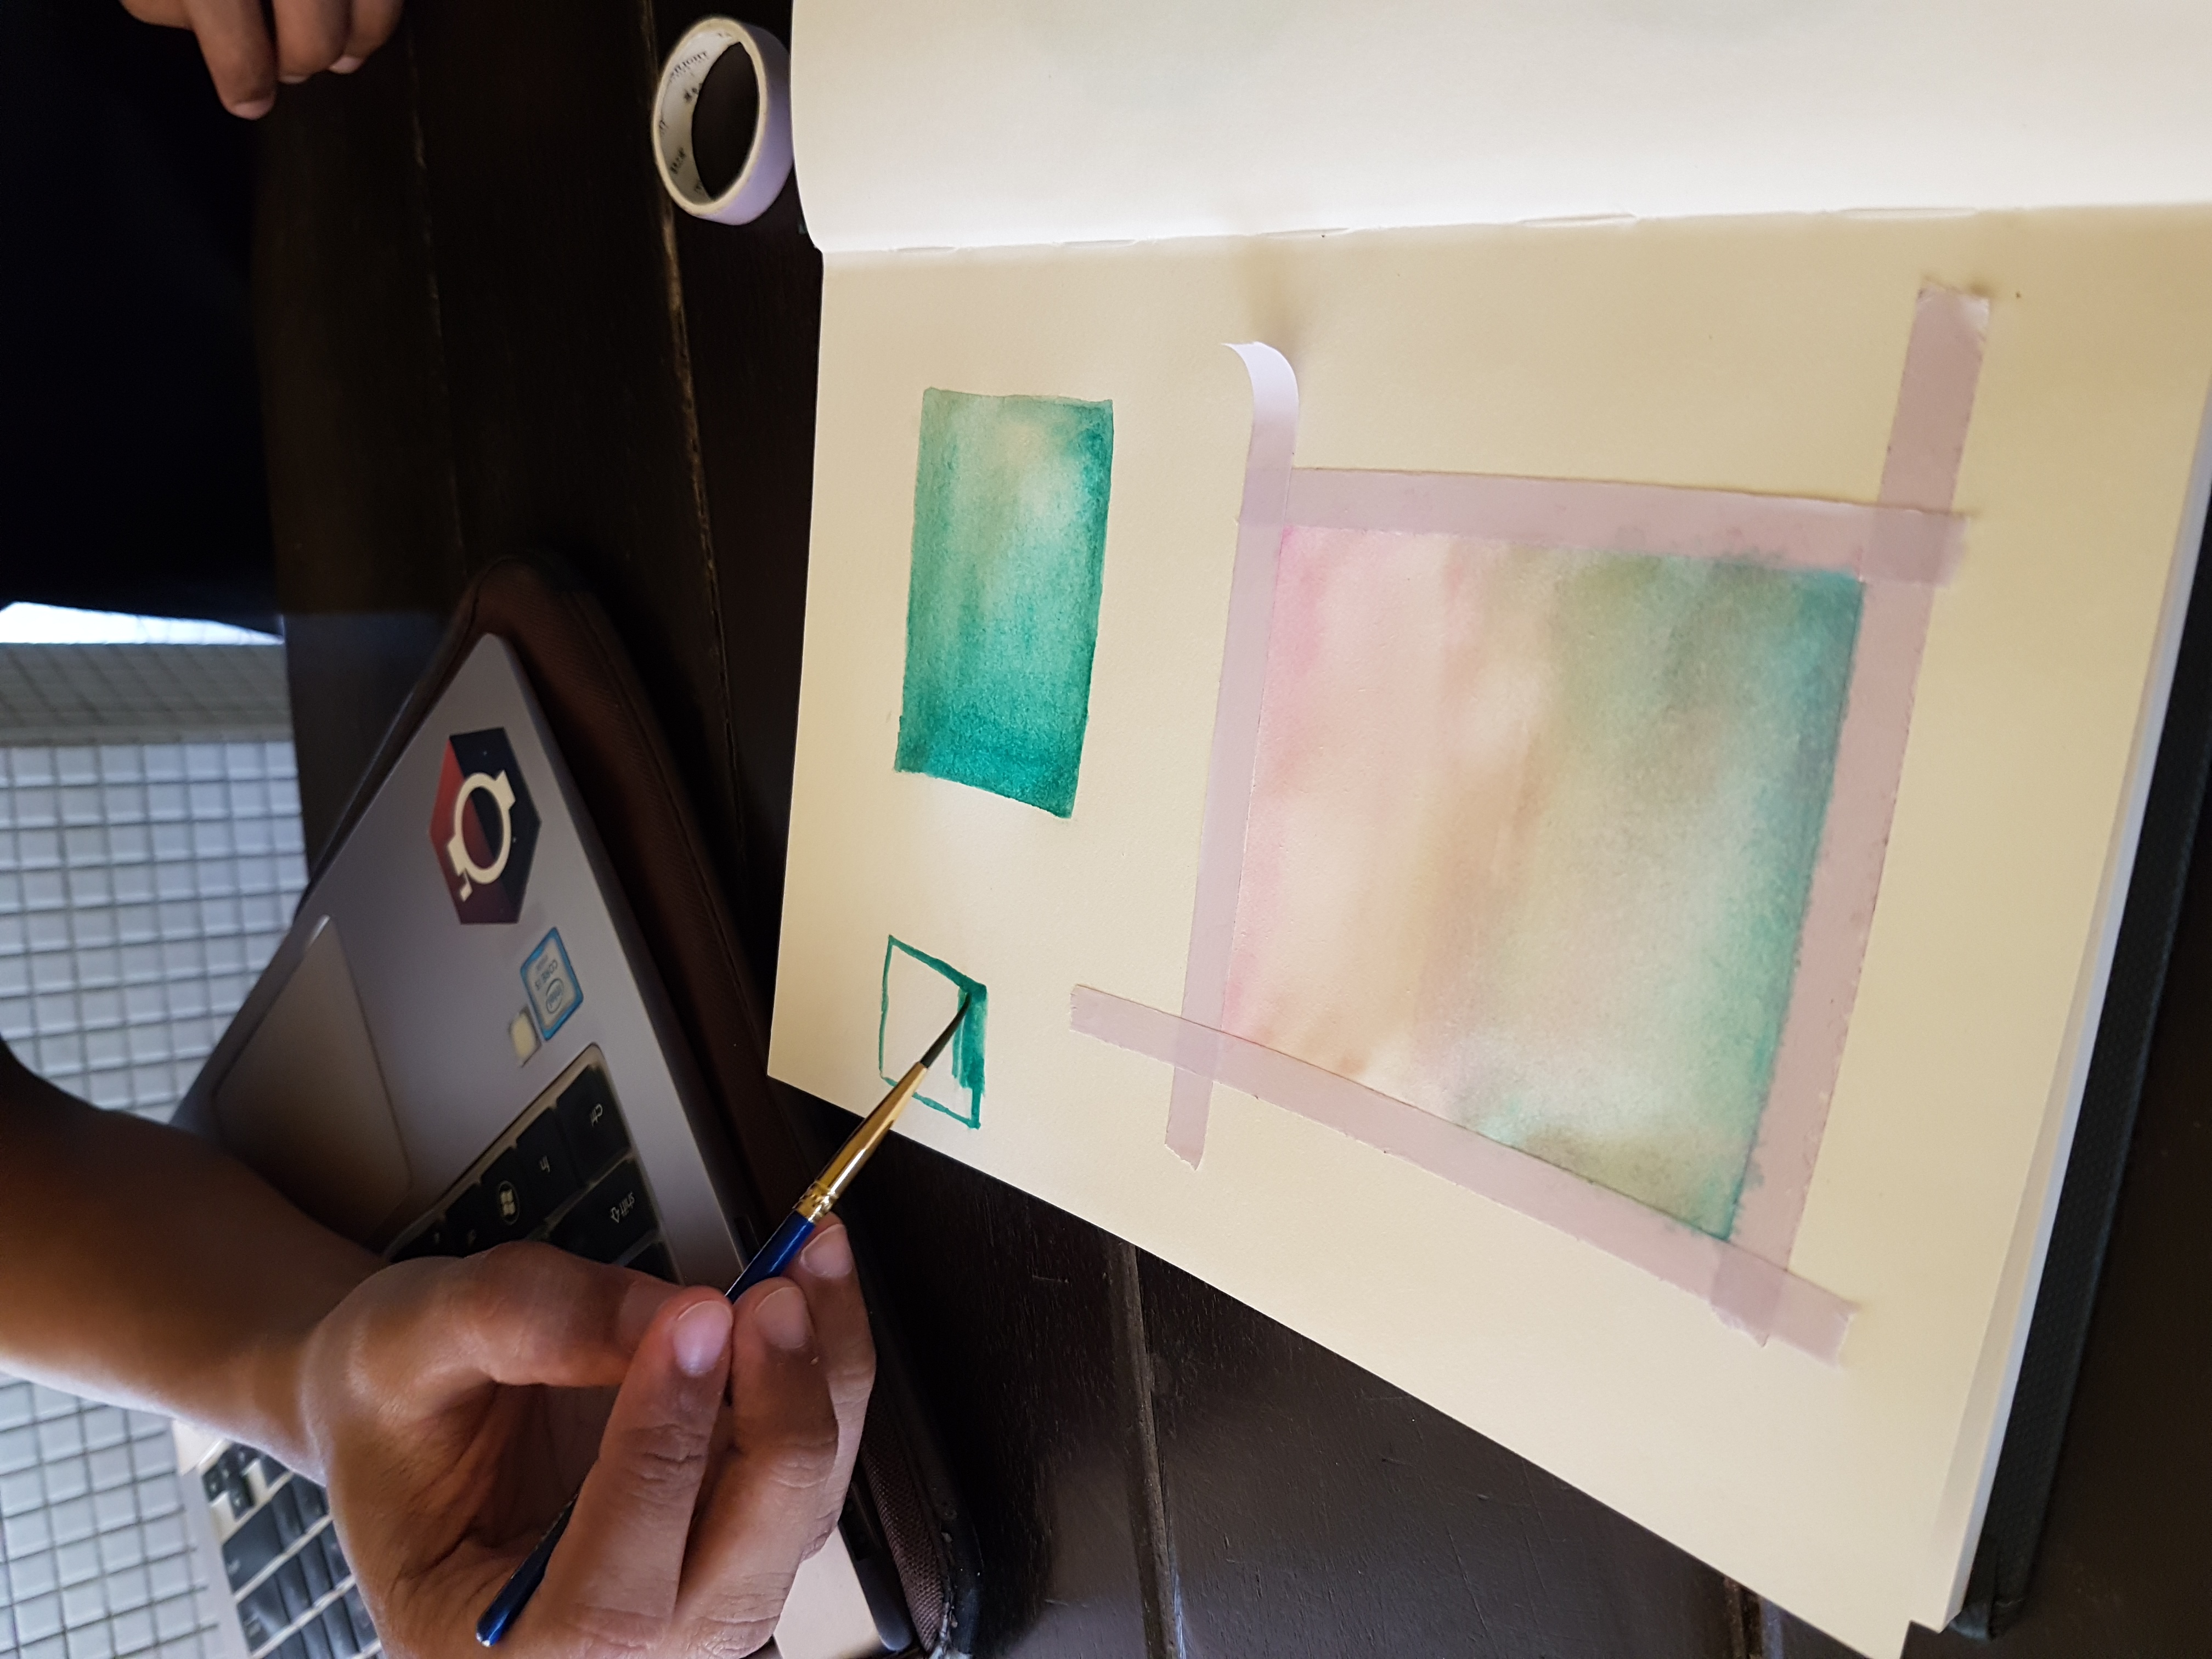
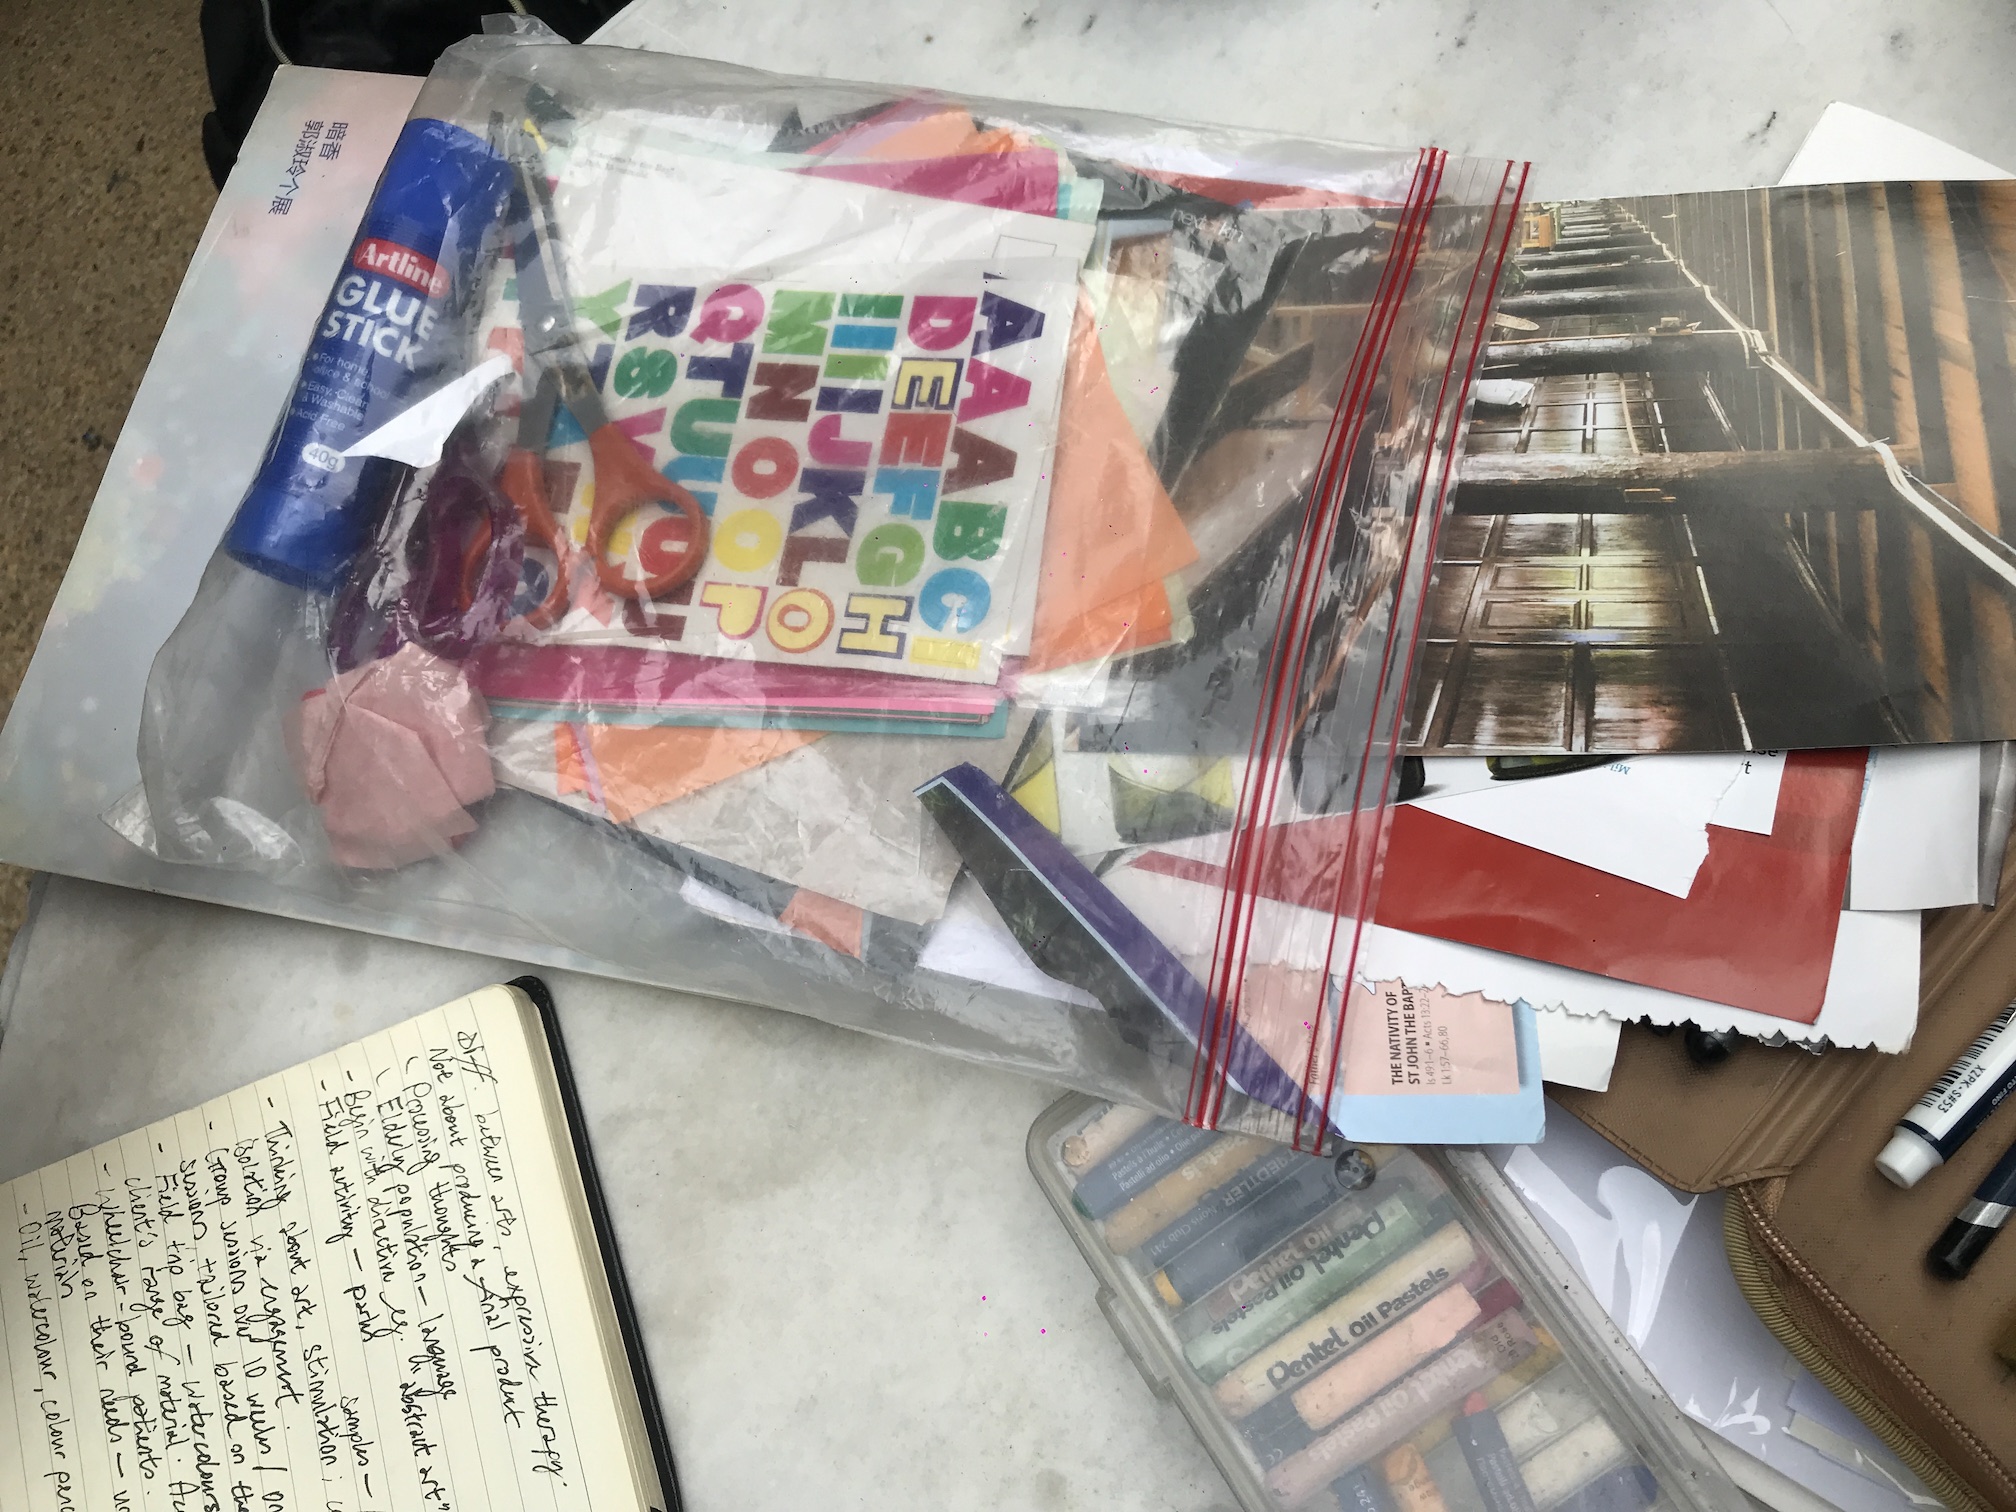
She started off by asking me if I have anything in mind that I wanted to paint out, but in the end we decided to use an image from the internet as reference. Some prep work was done first and she used the washi tape to create a square border. This is done so that the parameter of her painting will look neat and “clean”. She then proceeded to show me the actual painting process – always painting towards the same direction at a time.
Soon enough, I tried it out for myself. It’s definitely not as easy as it looks, as my attempts looked far from what I imagined them to look like. What I wanted to do was to paint a triangle that is solid at the base, and its colour fading as it reaches the tip. Didn’t manage to do it well.
Also I was told that I can add more paint to it to make it look more saturated, and add dab water to the painting if I want to make it look less intense – in a way diluting the paint and spreading it out.
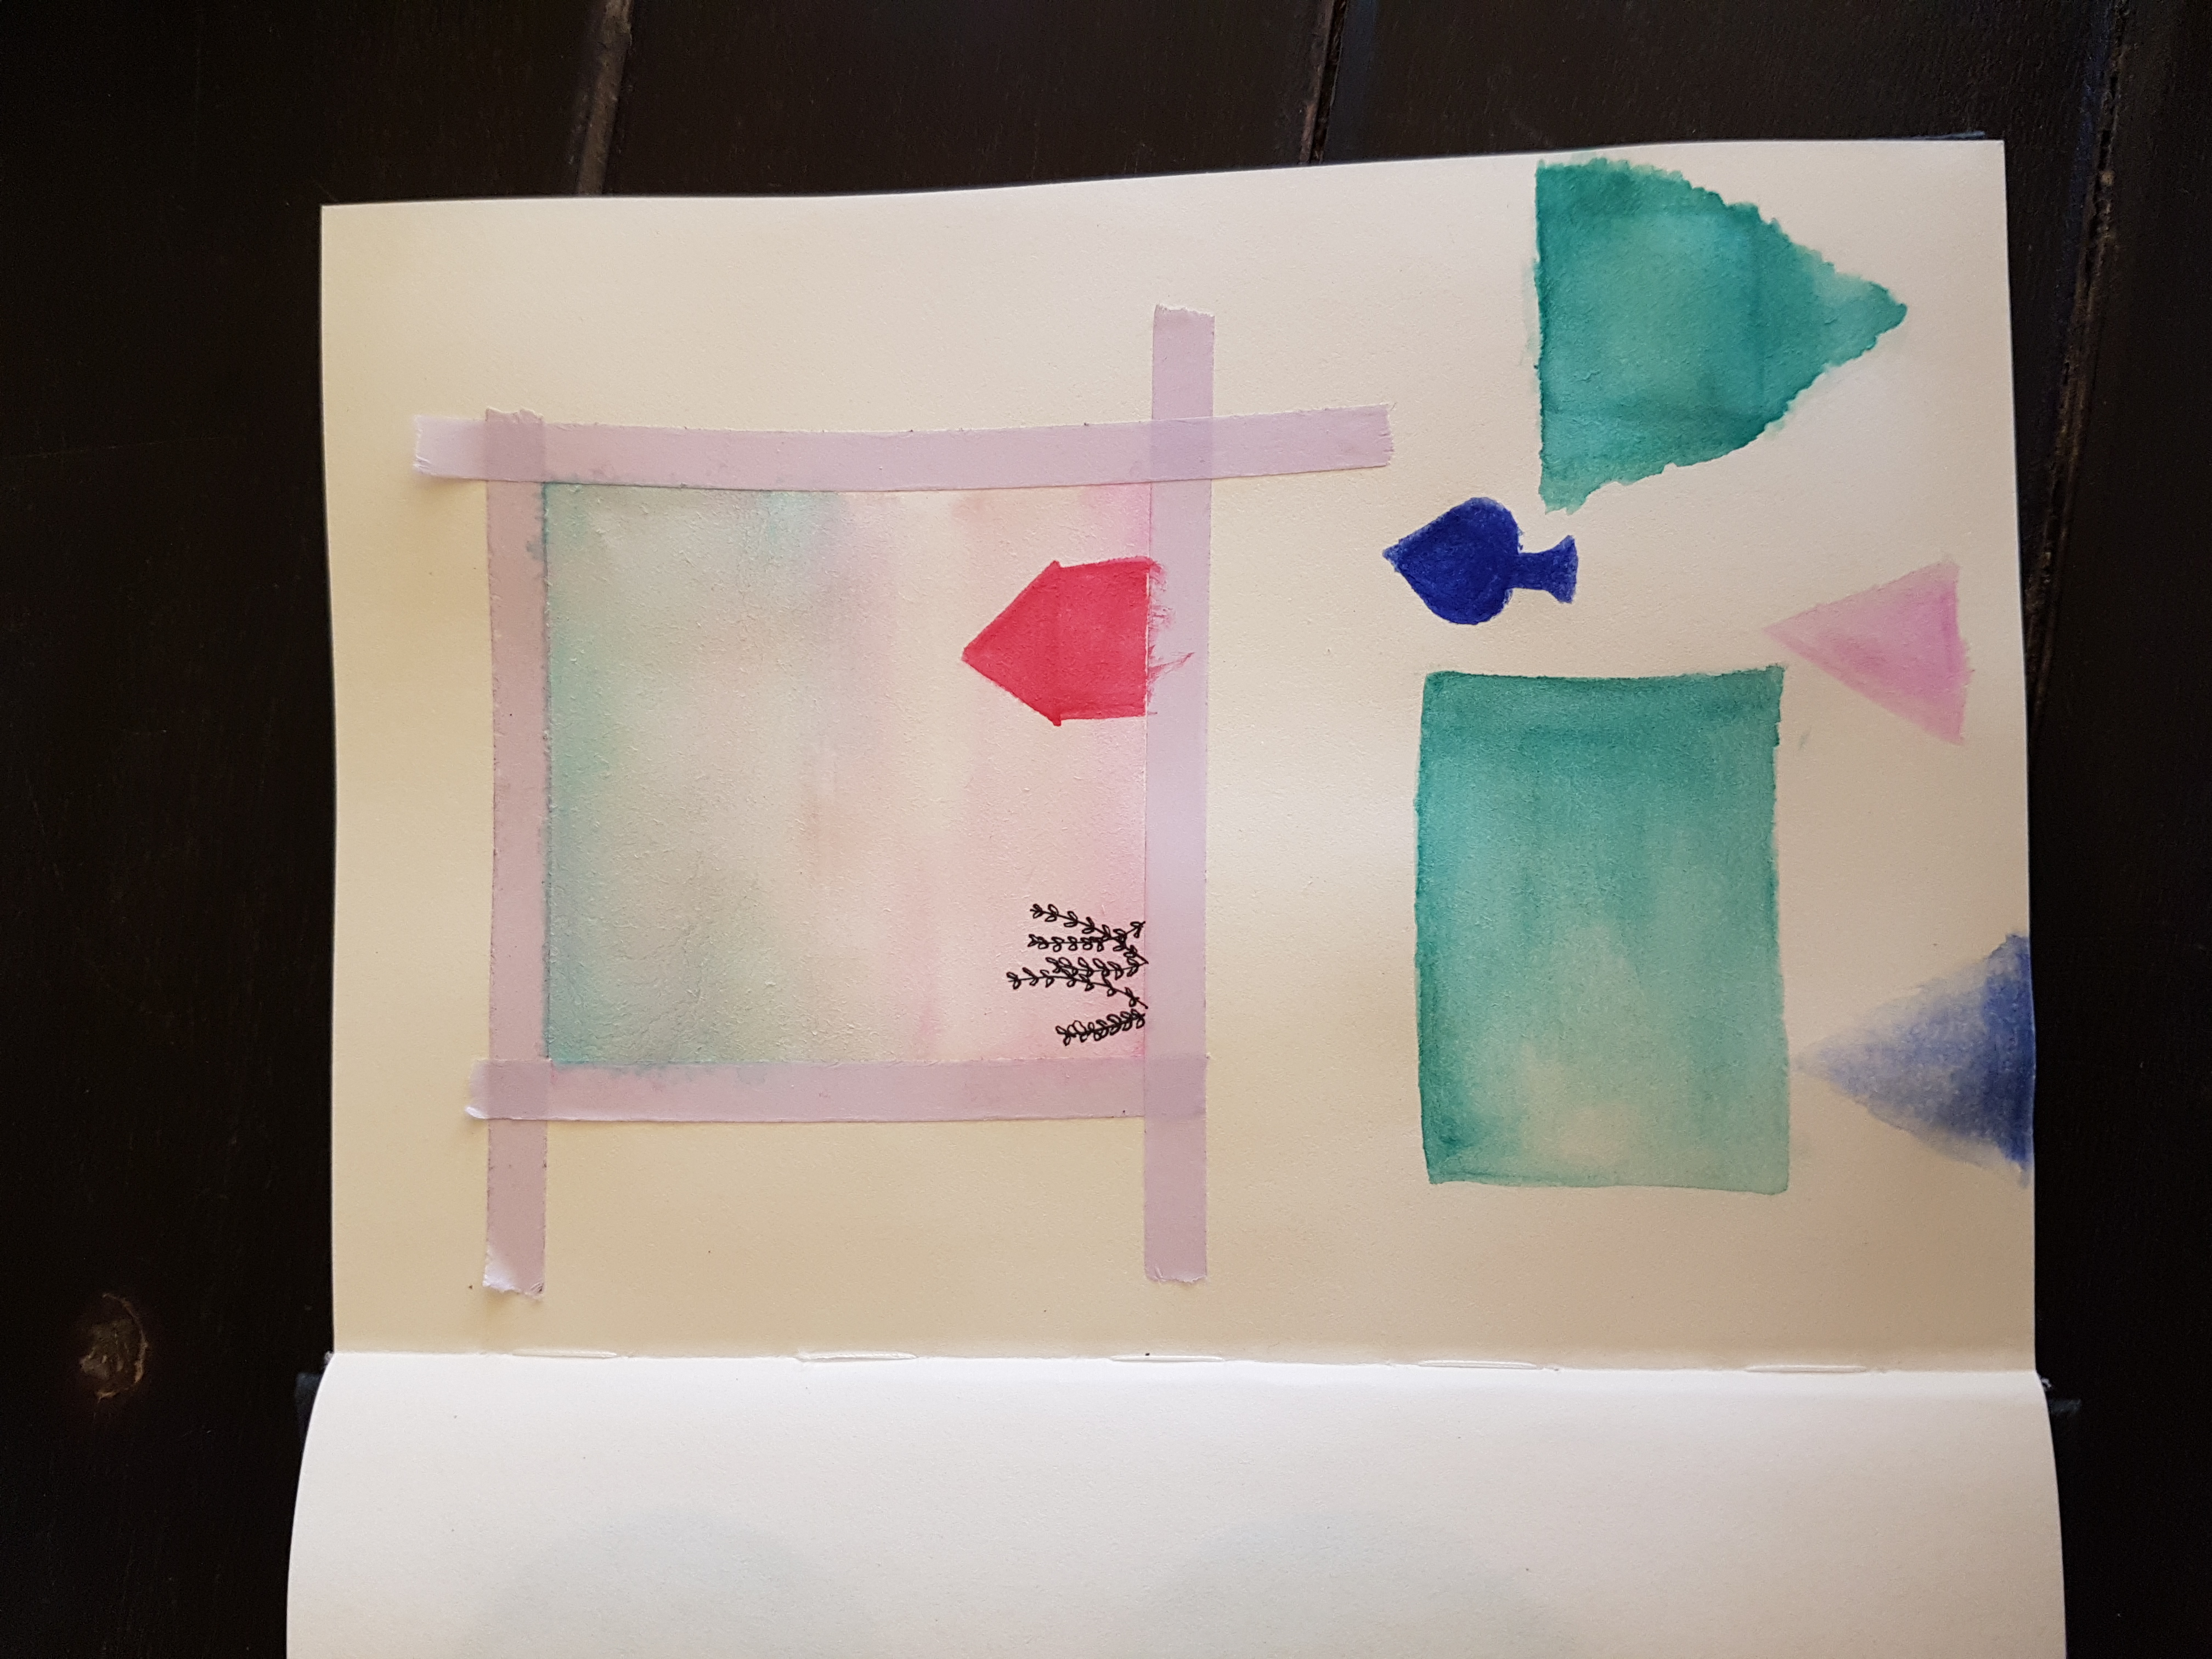
ithoughtialreadyrotatedthepicture… samehere…
In the end, below was what we came up with. No prizes for guessing which ones were painted by me. But if you really dont know, the green triangle was started by me and damage control-led by my friend, the blue spade, pink triangle and blue triangle were done by me. The rest were my friend’s painting.
Pain(t) Points
Water in the container turning murky very quickly, which could affect the colours that appear on the canvas. One solution to this is to use at least two glasses of water – one to wash off paint from the previous stroke, and one to prep the brush for the next stroke/ colour.
Actually bringing out the water container can be quite a hassle on its own.
The paper we painted on wasn’t the best for watercolour. She mentioned that using actual watercolour paper would be best as it would be easier to paint on.
PRO TIP: if you have a frayed paintbrush, don’t throw it away, it can still be used! Dip your brush in hot water, and it will solve itself out. Soon enough, your brush tips will return back to normal 🙂
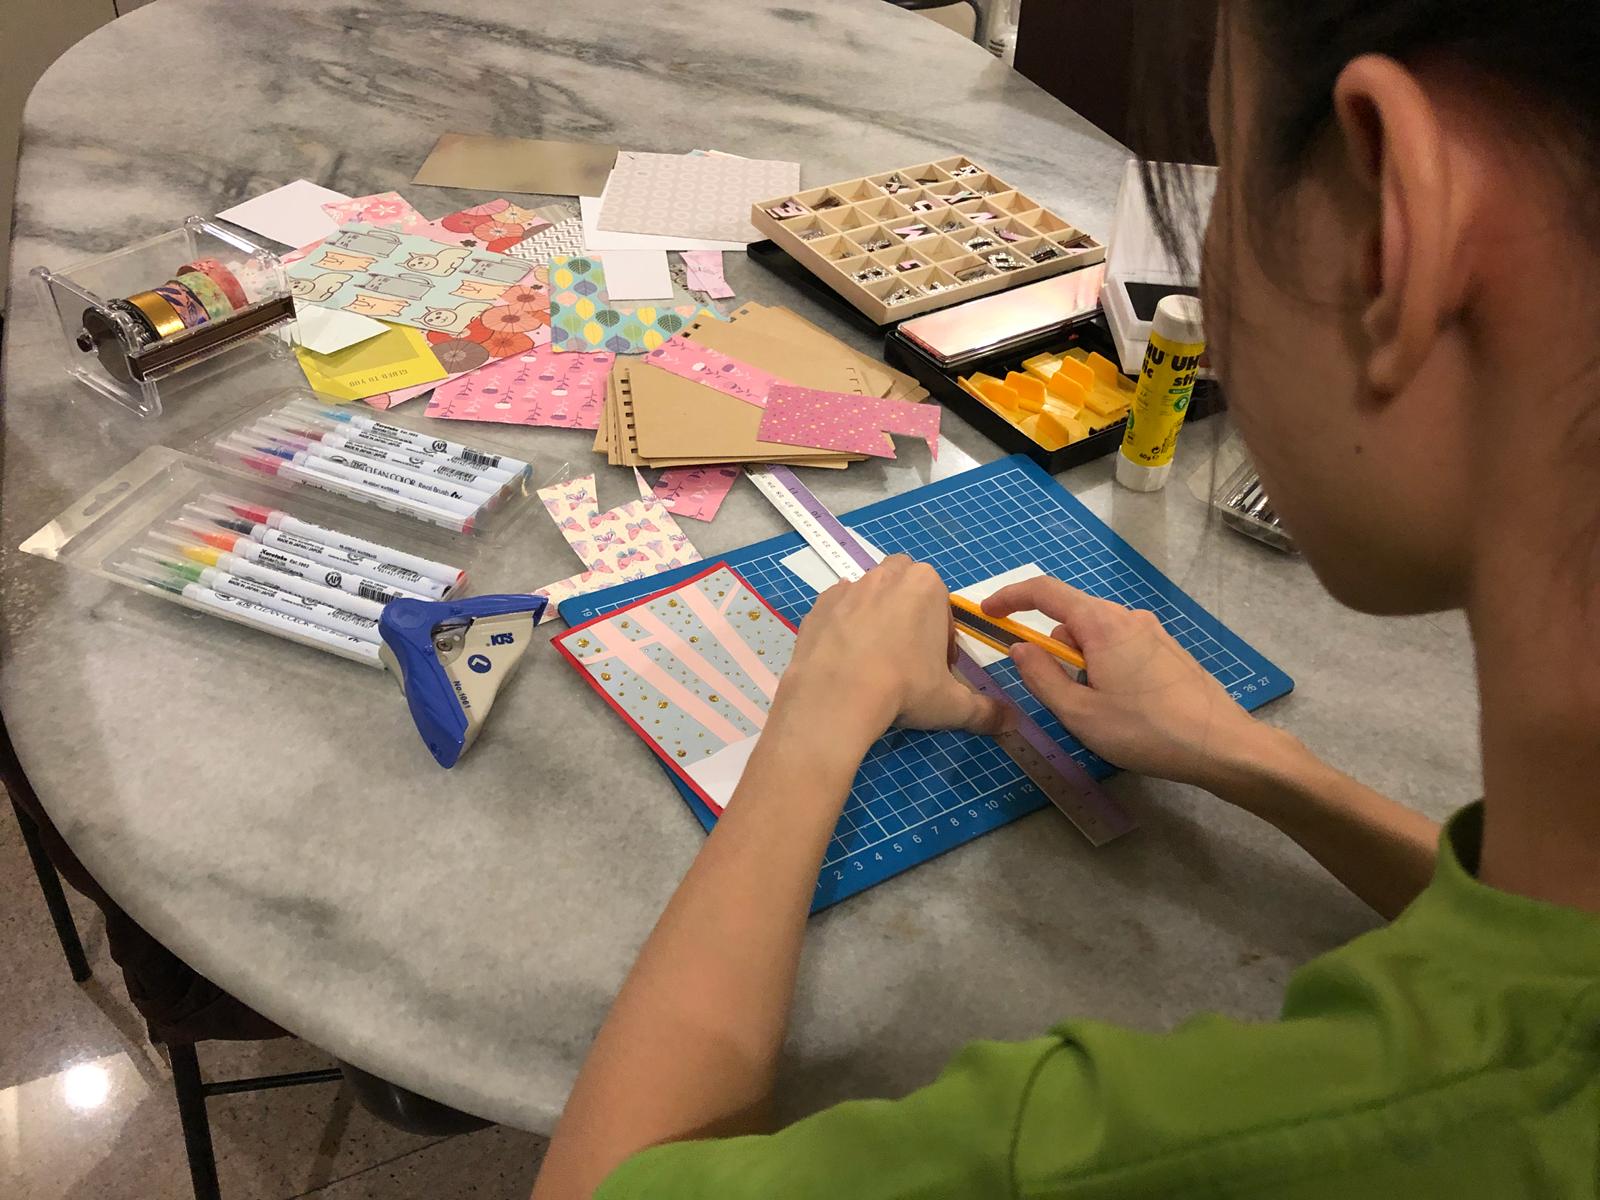
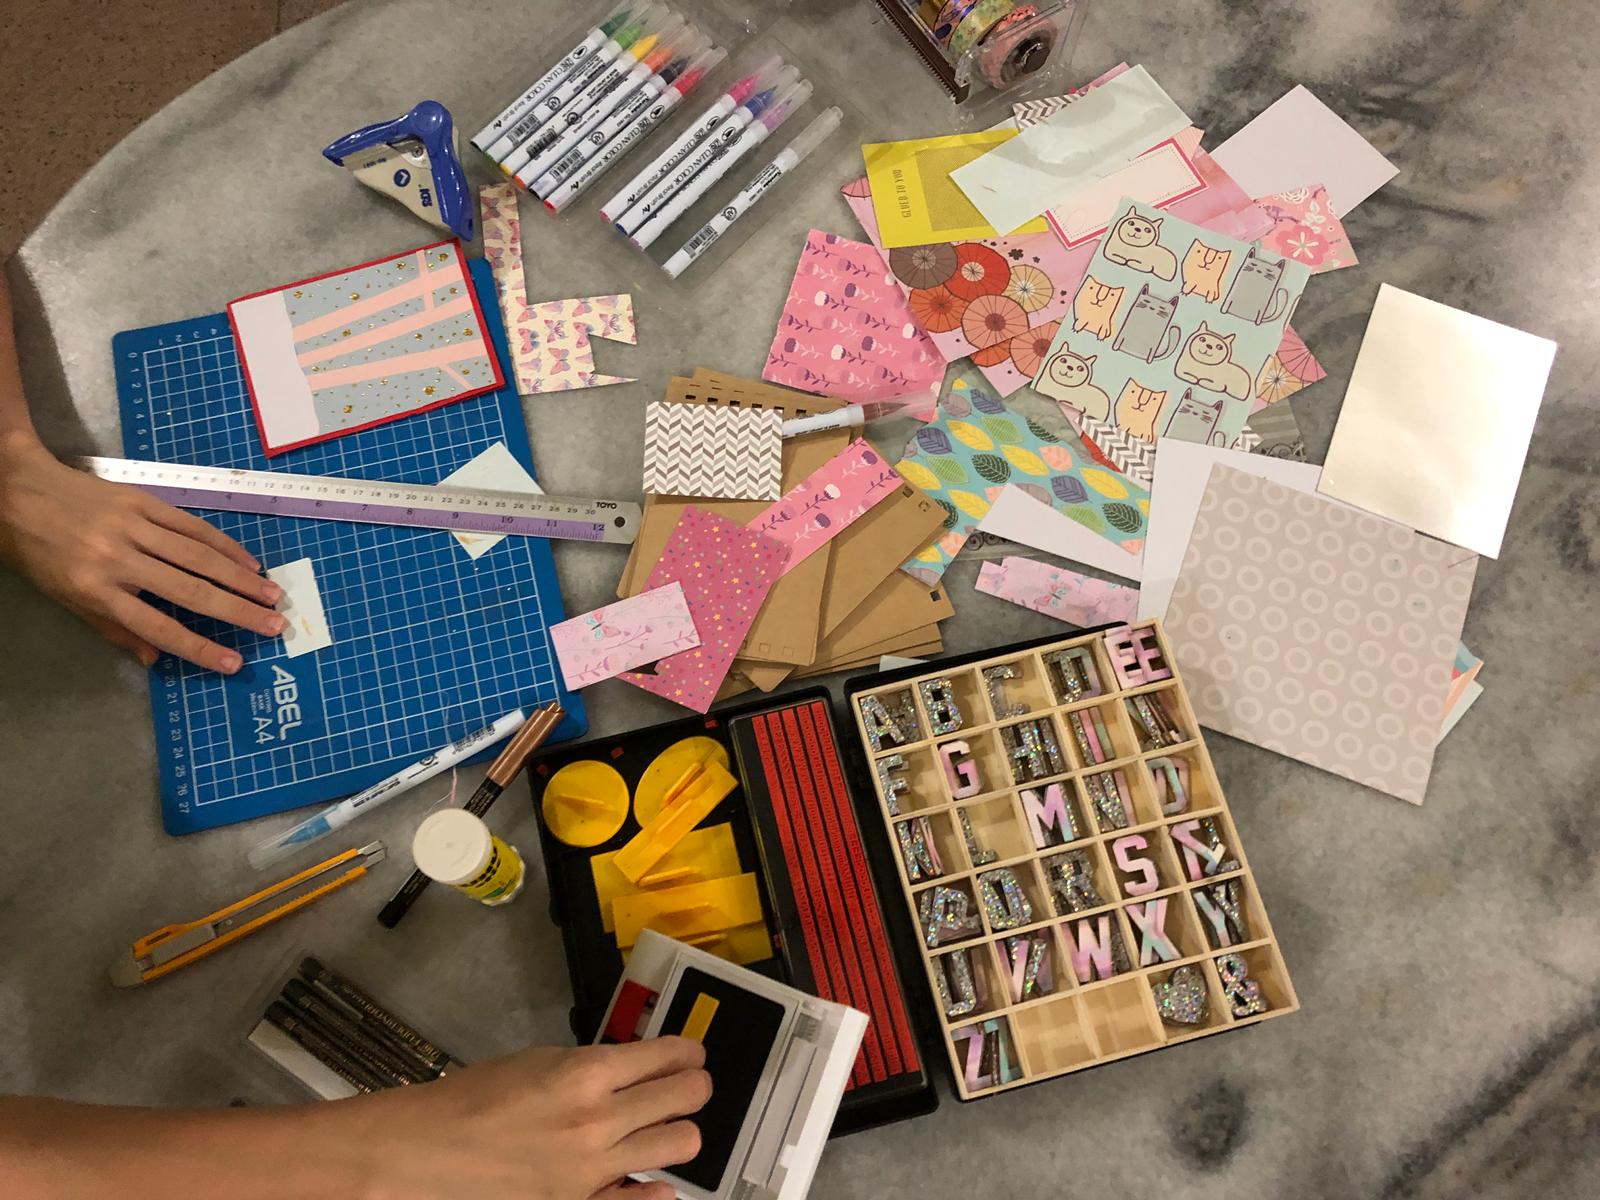
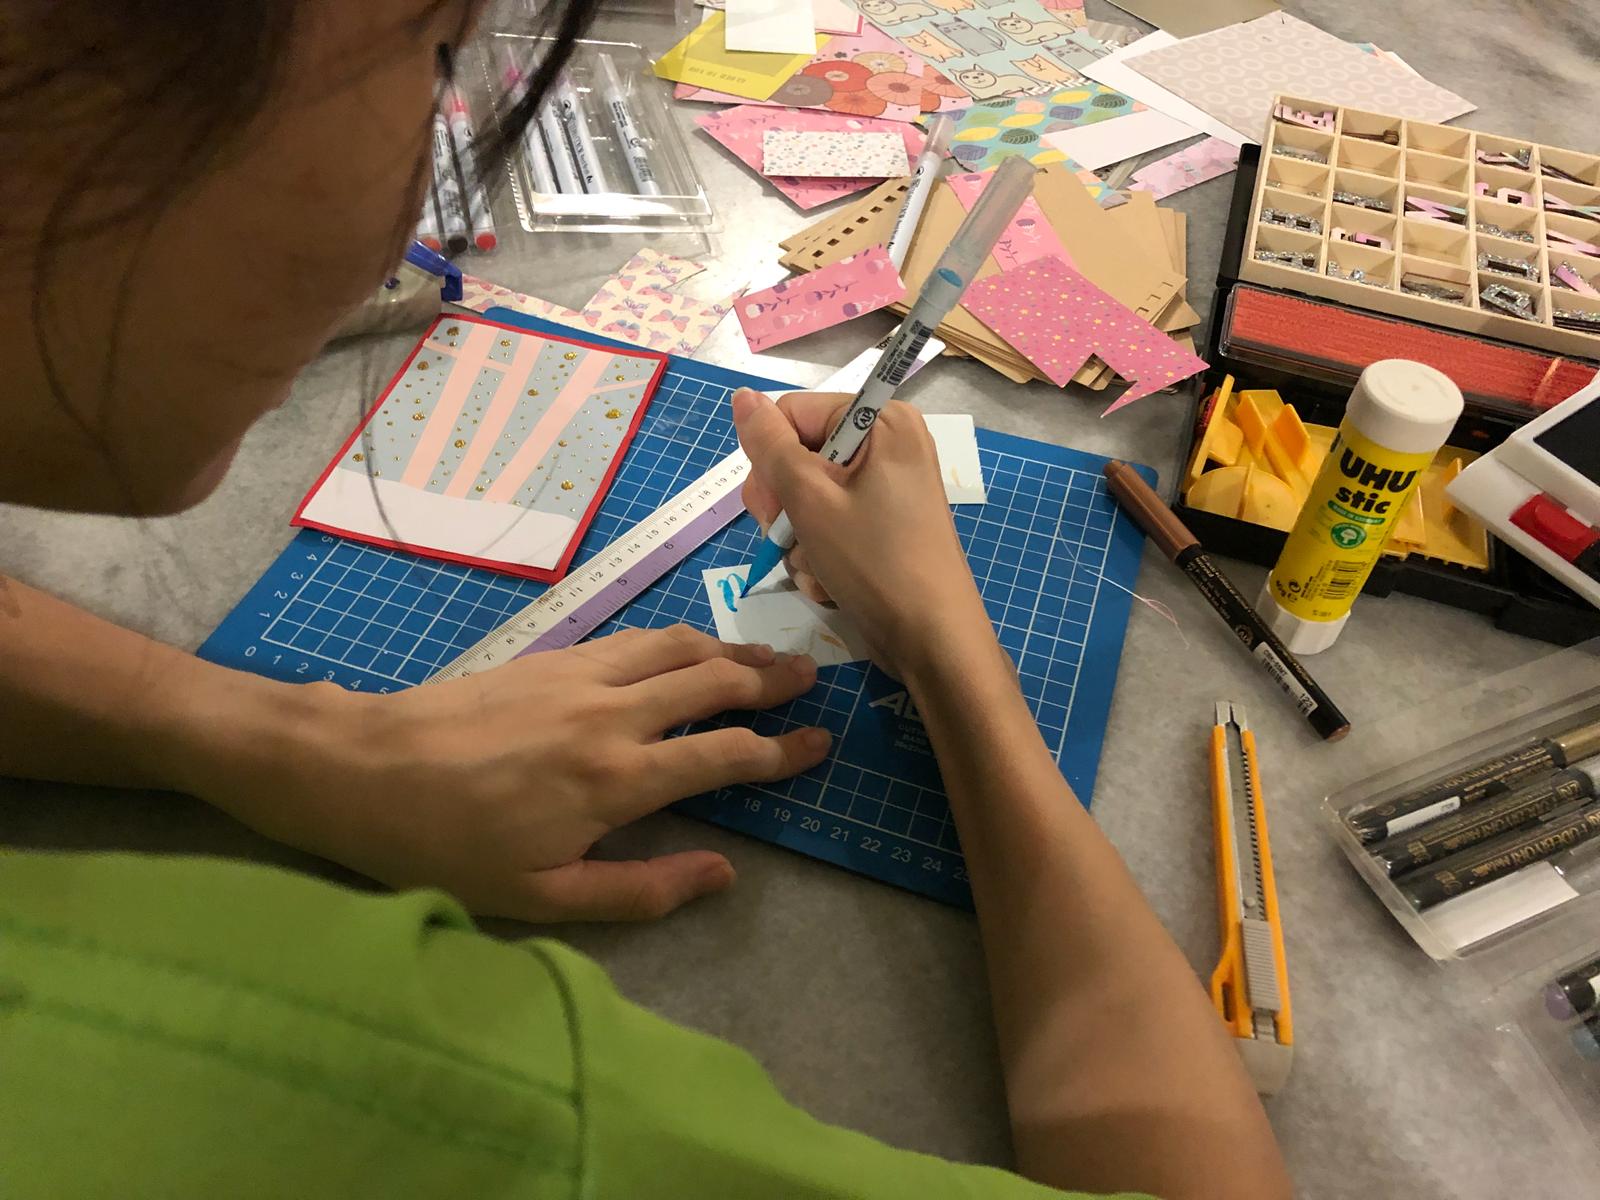
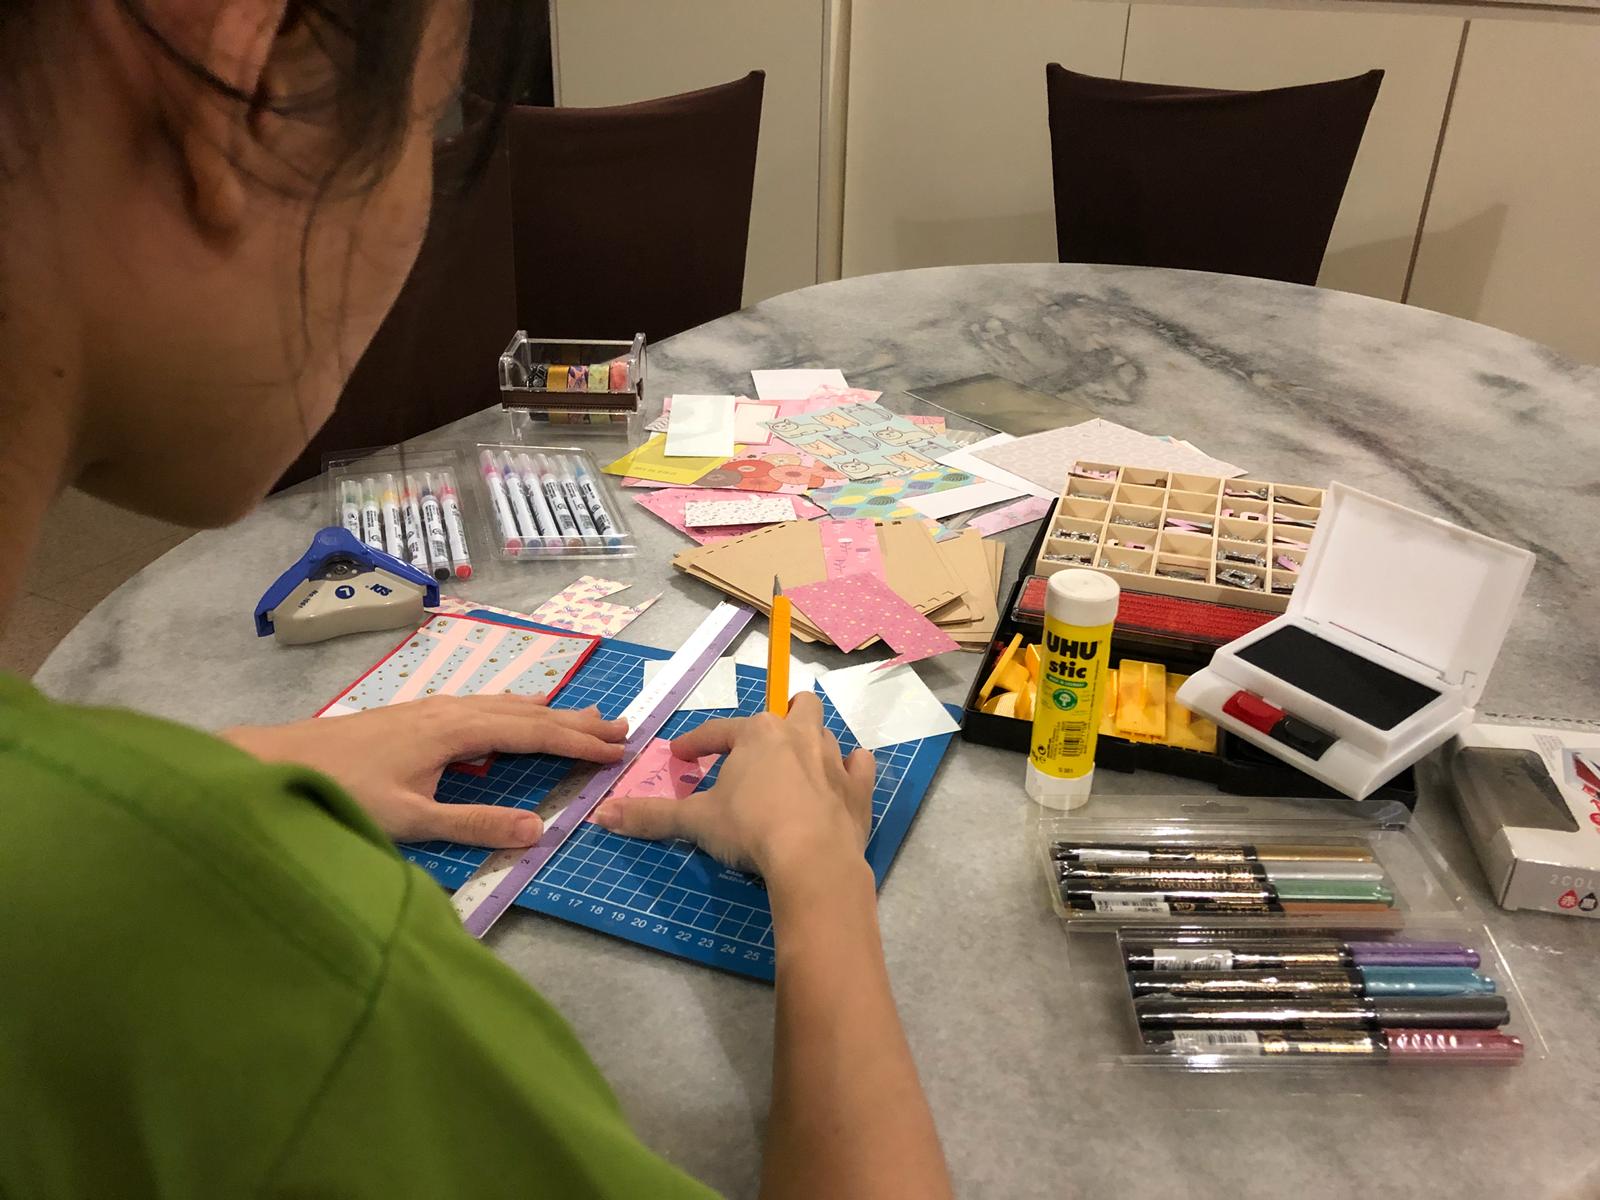
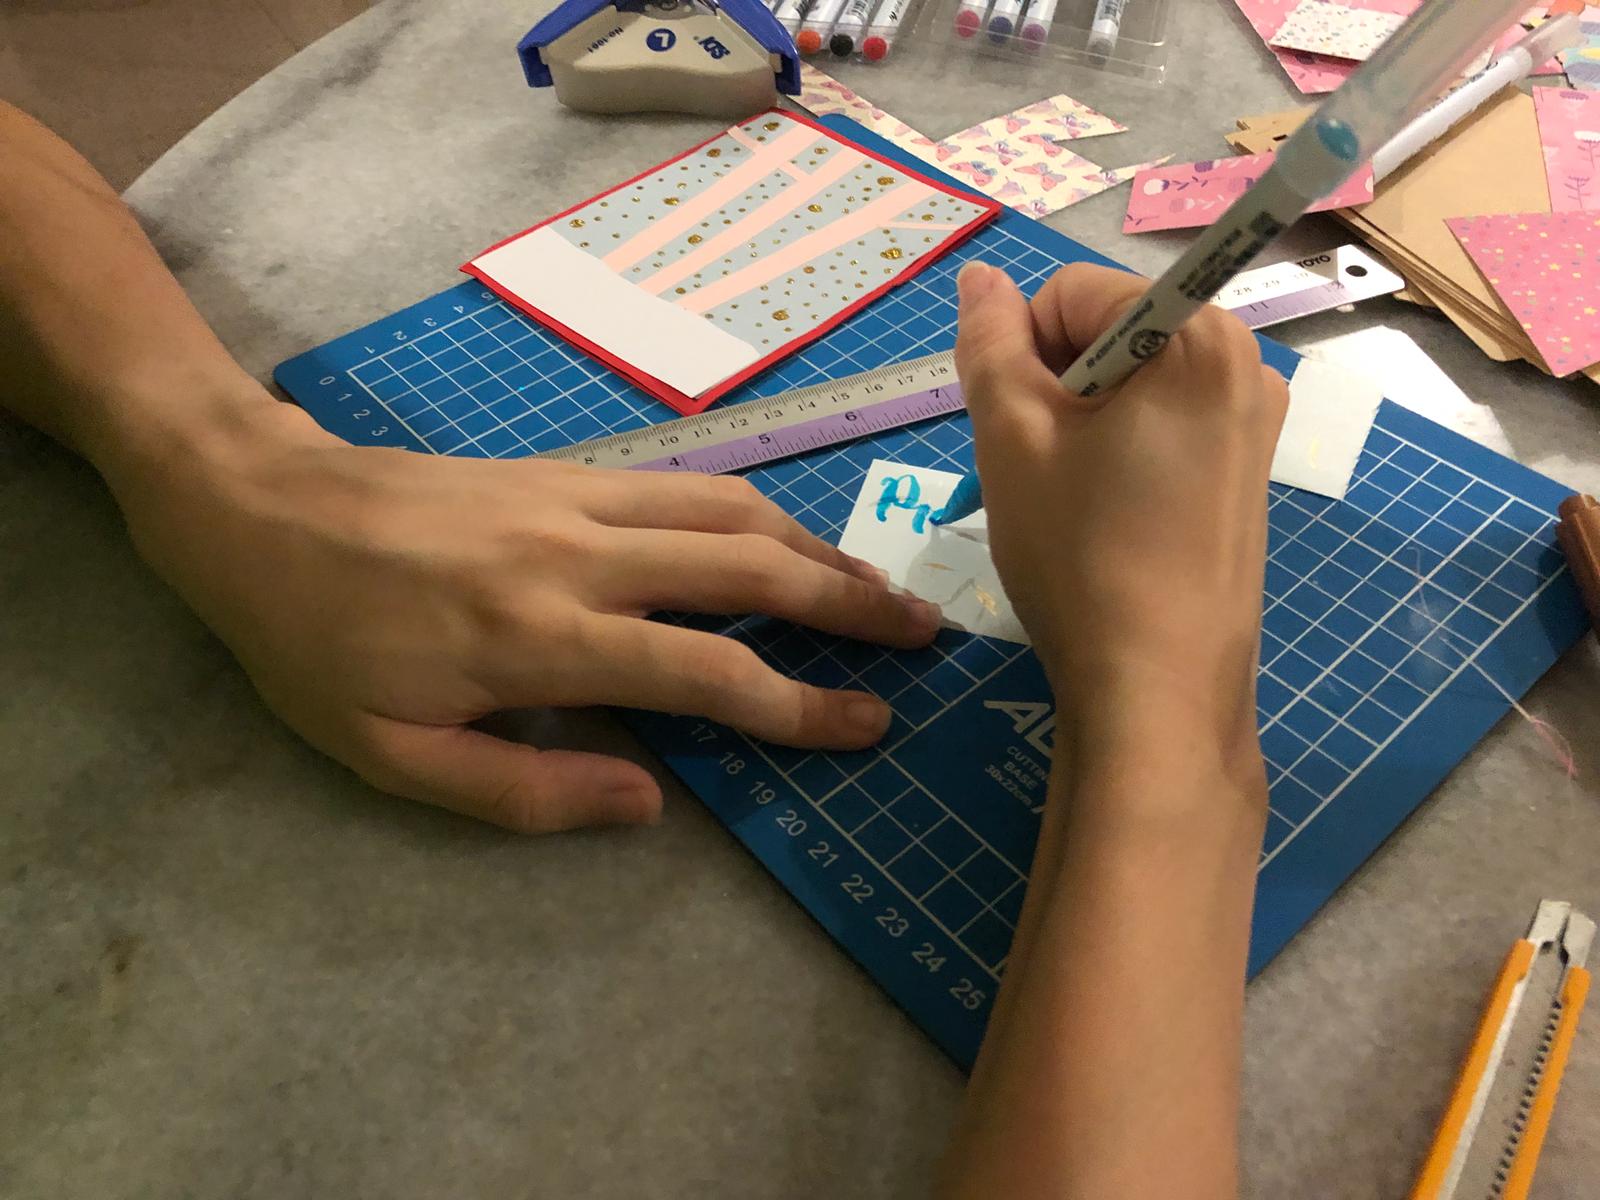
Tools: Paper cutting board Ruler Pen knife Scissors Coloured markers Glue Various decorative materials such as patterned tapes, alphabet & craft stickers, craft papers, stamps
Practice documentation: My friend makes interactive greeting cards for special occasions. According to her, one simple A5 card with 3 faces usually takes 6 to 7 hours as she has to make each part individually before sticking them all together on the main piece, and every single piece has to be cut to precision or the interactive aspect would not turn out working.
Art therapy: Anna is an experienced art therapist who works with the elderly. Her sessions focus on encouraging communication and thinking through art activities, during which the elderly’s sense of selves are enhanced.
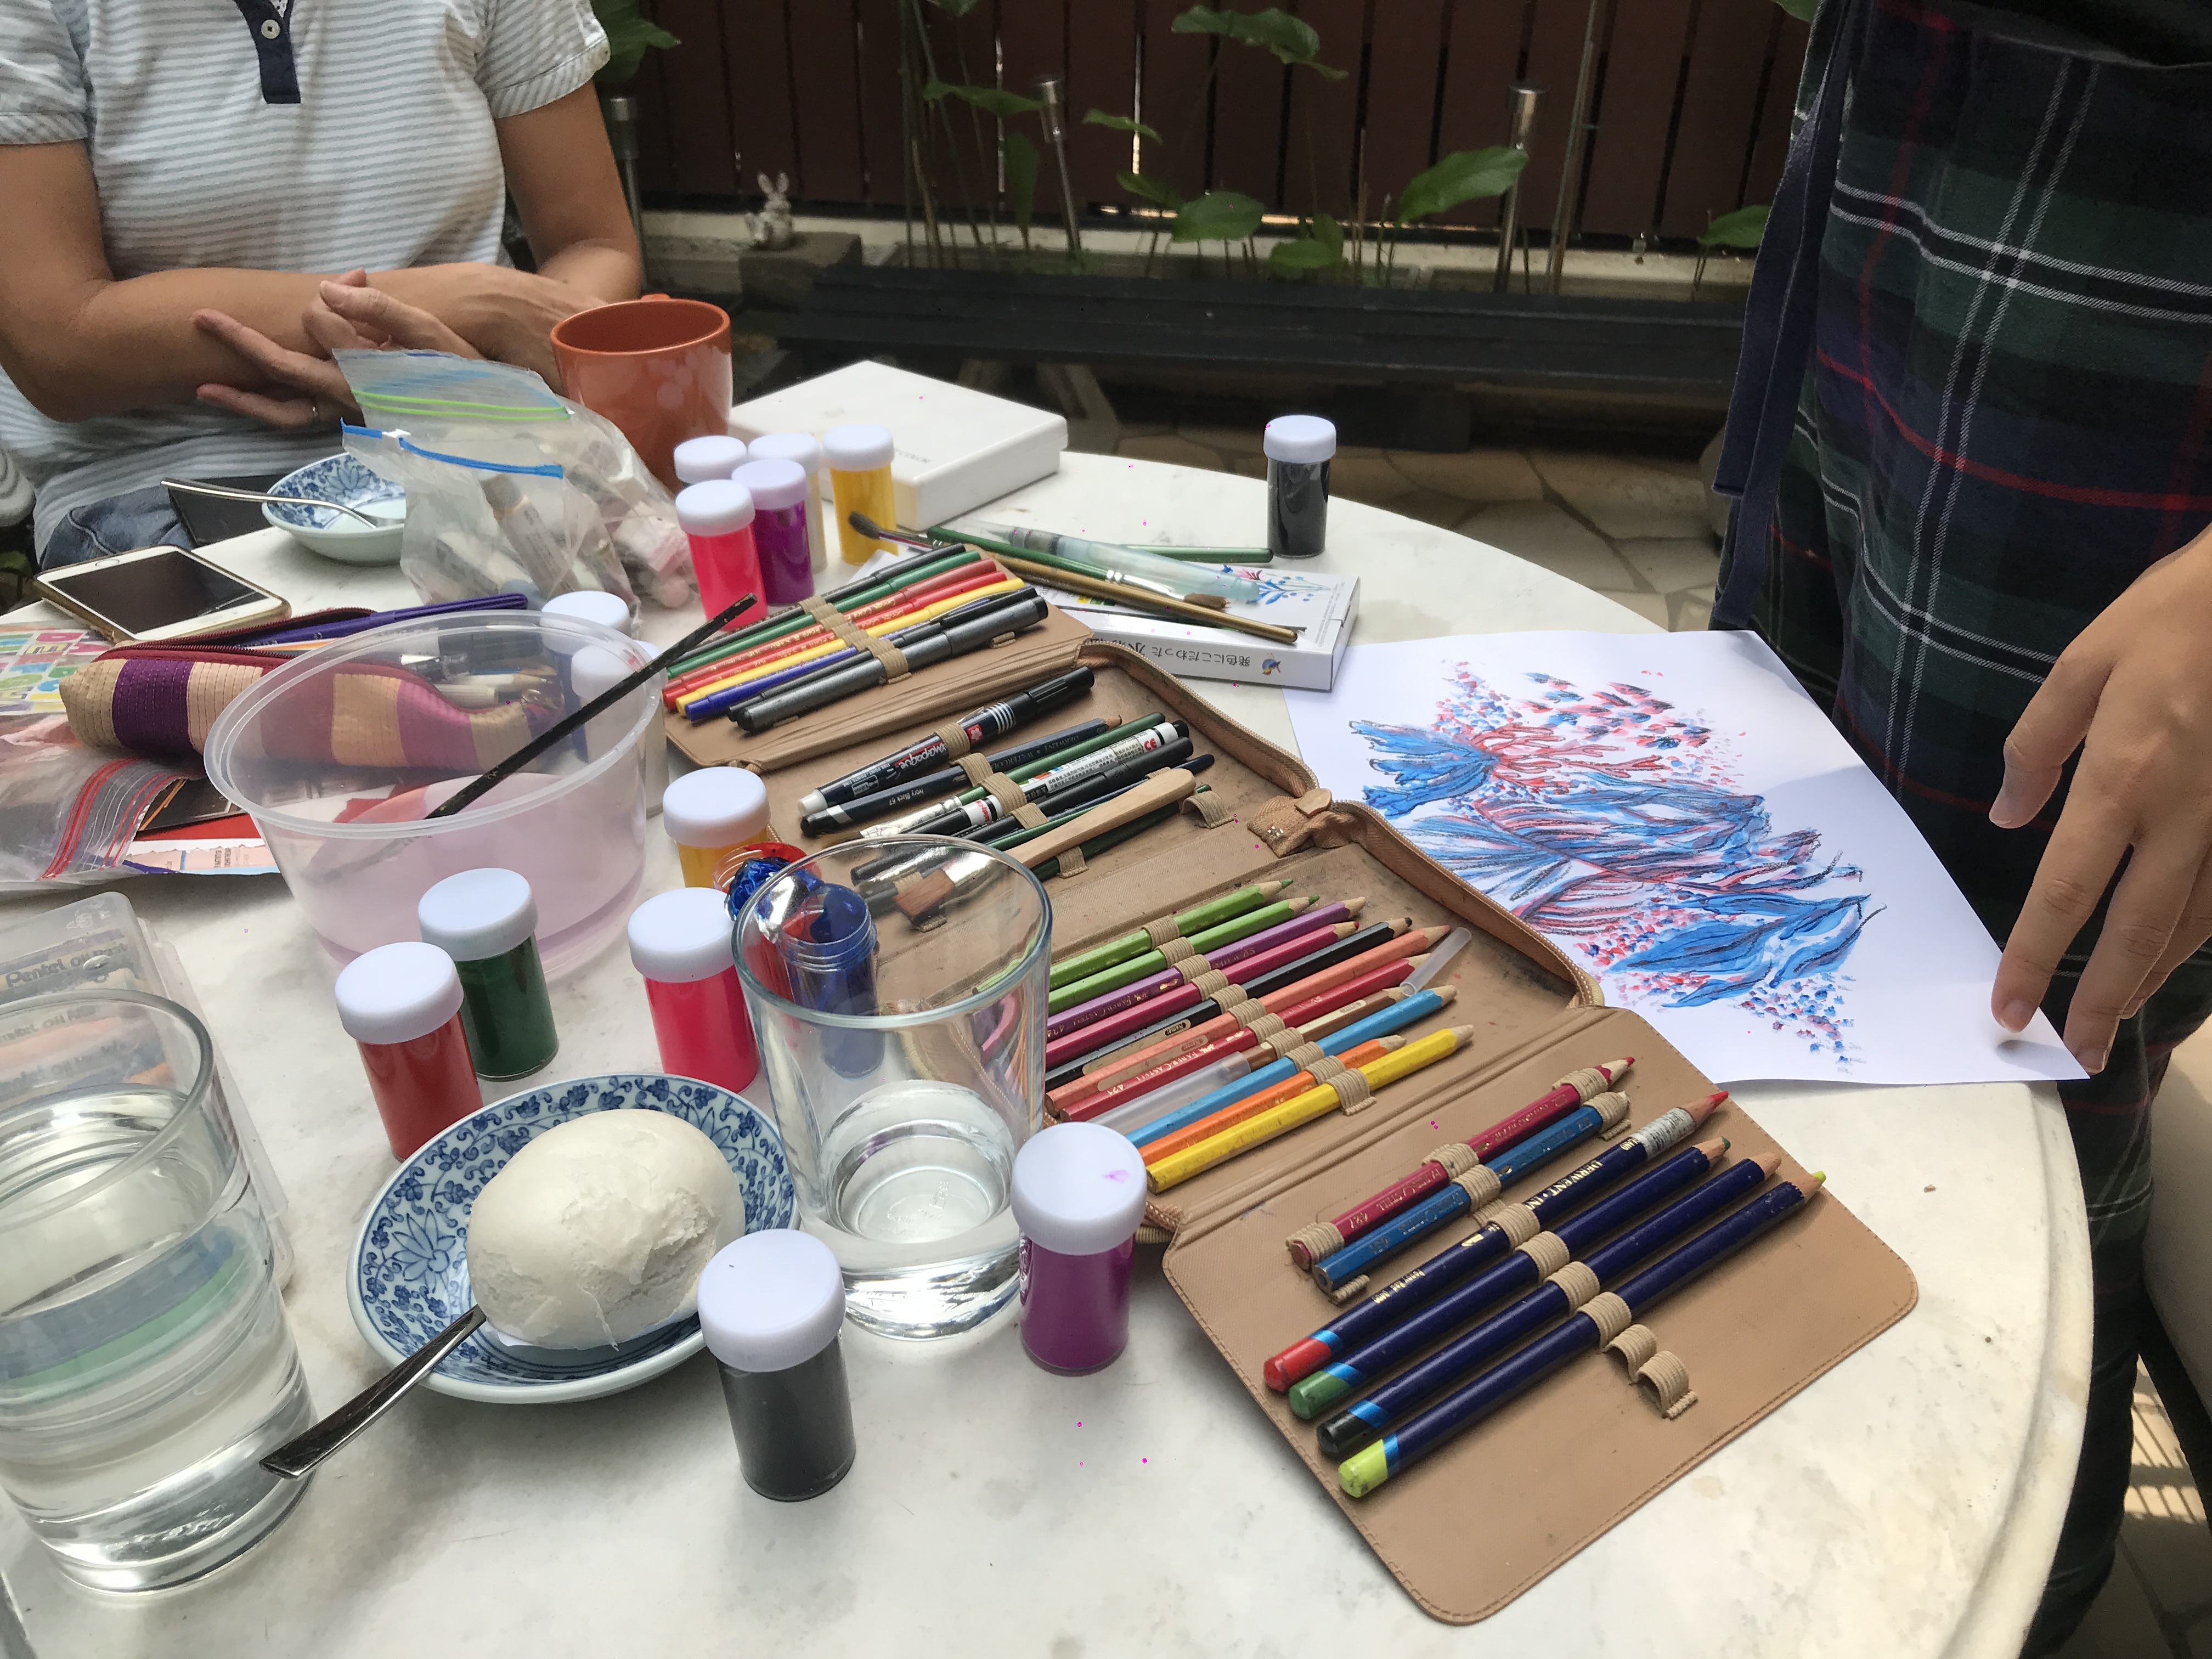
Tools & equipment used
• Visual references: art books or printed cards • Clipboard as painting or collaging surface • Canvas: any paper • Medium: colour pencils, crayons, oil pastels, paints, magazines and newspaper cut-outs, stickers • Paint brushes • Water bottle and container • Disposable aprons
Worksite / Set-up
For twice a week, Anna would conduct art therapy sessions at an elderly centre. Other times, she would conduct therapy sessions outdoors, such as in parks or nature reserves. As she would usually need to push her clients on their wheelchairs, Anna carries all her tools and equipment in a back pack or 2 for ease of transportation.
Backpack that carries foldable storage cases of brushes and colour pencils
Backpack holding other materials
She also organises her tools and equipment neatly in foldable cases and in respective zip-lock bags to ensure extra portability.
Finding a quiet and serene area suitable for wheelchairs and a bench for Anna to sit is key for the hour-long sessions. While flat surfaces such as outdoor tables are useful for elderly who are generally mobile, Anna improvised a table for those who are wheelchair-bound using clip-boards.
Process
While participating in actual therapy sessions with the elderly was not possible due to confidentiality, Anna kindly conducted a short session with Jo-Ann, Johann and I at her place in her backyard. I suppose a subtle requirement when selecting the right therapy location is how calming it makes clients feel!
During our short half-hour session, we were given 5-minutes to work on our artwork.
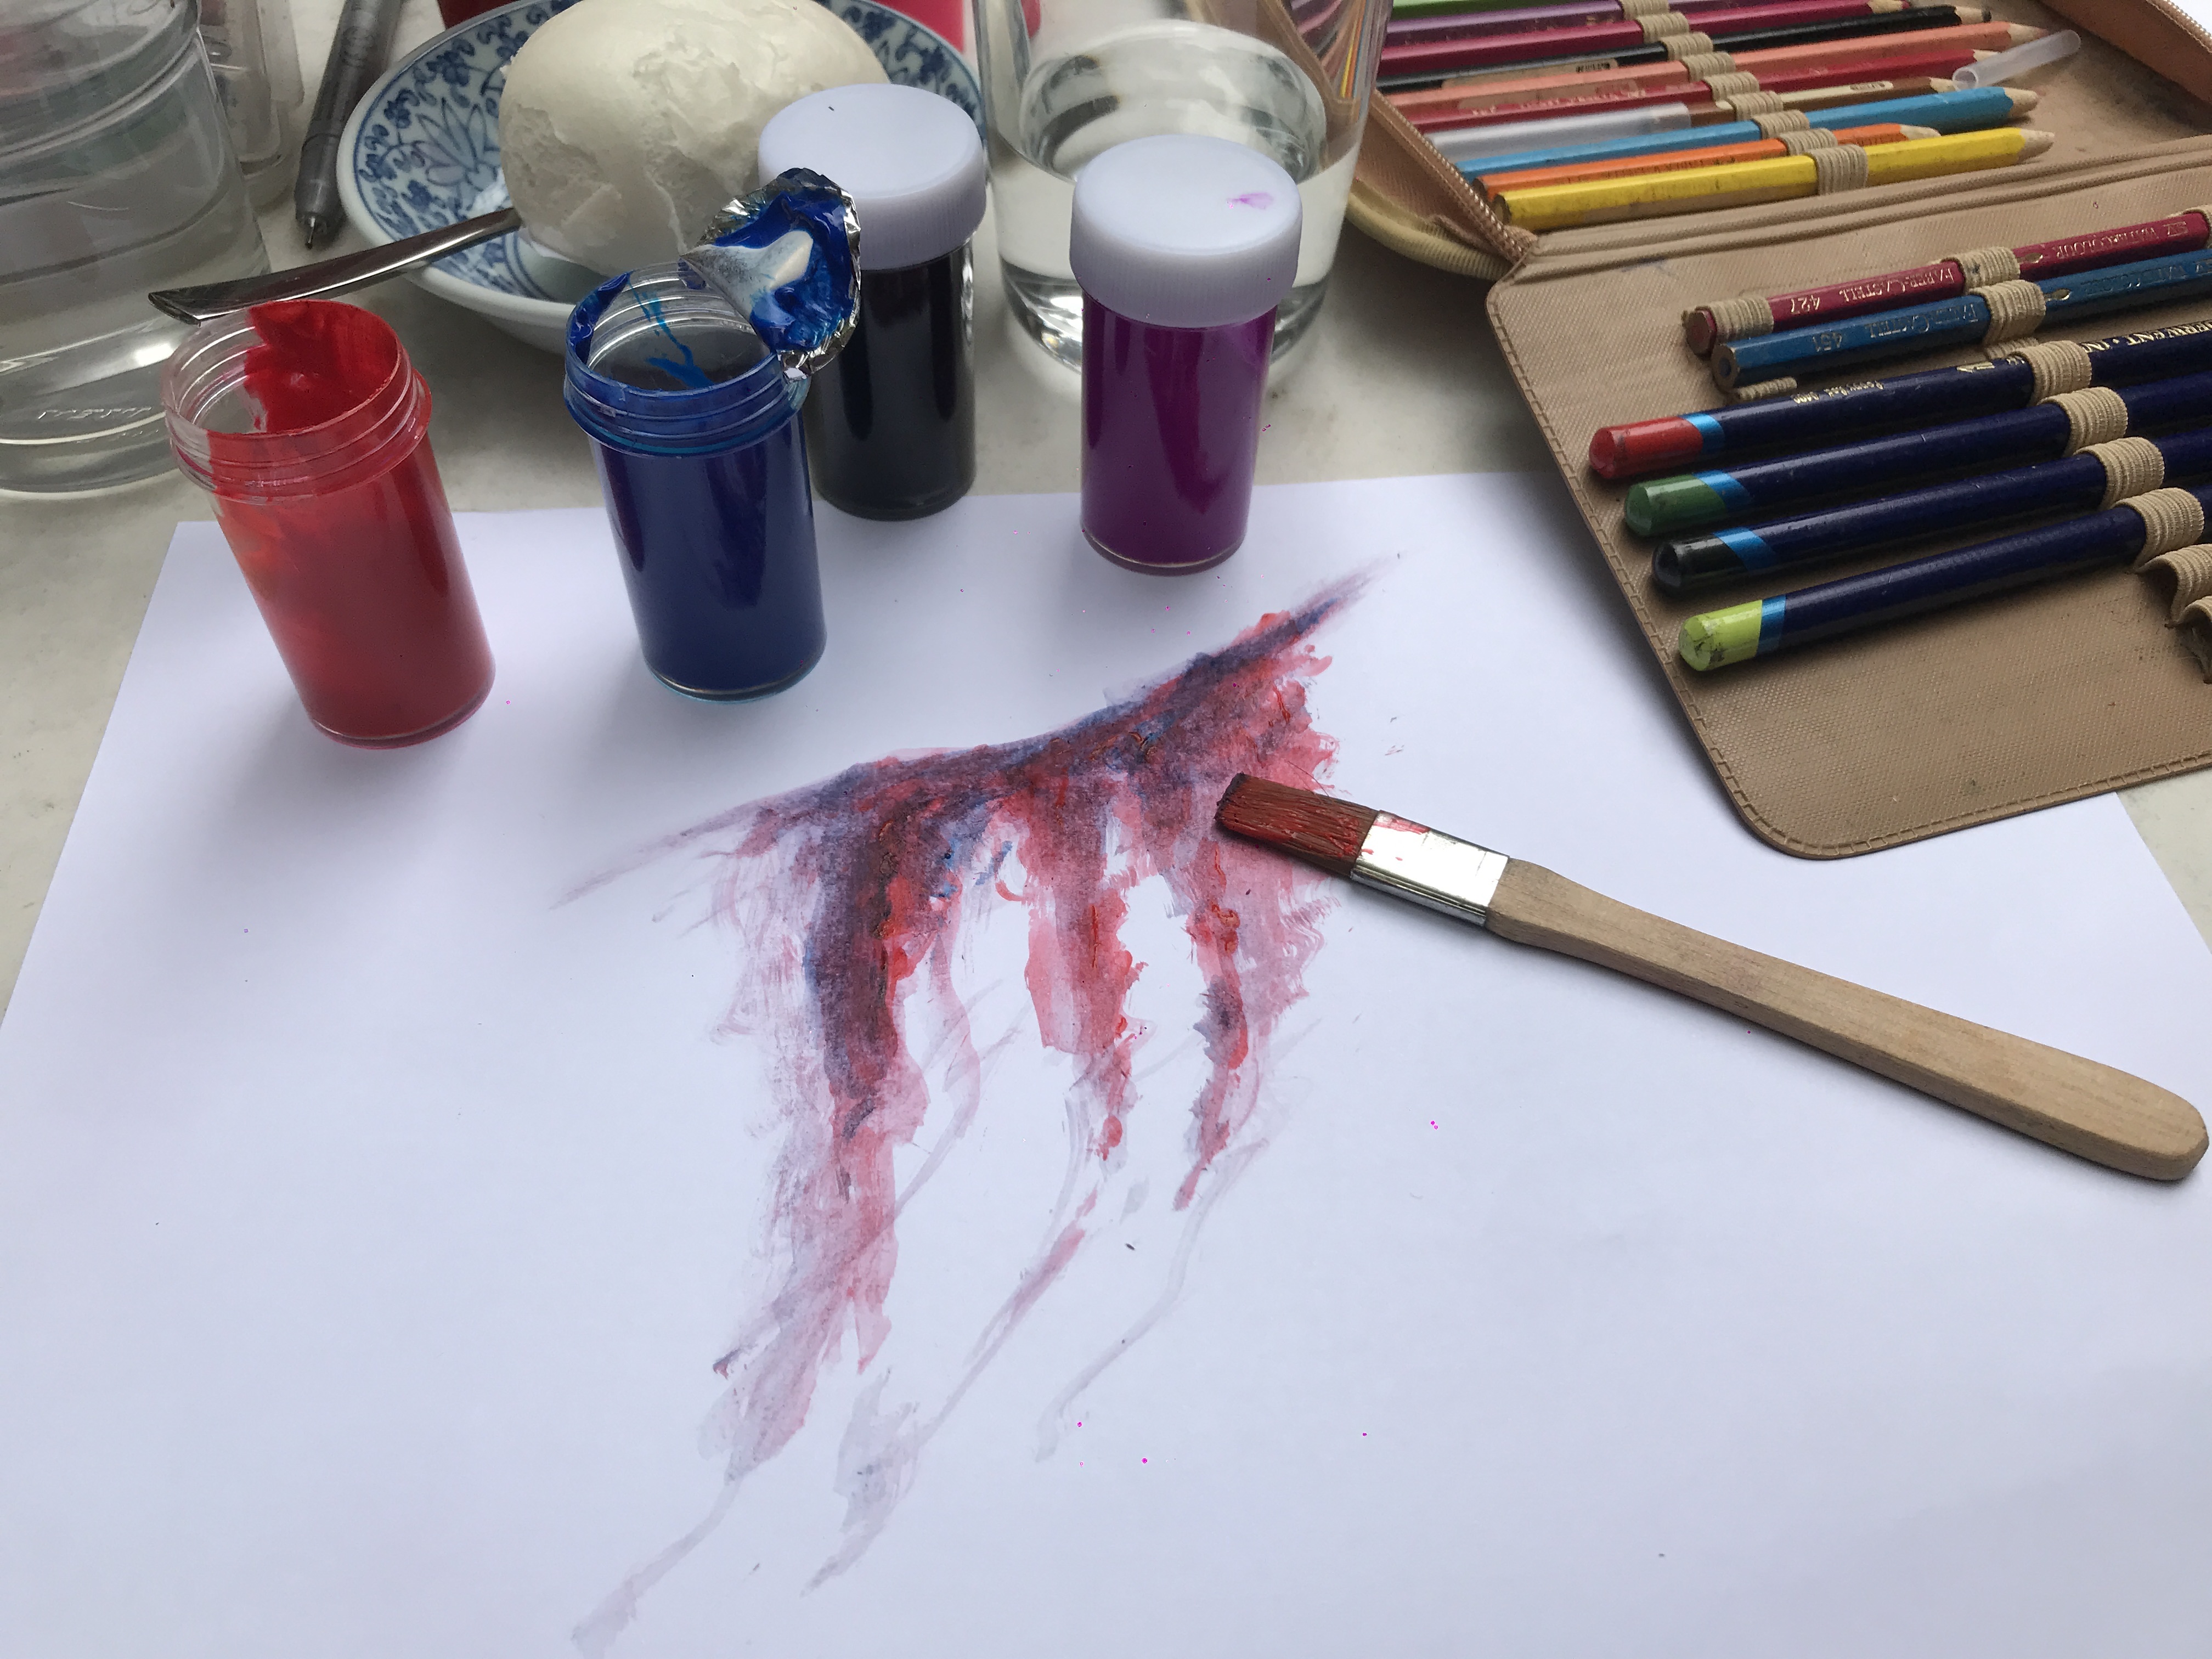
1. Visual references to give us a head start
2. Choosing desired medium: watercolour
My final artwork!
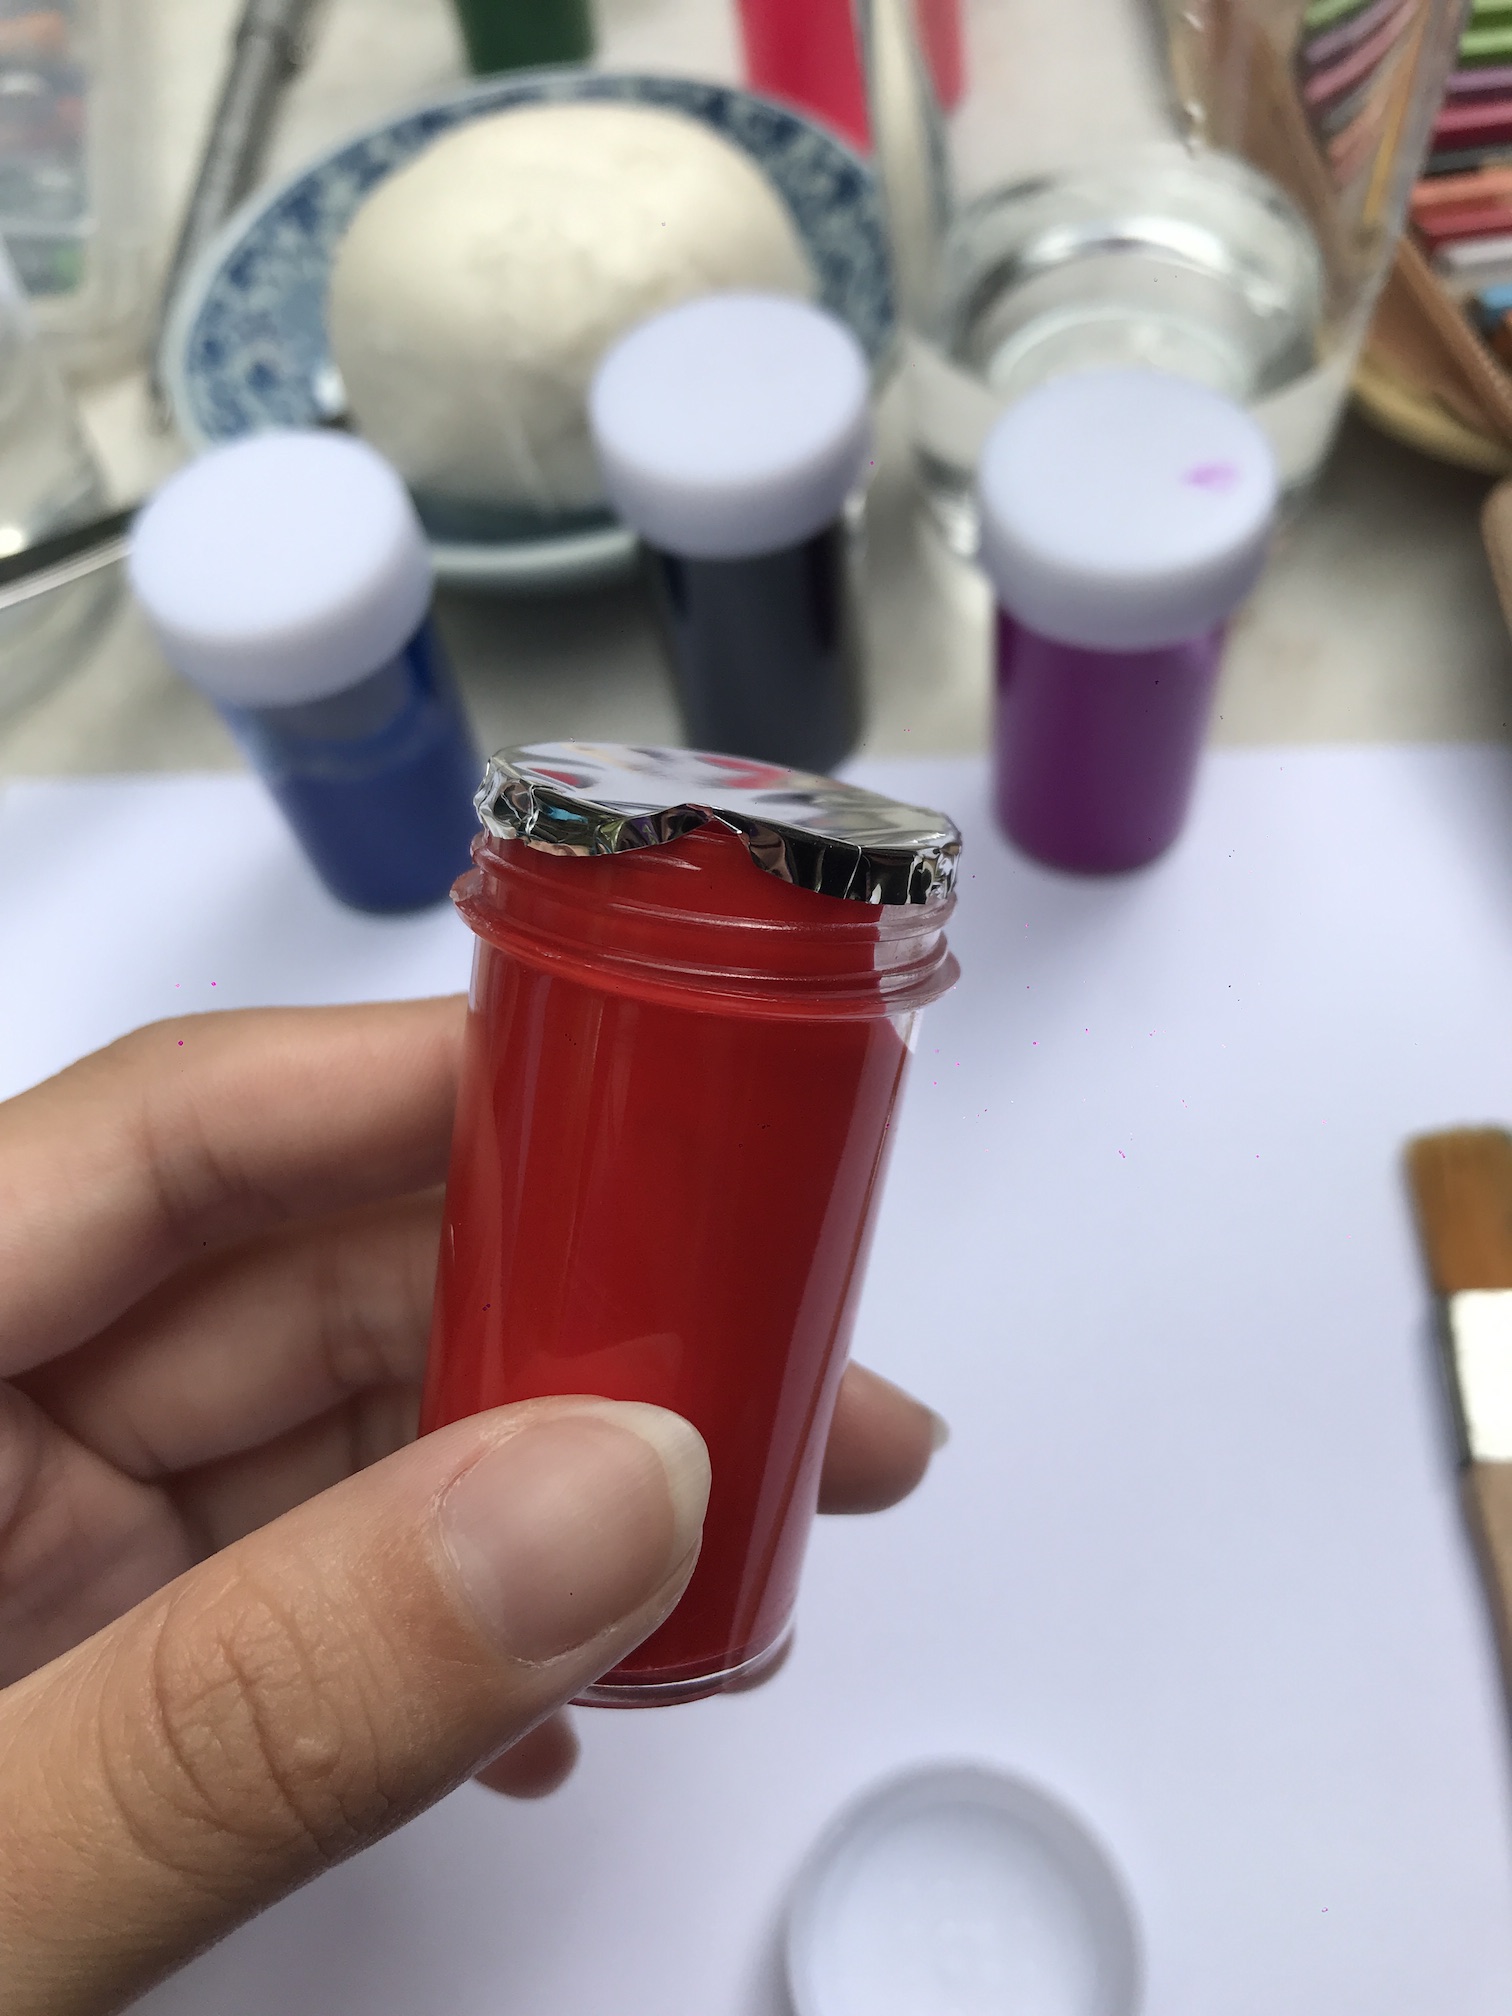
As mentioned, the goal of art therapy was to promote self-awareness and stimulate the mind, which was why Anna asked us individually about our process of creating what ended up with. (For me my stomach was not feeling well that morning; inspired by that, I decided to paint what would be a bleeding wound that was imagined to be on my abdominal area.)
The aftermath of making art
Pain Points
In the past, Anna had tried to use trolley bags in place of her back packs but found the former to be inconvenient when she had to push a wheelchair. Given the nature of her work which involves a lot of bulky materials and travelling, it is important that a wearable studio for her would be able to withstand weight yet be as light as possible. Other considerations would be how it ought to be easy to clean, since the medium that clients and herself would encounter includes a messy one – paint. A convenient source of water would also be needed for painting sessions.
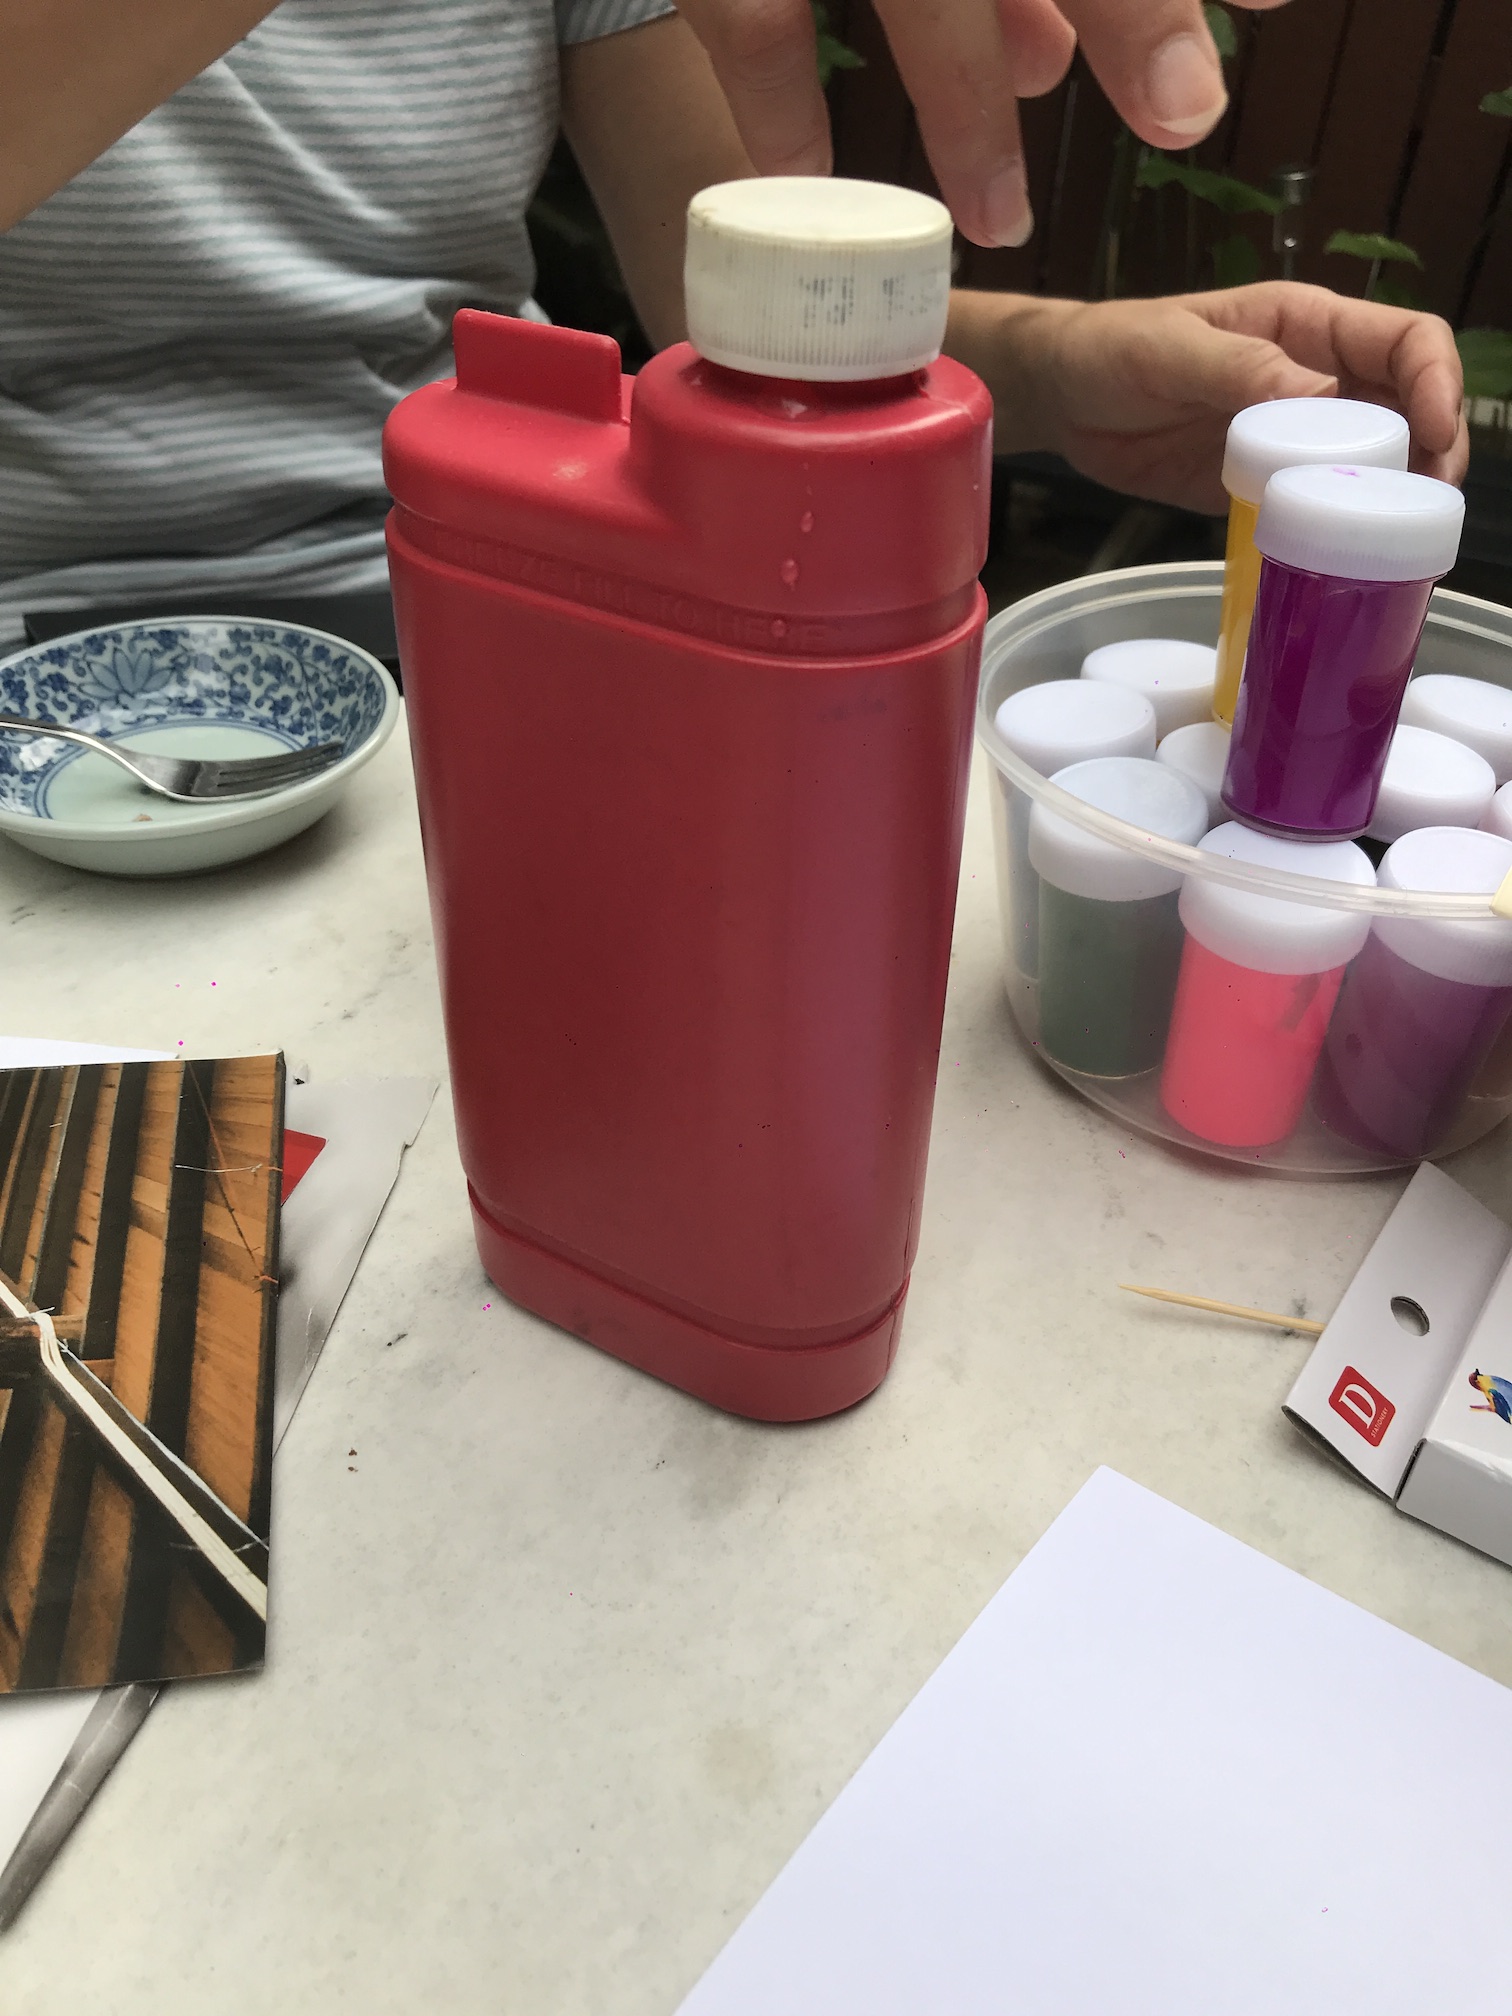
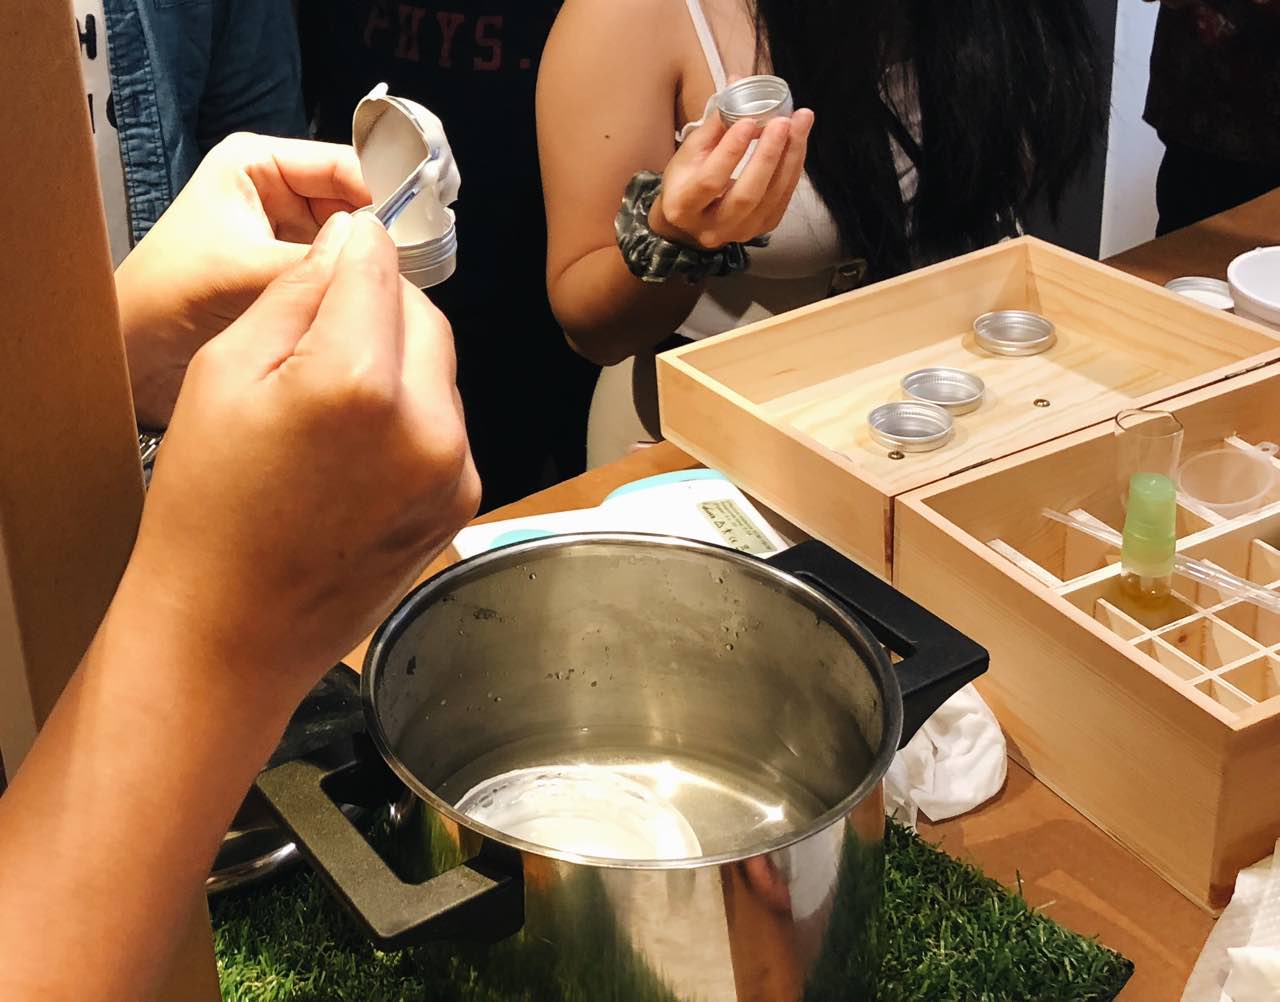
Tools/materials needed: – Small containers – Glass rod – Stainless steel pot – Essential oils – Moisturizer base
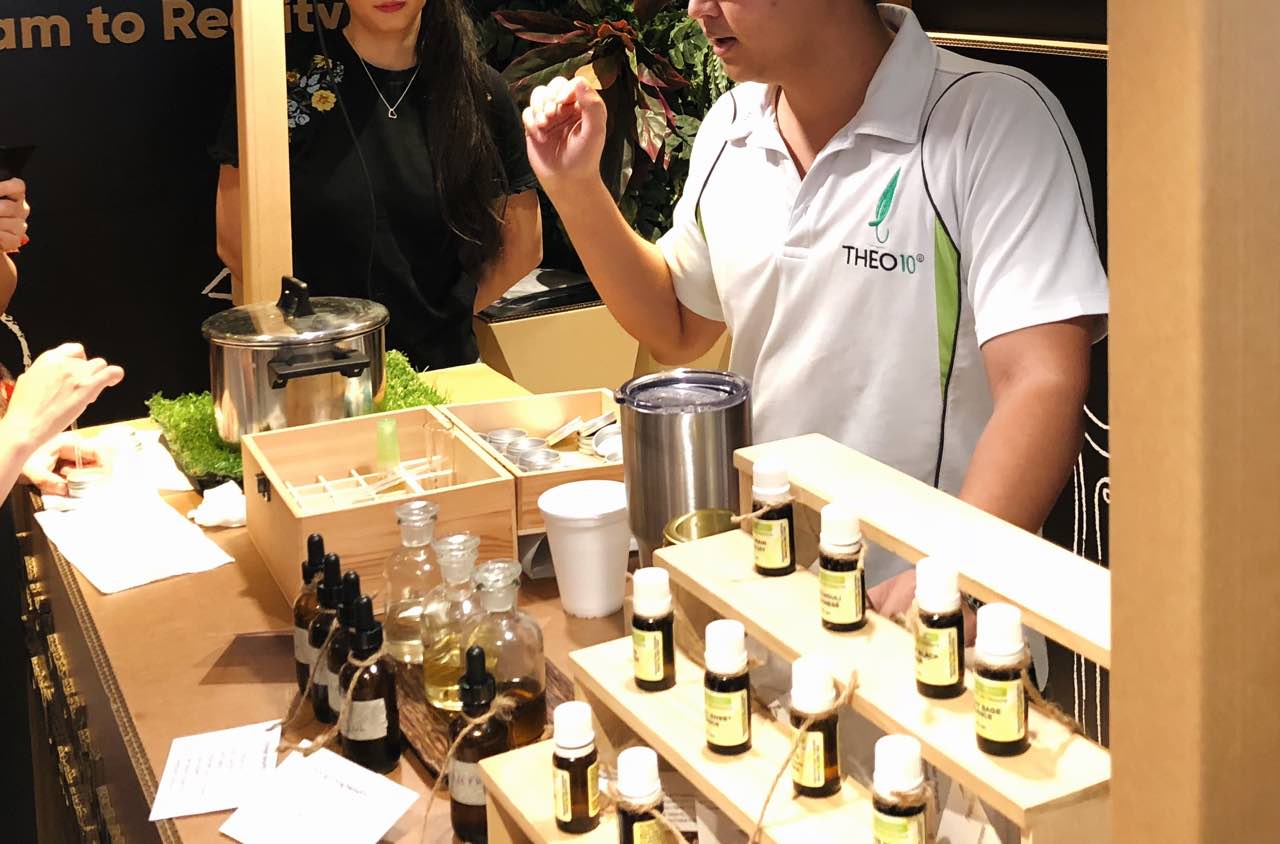
Theo started off the workshop by explaining to us where the ingredients for his products are sourced from, and some of the benefits of the different essential oils such as anti-oxidizing properties or those that can help you to sleep better!
Various essential oils on display
Theo started off the workshop by explaining to us where the ingredients for his products are sourced from, and some of the benefits of the different essential oils such as anti-oxidizing properties or those that can help you to sleep better!
The process first begins with customizing our moisturizer with a preferred scent using a combination of essential oils like ylang ylang, lavender, mint and rose. No more than 10 drops of essential oil should be used and they we were given a metal circular container to put them in.
Subsequently, Theo scooped a premade mix of jojoba, extra virgin coconut oil, aloe vera and glycerin which is the base for the moisturizer.
The moisturiser base is kept in the steel pot to ensure that it remains warm
Following that, we mixed the essential oils and the base with a glass rod while it was still warm to make sure that the essential oils would be fully blended together with the base before it solidifies.
Lastly, let we let the mixture cool and popped the lid on.
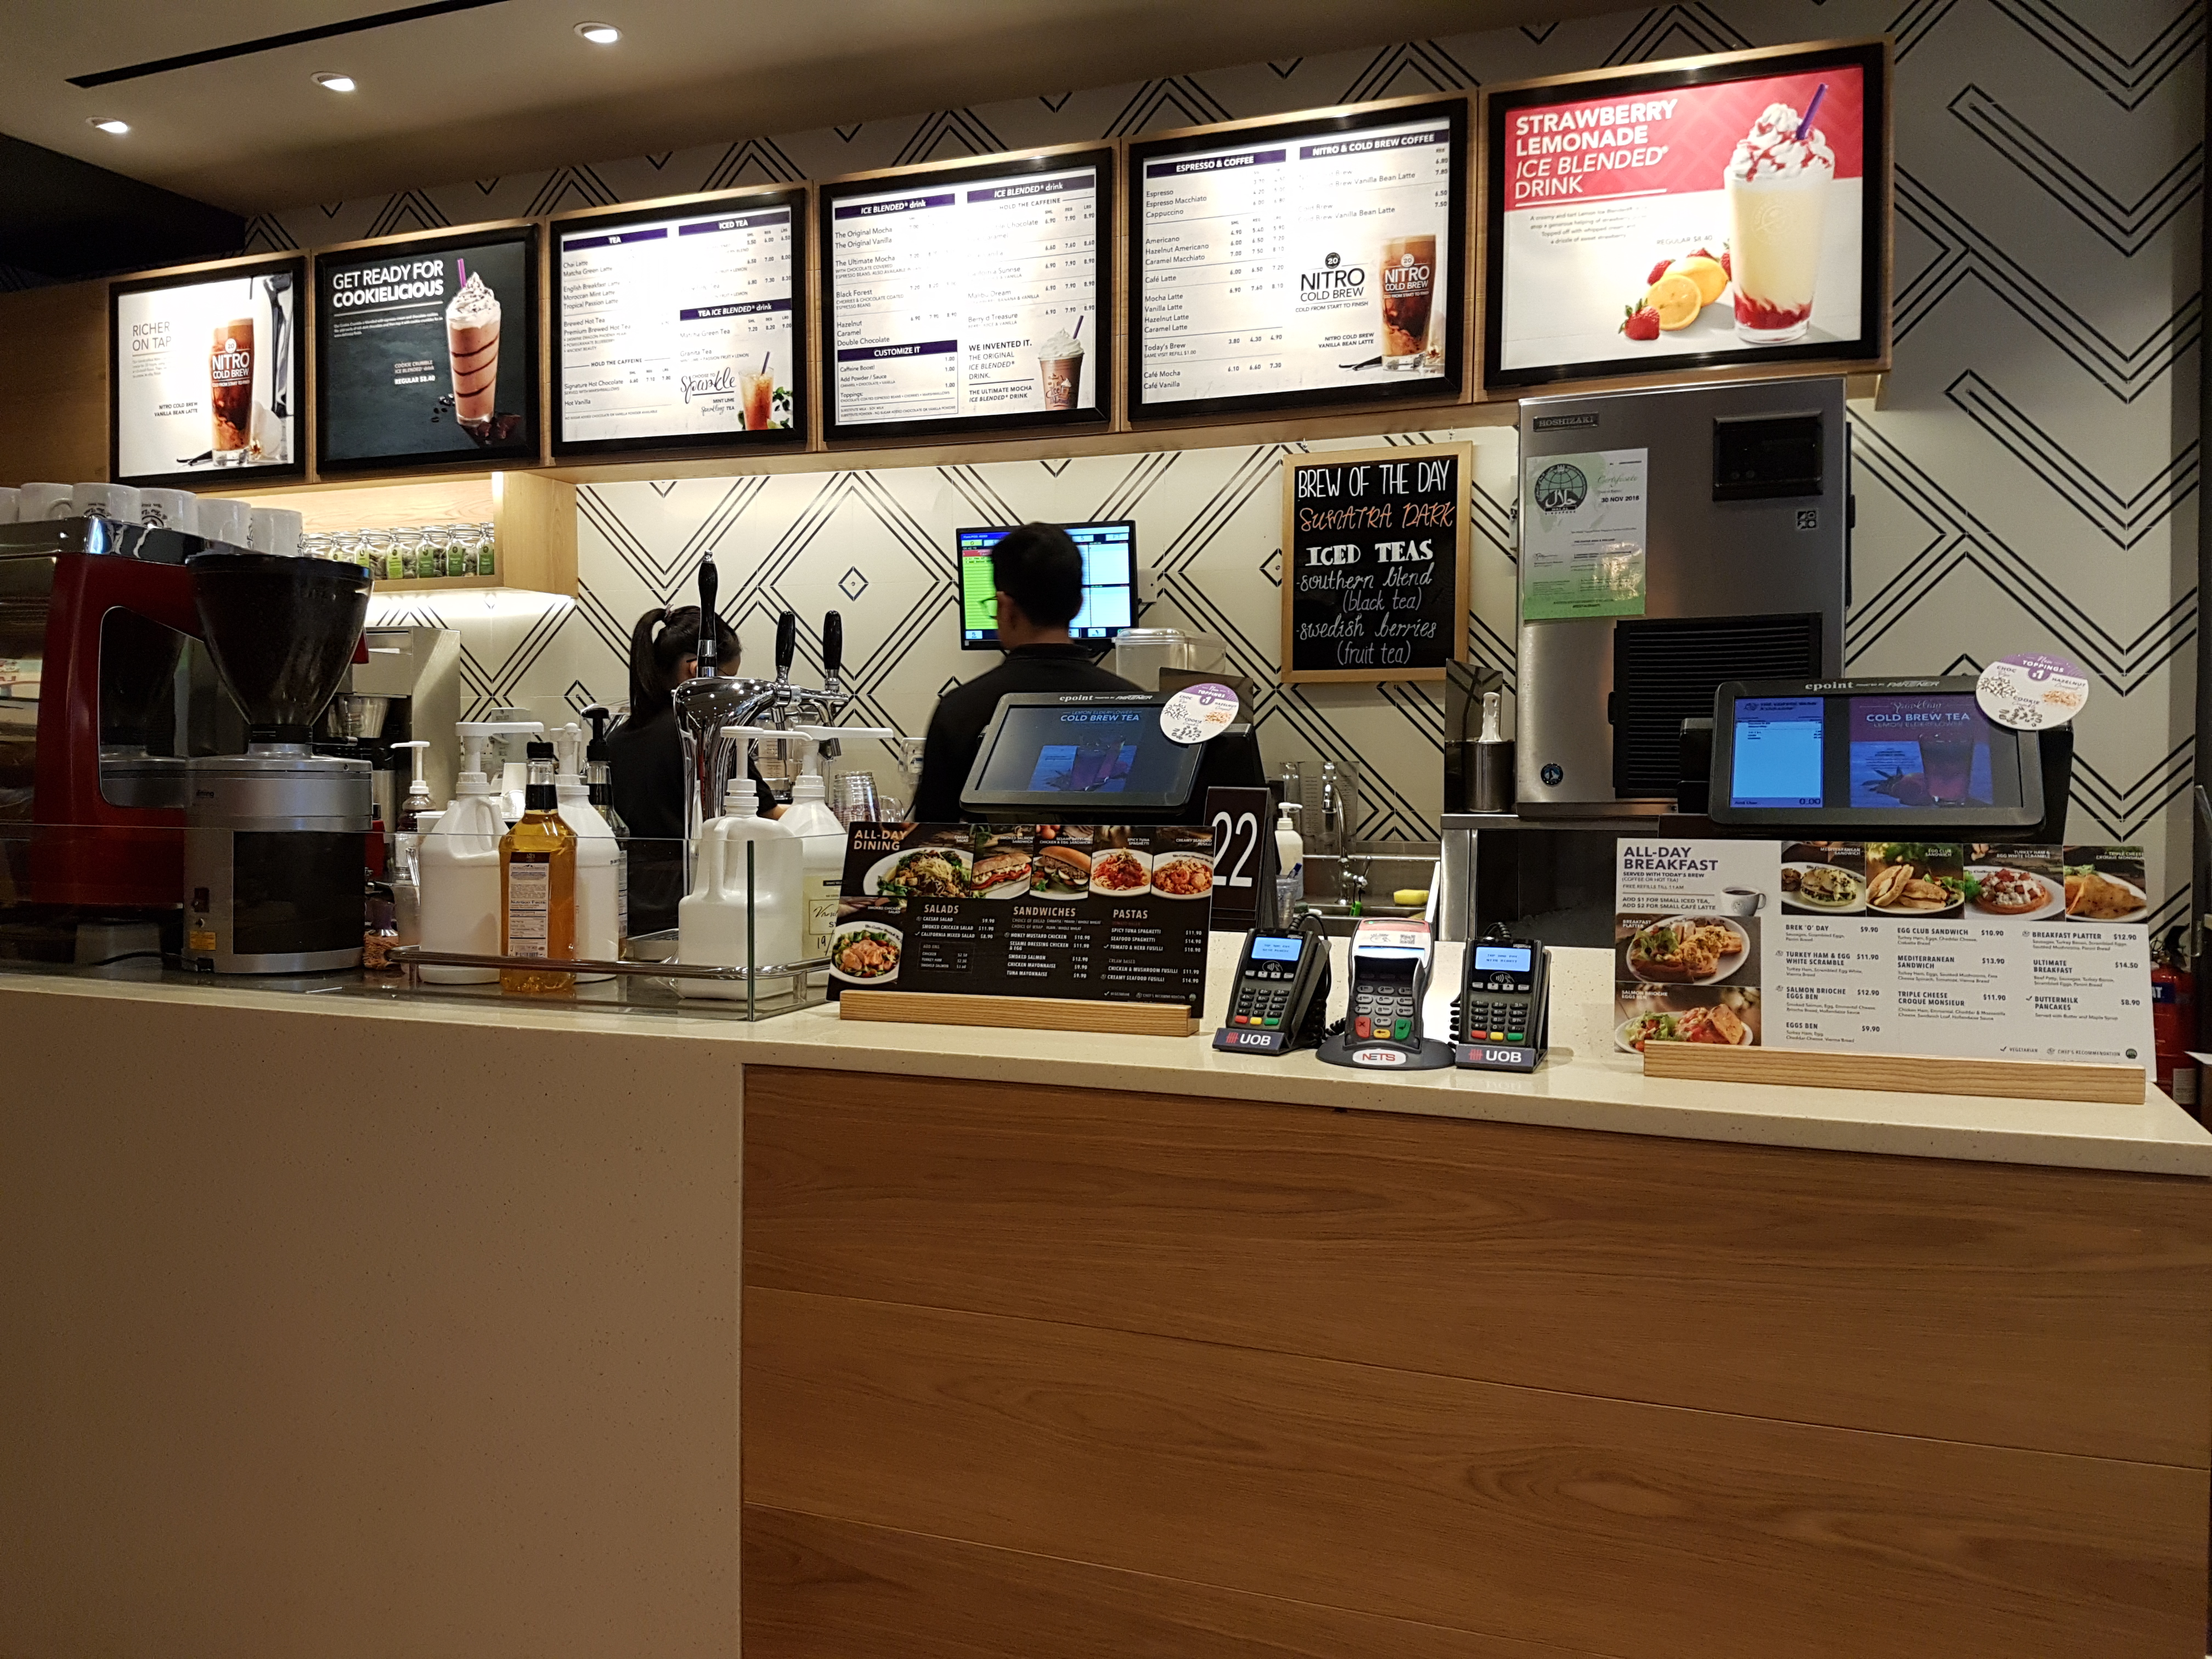
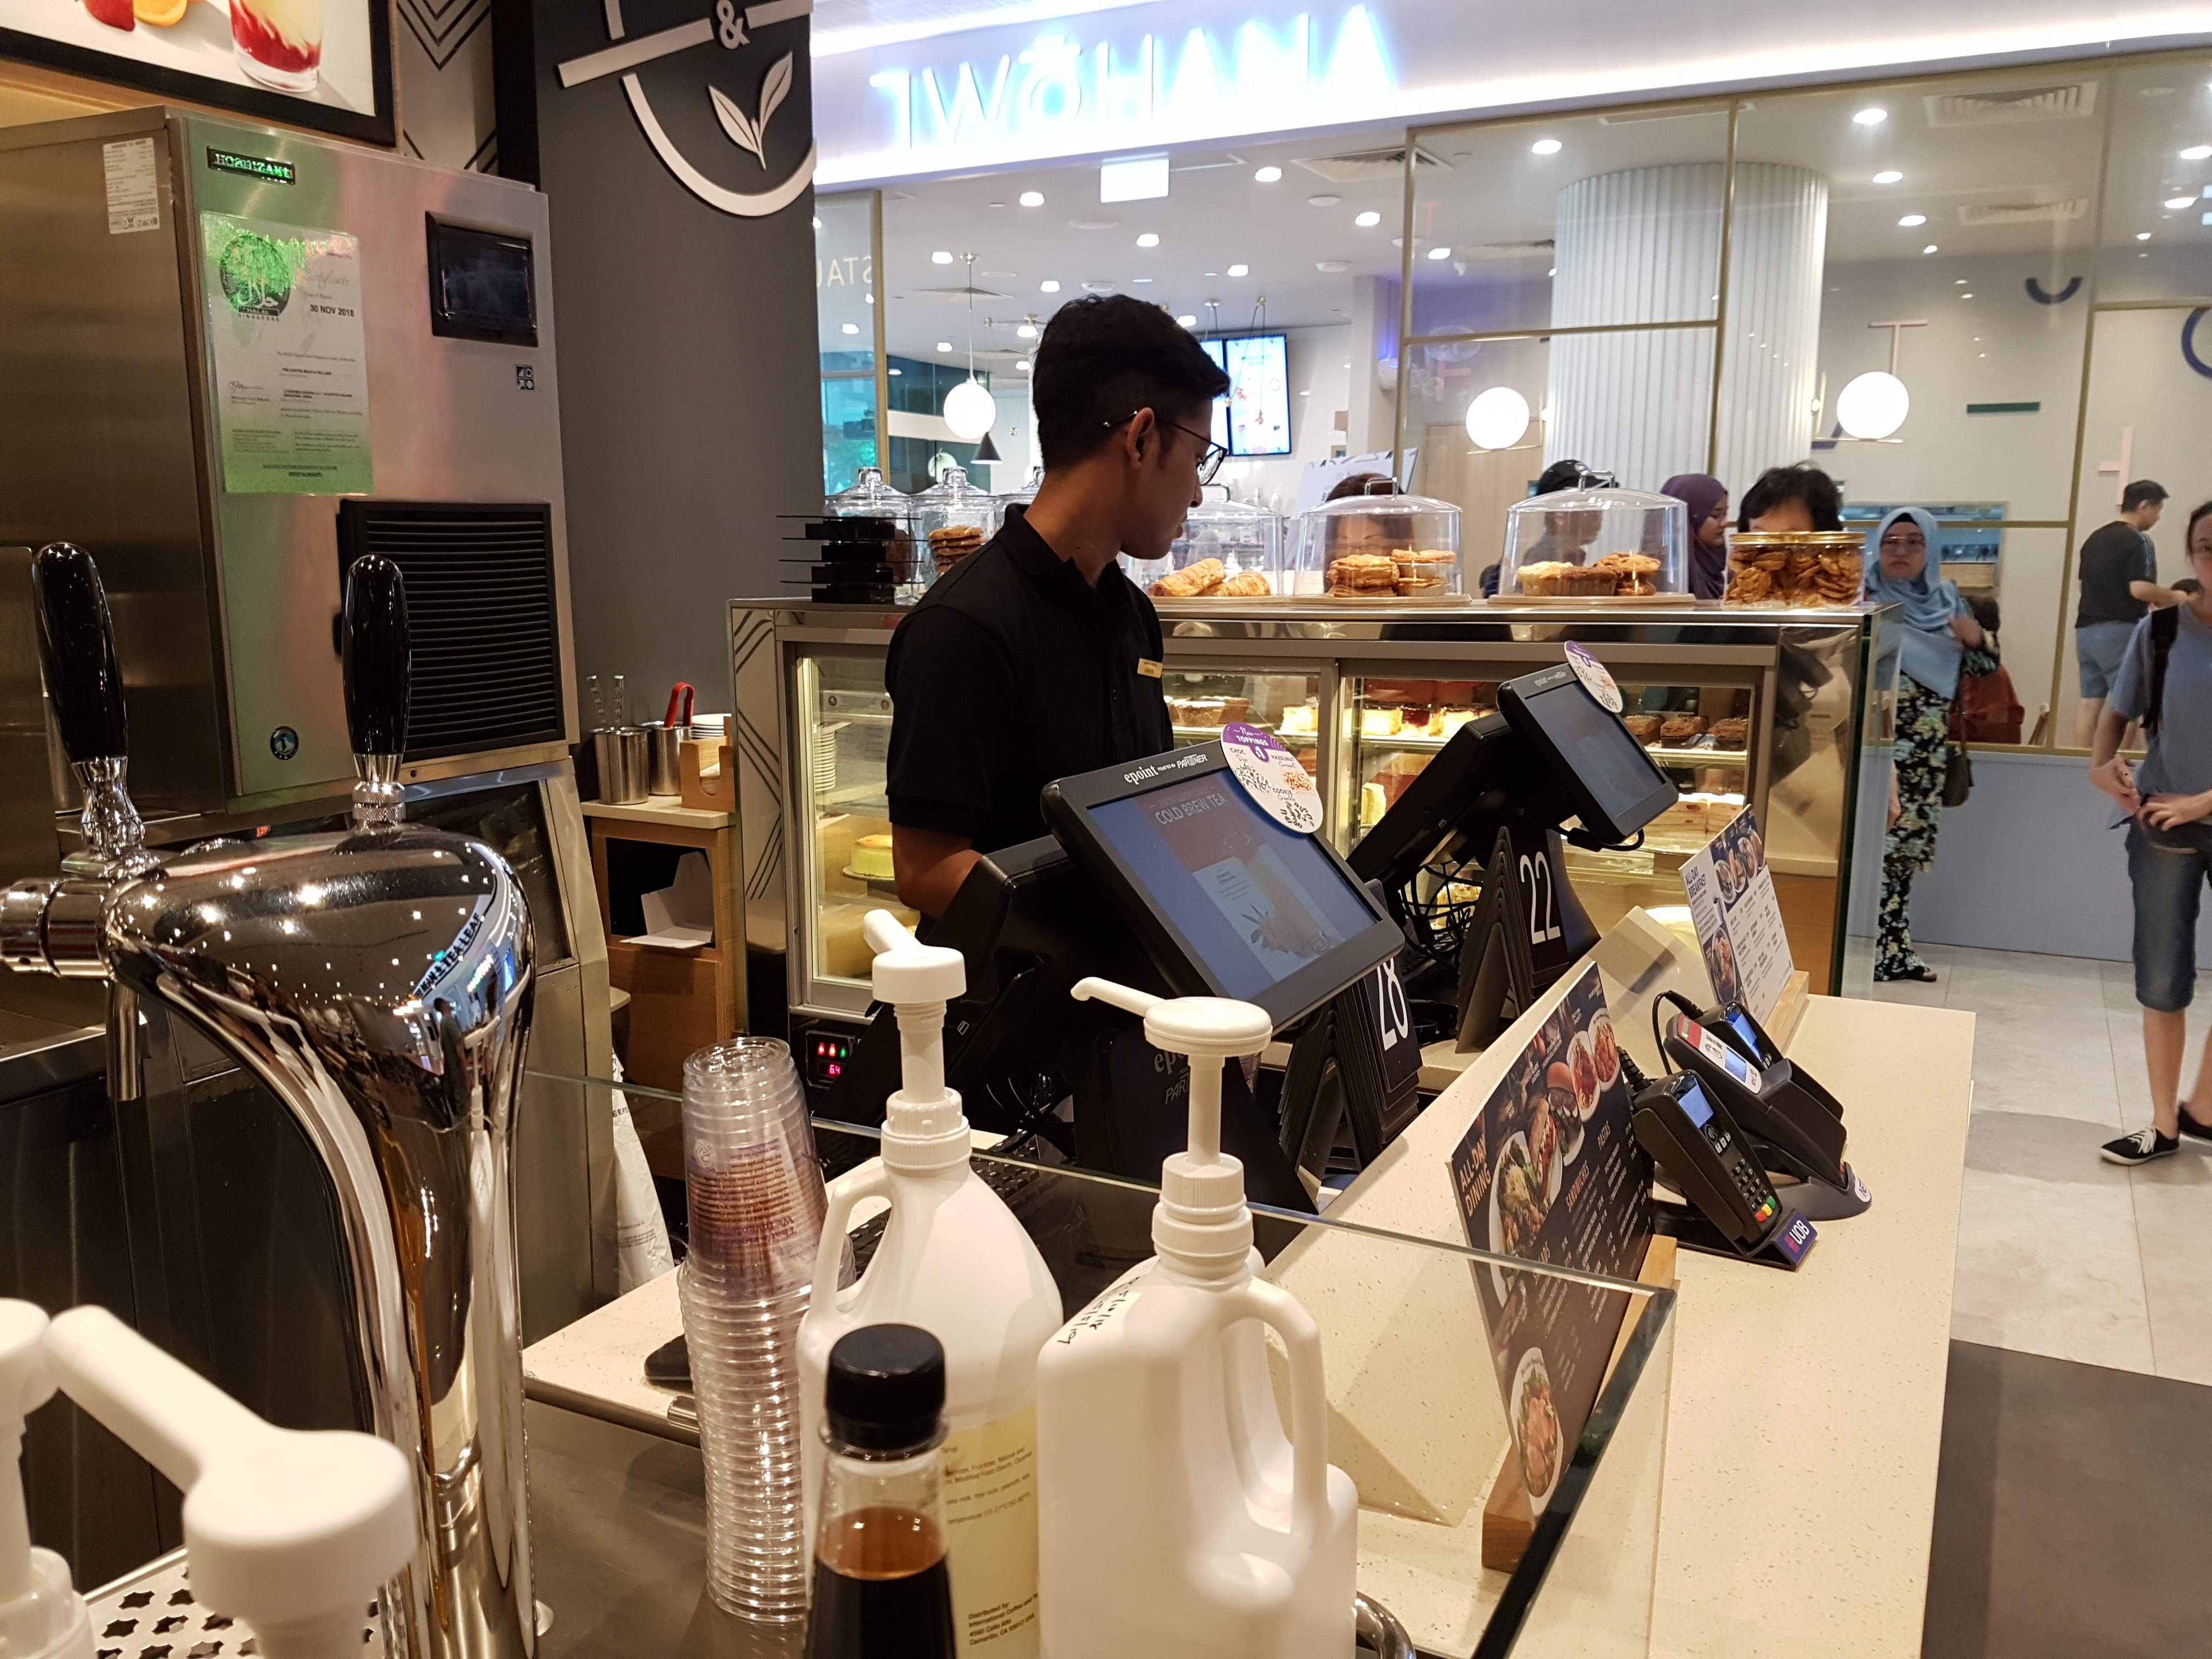
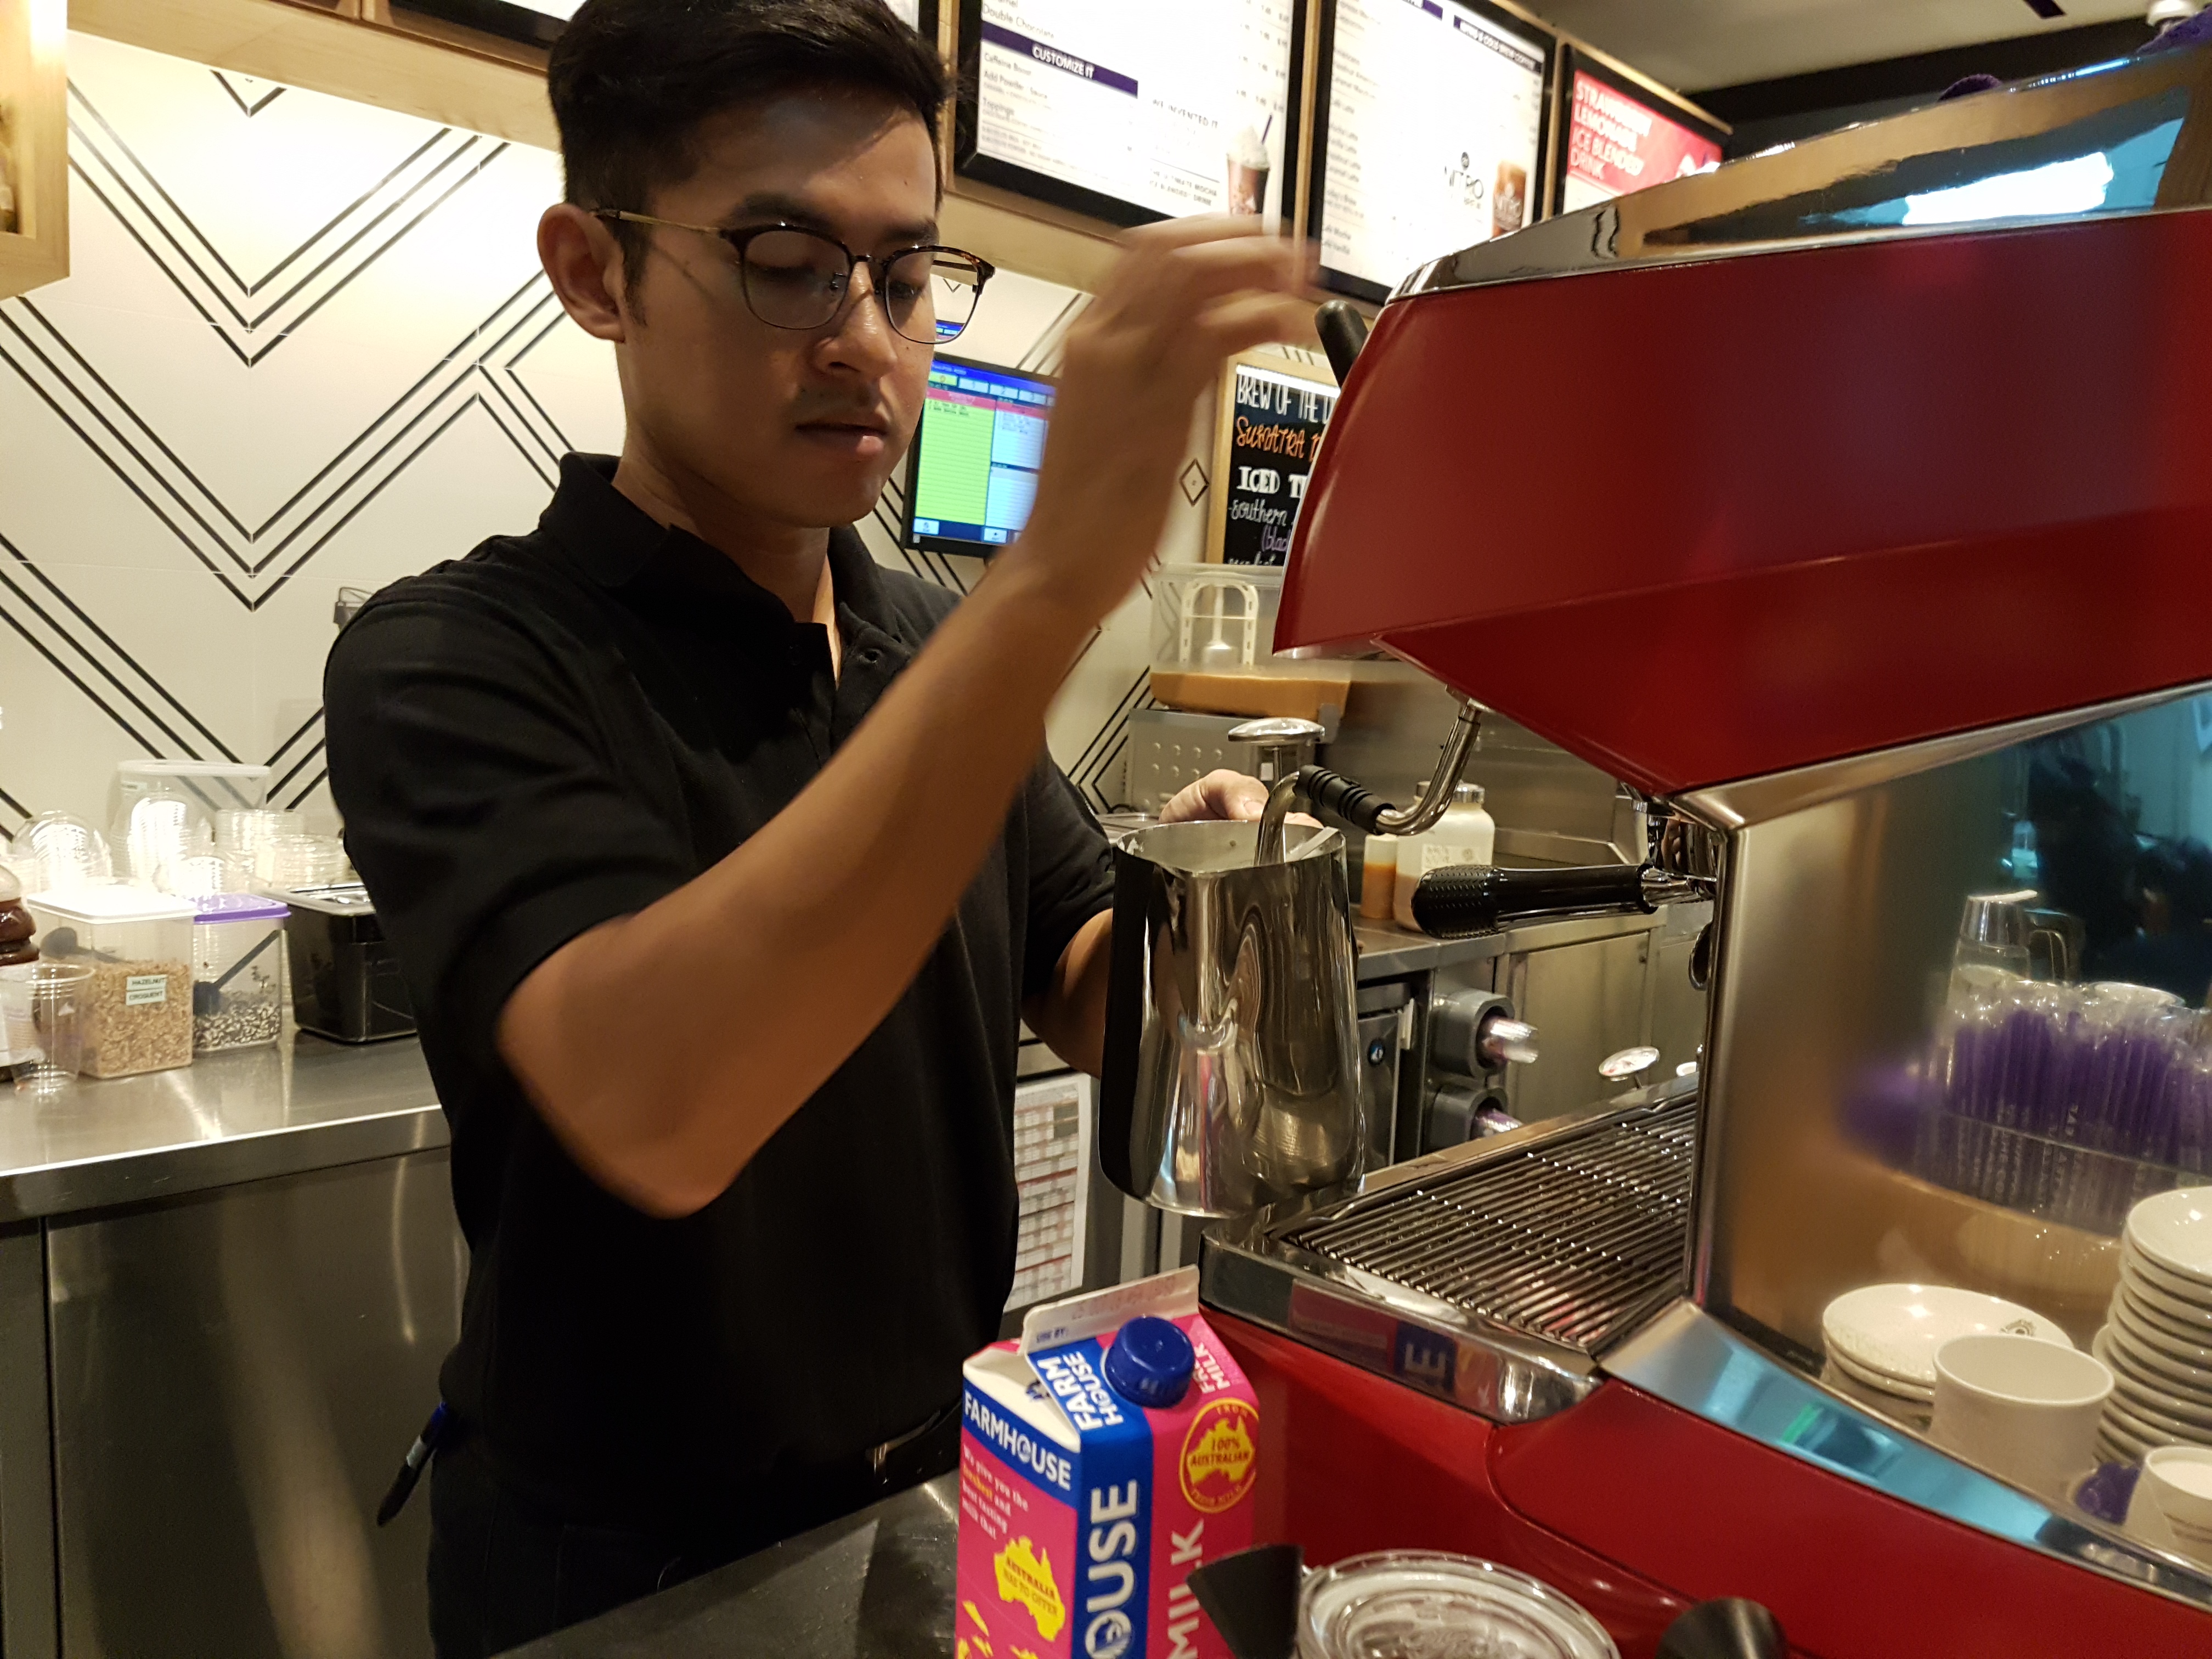
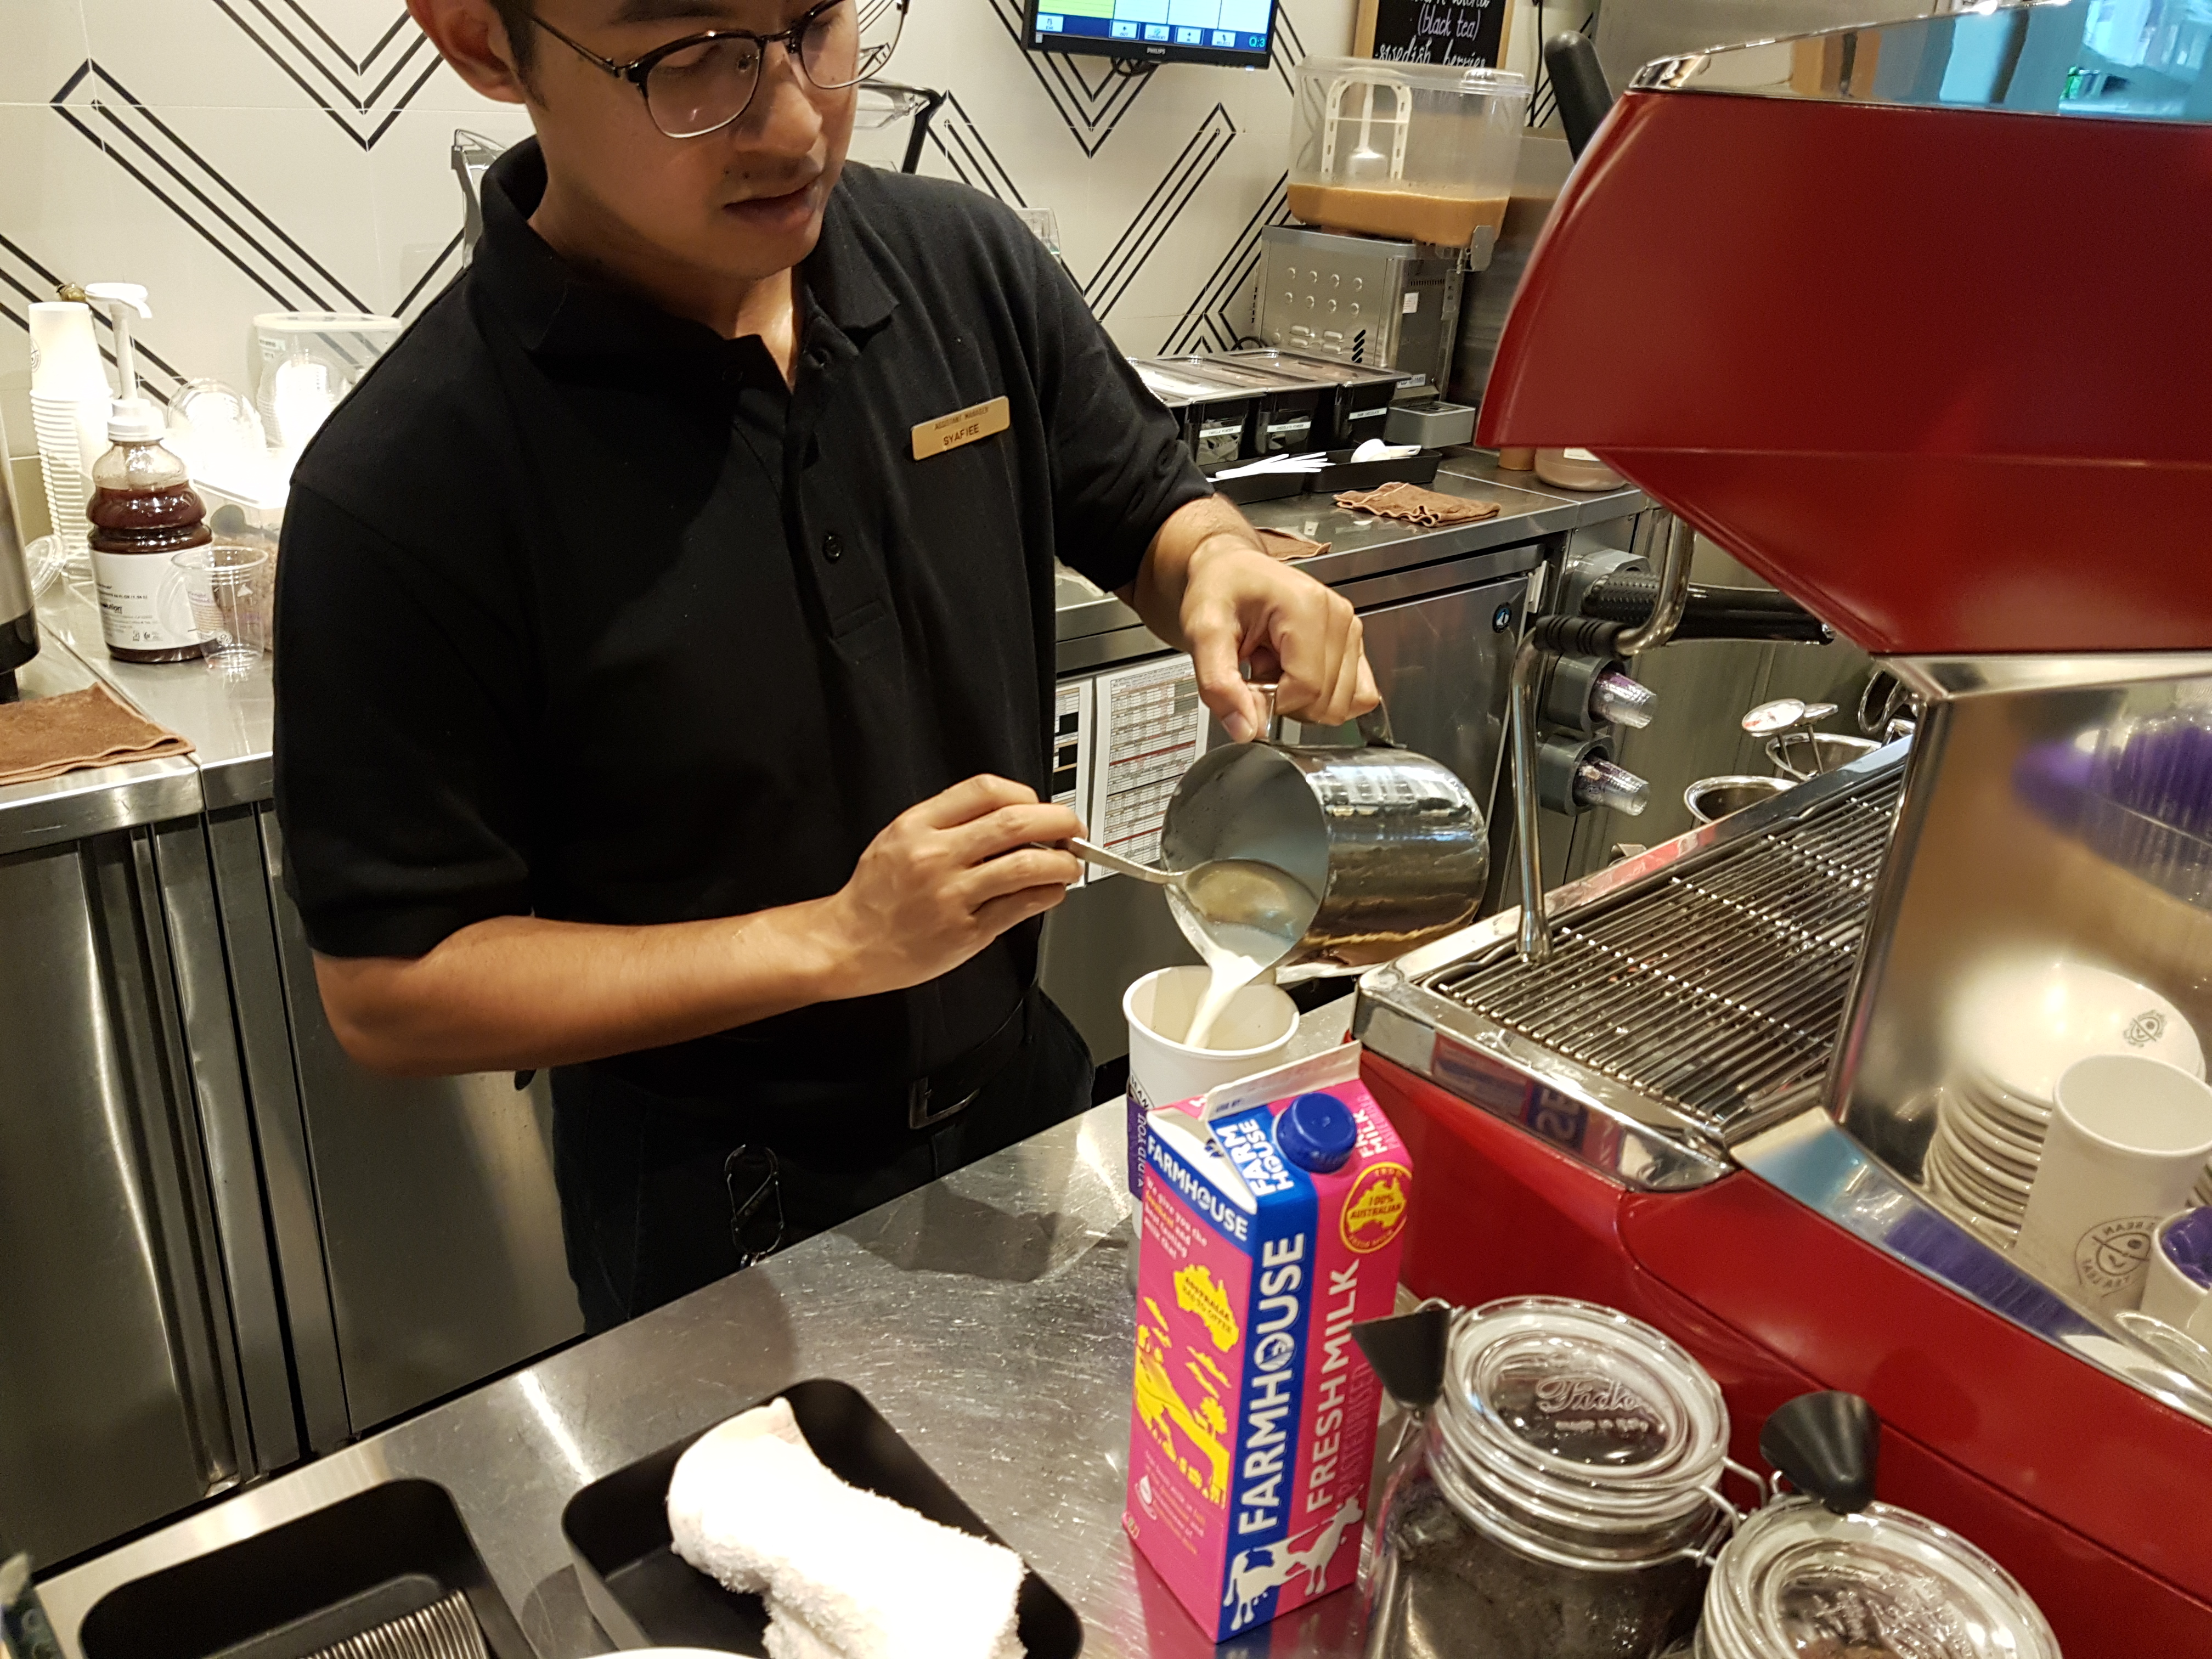
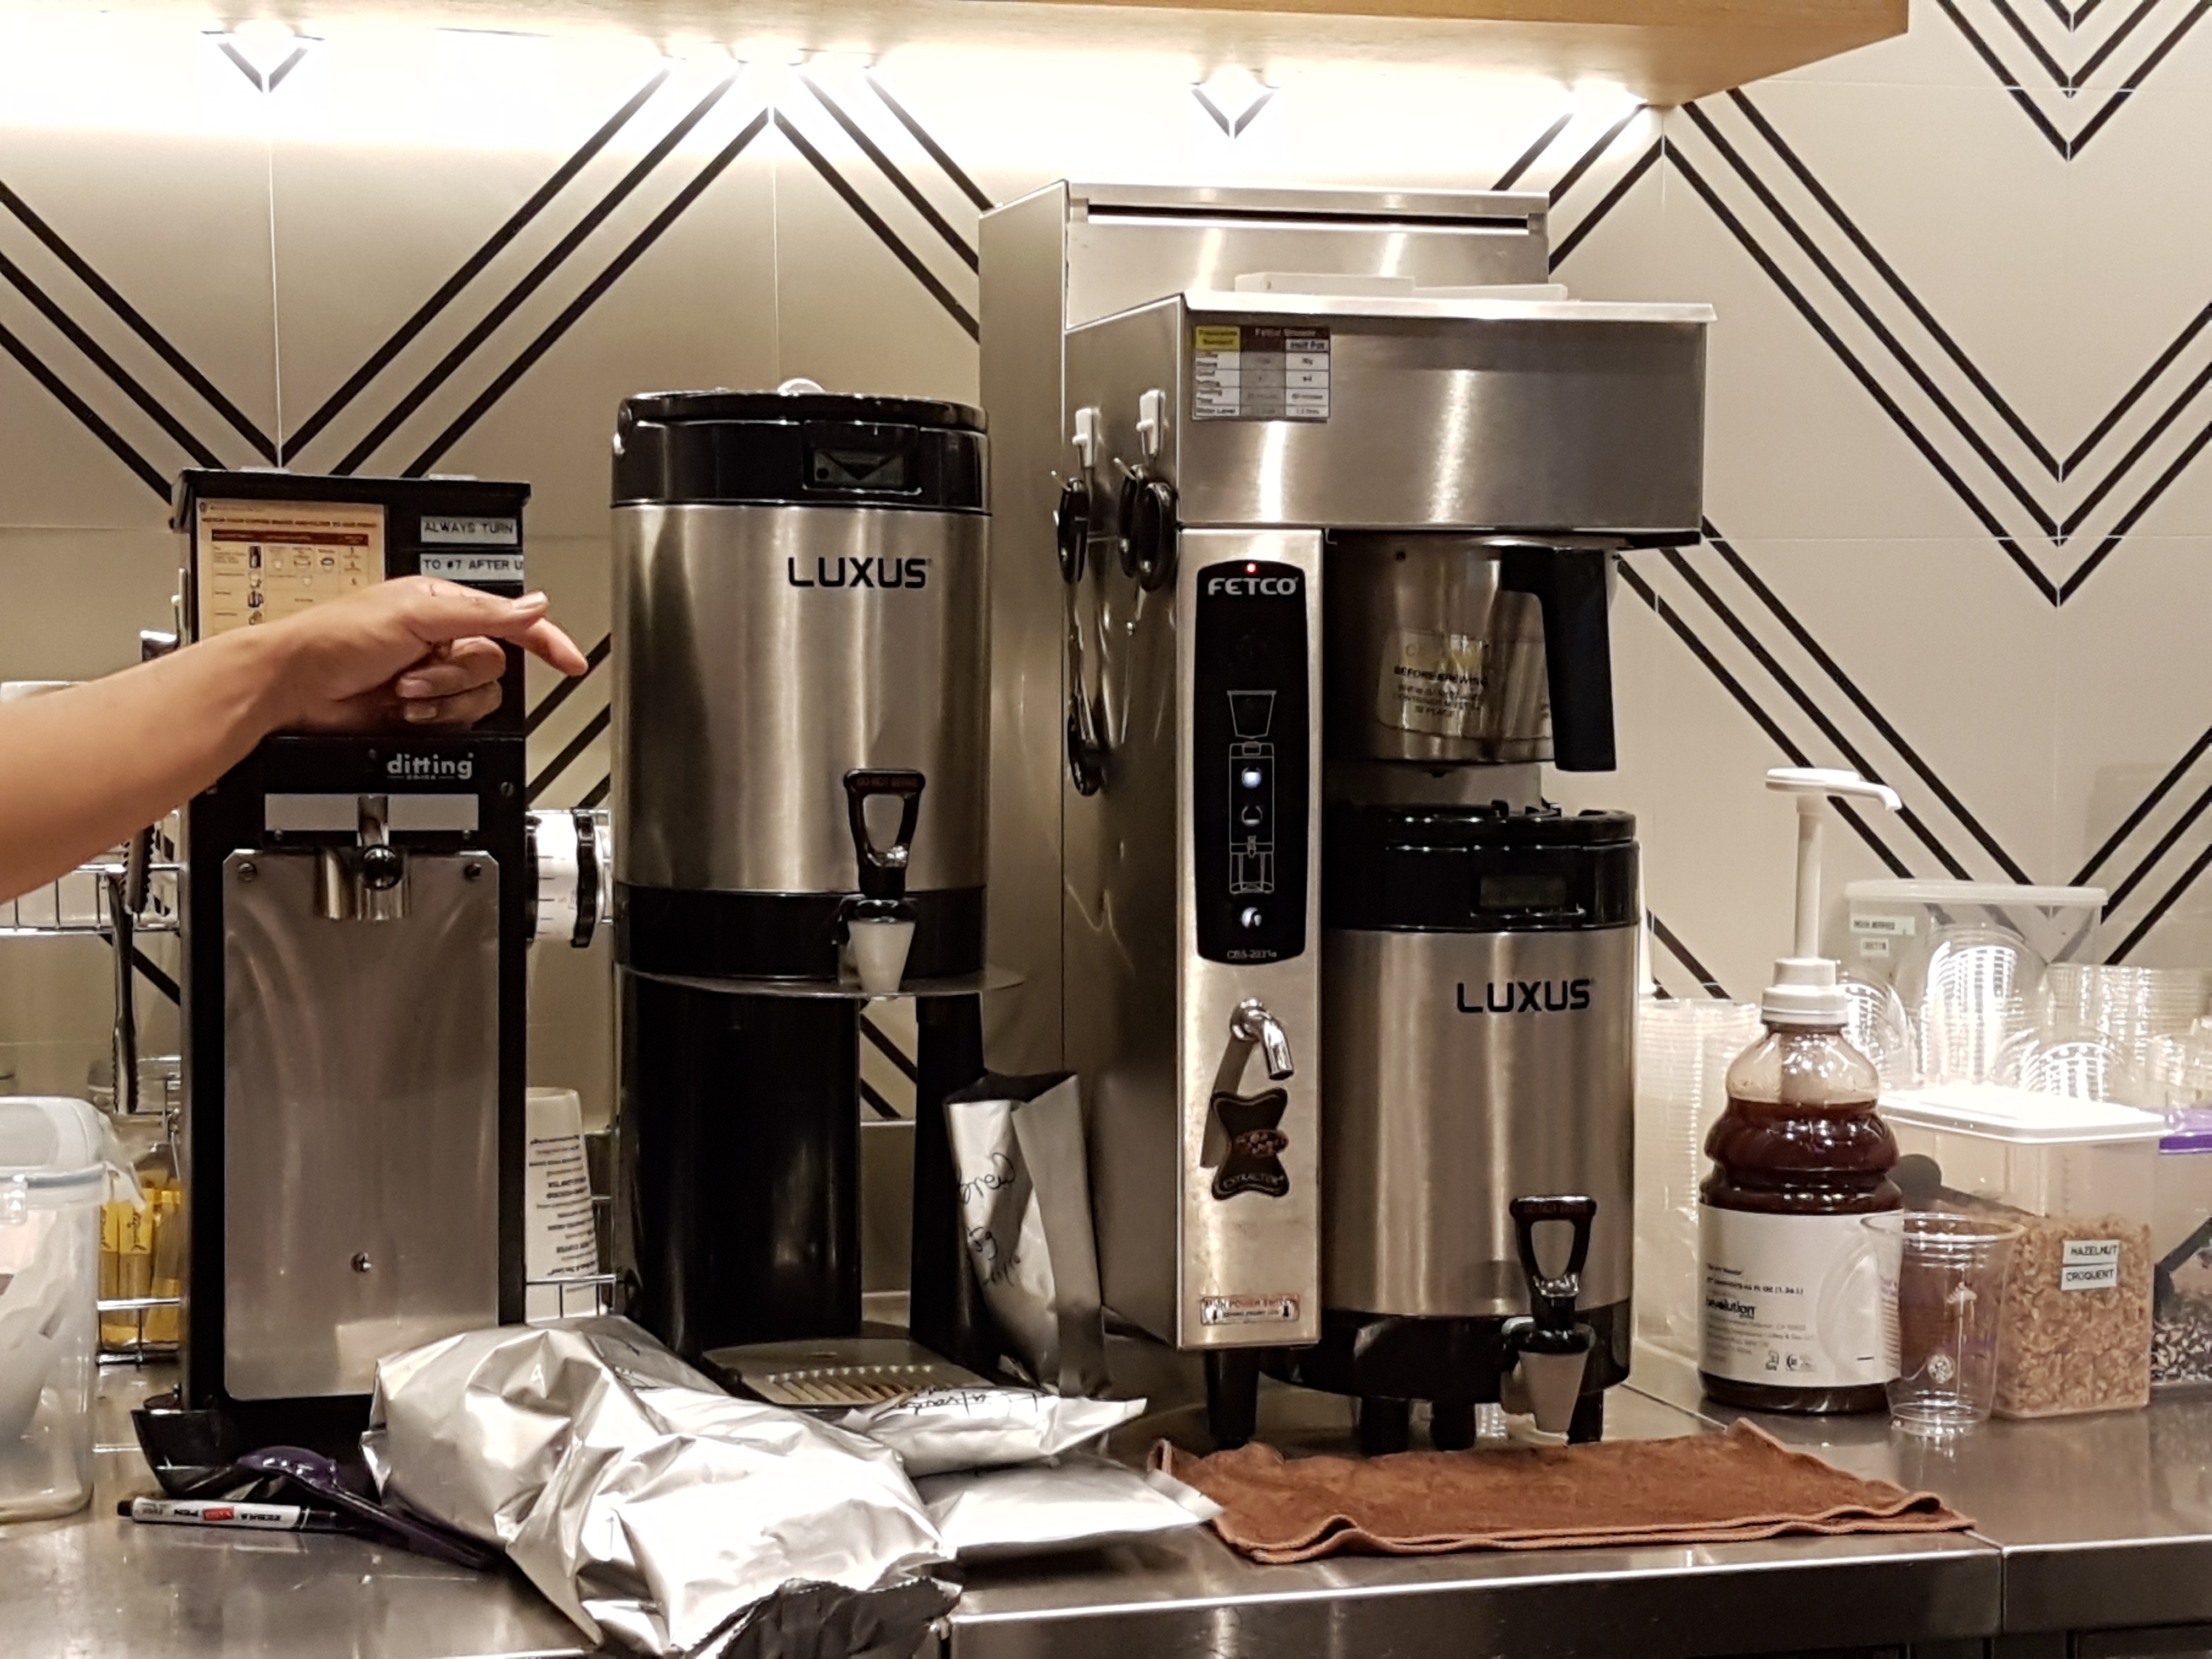
My friend works as a barista at Coffee Bean & Tea Leaf. He’s been working there for about a little over than a year. Throughout the whole process, I learnt quite a couple of things about how CBTL makes their drinks, which I will address later in this post 😉
Tools Used
Cashier counter
Coffee grinder
Espresso/ EB machine
Blender
Utensils and “Jug” to make drinks
The whole process starts of course, at the cashier, where customers order their drinks/ food and make payment.
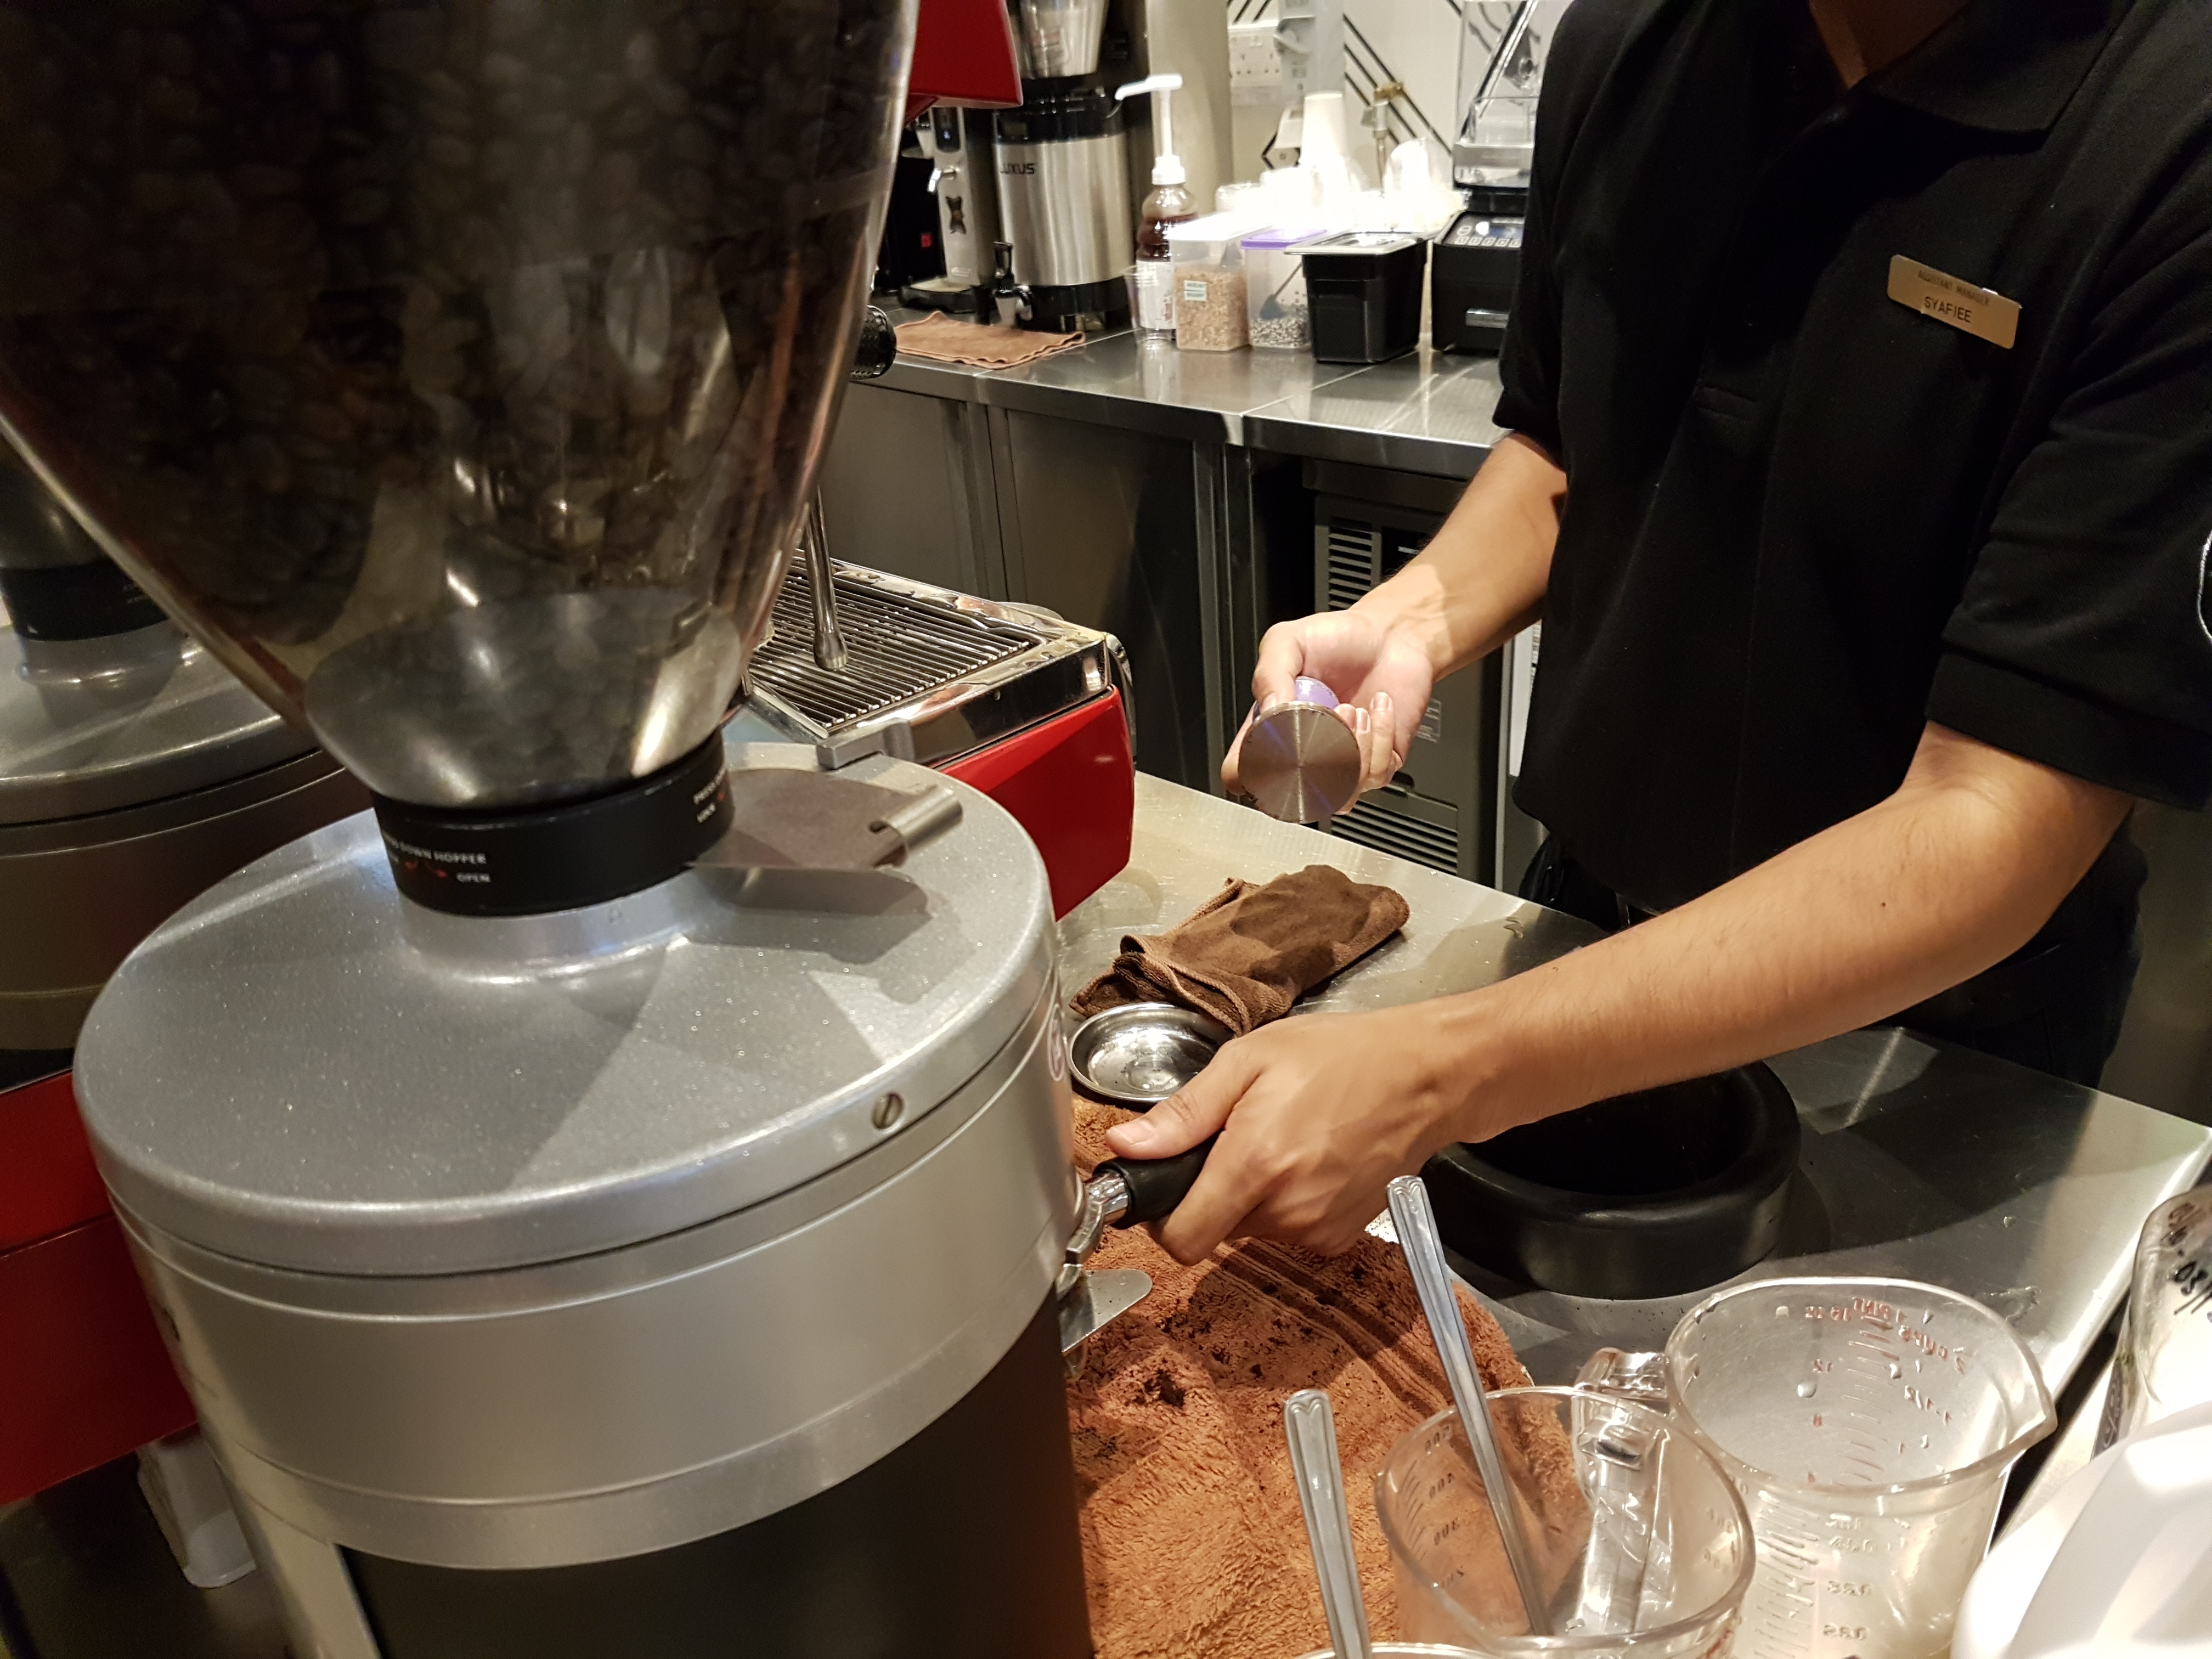
He then proceeds to the coffee grinder machine, where the machine grinds coffee on the spot and the barista has to manually press the coffee. This is one of the things that I learnt – CBTL grinds coffee on the spot, while Starbucks has their coffee already pre-grinded. Pretty interesting, if you ask me.
Coffee grinder. Coffee dispensed is pressed manually with the thing he’s holding on his right hand
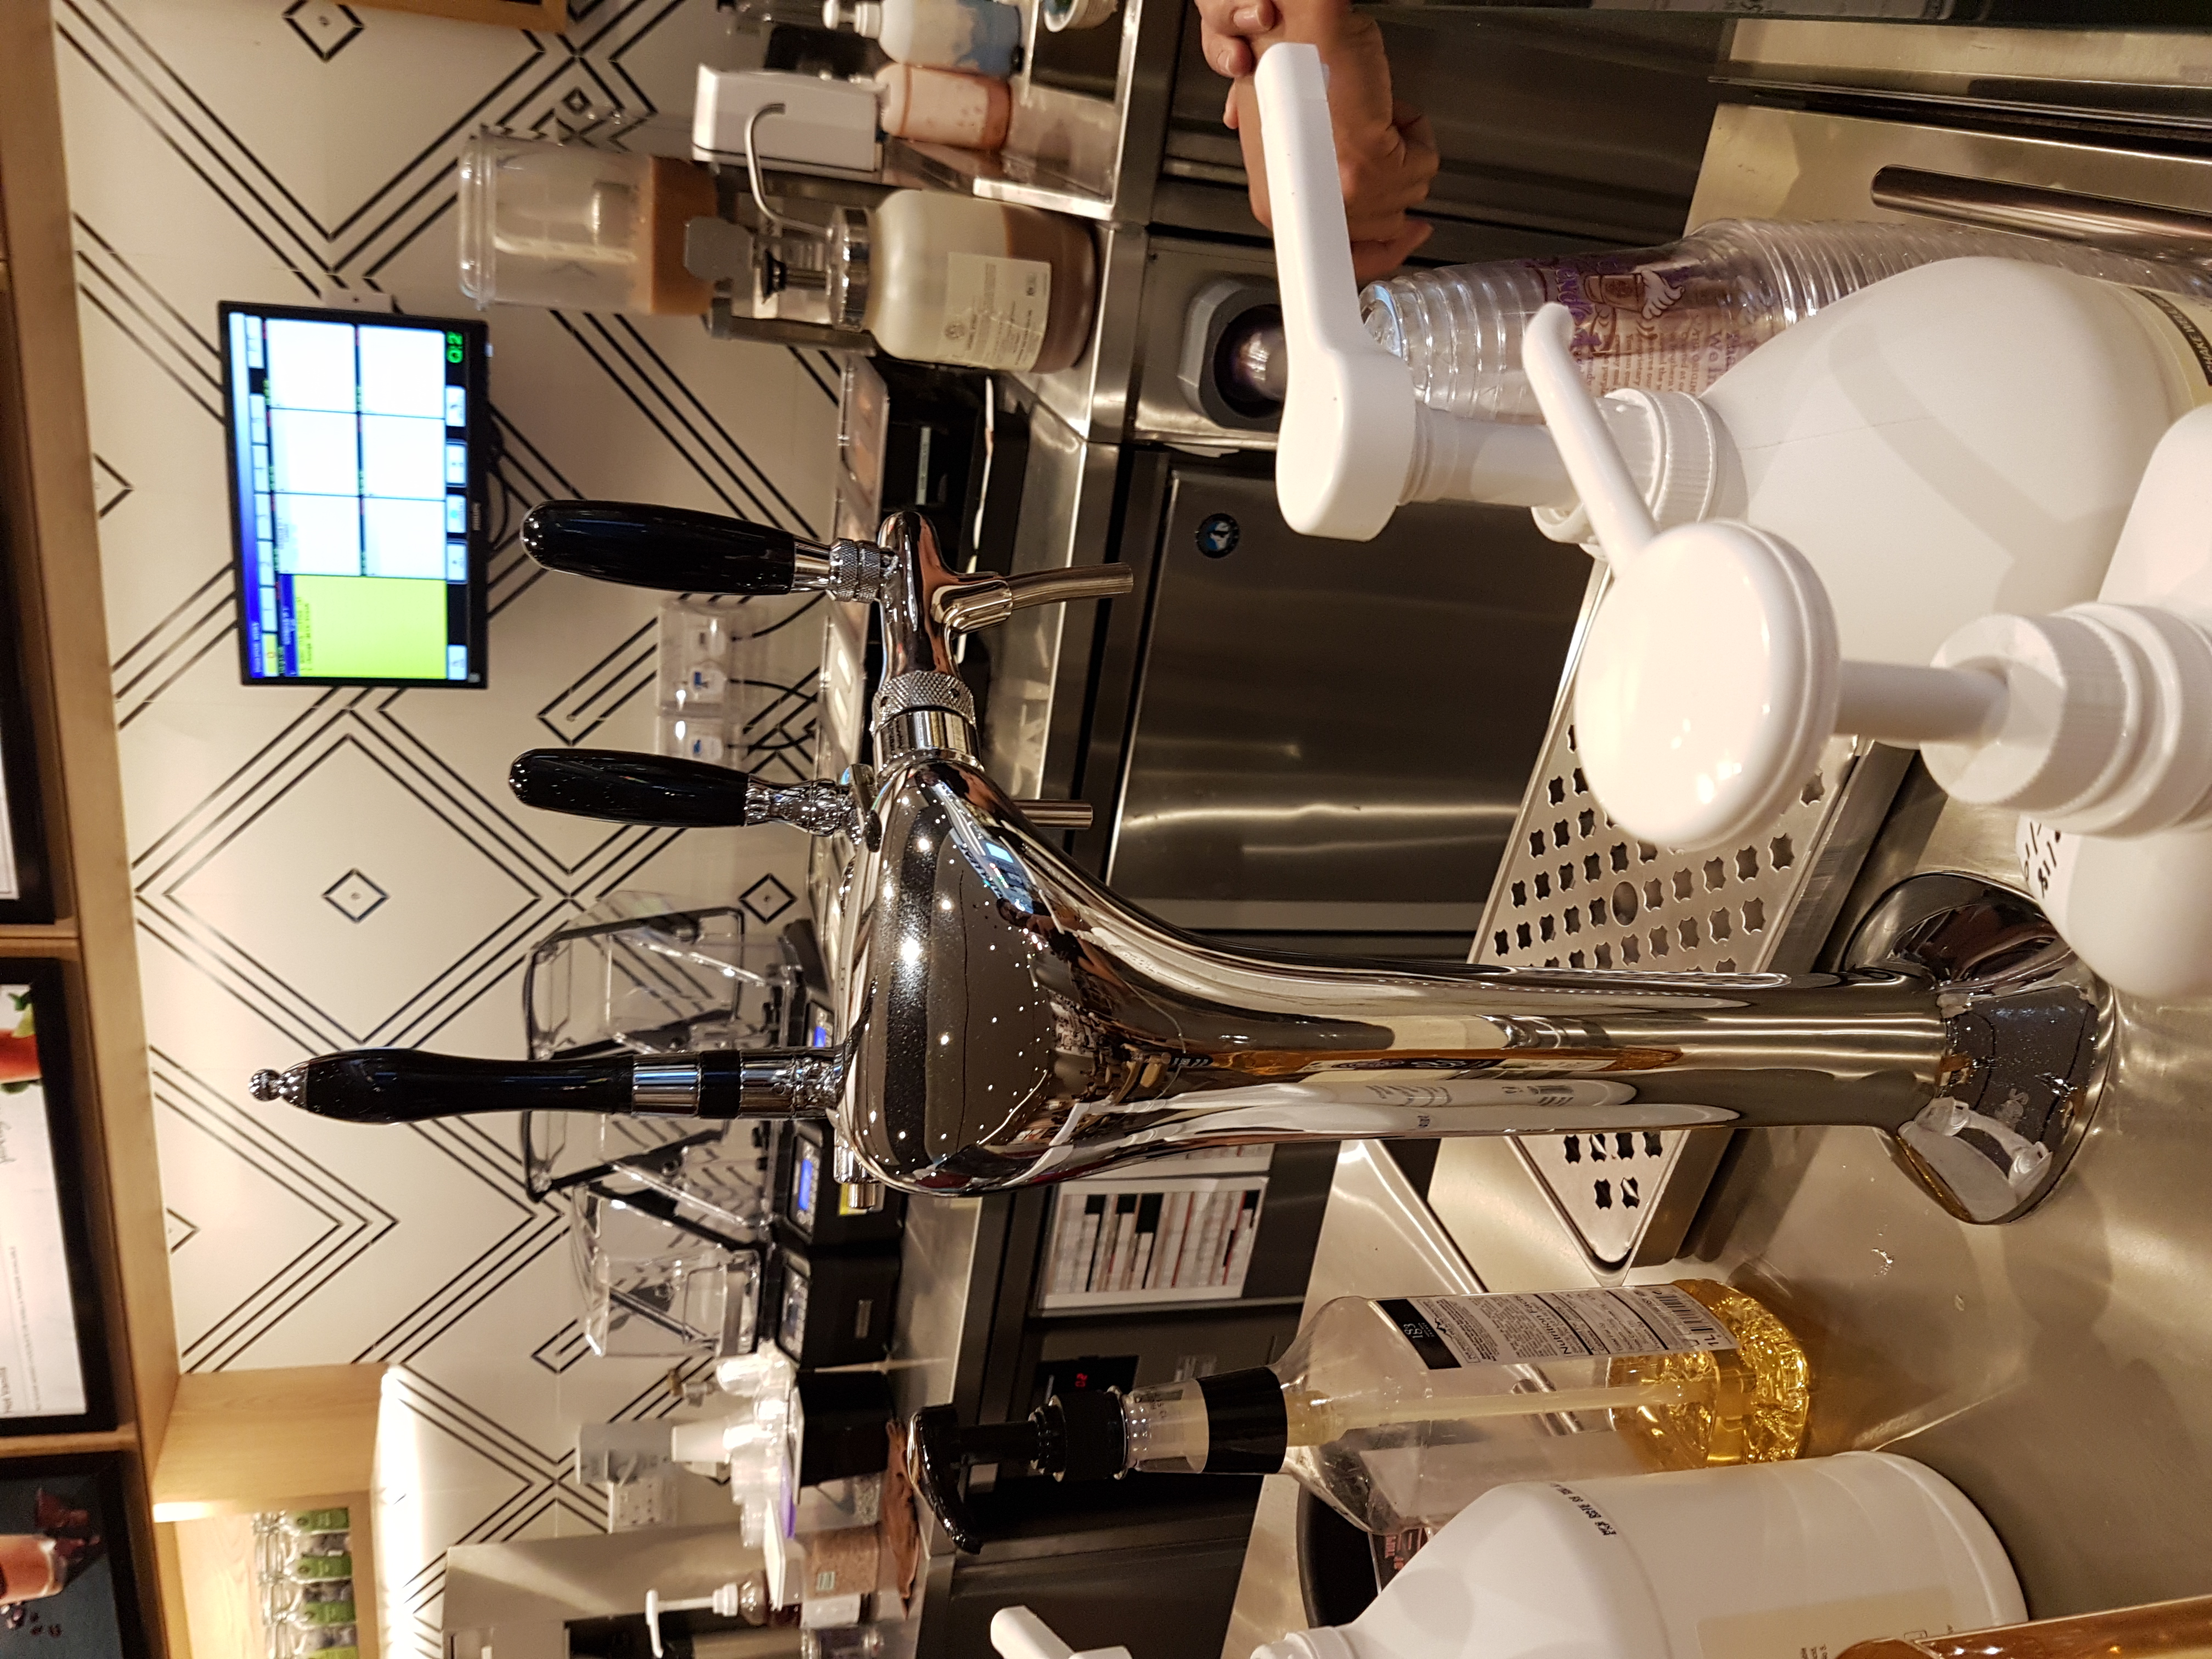
Then he moves on to the big red machine, which is called the Espresso Machine. What the machine does is to dispense hot water and to extract the coffee/ tea, and is used to specifically make espresso shots and tea lattes. A different machine is used for other types of coffees, which will be covered in a bit.
Another thing I learnt was that CBTL uses tea leaves for their flavourings and
Frothing milk
Pouring the milk out
And finally, when the drink is prepared, it is served on this counter here!
BONUS TOOLS!!!!
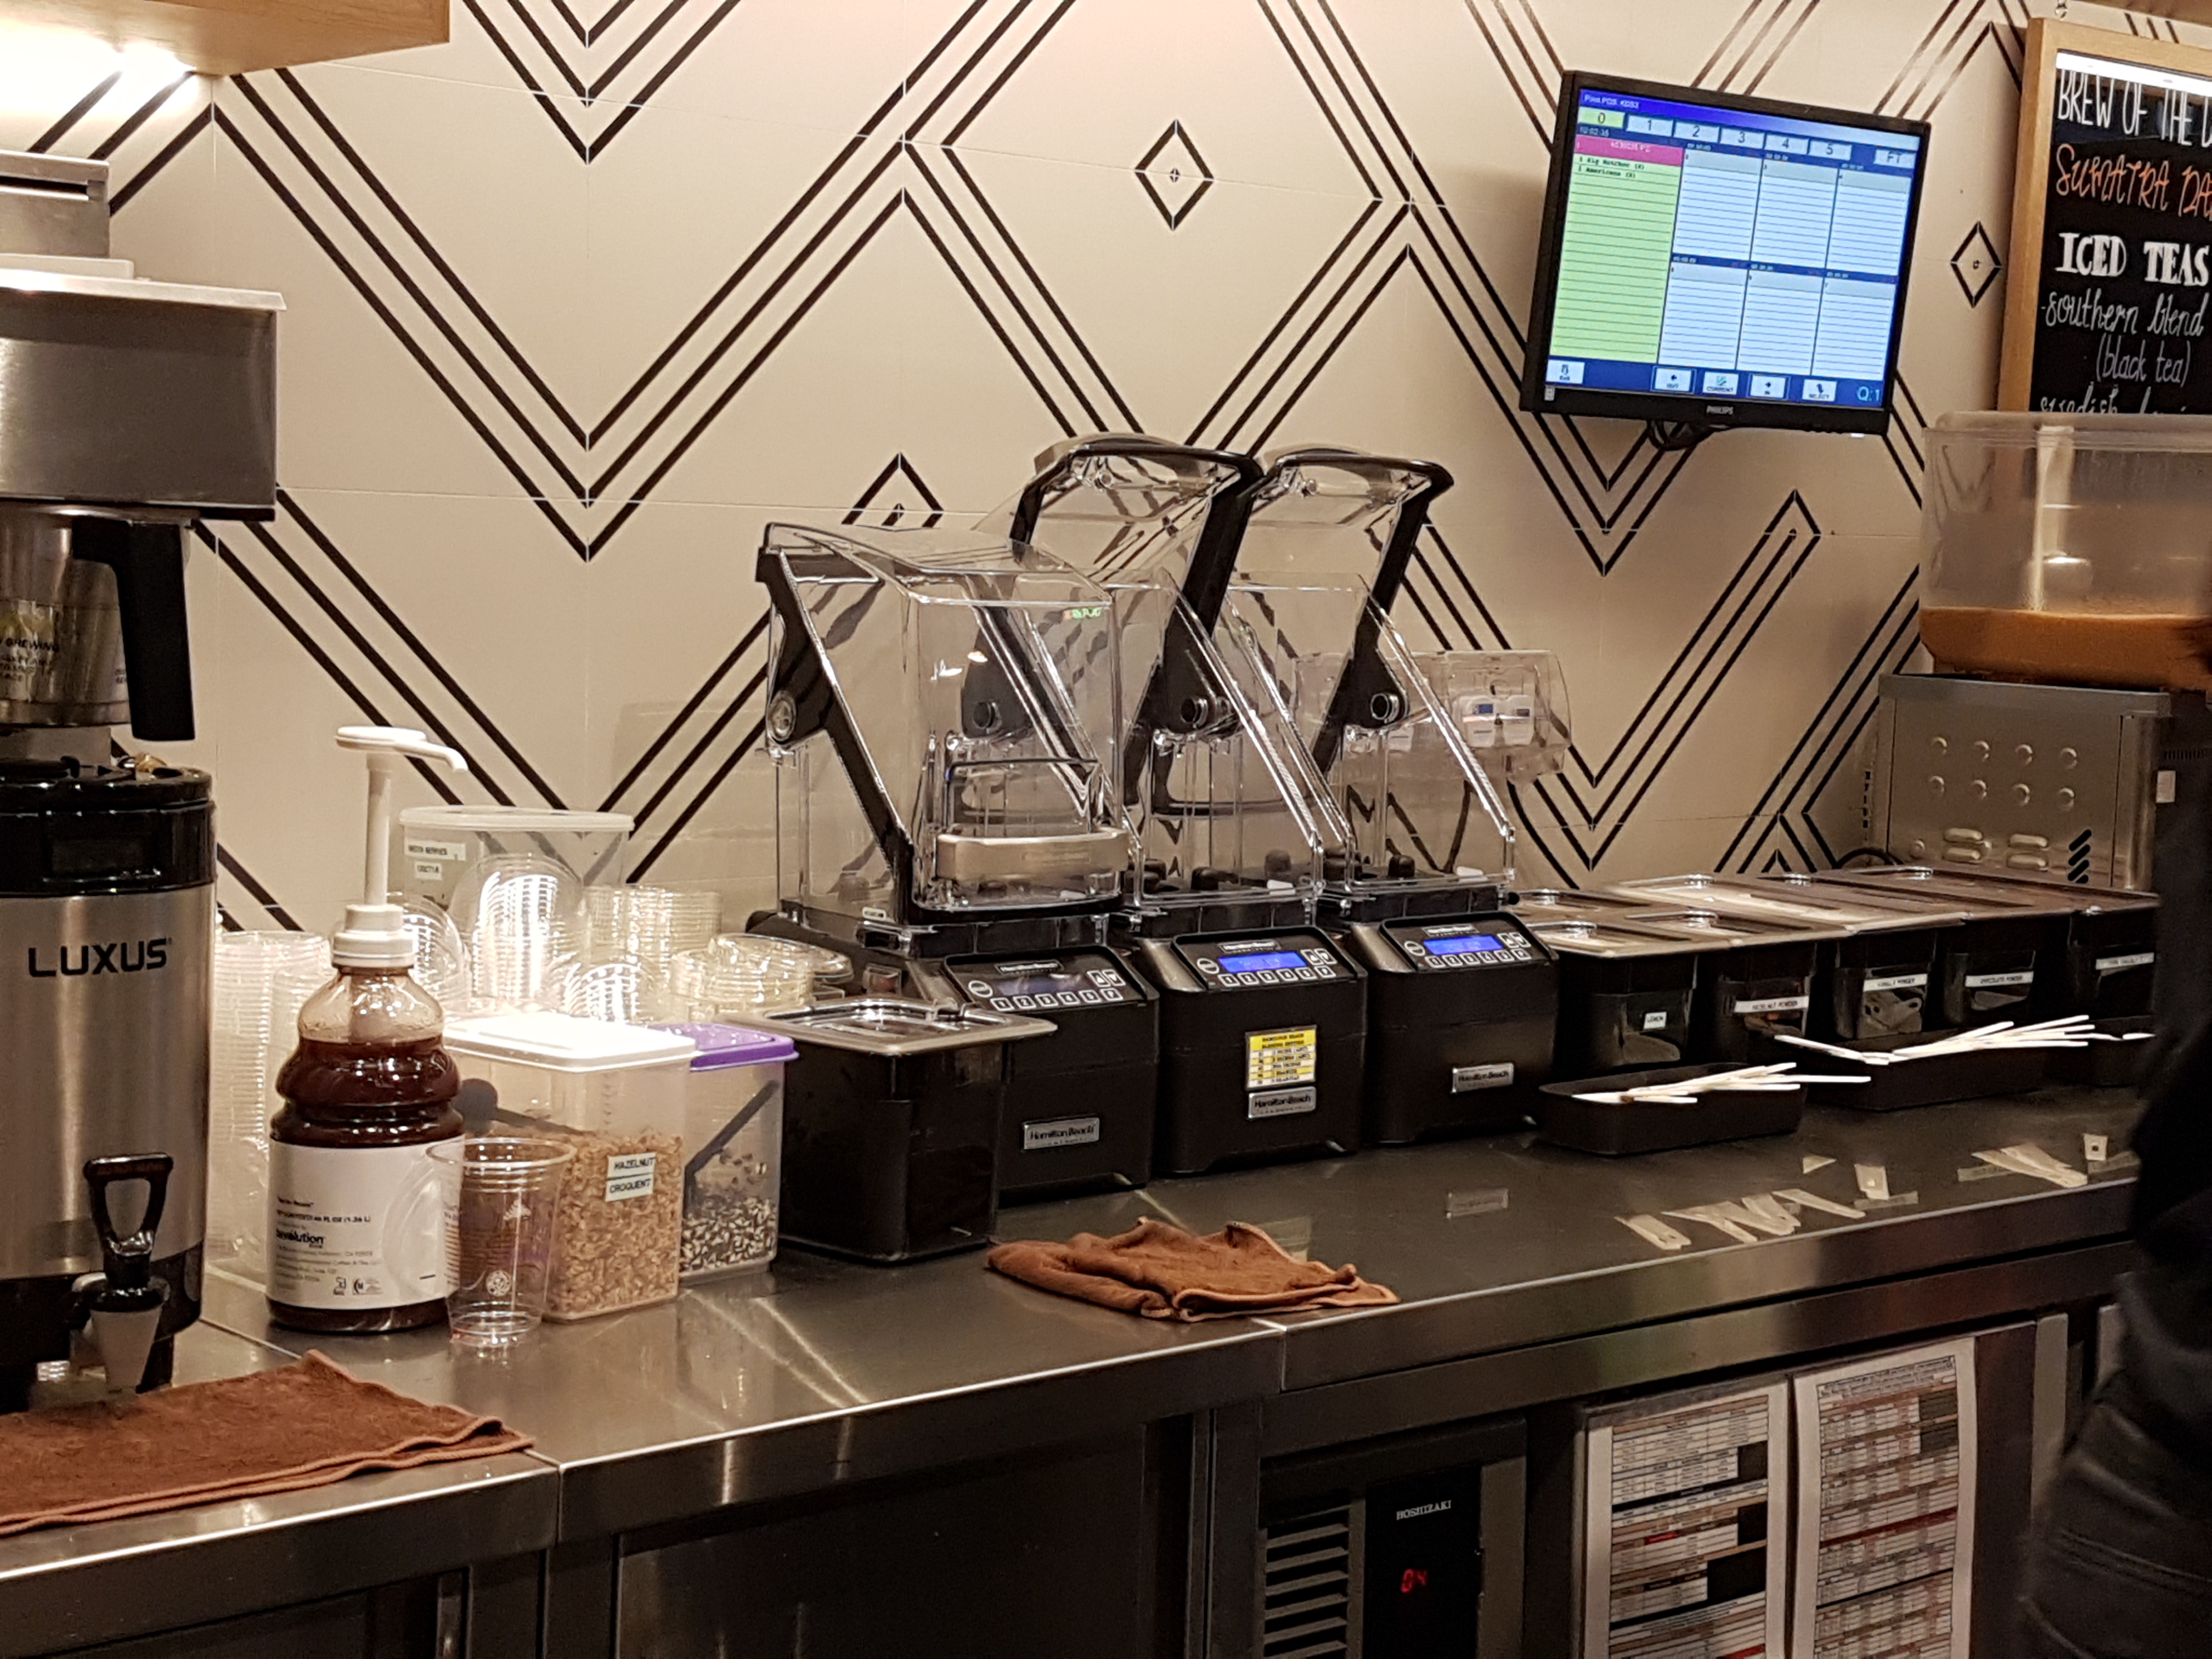
Blenders for Iced LattesCoffee machine for Brewed Coffee Machine for nitro cold brew coffee or carbonated tea (Someone help me with WordPress’ formatting PLZ)
Painpoints
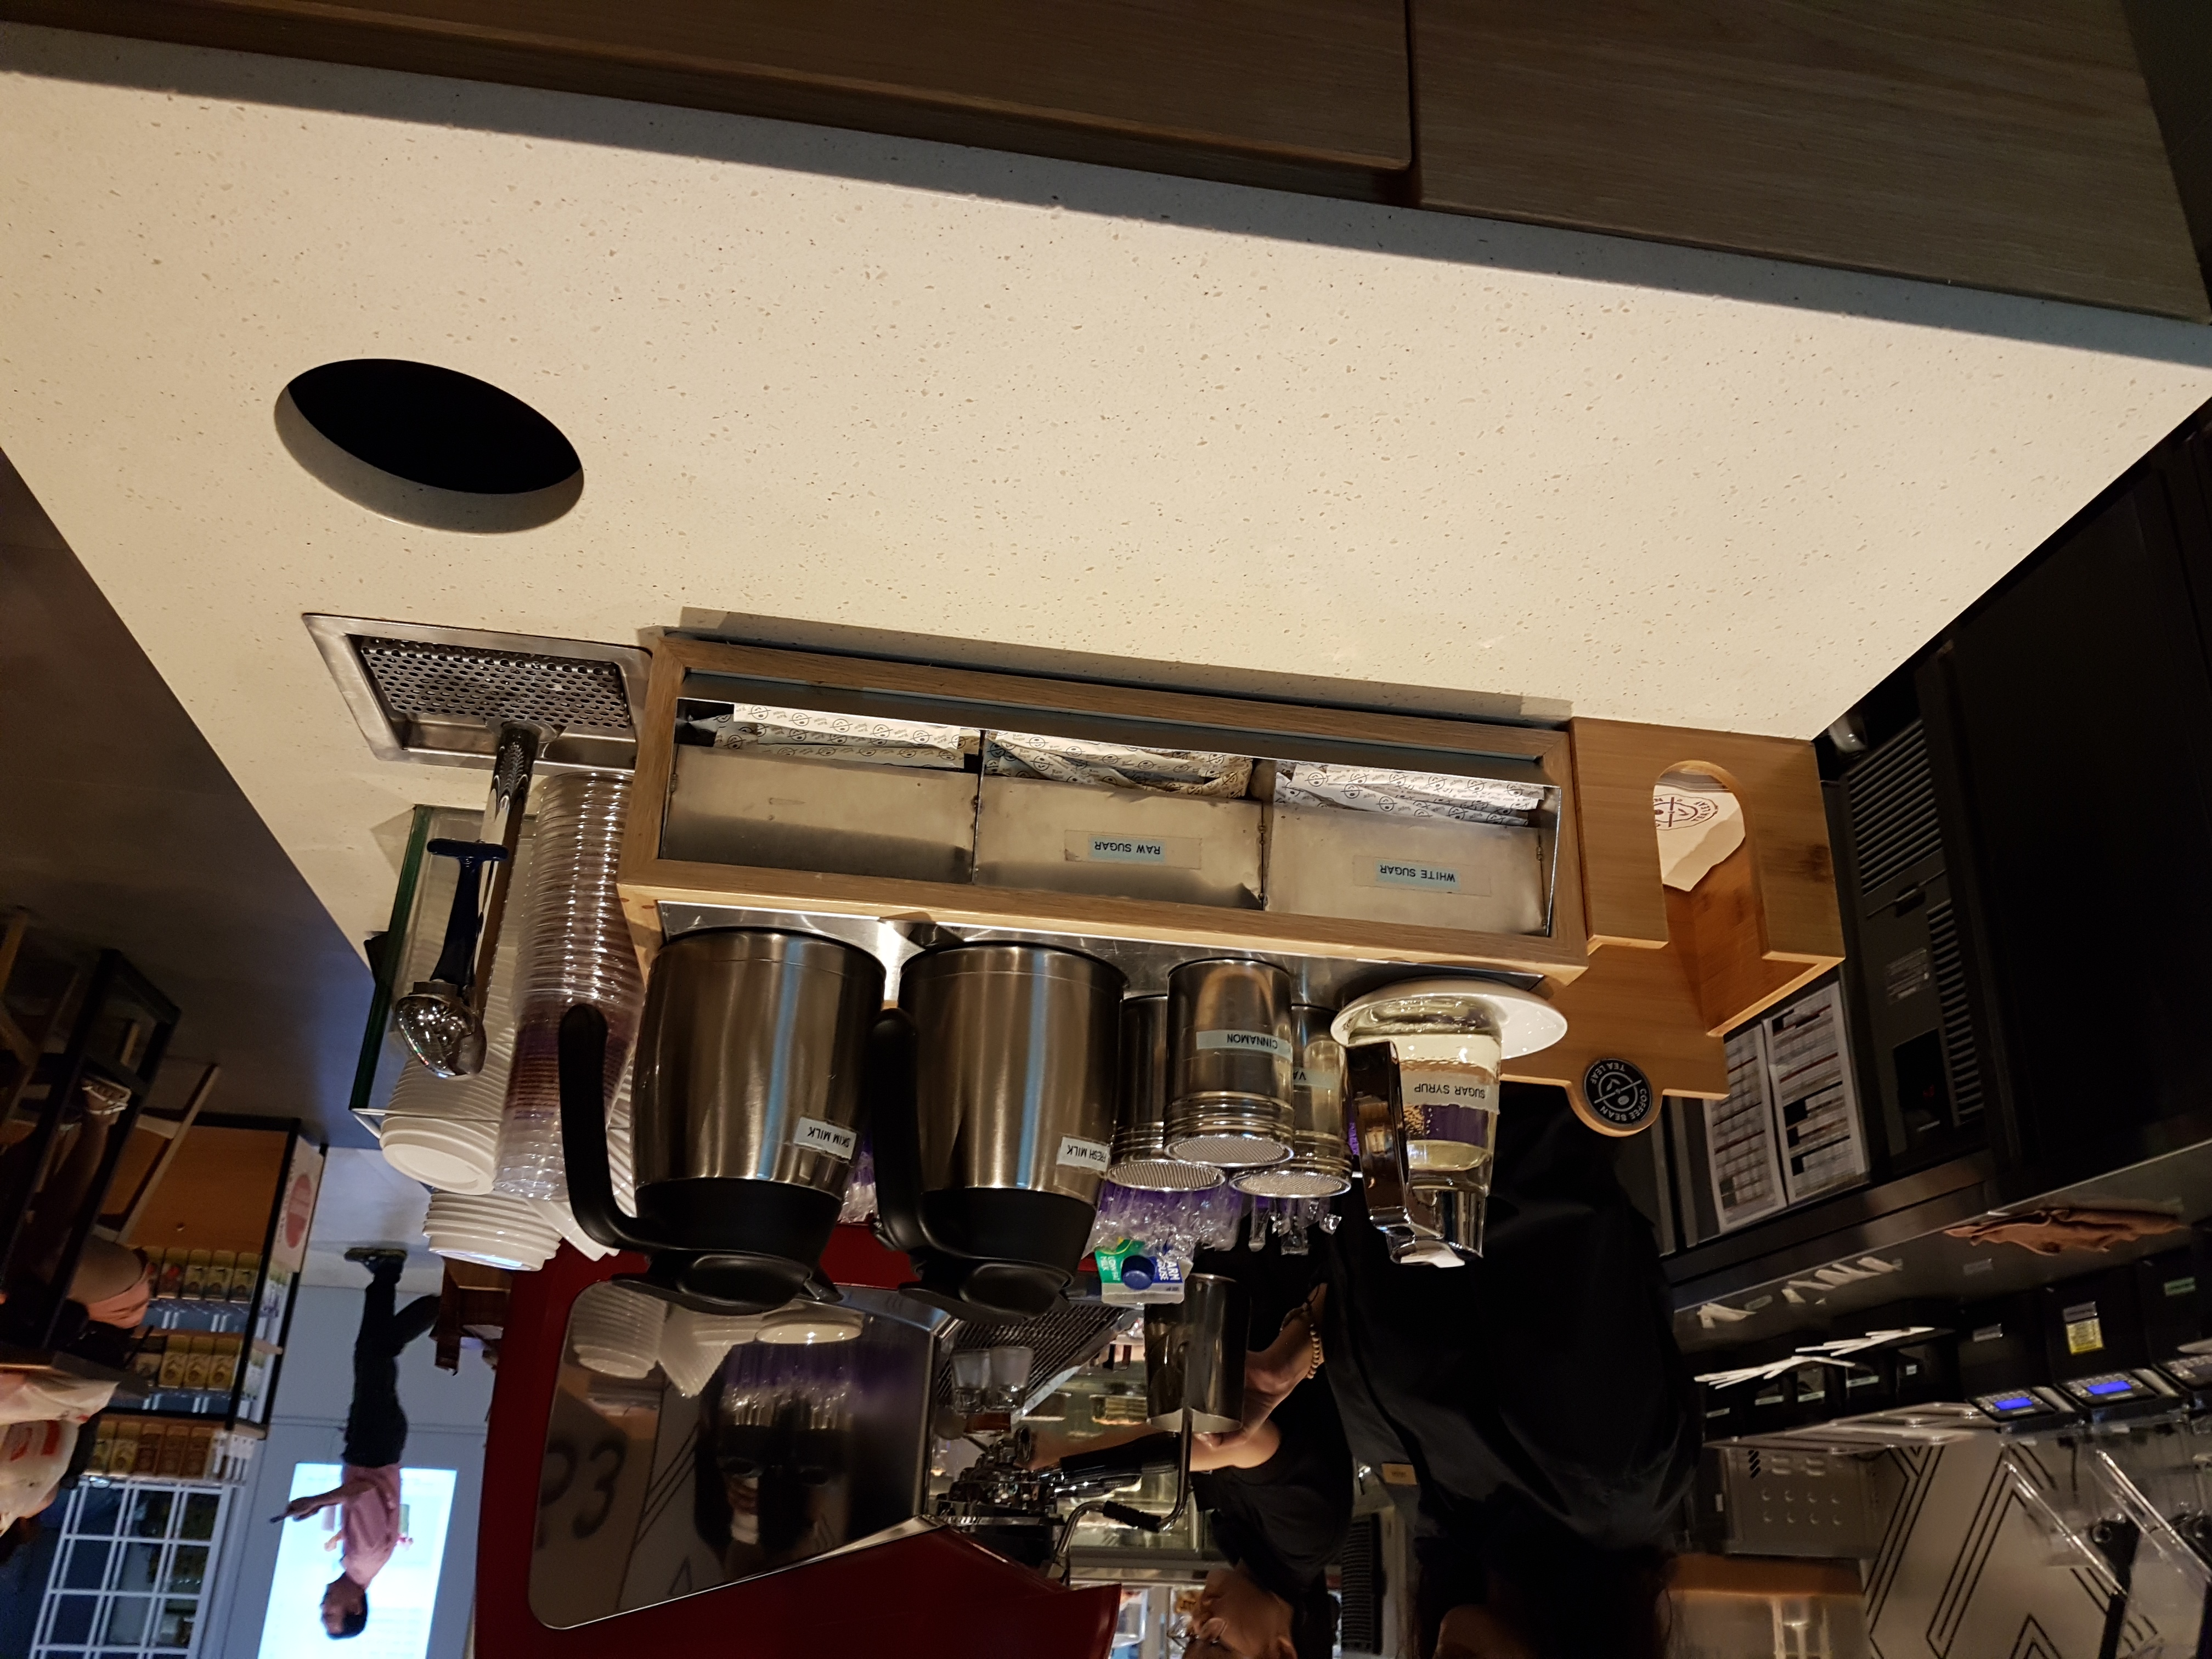
Initially he didn’t have much pain points to tell me because everything is pretty much automated, and the machines that he uses makes the barista-work easier. However, he did say that one thing that can be improved on was their system of washing utensils that they use to make drinks. Currently, when they are not making any orders, they soak the utensils in a jug full of hot water. This means that they often have to change the water in the jug, which can be a hassle especially when there are many orders to make (another pain point!). The same problem persist for the blenders.
That metal jug slightly to the left of the center holds the utensils. (sorry for the poor picture quality)
Also, their workstation can get quite messy when there are many orders to make.
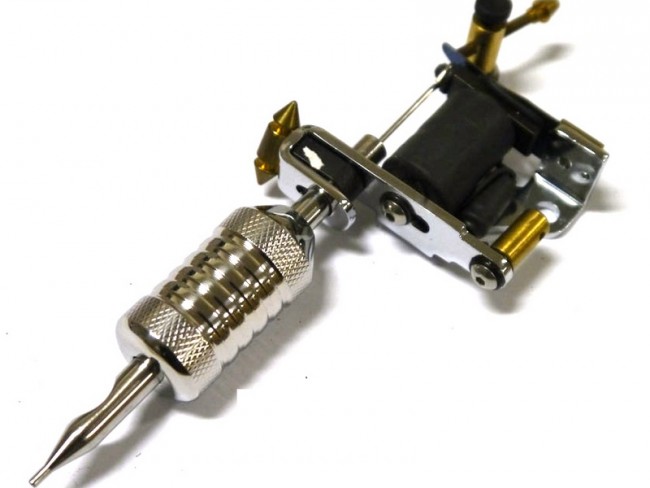
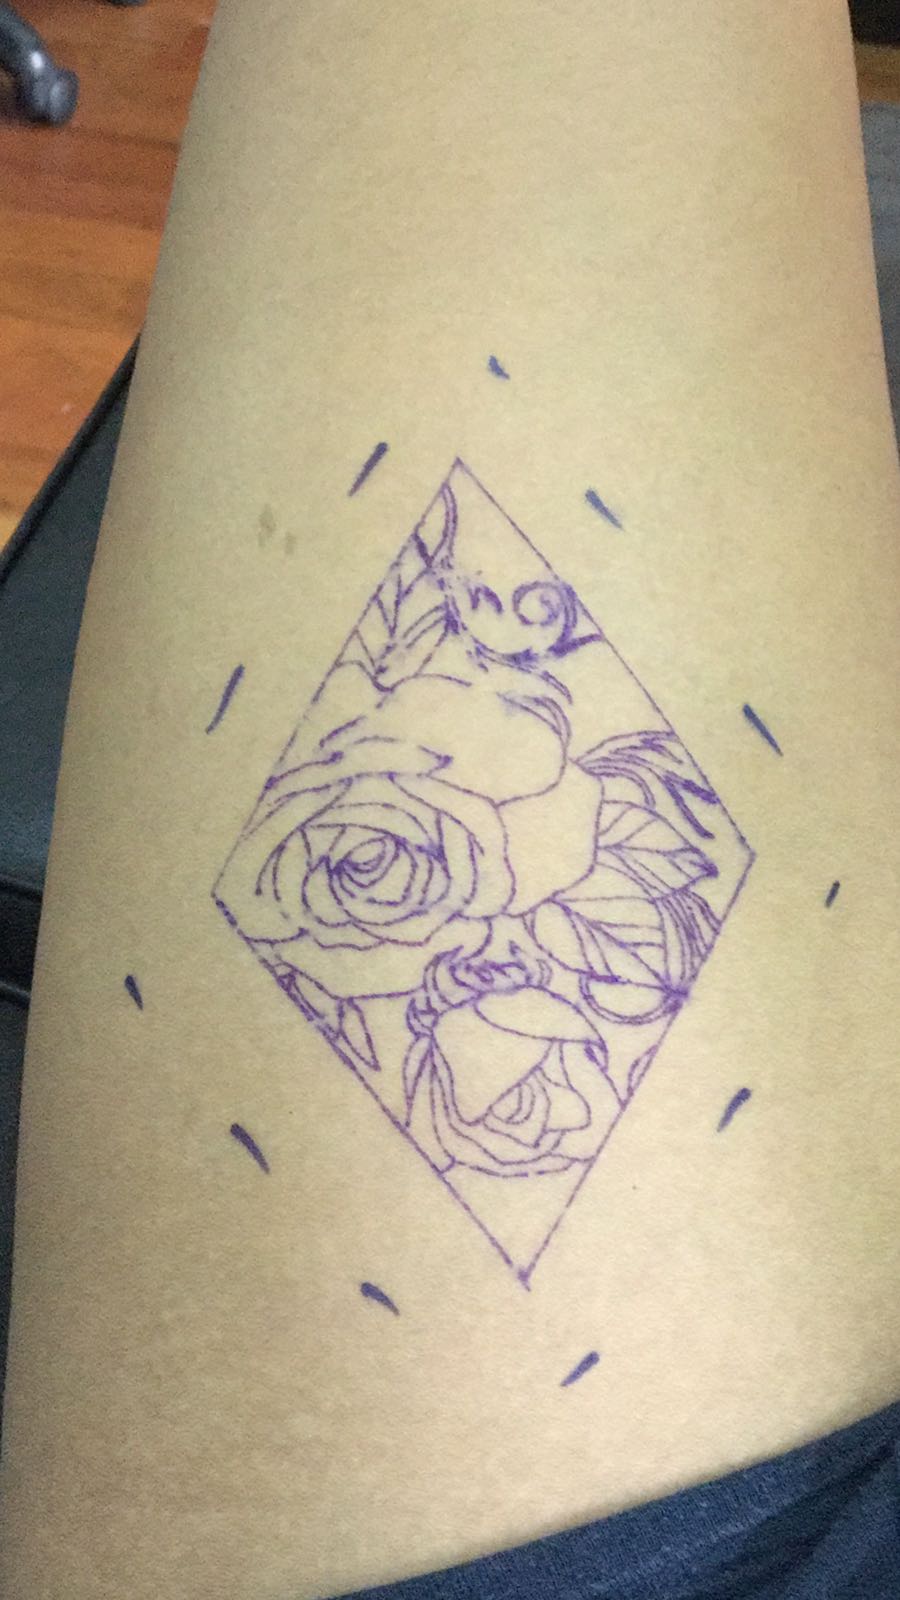
My friend is a tattoo artist and I went over to his studio to find out more about the process. For obvious reasons, I was not able to try out the practice but could just observe.
Tools
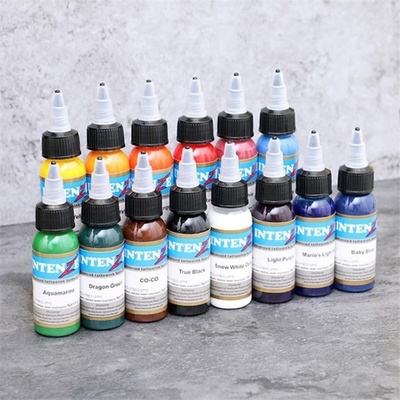
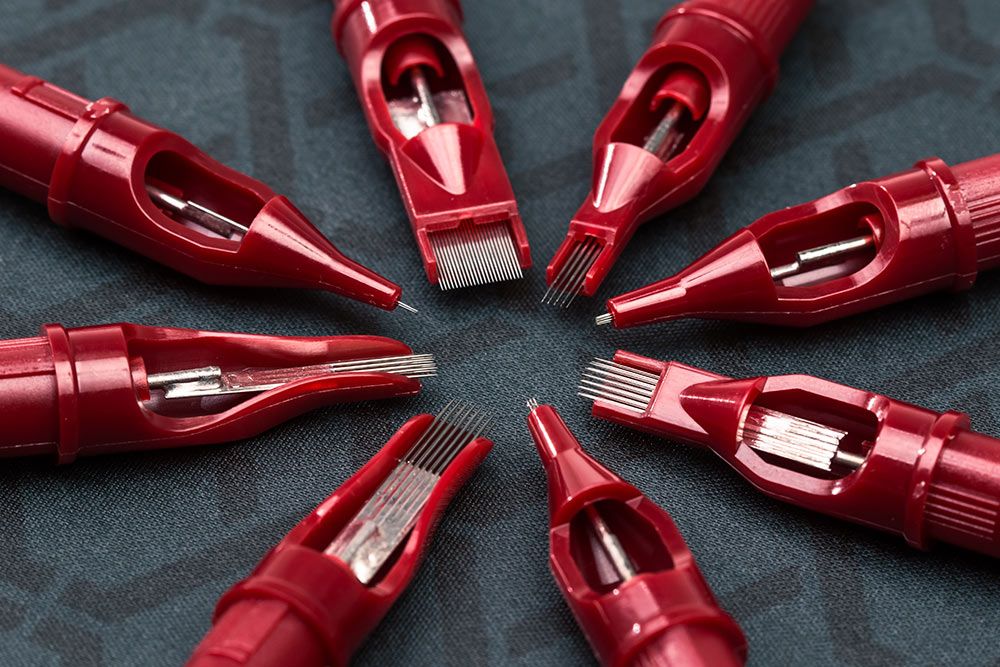
• Illustration methods • Special stencil paper • Tattoo machines • Needles • Ink • Gloves
Tattoo machine
Ink
Needles
Worksite
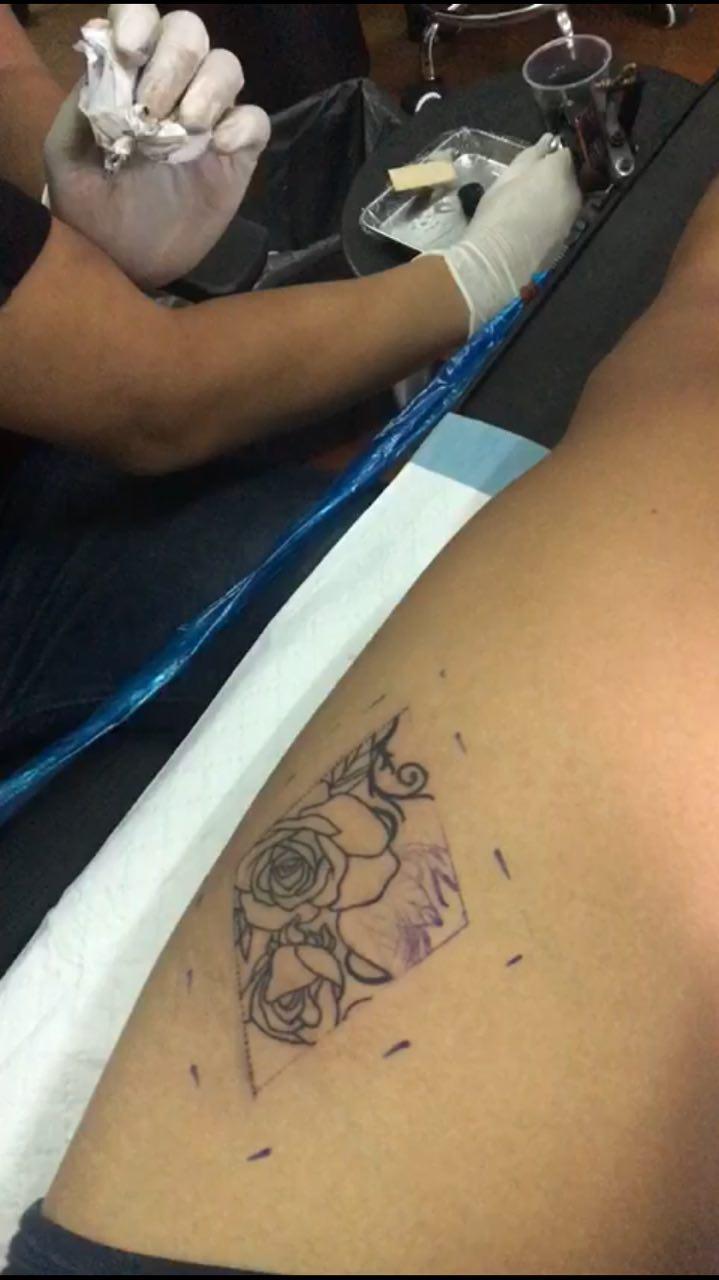
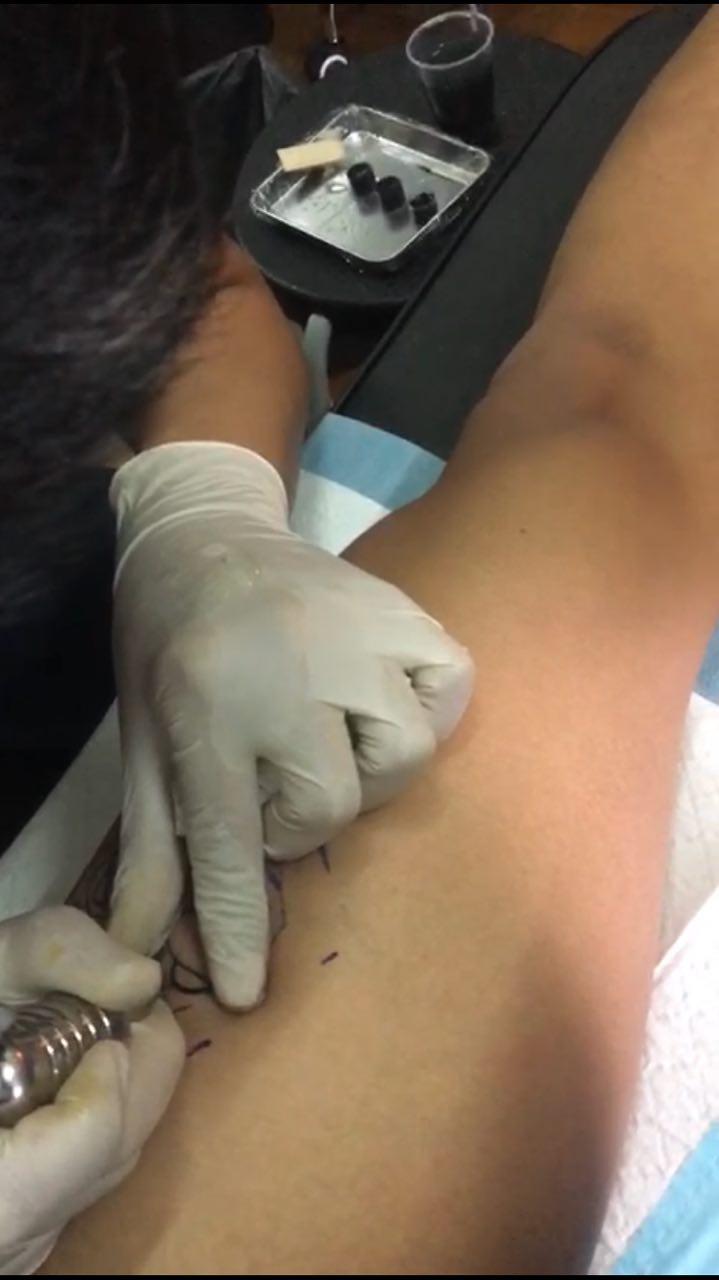
The usual worksite for tattoo artists is at a tattoo studio. The studio that I went to had an artistic vibe, with lots of paintings and designs everywhere. Although the space did feel a bit stuffy and can get a bit intimidating with the loud buzzing sounds. When it came to tattooing, I found out that one of the critical factors is actually hygiene. It is important for both the environment and equipment used to be sterile.
Process
The process is quite straightforward. Once the customer has selected their tattoo design, the stencil will be printed on a special paper. This stencil will be transferred onto the skin, coming off as a blue-purple temporary ink.
Before the actual inking, the artist has to wear gloves and single-use needles are used as well. There are different types of needles which will be attached to the tattoo machine. Each needle has different functions ranging from lining, shading and colour packing. The ink is placed in little ink caps and there’s also vaseline to help moisture and allow the needle to slide along the skin much more easily.
Once the inking is done for several hours, the body part will be wrapped with some form of wrap/bandage to avoid any infection.
Thoughts
From an observer’s point of view, it might have looked simple for something so permanent on your skin. However, it required focus and consistency especially when you’re inking for hours. As for the tools, there are a wide variety but they are portable and may be used in different environments. However, hygiene might be an issue as behind the scenes, a lot of importance is placed in ensuring that the equipment used is clean and sterile.
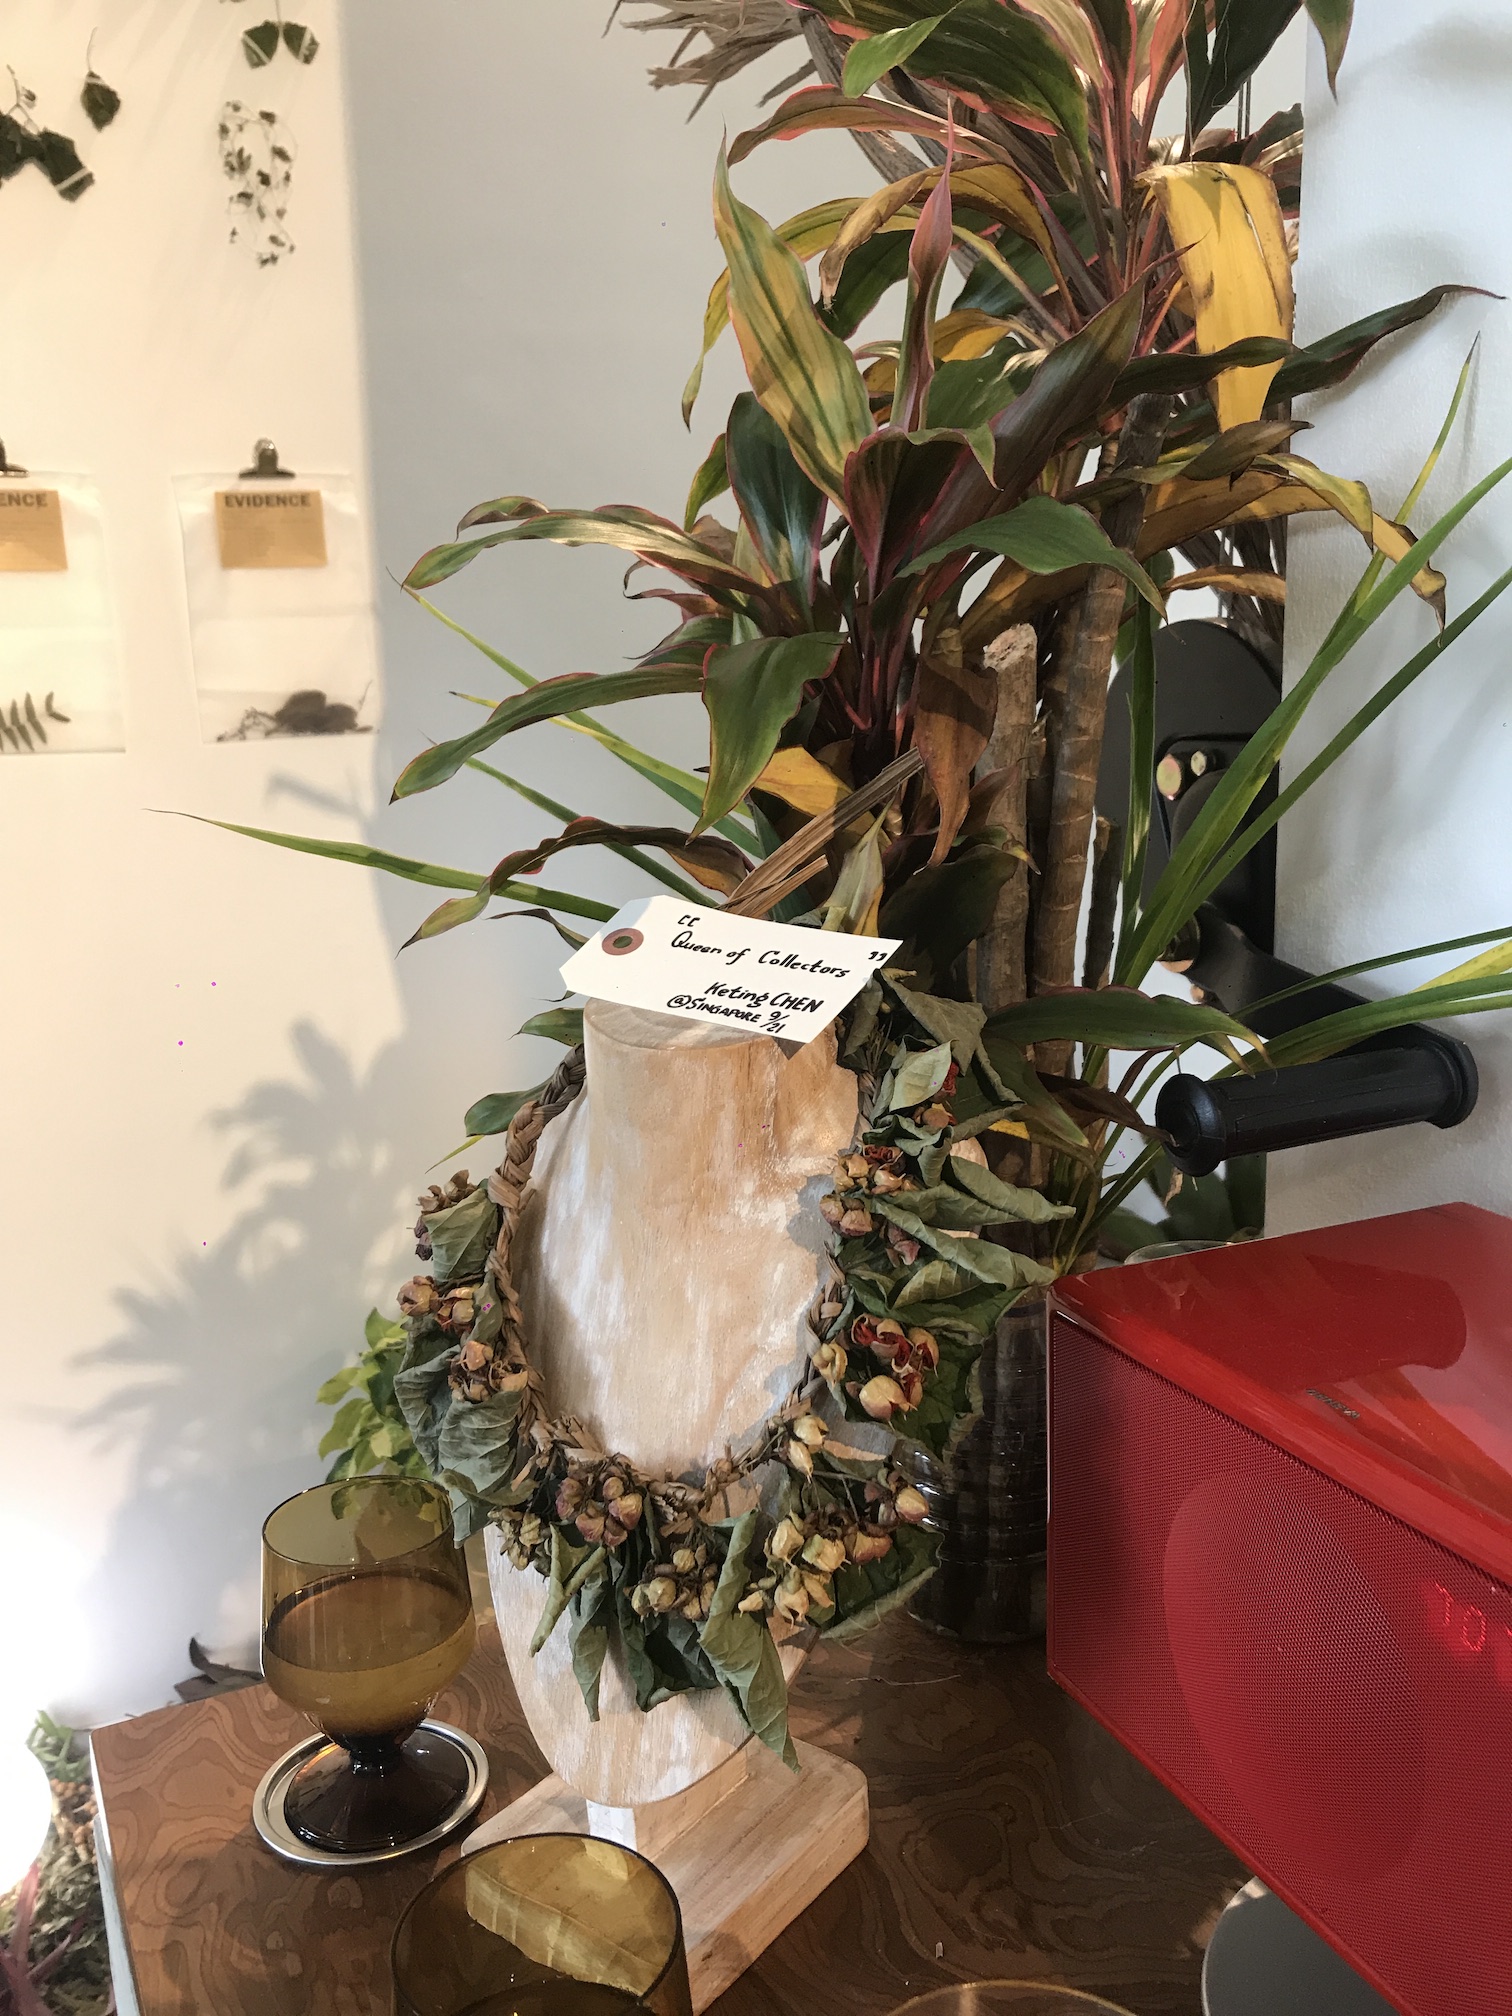
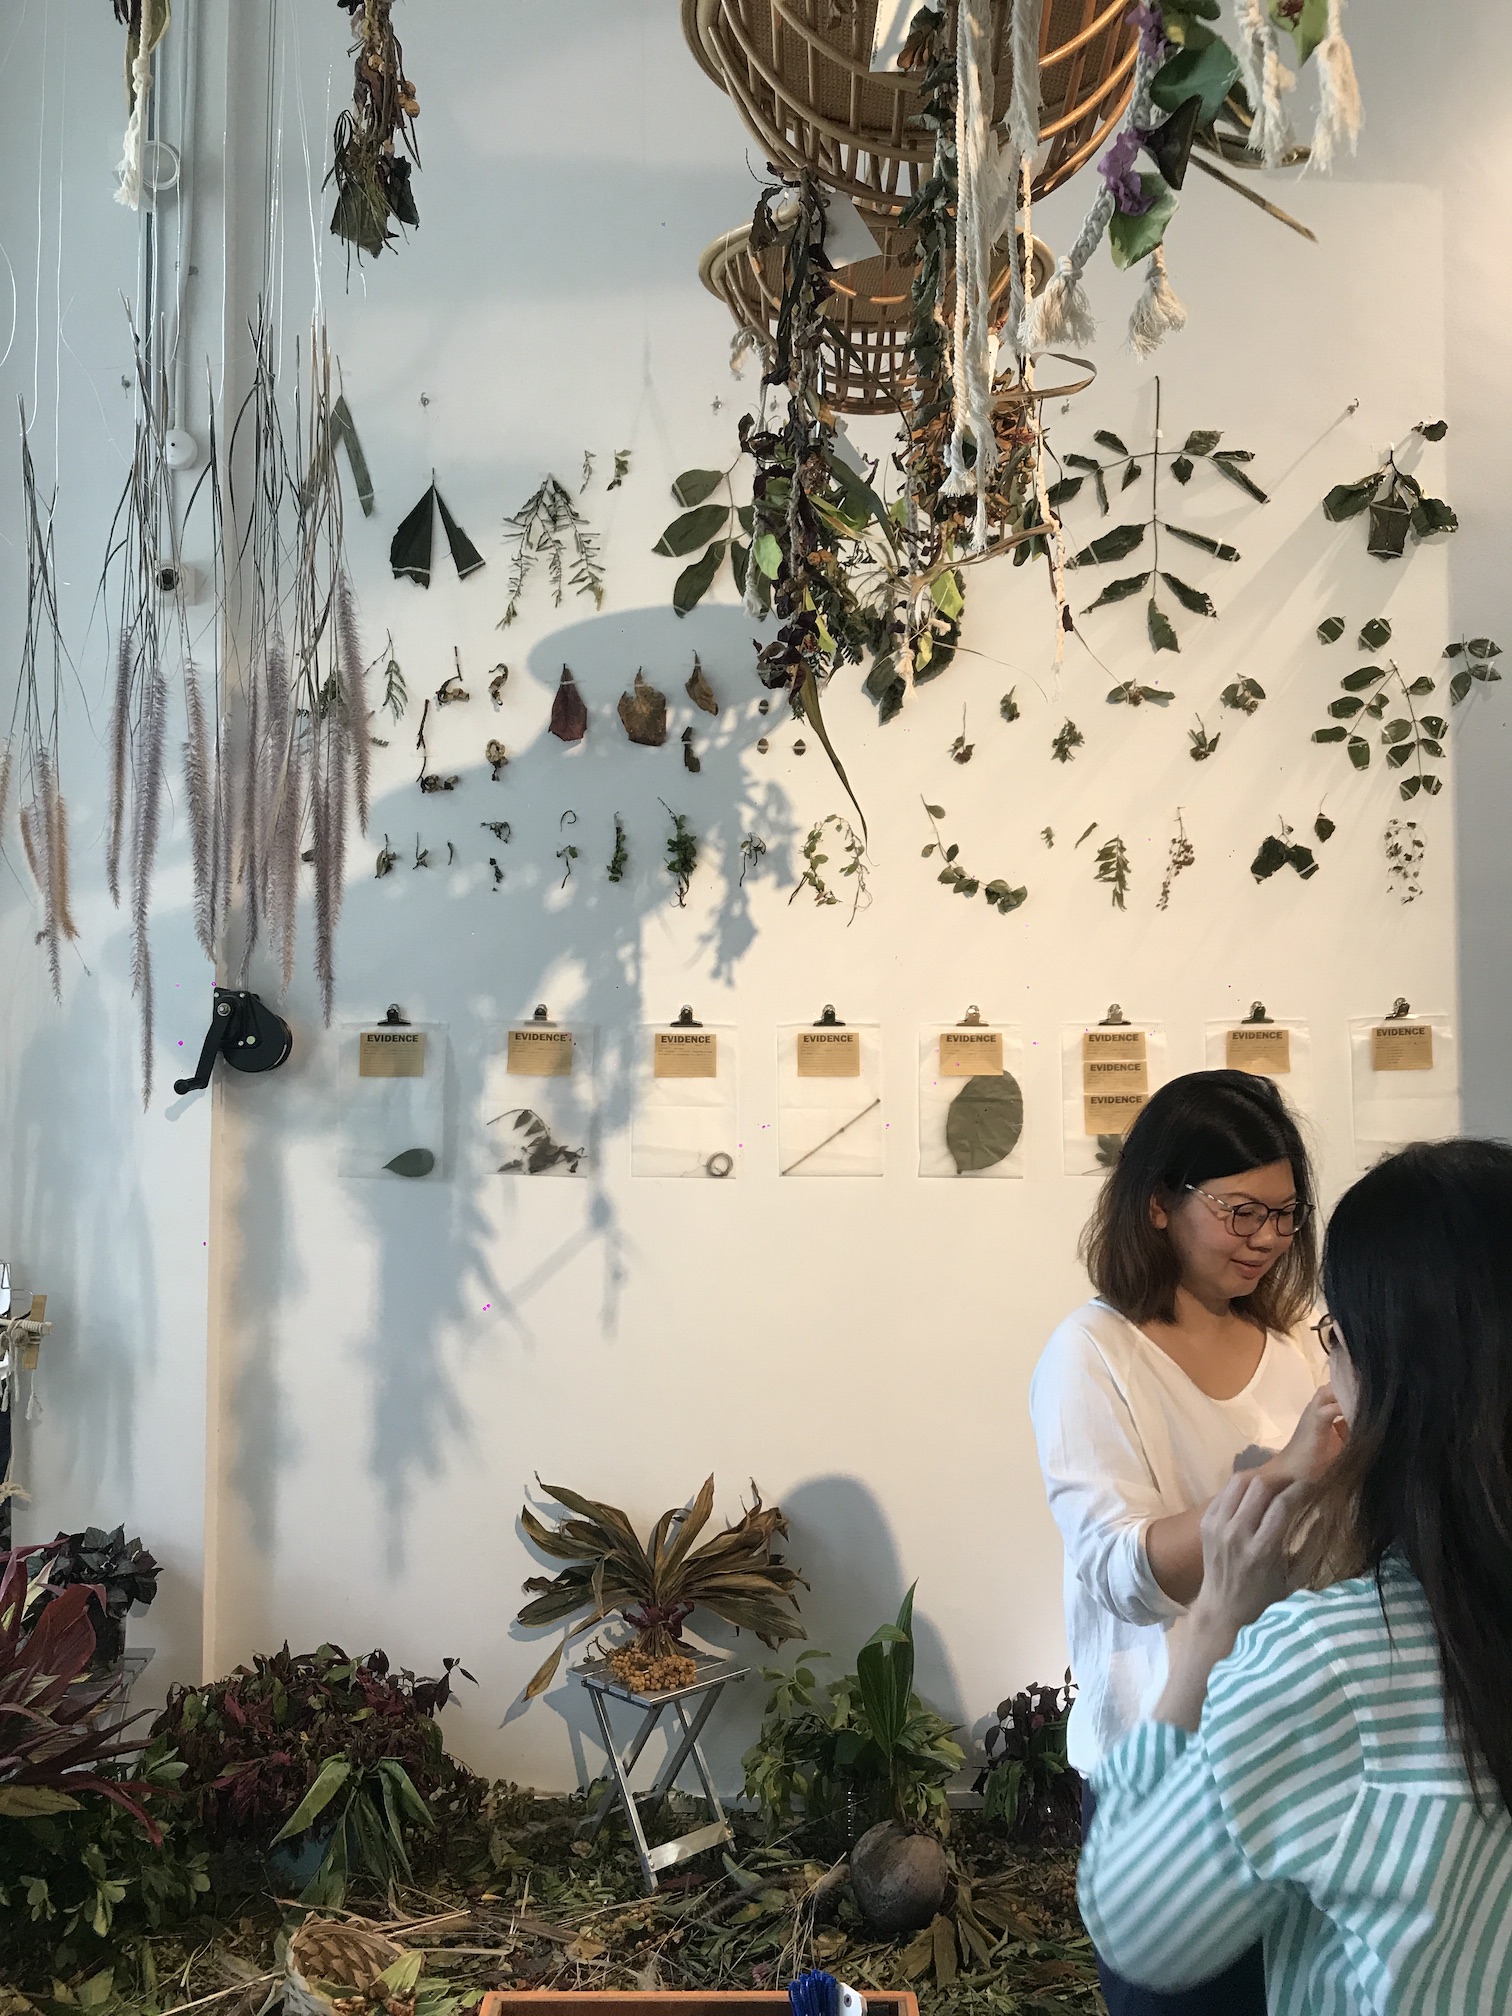
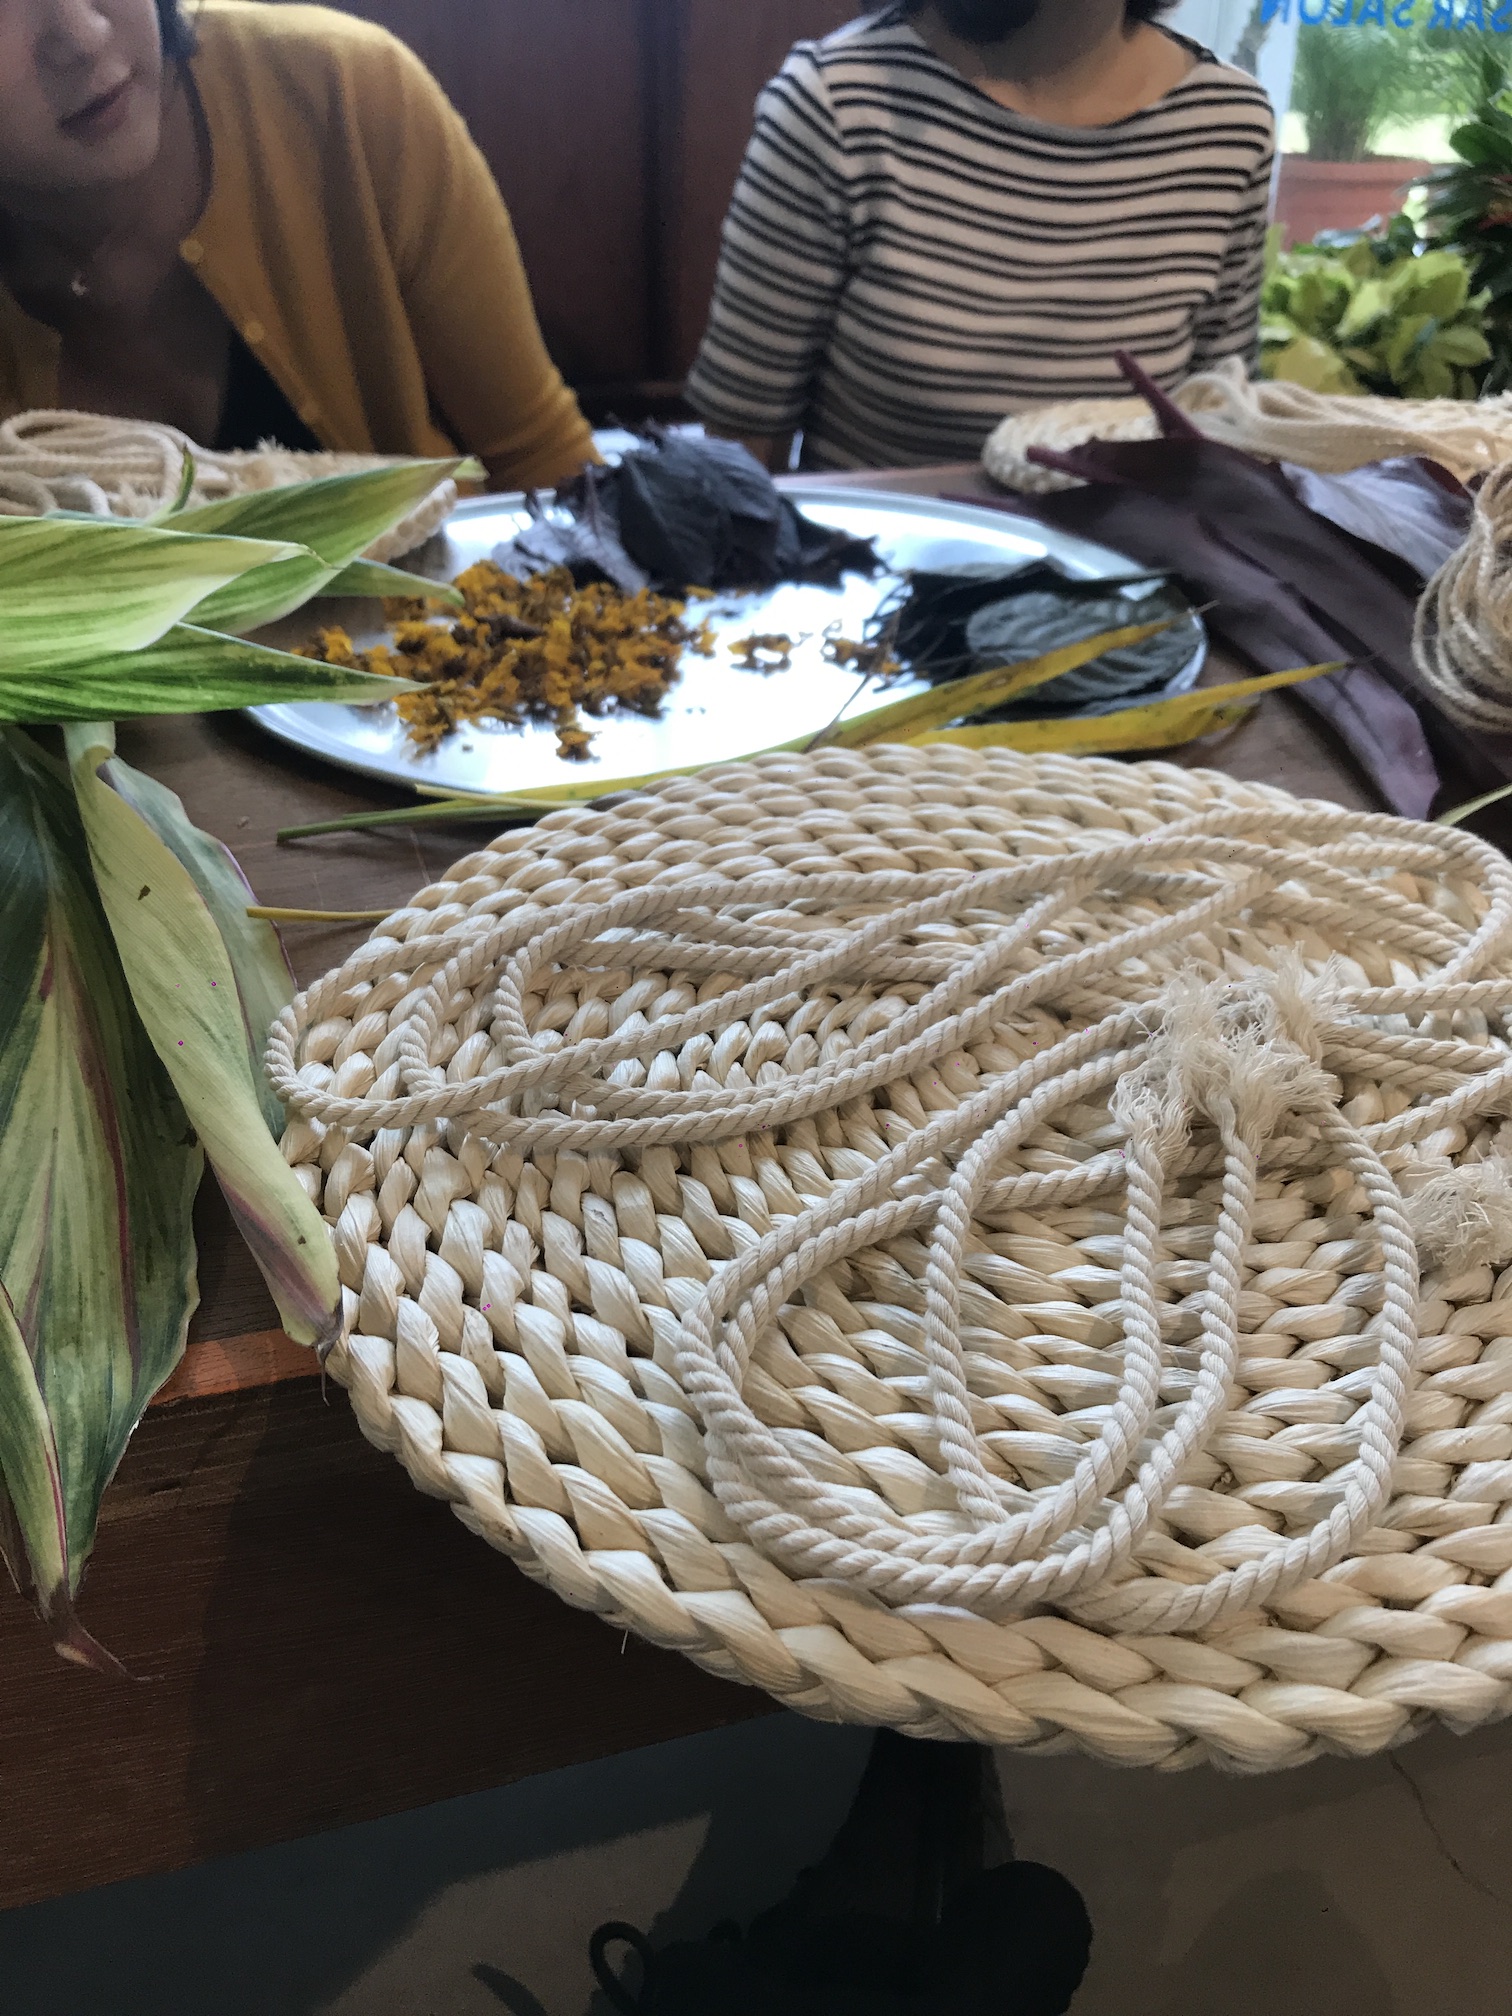
Ke-Ting Chen is a Taiwanese plant pathologist and artist whose residency with Jalan Besar Salon 2018 featured lei weaving artworks that intertwined with selected research documents. Collectively, the series of talks and workshops will showcase his work with the indigenous communities and farm sash where he explored the effects of human intervention on these natural resources.
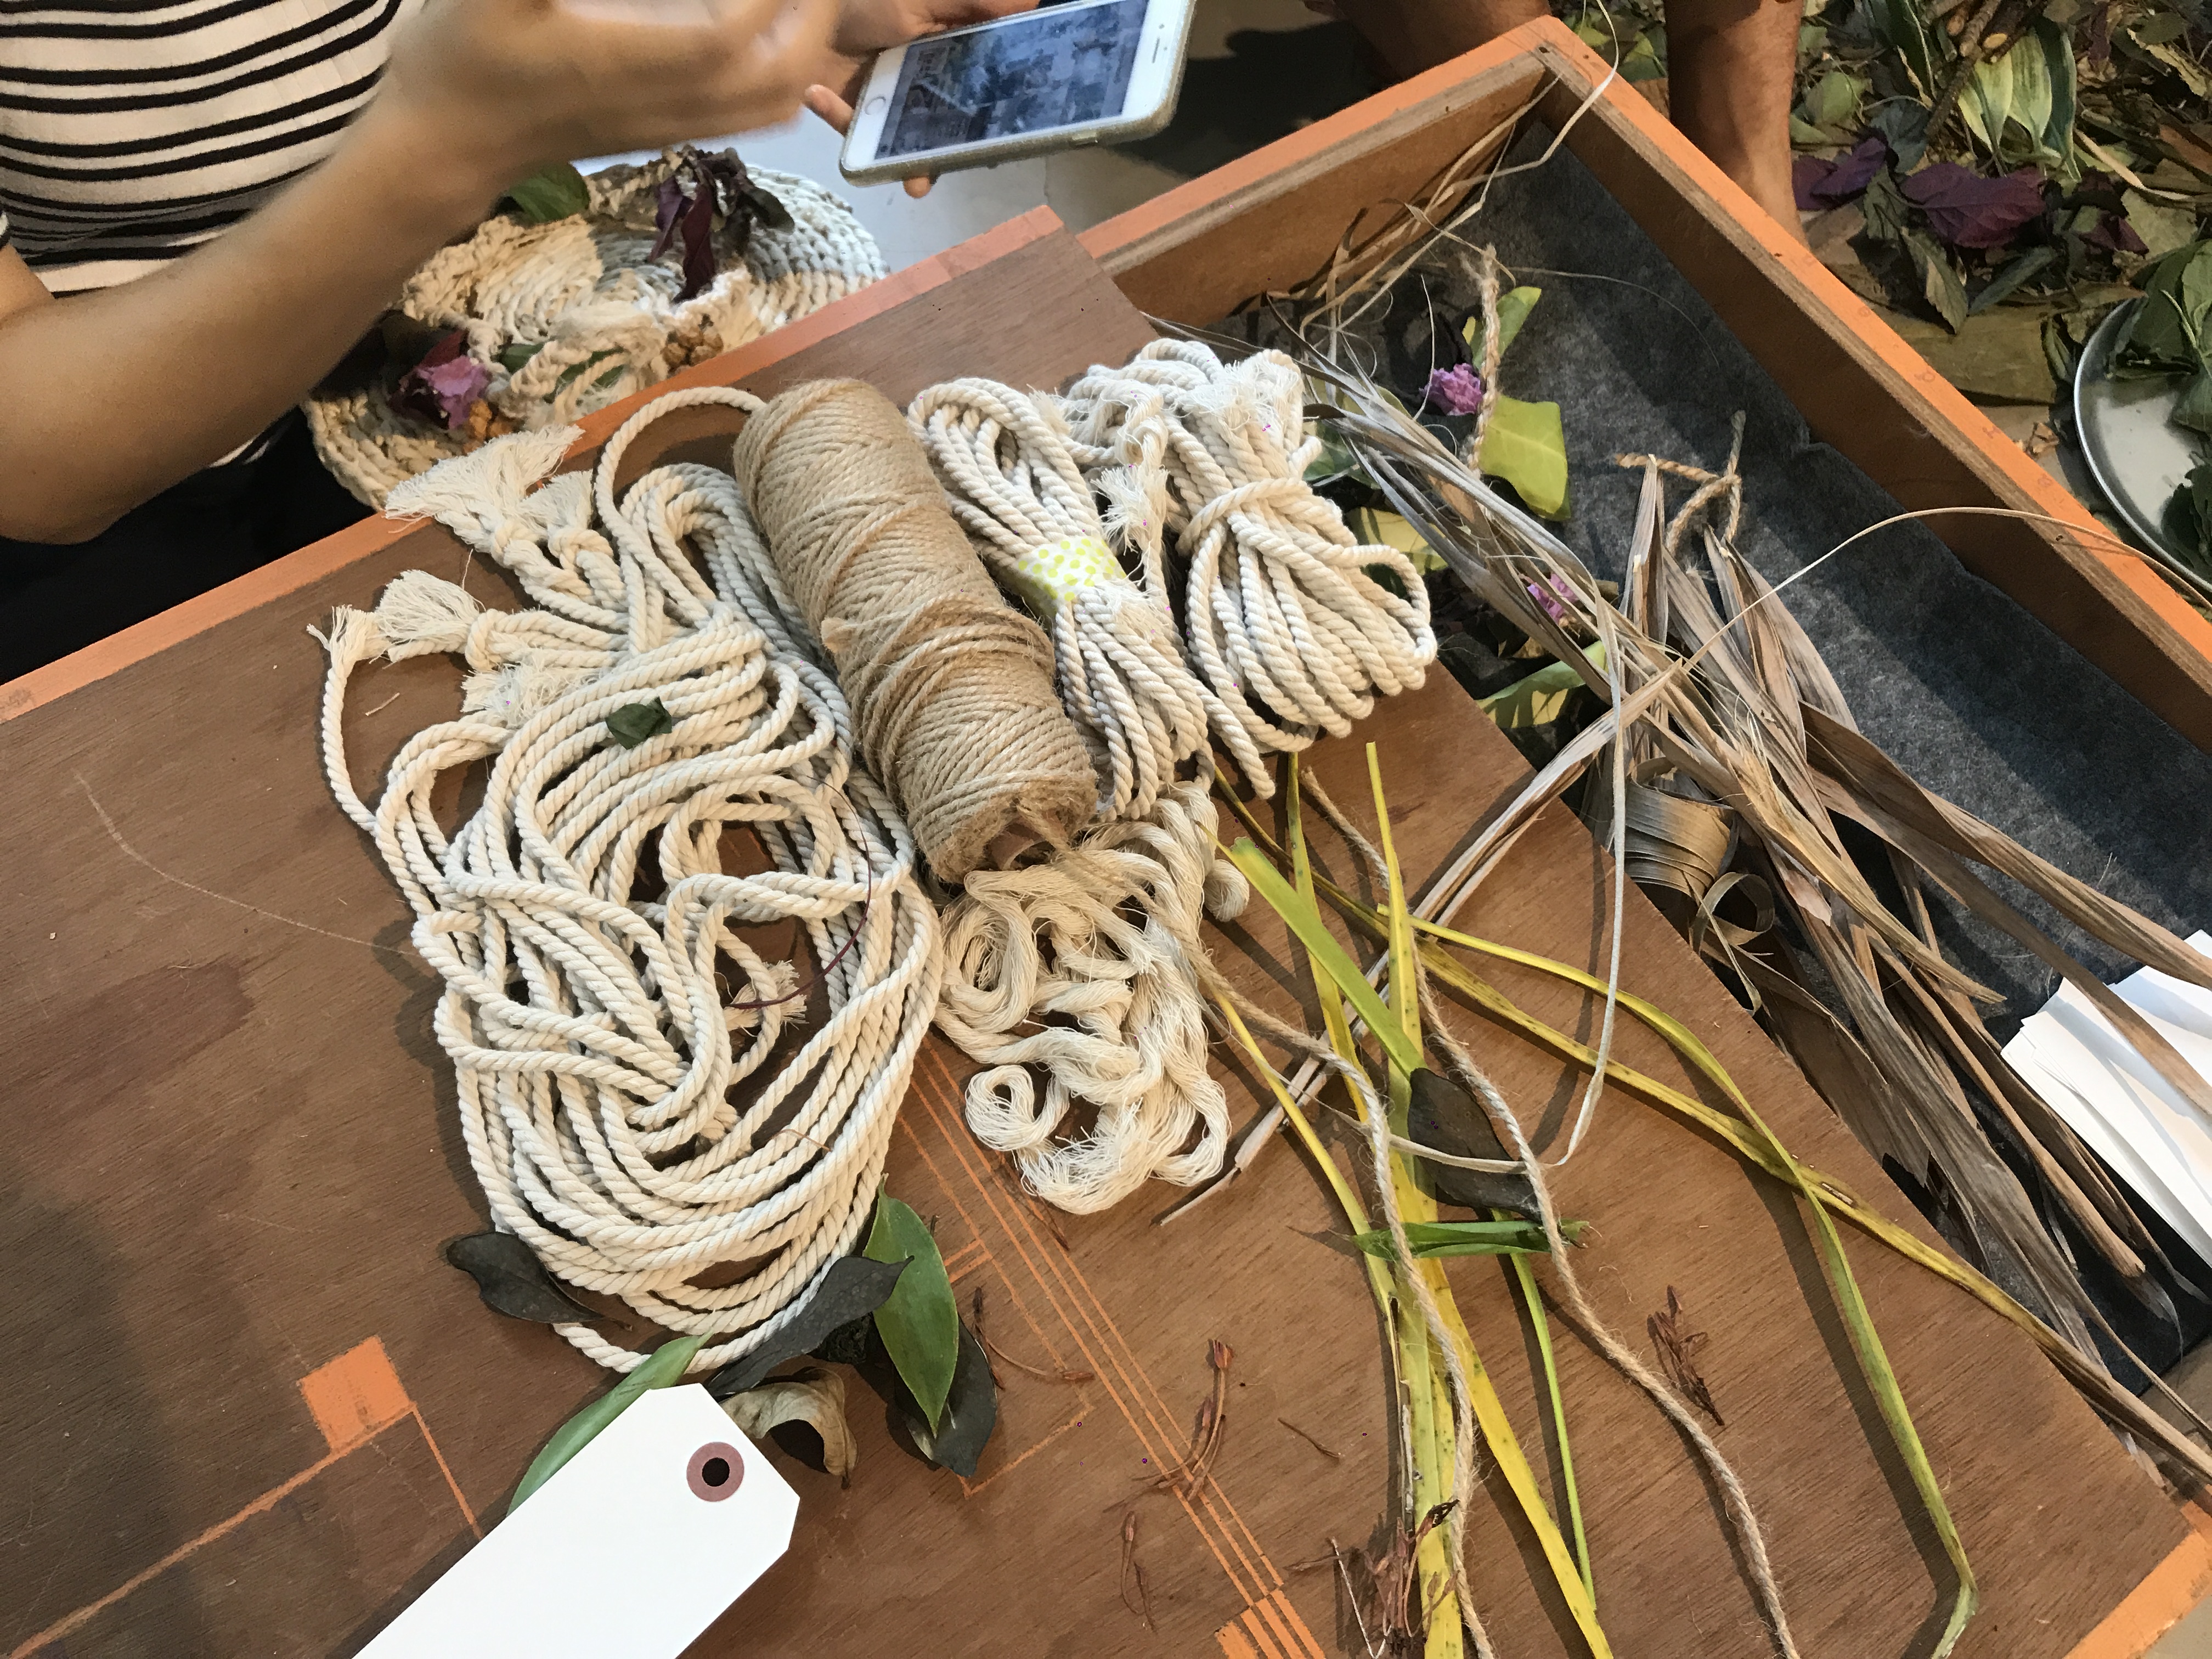
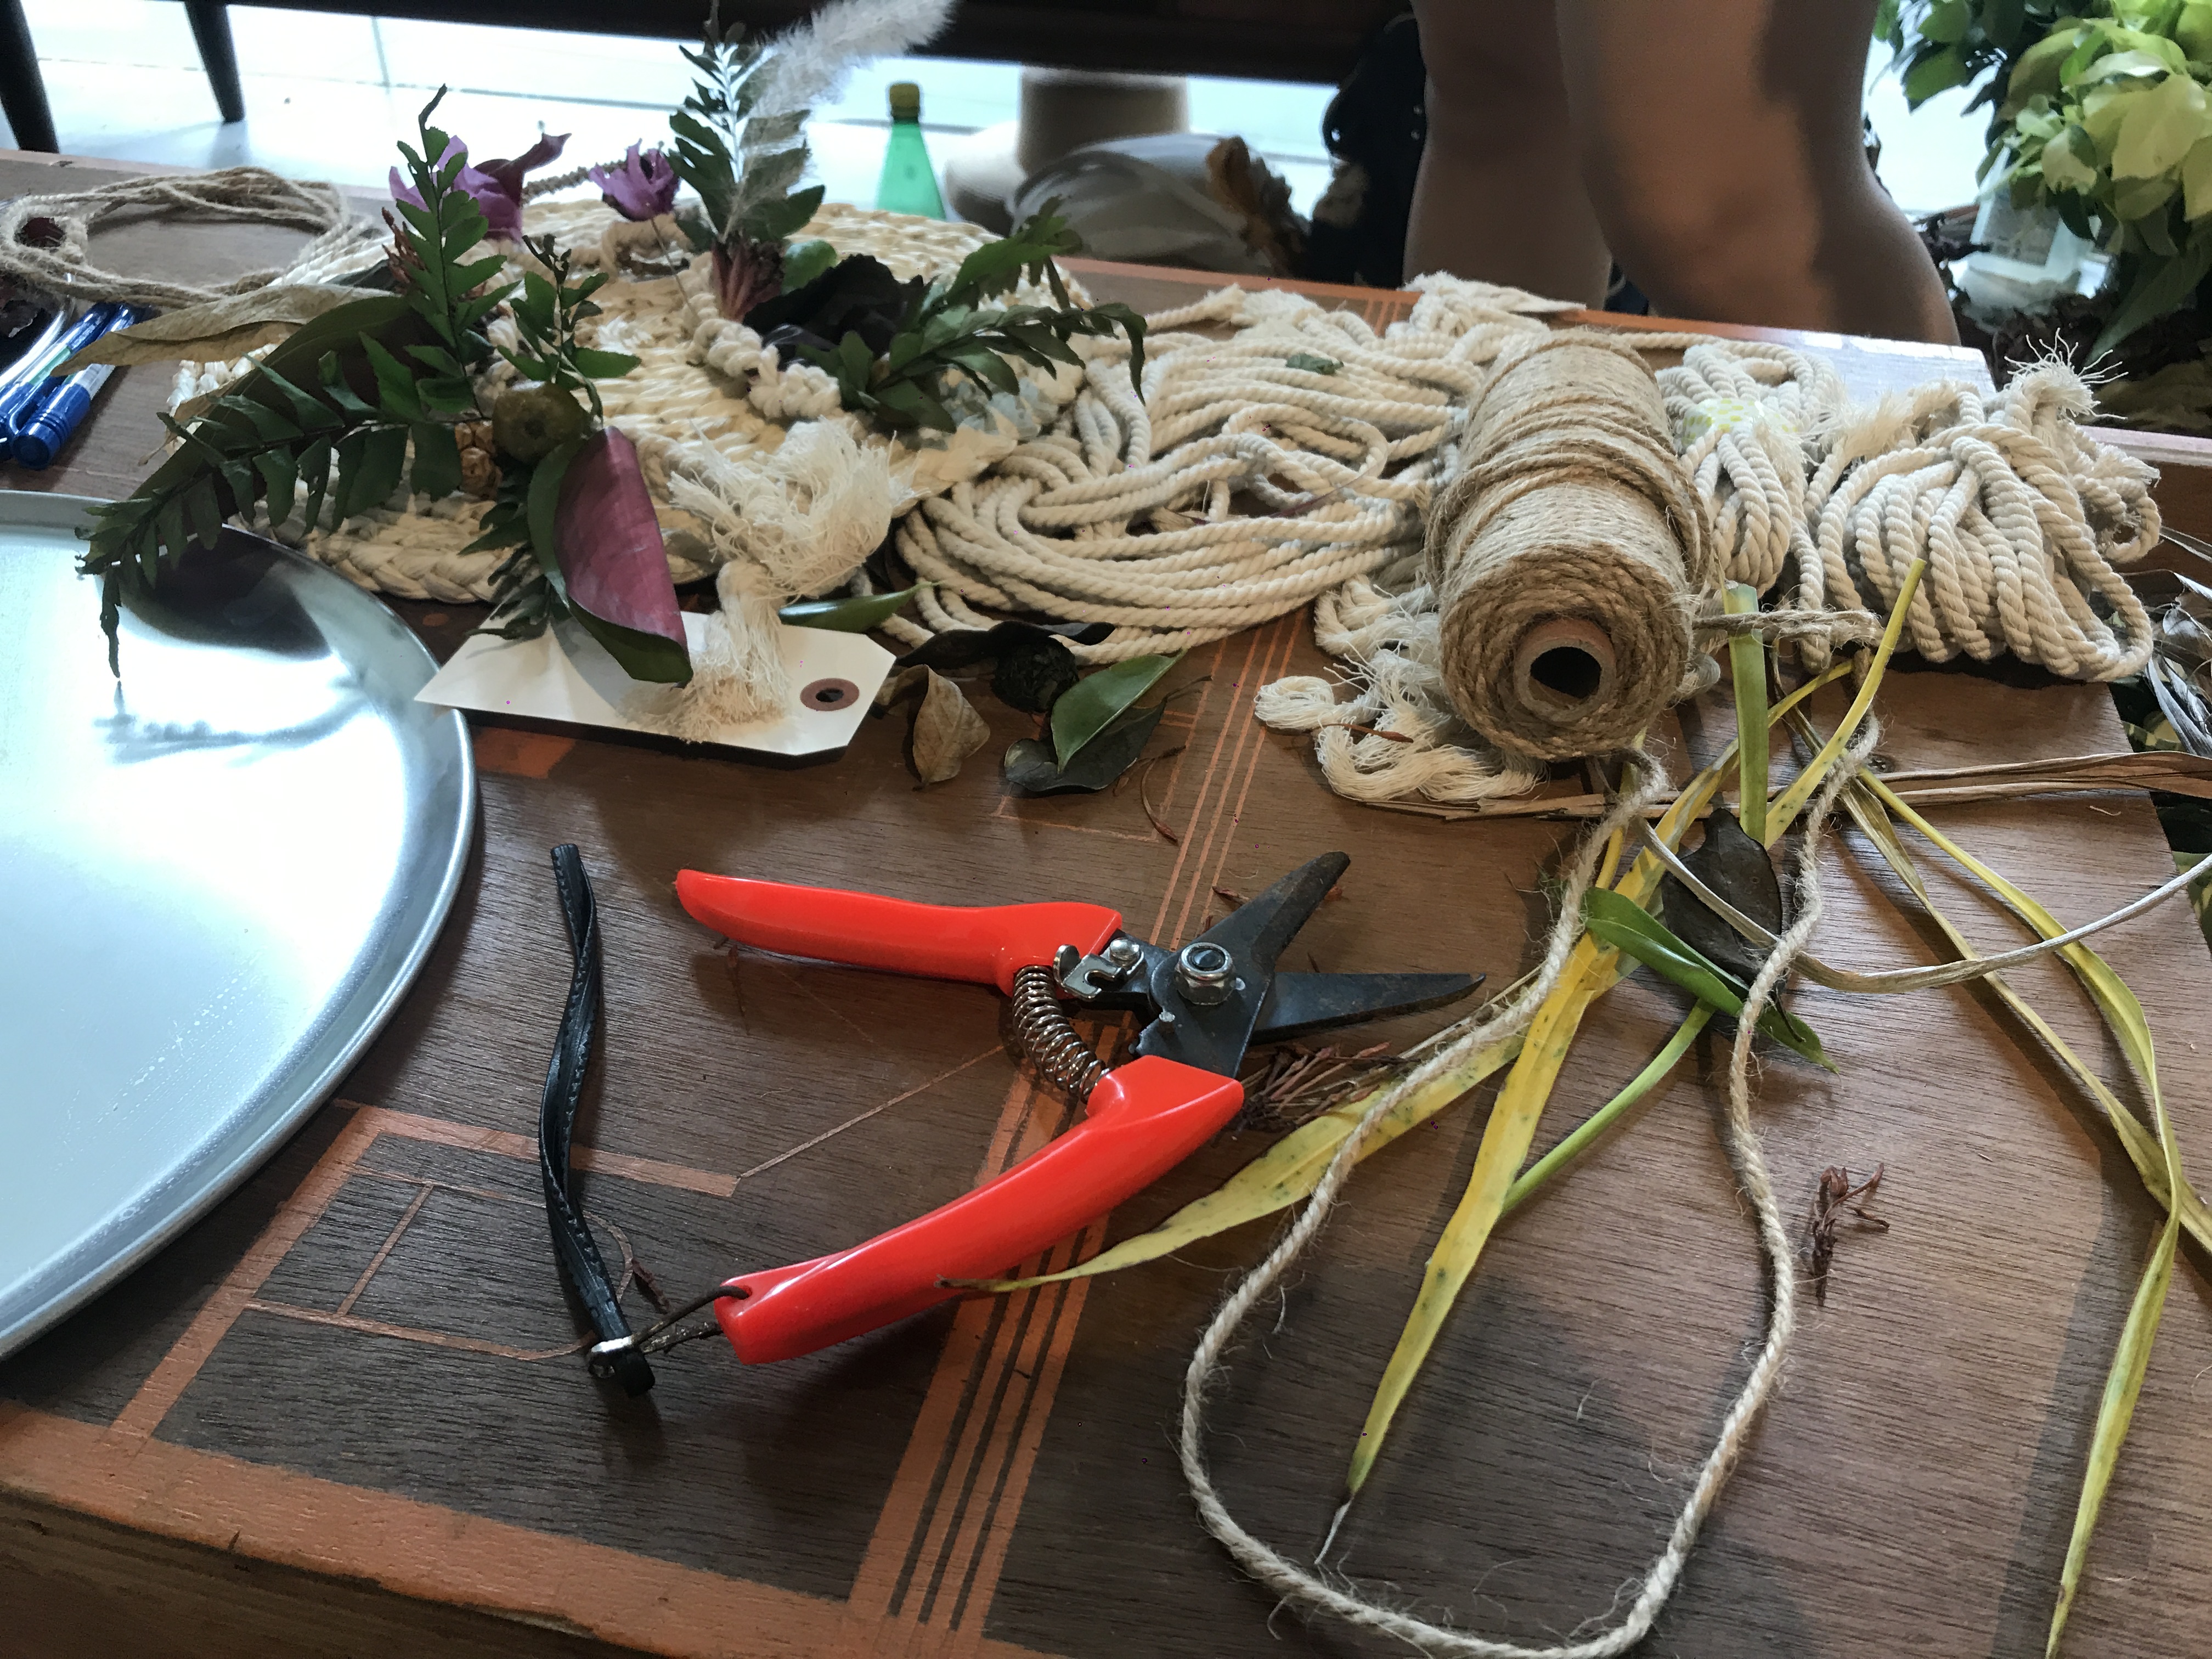
Tools & equipment used
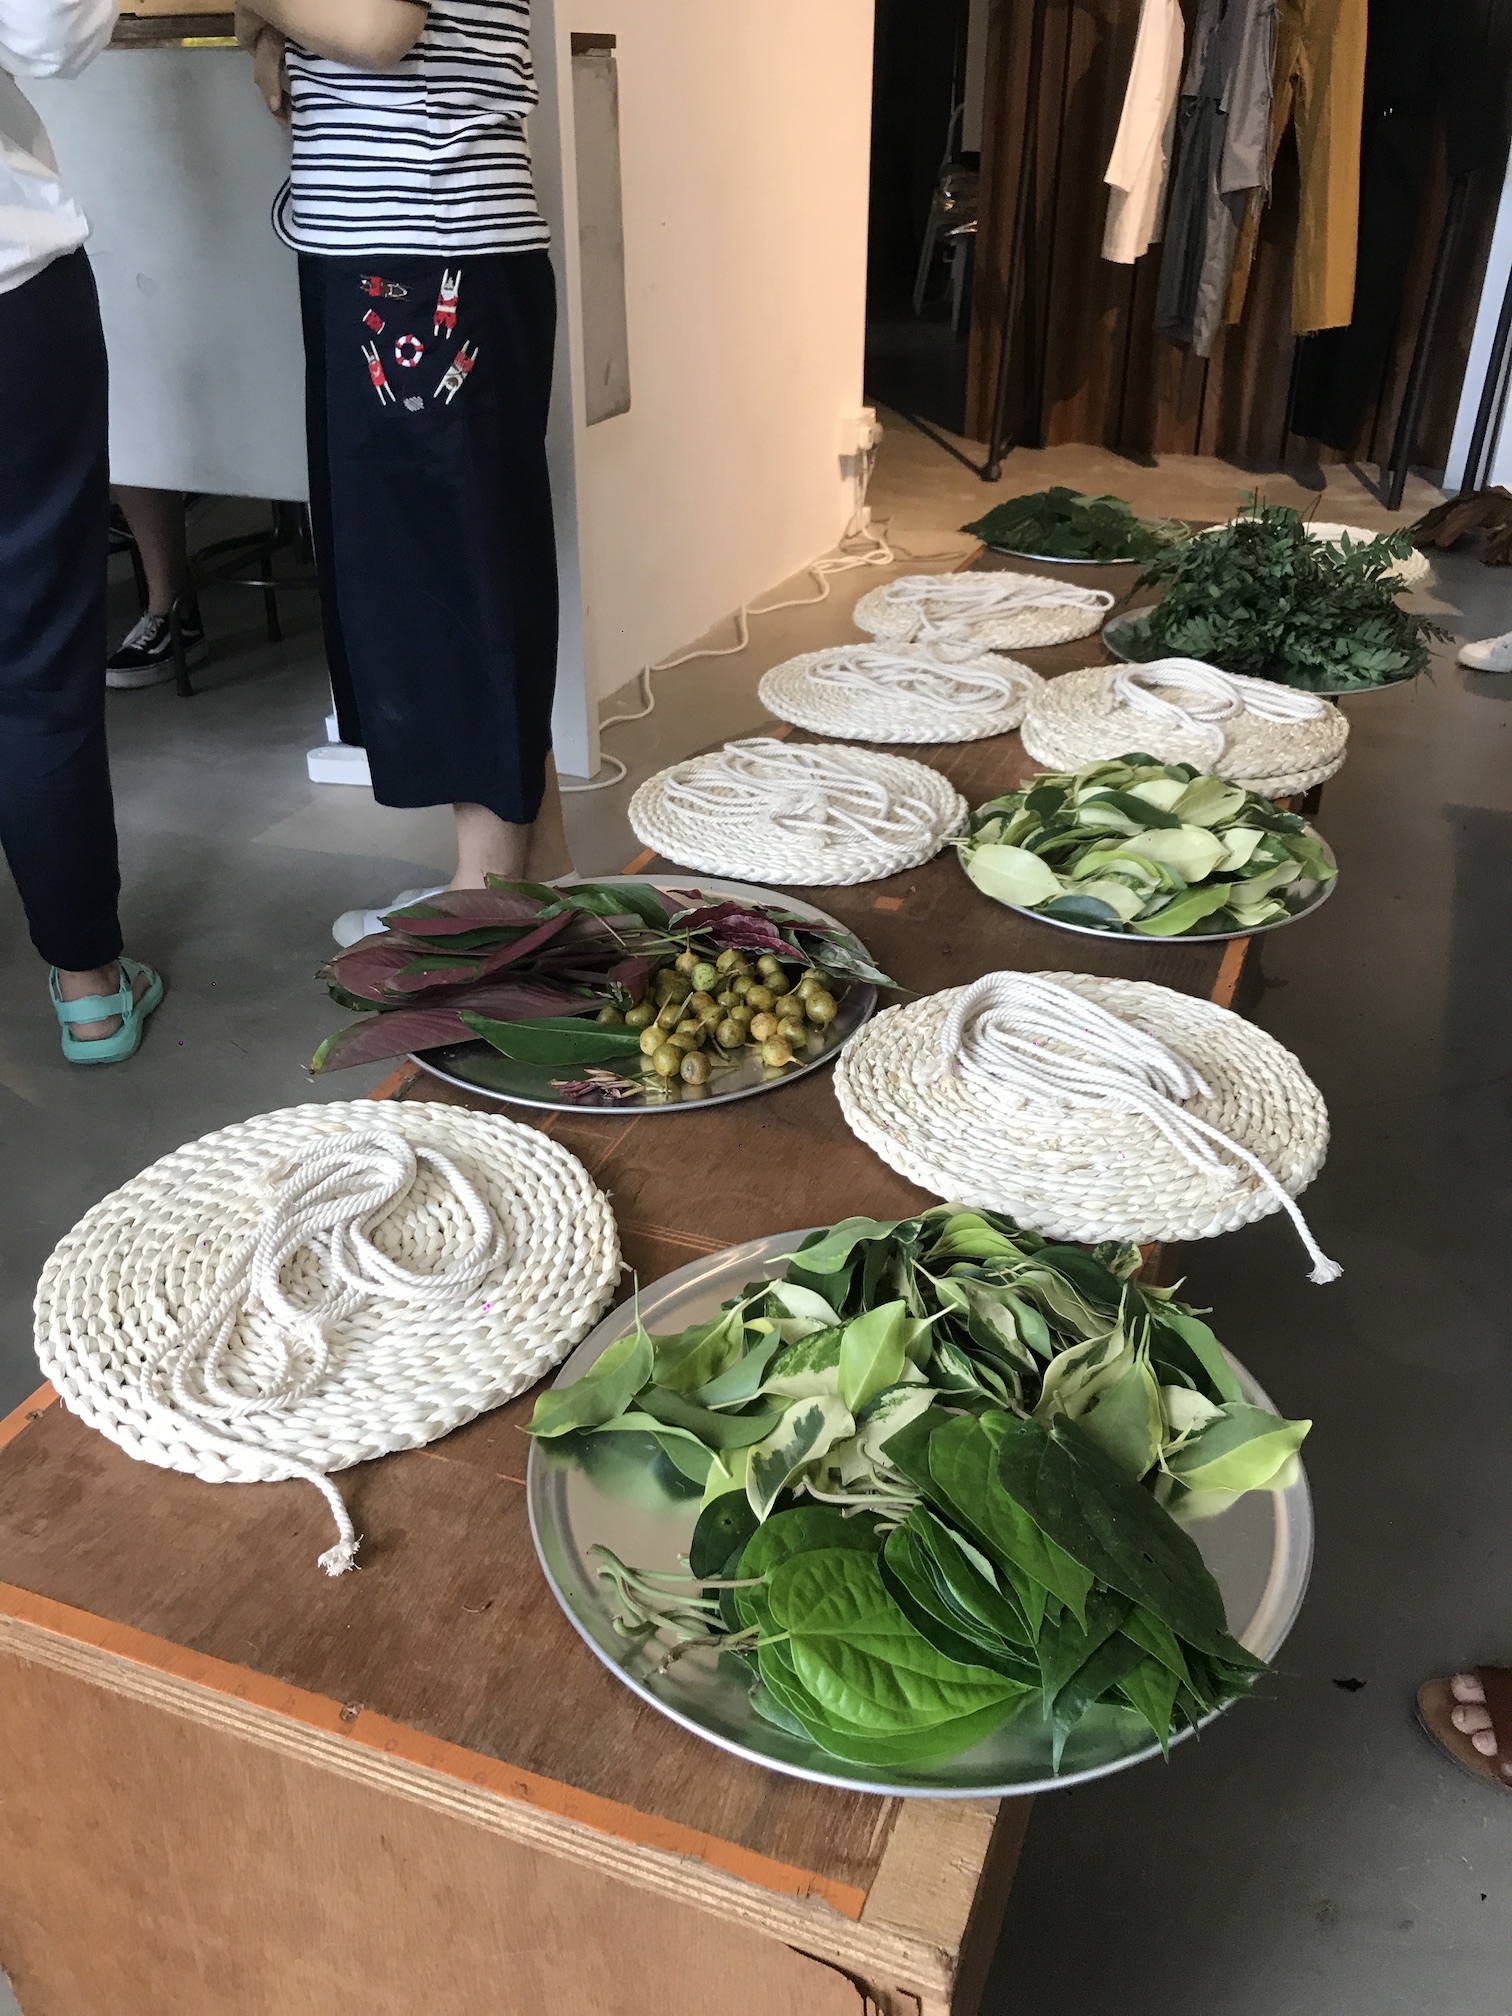
• Fresh and dried botanicals specimens • Weaving ropes of variable thickness • Cutters or scissors • Mats or trays • A pair of hands!
Weaving ropes of variable thickness
Cutter
Mats or trays with flowers and leaves
Worksite / Set-up
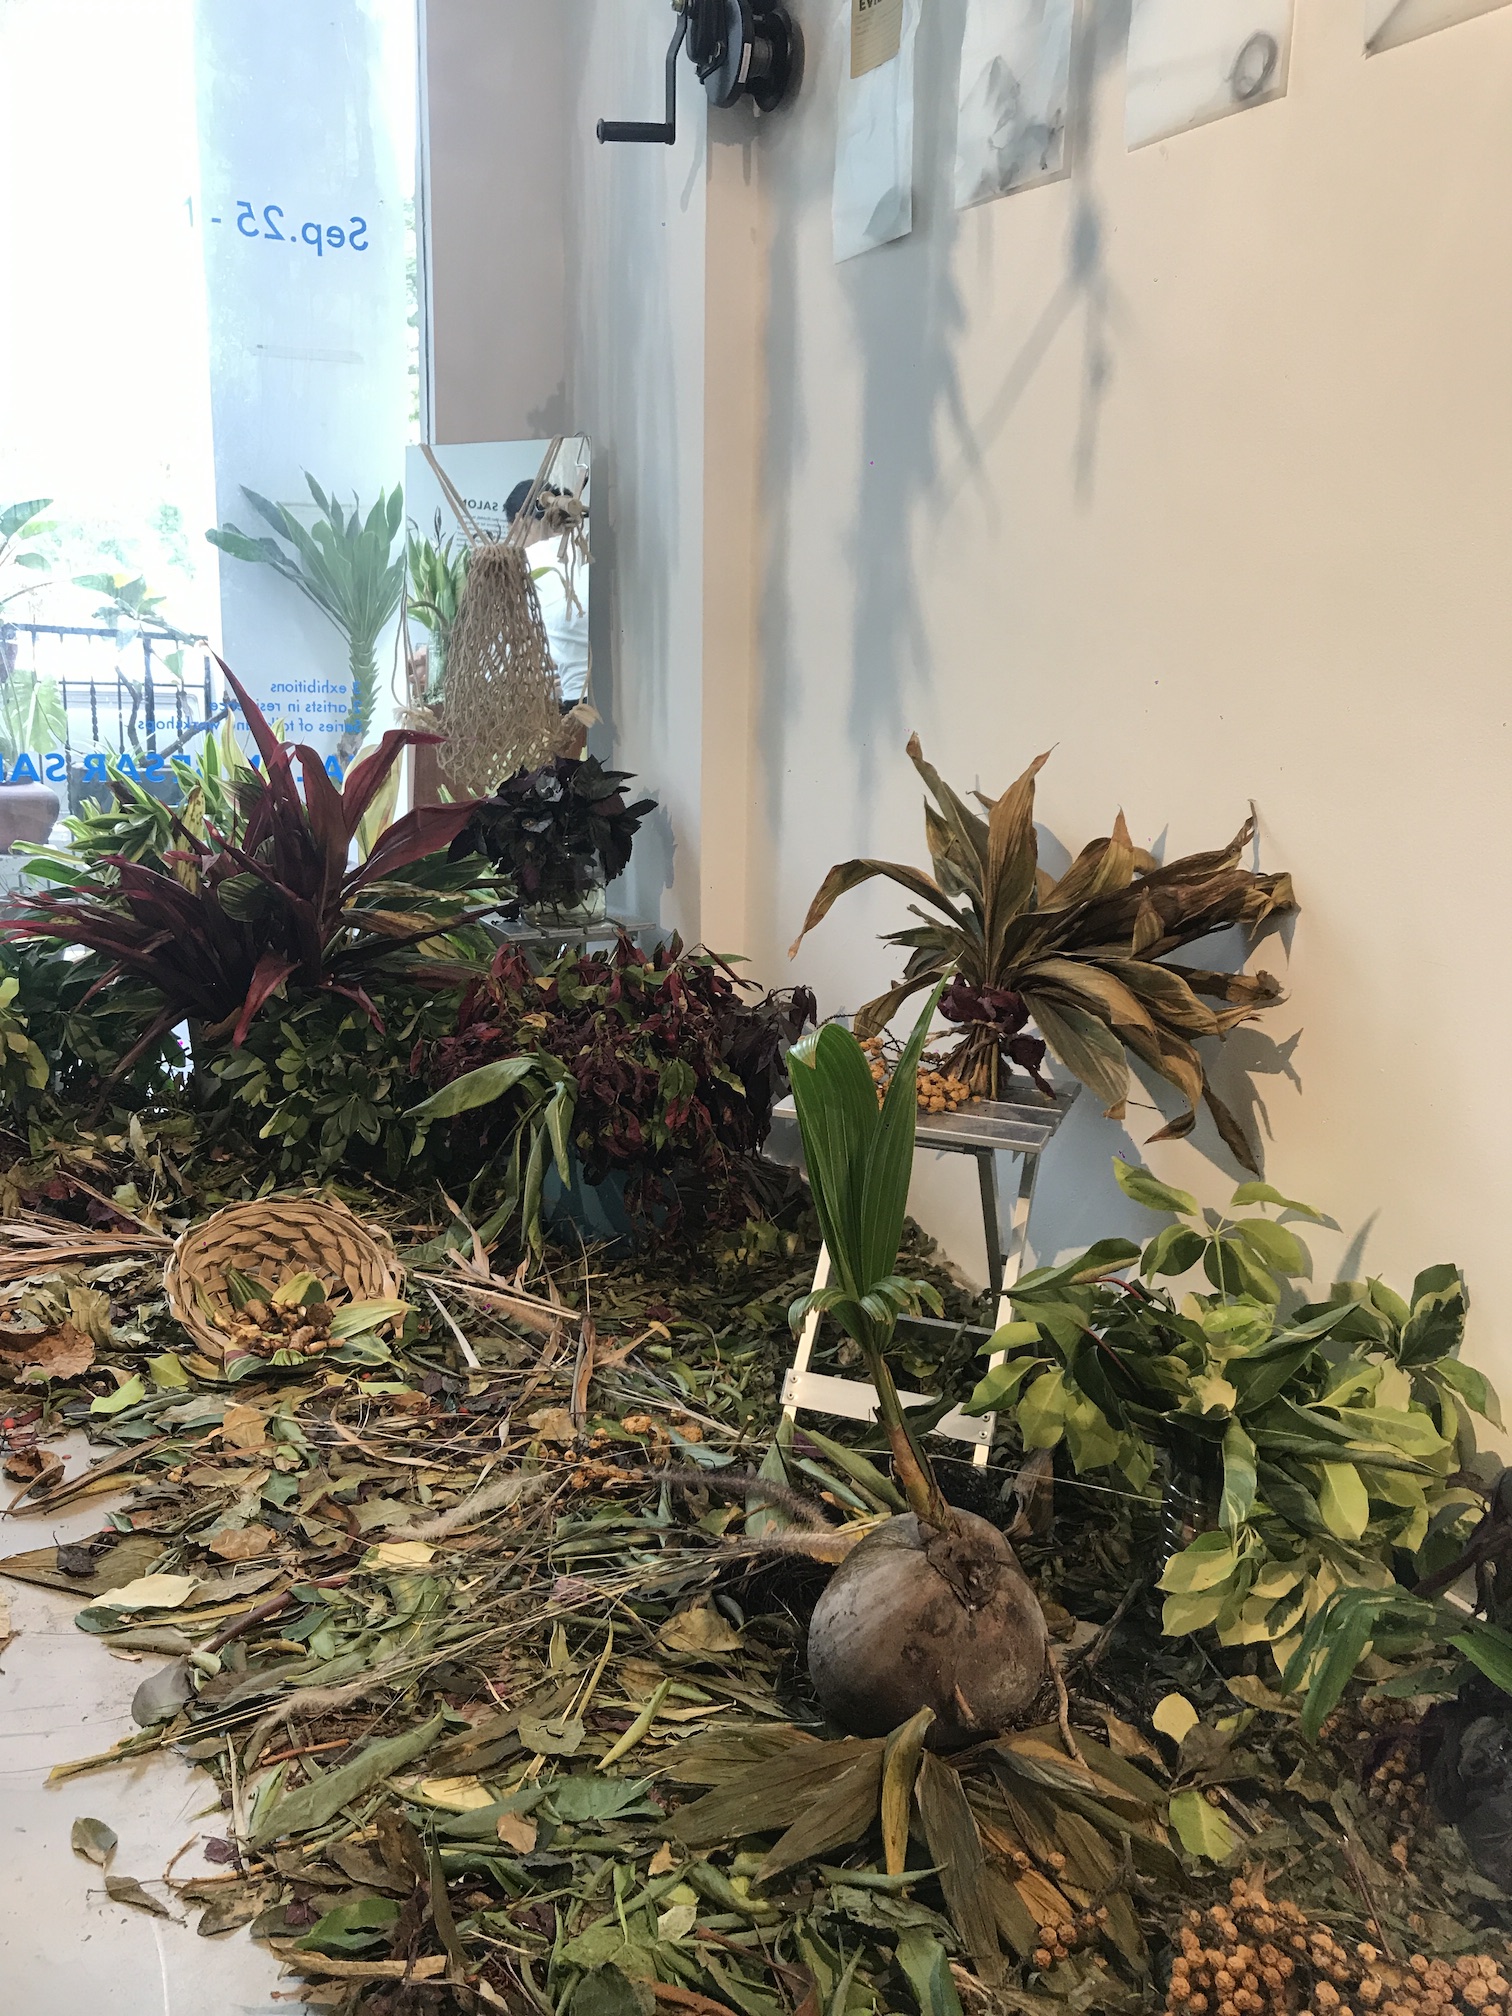
Chen picked up lei weaving from aboriginal tribes of Taiwan; they would typically weave head or body wreathes in open spaces surrounded by natural environments, such as in indigenous villages and farms. Here in the city, his weaving workshop was conducted within a retail store, where participants would sit on the floor around tables and the experience turned out to be quite and intimate!
Retail store of Emporium of the Modern Man (EoMM)
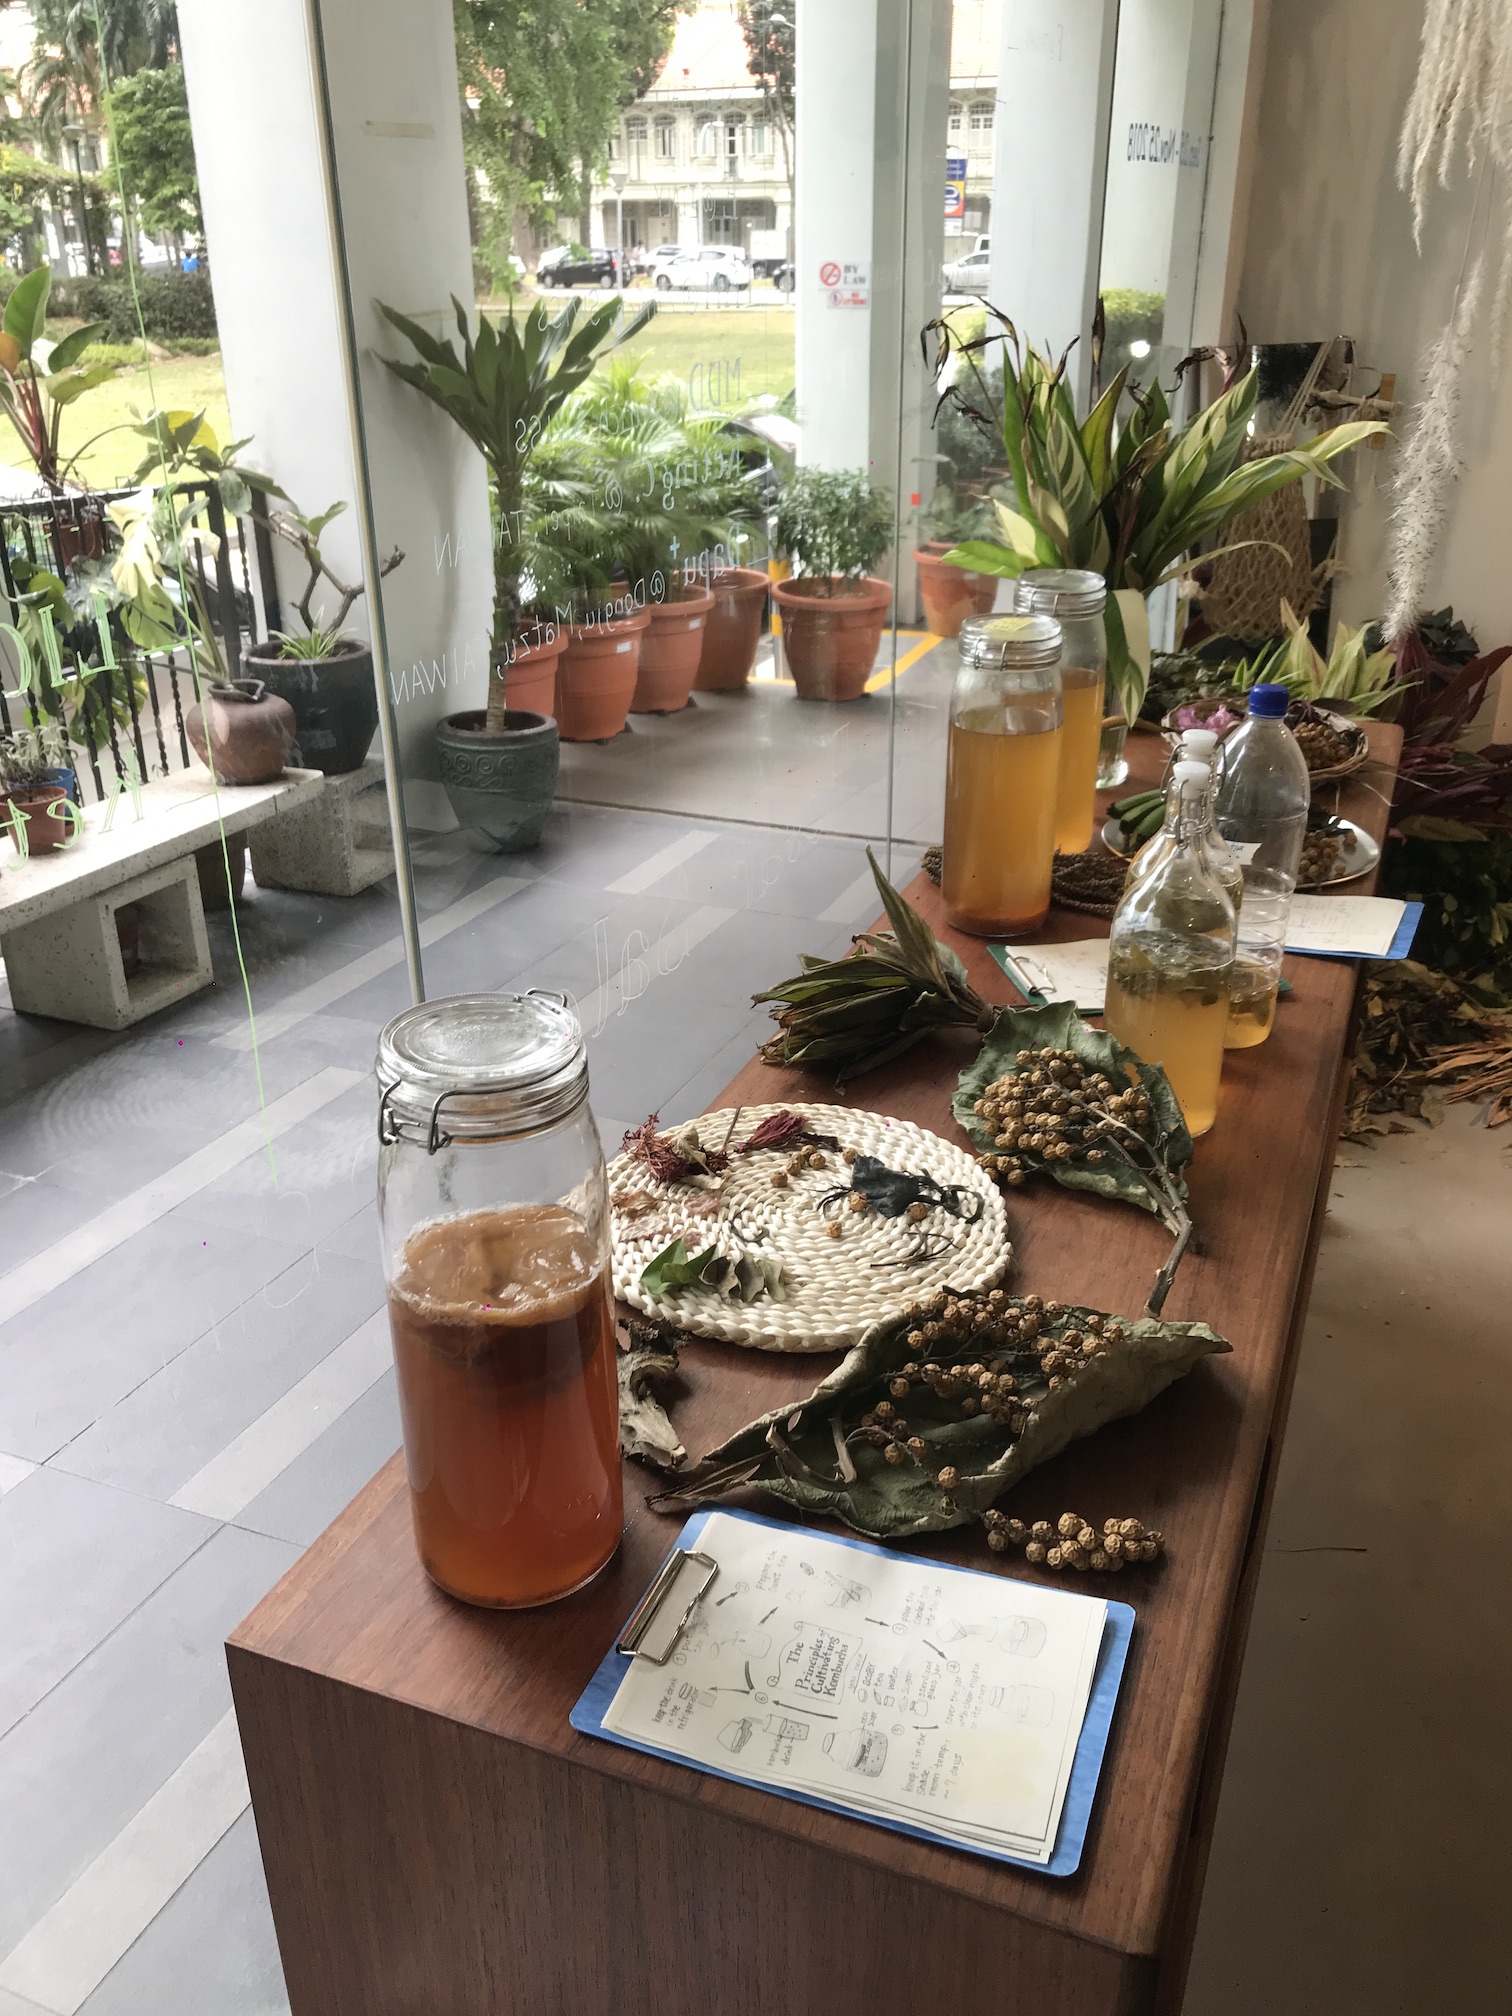
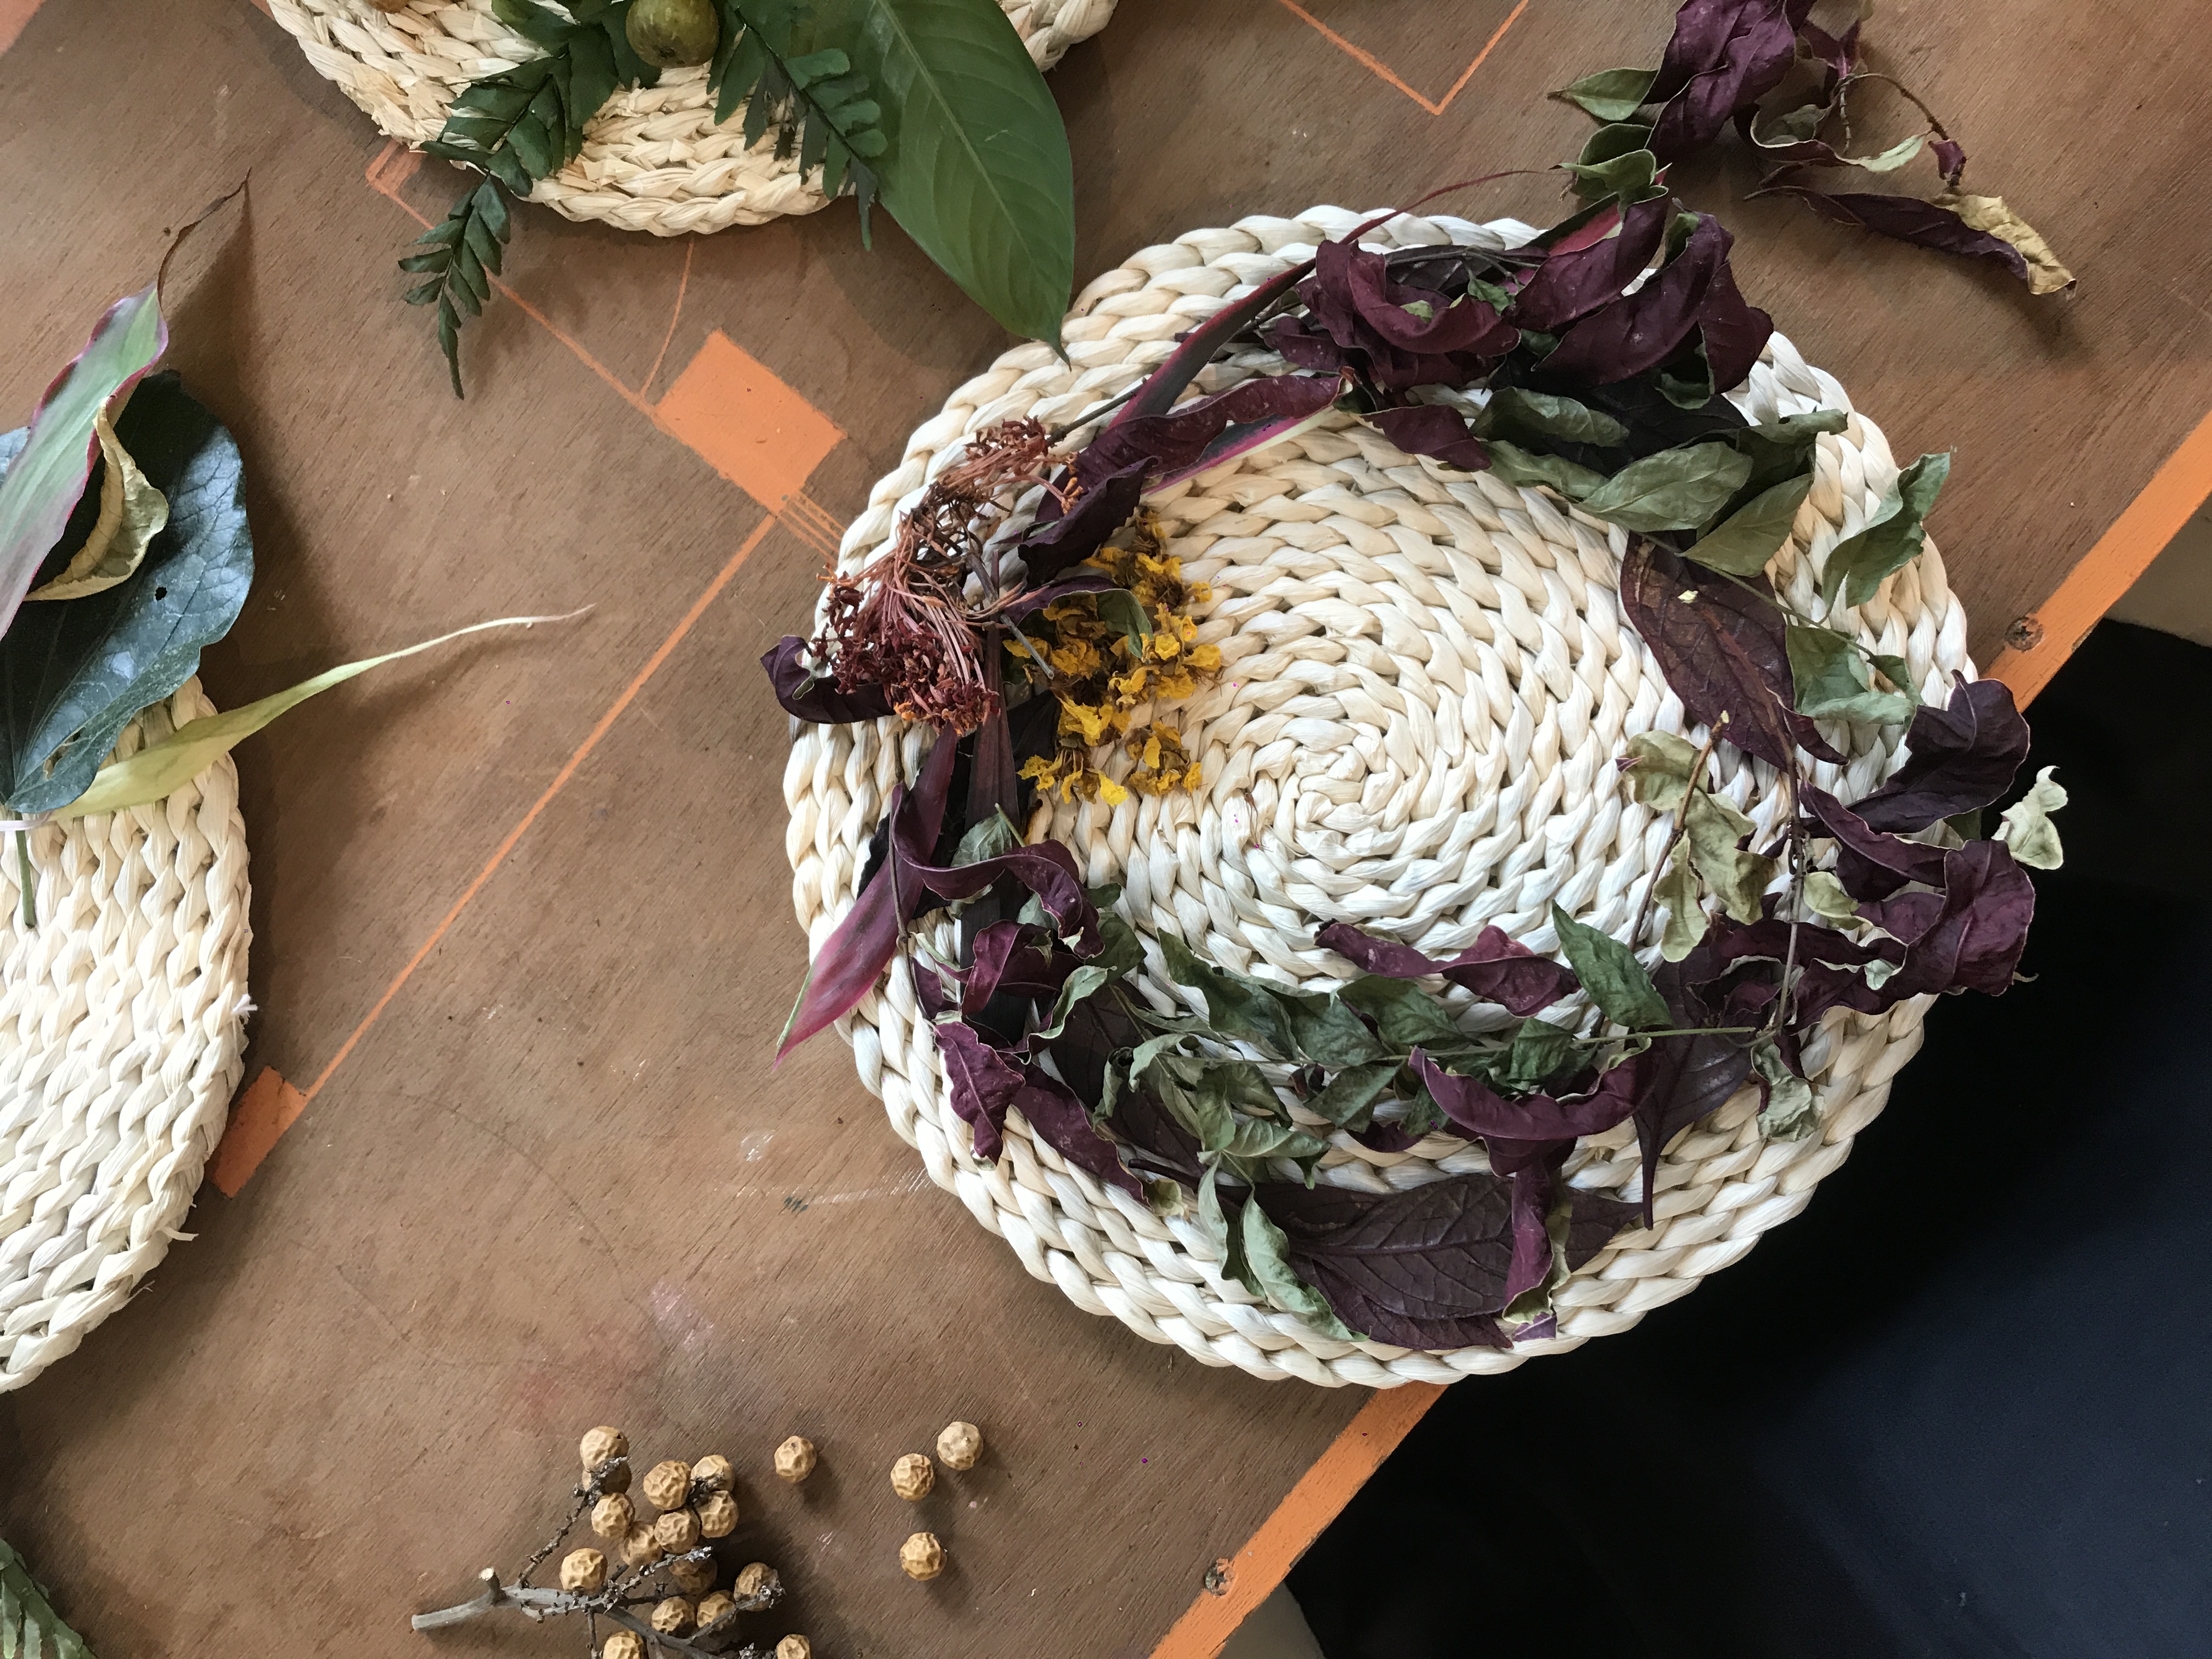
While handy leaves and flowers were prepared on trays for later use, a corner in his 3-week worksite is dedicated to a larger variety of plant and flower specimens, which were also part of his botanical installations.
Chen’s Kombucha displayed with his collection of local flowers and plants
Research specimens from his botanical detective workshop
Local plants and flowers collected by Chen over 3 weeks
Process
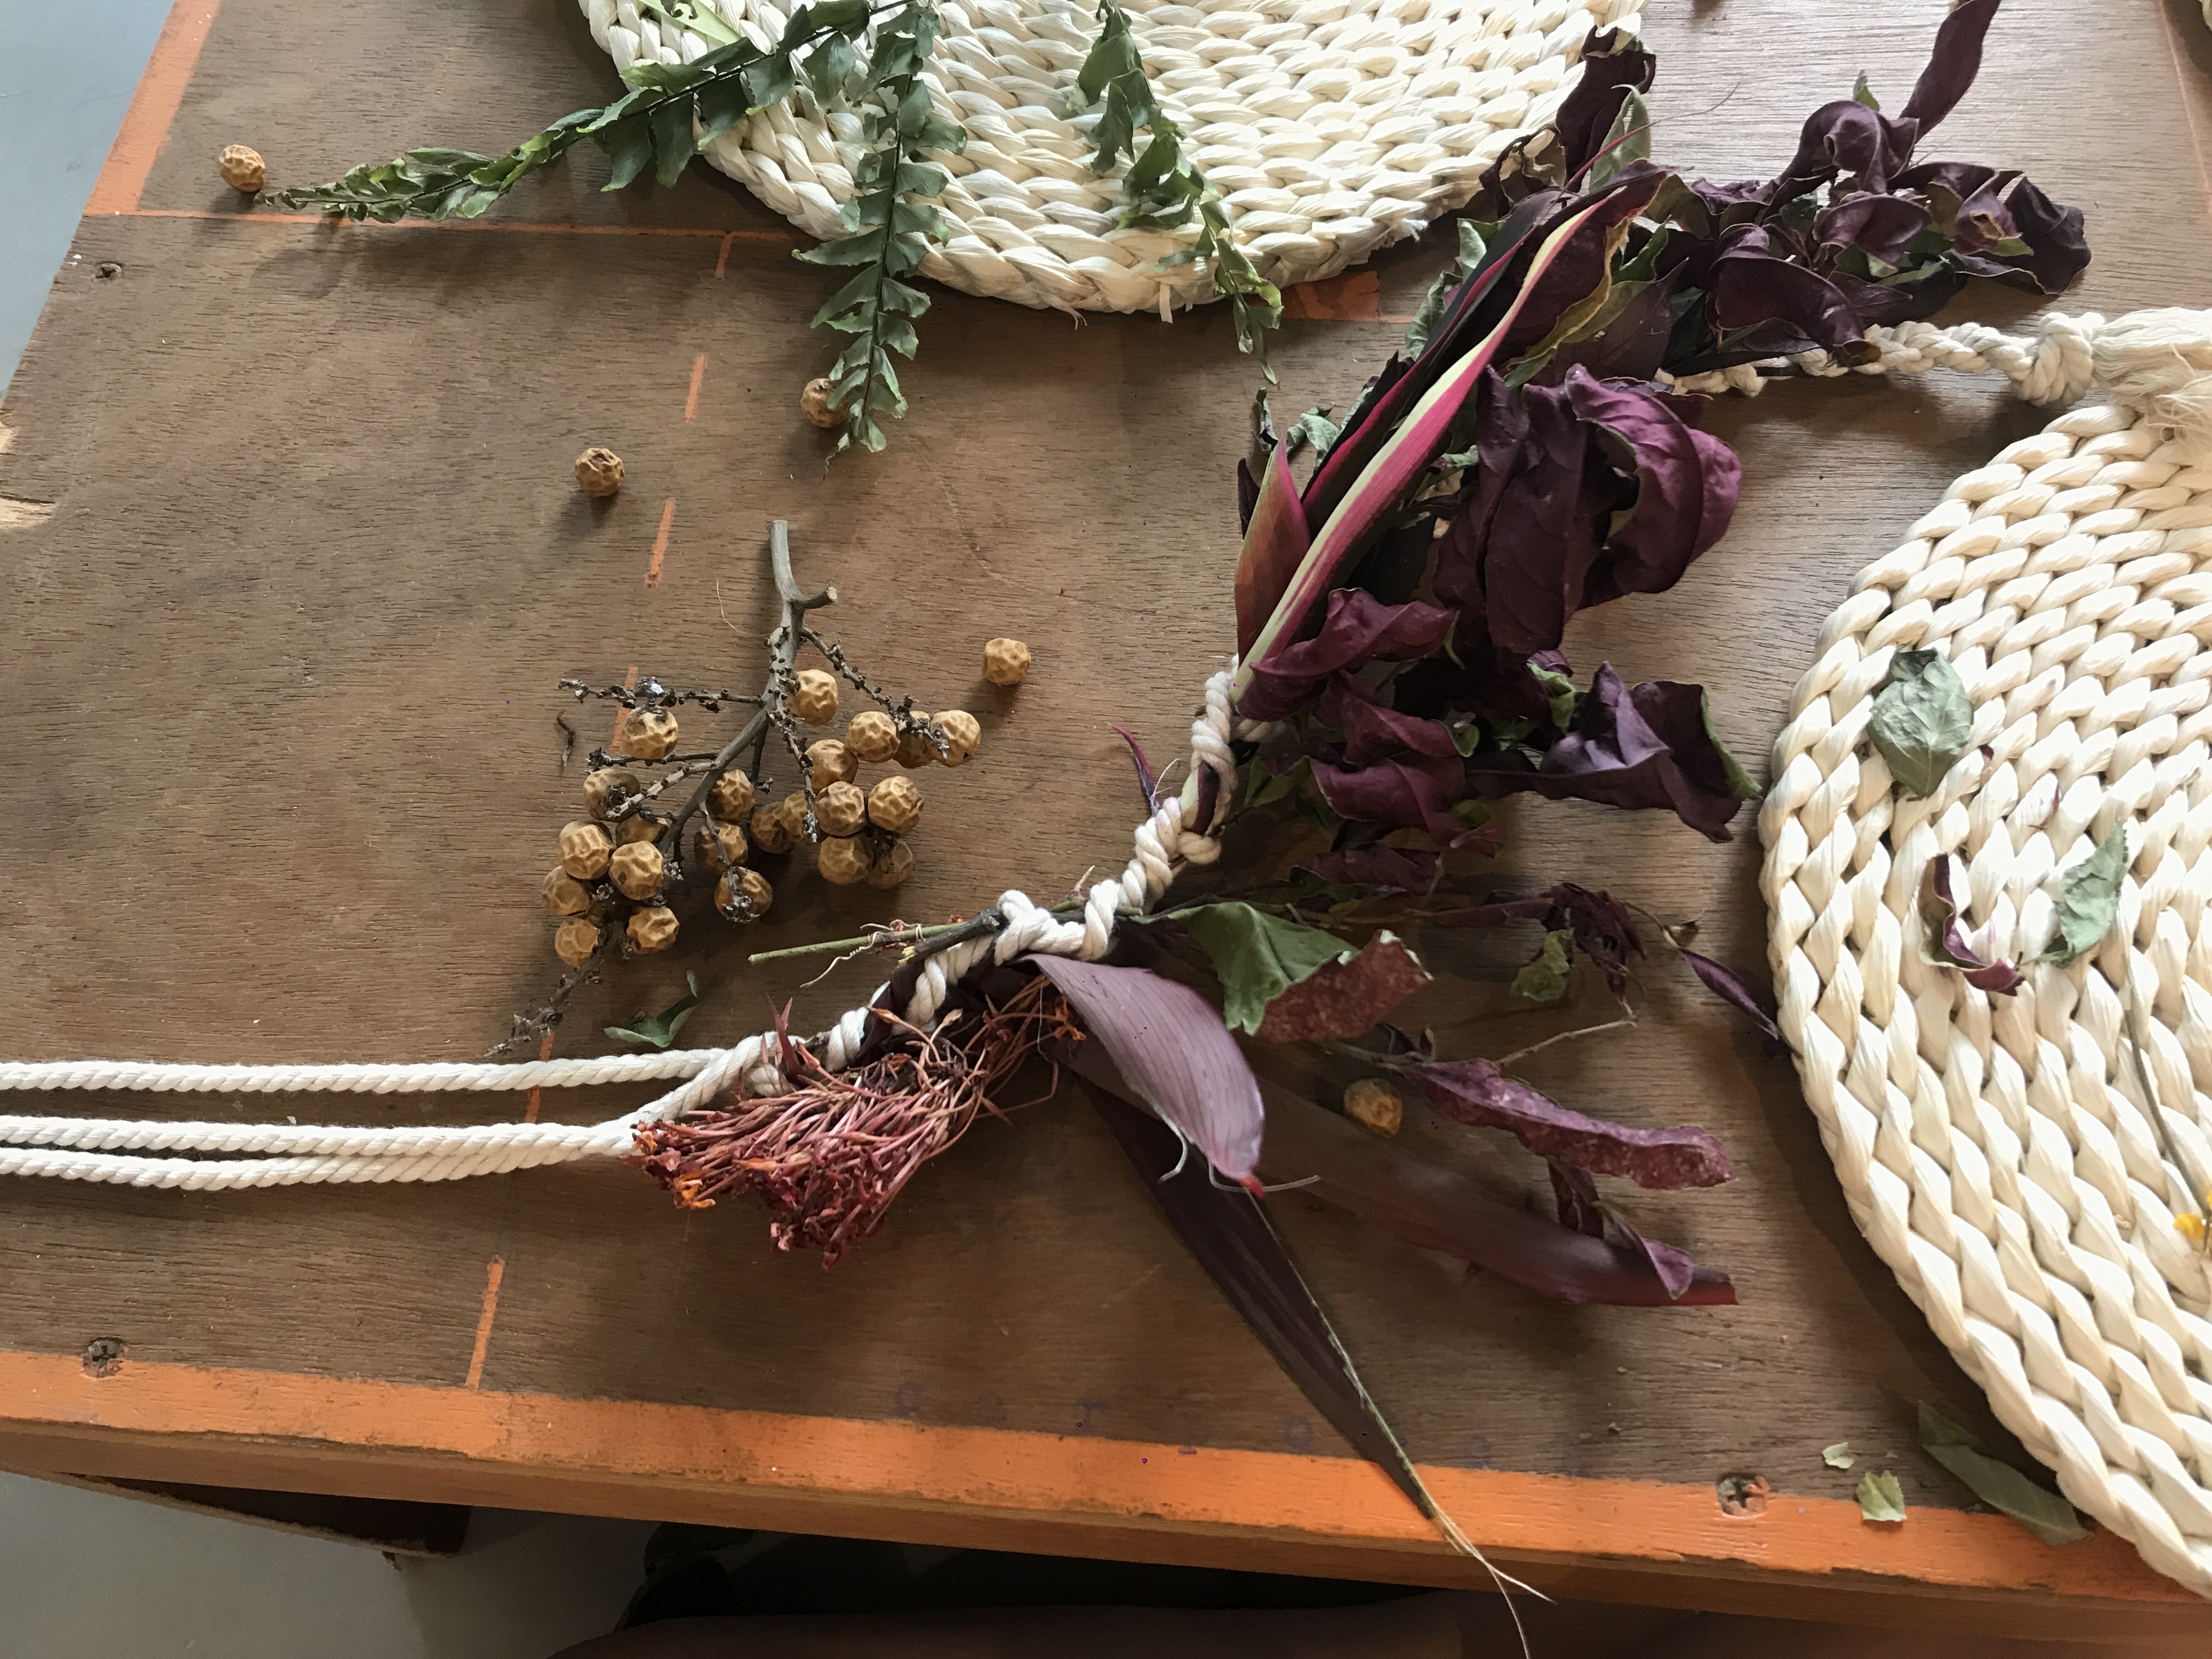
We were taught one of the simpler forms of lei weaving: using braids.
1 mat and 3 weaving ropes per participant
1. Braid the ropes to about 5 – 10cm
Before we started to weave flowers into our ropes, Chen advised us to map out how we wanted our final wreathe to look, on the mats/trays given to us.
I really liked the purple leaves and thought I would add yellow and red flowers as a pop of colour.
2. Visualising how my neck wreathe would look like
2. Visualising how my neck wreathe would look like
Time for weaving!
3. Weaving in dried and fresh leaves and flowers
Made a whole lot of mess 🙁
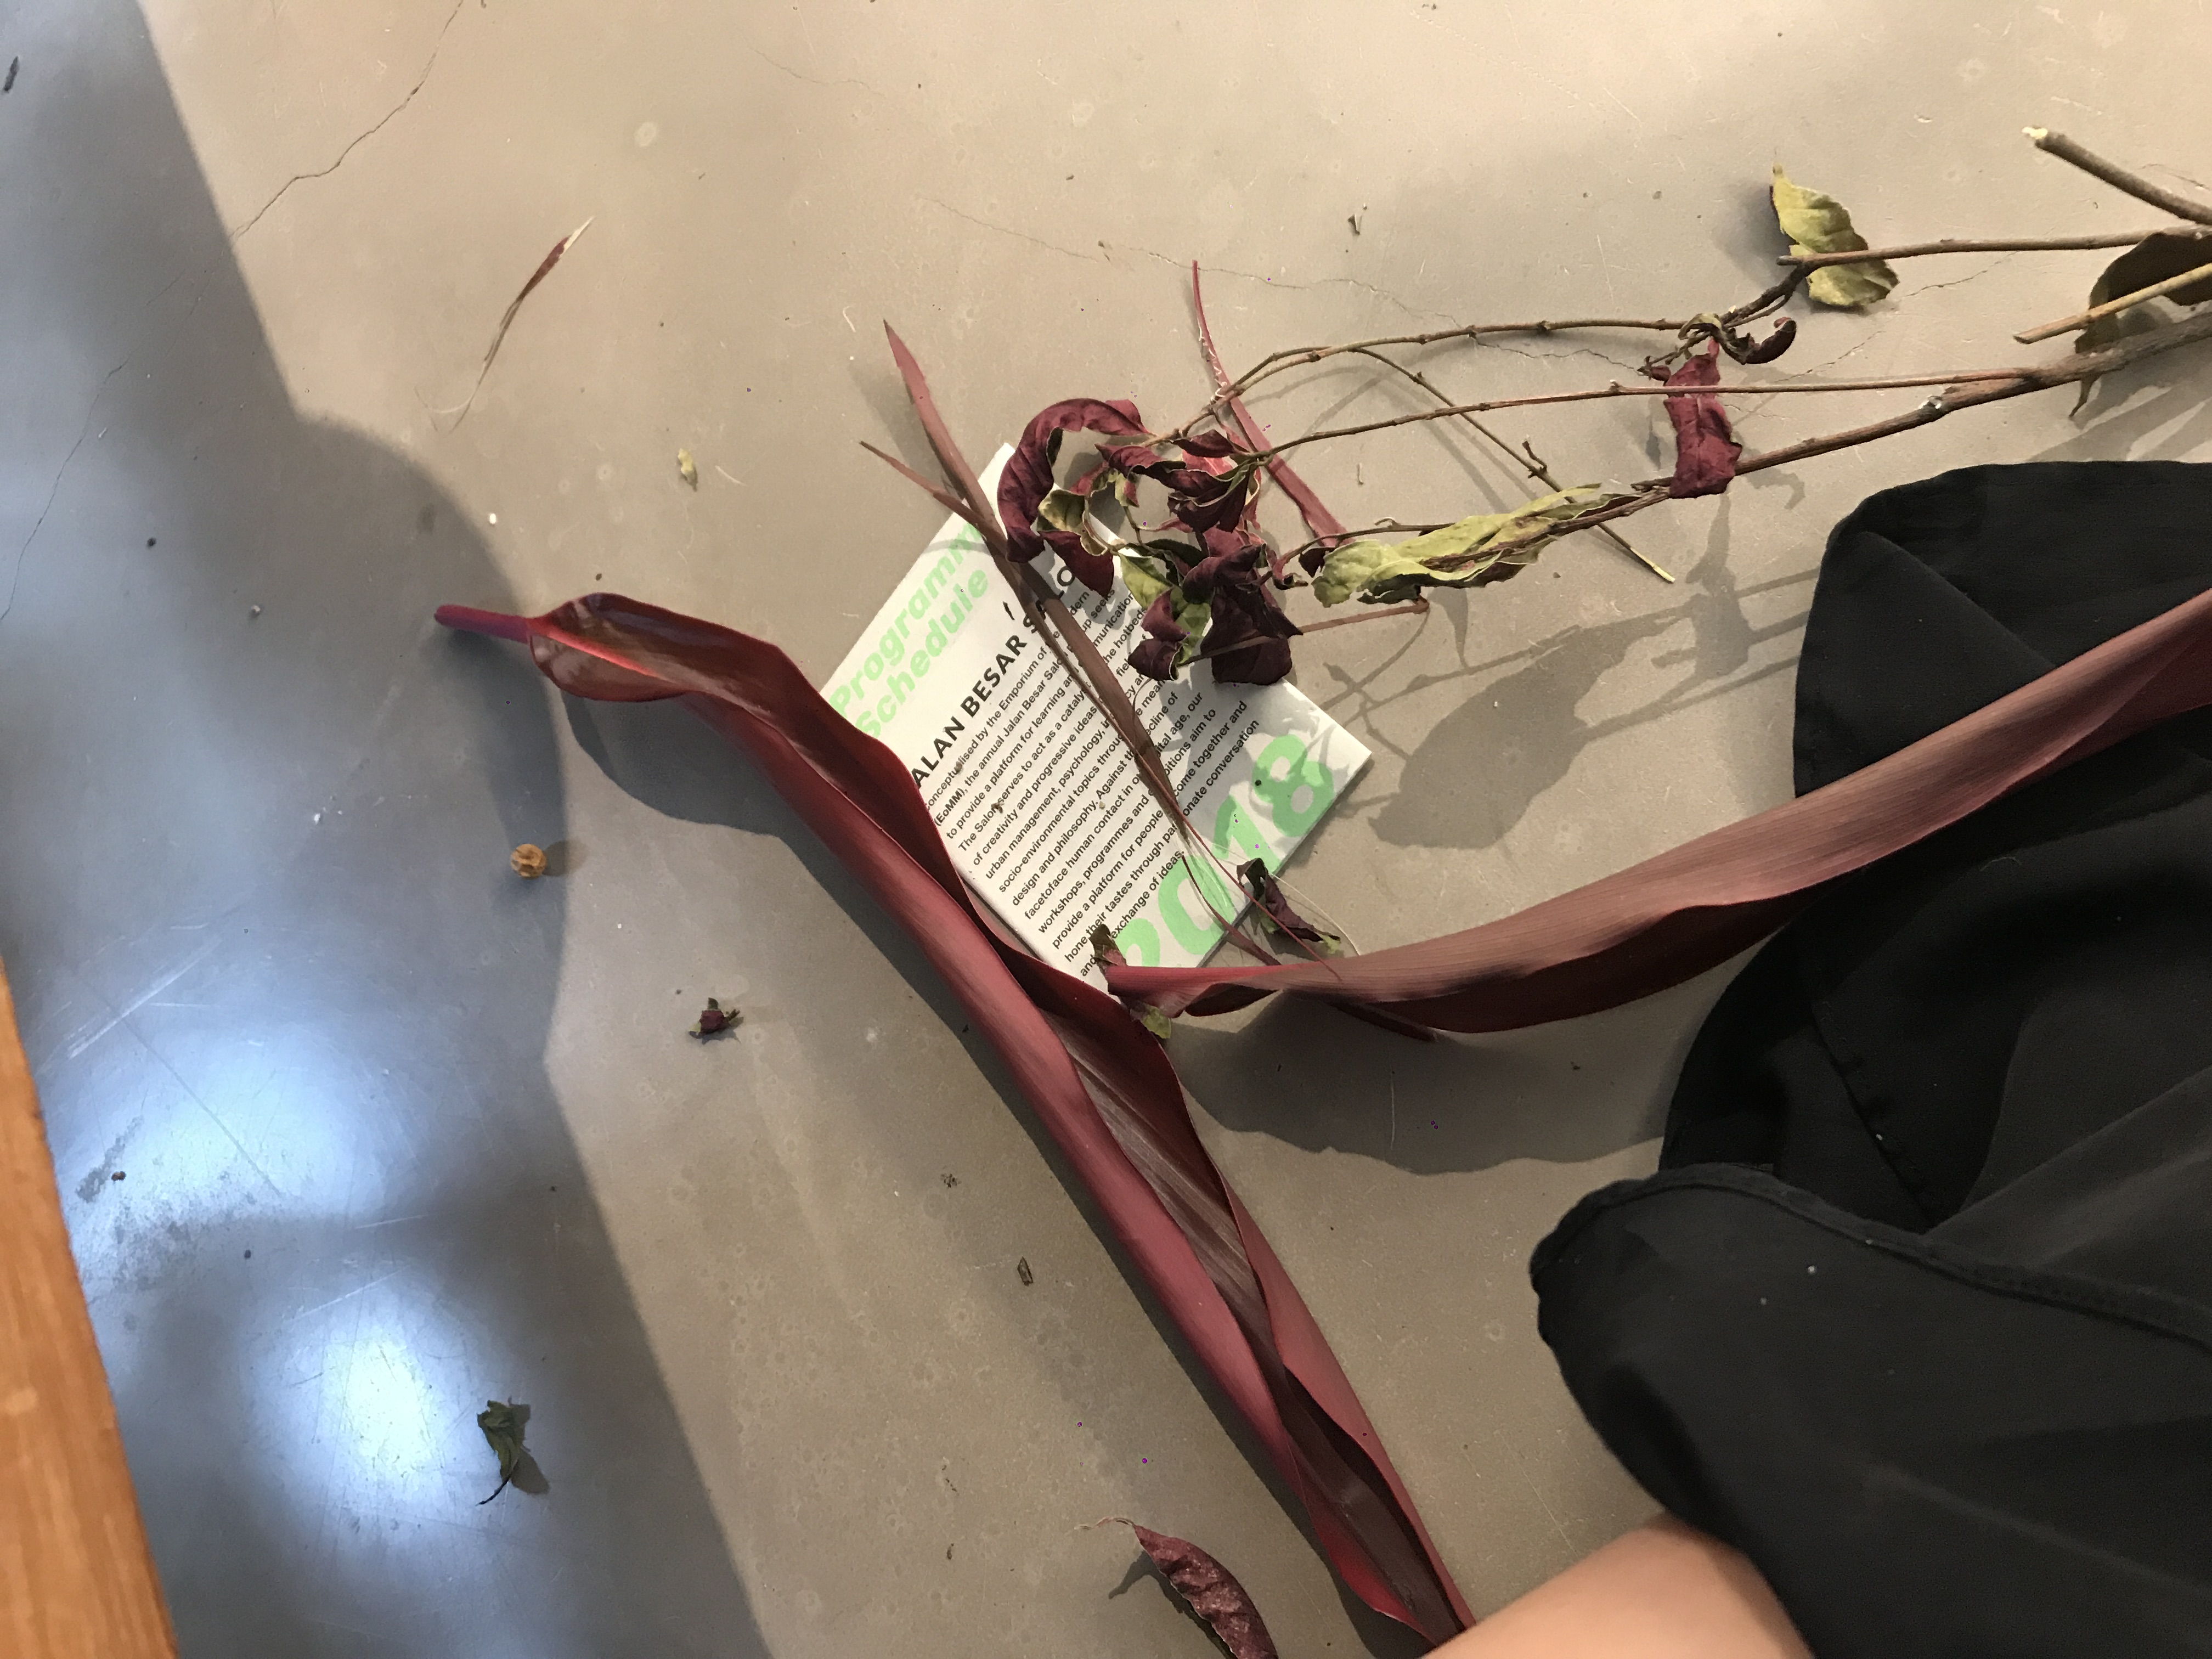
2 hours and a whole lot of patience later…
My very own neck wreathe
Pain Points
It was really difficult to braid dried stems into the sash because they’re very brittle and rigid; I had to replace them multiple times whenever they would break away. Chen later mentioned the trick was to soften them before braiding by spraying some water on them; I wished he would have told me that earlier!